
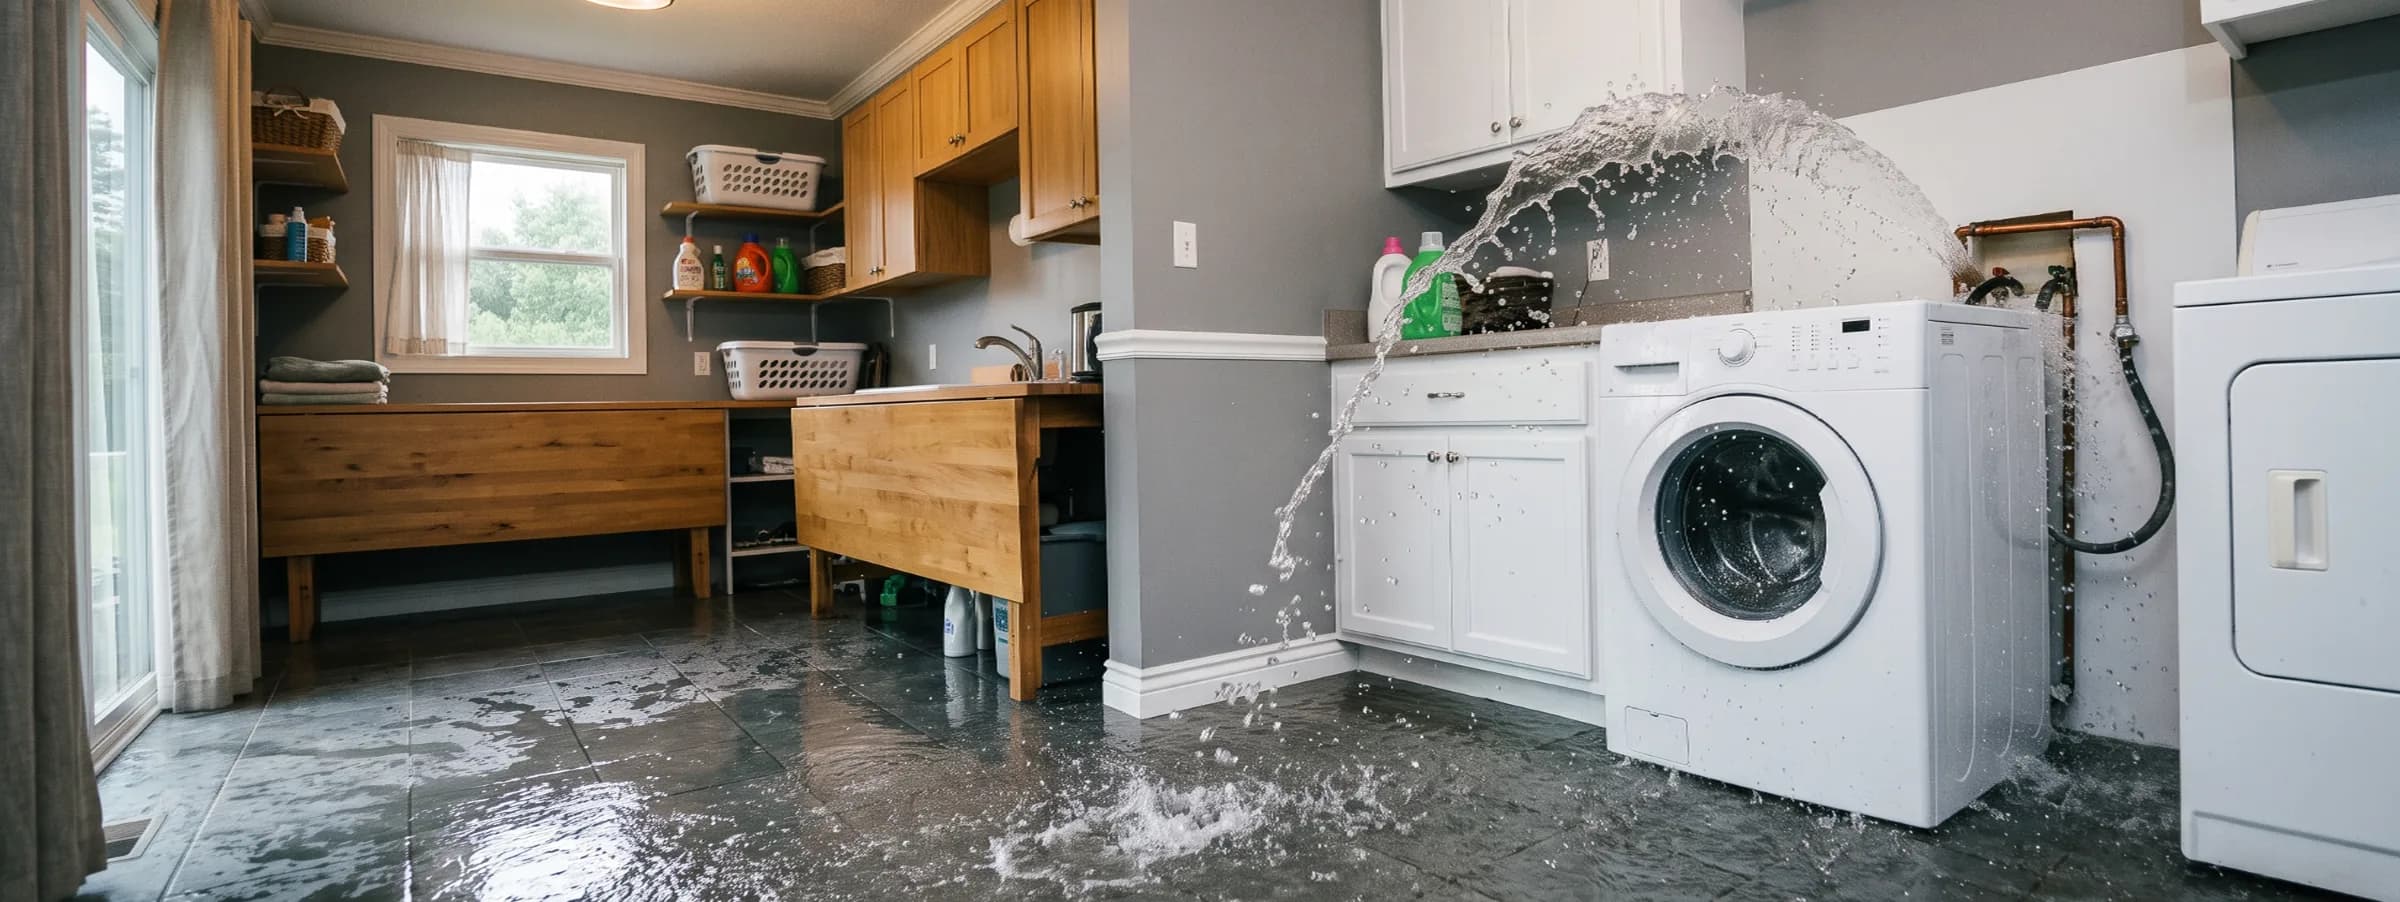

A burst pipe can put several gallons of water into a room before you've even found the source, and what happens in the next few minutes matters more than how bad the flooding looks right now. Panic is the natural response, but the fix is a short, specific sequence: stop the water, cut the power if needed, document what you're looking at, and get it drying before anything else. A burst pipe is a sudden failure in a water supply line, most often from freezing, corrosion, or excess pressure, that releases water faster than the surrounding materials can absorb it without becoming saturated, per the drying and moisture standards set out in IICRC S500.
Freezing, corrosion, and excess pressure cause most pipe failures, and a hissing sound, a pressure drop, or a climbing water bill often show up before the full break happens. Once a plumber and a water damage restoration company are both involved, the total cleanup cost depends far more on where the water reached than on how much of it there was.
Key insights
- The main shutoff valve stops the flood, not the plumber. Locating and closing it is the single action that does the most to limit total damage, and it should happen before any call gets made.
- Freezing causes most burst pipes. Corrosion, high water pressure, water hammer, and ground movement can all fail a pipe without a single freeze ever occurring.
- Fast drying usually prevents mold. Materials dried within 24 to 48 hours typically avoid growth, while anything left wet longer, especially inside a wall or under flooring, has a meaningfully higher risk.
- Insurance usually covers sudden failures. A burst pipe is typically covered as sudden and accidental damage, but a slow leak that went unaddressed for weeks often isn't.
- Cost depends on what's hidden, not what's visible. Restoration pricing ranges from a few hundred dollars for a small, quickly caught leak to tens of thousands for a break inside a wall or under a slab.
- One freeze raises the risk of a repeat. A pipe that's already been stressed by freezing is more likely to fail in a later cold snap, even if it didn't burst the first time.
What to do immediately when a pipe bursts
The first several minutes after a pipe bursts call for shutting off the water, cutting power to any wet electrical zones, relieving pressure in the line, documenting the damage, and starting extraction, in that order. Skipping ahead to cleanup before the water is actually stopped just means doing the same work twice.
 Standing water near an outlet or panel is a shock hazard regardless of how minor the flooding looks. OSHA's flood preparedness recommendations call for cutting power at the breaker before anyone enters the affected area.
Every minute standing water sits is a minute it has longer to soak into flooring, baseboards, and drywall, so speed matters more than thoroughness in this first phase. Carpet padding alone can hold several times its weight in water within the first hour, which is part of why extraction comes before anything else once the source is stopped.
Shut off the main water valve
Close the main shutoff rather than trying to isolate a single fixture, unless you know for certain which valve controls only the affected line. The main valve is typically near where the water line enters the house, in a basement, crawl space, garage, or utility closet.
Cut power to wet areas
If water reached outlets, switch plates, or an electrical panel, shut off the breaker for that zone at the panel rather than walking through standing water to reach a switch. Standing water near live circuits is a shock hazard serious enough that OSHA's flood preparedness recommendations call for cutting power before anyone enters the area, and that same caution applies at home. If you're unsure which breaker controls the affected area, shutting off the whole panel is the safer default.
Drain the remaining pressure
Once the main valve is closed, open the faucets fed by the broken line and flush nearby toilets. This relieves pressure still trapped in the pipe and reduces how much additional water drains out once you start working near the break.
Document before you touch anything
Photograph and video the water's extent, the visible source if you can see it, and anything it's already reached. This step takes a few minutes and becomes the backbone of an insurance claim later.
Move belongings off wet flooring
Pull furniture, rugs, and stored items off the affected floor so air can reach the surface from more than one side, and so nothing sits soaking in water any longer than it has to.
Extract standing water and start drying
Remove pooled water with a wet/dry vacuum, mop, or pump, then run fans and a dehumidifier once the bulk of the standing water is gone. This is also the point to call for emergency water damage restoration if the flow was heavy, reached more than one room, or you're not confident you can dry it fully on your own.
A water damage restoration checklist covers the fuller nine-phase sequence for larger jobs, including materials handling and insurance documentation, if the damage extends beyond what these first steps can fully address. A loss that spans more than one room or involves category 2 or 3 water typically needs that fuller sequence from the start rather than partway through.
What not to do when a pipe bursts
Certain instinctive reactions to a burst pipe end up making the damage worse rather than better, particularly around electrical safety, drying technique, and repair attempts. These five mistakes are the ones that most often turn a contained leak into a bigger, more expensive job.
 A standard household vacuum isn't built for liquid pickup and can short out or cause a shock near standing water. Use a wet/dry shop vacuum rated for water instead.
Don't use a household vacuum on standing water
A regular vacuum isn't built for liquid pickup and can short out or cause a shock. Use a wet/dry shop vacuum rated for water instead.
Don't run fans before the standing water is removed
Airflow across a pool of water mostly just spreads moisture into the surrounding air rather than drying anything, and it can spread contamination if the water isn't clean. Extract first, then dry.
Don't ignore a bulging or discolored ceiling
A ceiling that's swollen or sagging is already holding more water weight than the drywall can support, and it can fail suddenly rather than gradually. Stay clear of it until the pressure is safely relieved.
Don't attempt a permanent repair yourself
A temporary patch or clamp can buy a few hours, but a full repair on a burst section, especially one that failed from freezing, often has additional weakened sections nearby that aren't obvious without a plumber's inspection.
Don't wait until the repair is finished to contact your insurer
Notifying your insurance company early, even before a plumber has finished the fix, gives an adjuster the clearest possible timeline and avoids any question about how quickly you responded.
Temporary fixes while you wait for the plumber
A pipe clamp, rubber patch, or heavy-duty tape can slow a small leak enough to buy time before a plumber arrives, but none of these are permanent repairs. They exist to reduce how much water gets into the house in the next hour or two, not to solve the underlying failure.
 A clamp with a rubber sleeve applies even pressure around the full pipe, unlike tape wrapped over just the visible crack. It's a stopgap only, not a substitute for a plumber's permanent repair.
For a split rather than a pinhole leak, a repair clamp with a rubber sleeve, sold at most hardware stores, is usually the most effective stopgap, since it applies even pressure around the full circumference of the pipe rather than just covering the visible crack. Wrapping tape or a patch around only the top of a leak often just redirects the water to spray somewhere else along the same weak section.
If the burst pipe is above a ceiling, the drywall can absorb a surprising amount of water before it visibly sags, and a bulging section is a sign the cavity above is already holding more weight than the material can support. Relieving that pressure with a small, deliberate puncture and a bucket underneath, only in an area confirmed to be electrically safe, prevents an uncontrolled collapse later. For a contained leak on an easily accessible surface, DIY water damage cleanup covers the tools and drying steps for handling the aftermath yourself once the immediate crisis has passed.
Once the plumber has the line fixed, the total restoration timeline still tracks the same category, class, and material-loss variables that drive the cost a restoration company quotes. A single room drying out typically finishes in three to five days, while a job involving a wall cavity or subfloor usually runs longer.
Should you call a plumber or a restoration company first
Call the plumber first, every time, regardless of how much water damage has already occurred. A restoration company cannot dry an area that's still being fed by an active leak, and starting drying equipment before the source is fixed usually means running it twice.
The order matters even when the damage looks severe enough to want everyone on-site at once. A plumber's job is narrow and mechanical: find the break, stop it, repair or replace the section. A restoration company's job depends entirely on that first step being done, since their moisture readings, drying plan, and materials decisions are all based on the assumption that no more water is coming.
Many restoration companies can dispatch on the same call as a plumber and simply wait to start extraction until the water is off, which is often faster than calling them sequentially. If you haven't already vetted anyone, choosing a water damage restoration company covers what to check, IICRC certification, insurance, and response time, before you're stuck picking blind during an active emergency.
Where the water goes and what it damages
Water from a burst pipe travels along the path of least resistance rather than staying at the point where the pipe actually failed, and the risk changes fast: EPA flood cleanup recommendations treat 24 to 48 hours as the practical window for drying wet materials before mold becomes likely. A break inside a wall, under a floor, or above a ceiling can soak materials several feet from the original source before anyone even notices water on the visible surface.
 Insulation this saturated can hold water for days behind a wall that looks dry from the room side, well past the 24 to 48 hour window before mold risk rises.
The type of material involved and how long it stays wet, more than the size of the original break, determines how much of the room ends up needing replacement rather than just drying. Solid hardwood can sometimes be saved with aggressive drying, while particleboard and MDF swell permanently within hours and almost always need to be replaced.
| Location | What typically gets soaked | Structural risk if left wet |
|---|---|---|
| Wall cavity | Insulation and the back side of drywall, often feet below the actual break | Drywall paper delamination, framing swelling, slow drying since airflow can't reach it directly |
| Ceiling assembly | Drywall, insulation, and any wiring or ductwork running through the cavity | Sagging or collapse if drywall absorbs enough weight in water before anyone notices |
| Subfloor | Plywood or OSB beneath tile, vinyl, or hardwood | Delamination and swelling that can leave a floor spongy even after the surface looks dry |
| Cabinet base and toe kick | Particleboard cabinet bottoms and the flooring underneath | Swelling and warping that usually requires cabinet replacement rather than repair |
| Under a slab | Nothing visible directly, water travels sideways or up through the concrete itself | No cavity to open and dry; a plumber has to reroute or tunnel to reach the actual leak |
A hidden wall cavity or subfloor doesn't get the benefit of open airflow the way a visible floor does, which is why the drying window matters even more in the locations you can't see. Category also shifts depending on where the water sits once it's stopped moving. Clean supply-line water that pools on a floor for more than a day or two starts picking up contamination from the surface it's sitting on, which is one of the reasons the water damage categories system treats the same water differently depending on how long it's been standing.
How difficult a given material is to dry, separate from what caused the leak, is what the water damage classes system measures, and a wall cavity or subfloor almost always lands in a higher class than an open, exposed surface with the same square footage affected. That higher classification usually means more air movers and a longer monitoring period before a technician will confirm the space is fully dry.
What causes a pipe to burst
A pipe bursts when pressure inside it, whether from expanding ice, water pressure above 80 psi, the maximum allowed under the International Residential Code, or a sudden valve closure, exceeds what the pipe wall can withstand. Freezing is the single most common cause, but corrosion, high pressure, water hammer, clogs, and simple age all fail pipes without any freeze involved.
 Ice expanding inside a pipe builds pressure until the wall cracks, often at the coldest, least insulated section rather than at a joint. That pressure buildup is why freezing accounts for the majority of burst pipes.
Knowing which pattern caused the break helps a plumber find and fix the actual problem instead of just patching the symptom, and it also tells you whether the same failure is likely to happen again somewhere else in the house. A corrosion-related break, for instance, is often a signal to have the rest of the home's supply lines inspected rather than treating the failure as an isolated event.
| Cause | How it fails the pipe | Typical warning before it happens |
|---|---|---|
| Freezing | Water expands as it turns to ice, building pressure until the pipe wall cracks or splits | Sudden drop in temperature, especially in an uninsulated wall, garage, or crawl space |
| Corrosion | Pitting or uniform wear thins the pipe wall from the inside until it can no longer hold pressure | Discolored or rust-tinted water, reduced flow, pinhole leaks that develop over weeks |
| High water pressure | Pressure above roughly 80 psi stresses joints and fittings until one gives way | Banging pipes, dripping faucets, short appliance hose lifespan |
| Water hammer | A fast-closing valve sends a pressure spike backward through the line, straining fittings | A loud thud or knock in the walls right when a faucet or washing machine valve shuts off |
| Clogs and ground movement | A blockage or shifting soil builds backpressure or physical stress on a fixed line | Slow drains, gurgling, or a damp patch above a buried line with no obvious source |
| Age and material | Galvanized steel and polybutylene reach the end of a safe service life and fail at a joint or along a weak section | Home built before the 1960s (galvanized) or with plumbing installed in the 1970s through 1990s (polybutylene) |
More than one factor is often at work at once. A pipe that's already thinned by corrosion needs far less pressure or cold to fail than a newer one, which is part of why the same freeze that causes no damage in a well-maintained home can burst a line in an older one.
How much does burst pipe water damage restoration cost
Restoration after a burst pipe typically costs $1,500 to $7,000 for a single affected room, though a small leak caught within hours can run under $1,000, and an undetected multi-room loss can climb past $25,000. Labor and equipment time, not materials, make up most of that cost regardless of scenario, since drying and monitoring can take several days even on a contained job.
 Removing wet drywall down to a clean stud line, rather than patching a smaller section, prevents wicking from an unseen wet edge left behind the new patch.
The scenario matters more here than a single national average would suggest, since two burst pipes with similar water volume can land at very different price points depending on what's behind the wall or under the floor. A leak that reaches finished flooring like hardwood or tile typically costs more to remediate than the same volume of water on a garage or basement slab, since the flooring itself usually can't be dried in place.
| Scenario | Typical cost | What drives the range |
|---|---|---|
| Small supply line leak, caught within hours | $500–$2,000 | Extraction and drying only, no material removal |
| Break behind a wall, one room | $2,500–$7,000 | Drywall and insulation removal, containment, multi-day drying |
| Ceiling cavity or floor below affected | $5,000–$15,000 | Demolition on two levels, structural drying, possible sagging drywall removal |
| Slab leak | $4,000–$15,000+ | Plumbing access cost on top of restoration, since the line has to be rerouted or tunneled to |
| Multi-room loss, undetected for days | $15,000–$25,000+ | Extensive material removal, longer drying timeline, higher contents-restoration exposure |
These figures cover water mitigation and material removal, not the plumbing repair itself or reconstruction like new drywall, flooring, or cabinetry, which restoration companies typically bill separately from the plumber's invoice. National pricing by category, class, and room, rather than by burst pipe scenario specifically, is what water damage restoration cost covers, and these scenario figures sit inside that broader range.
Once a scenario is underway, how long water damage restoration takes tends to track the same cost drivers, wider damage generally means a longer job as well as a bigger bill. Insurance approval timing can add several more days on top of the physical drying and repair work, particularly for claims above a few thousand dollars.
Does insurance cover water damage from a burst pipe
Yes, homeowners insurance typically covers water damage from a burst pipe, since most standard HO-3 policies cover sudden and accidental water discharge from plumbing, and a burst pipe is the textbook example of that category. Coverage narrows significantly if the failure traces back to a leak that was visible or ongoing for weeks before the pipe finally gave out.
 Photos taken before any cleanup starts give an adjuster a timestamped record of the damage's extent, which matters most when a sudden failure needs to be distinguished from a slow, unaddressed leak.
The distinction between sudden and gradual matters more for burst pipes than for almost any other water damage cause, because the same physical event can be classified two different ways depending on the timeline behind it. A pipe that fails suddenly during a hard freeze and gets reported promptly is a covered loss under nearly every standard policy. A slow pinhole leak that dripped for months before the pipe finally split is far more likely to be treated as a maintenance failure, particularly if an adjuster finds evidence of prior staining or corrosion.
Documenting when you first noticed anything unusual, and when you called the plumber, gives an adjuster the timeline needed to classify the loss correctly. Deductible mechanics, actual cash value versus replacement cost, and the full claim-filing sequence go beyond what's covered here; homeowners insurance covers water damage walks through the documentation an adjuster actually needs.
Early warning signs before a pipe fully bursts
A pipe rarely fails without warning, and catching the signs before a full burst usually means a repair instead of a restoration job. The most common signals are a sudden pressure drop, unusual sounds in the walls, discolored water, and a water bill that climbs 20 percent or more without any change in usage.
 A small triangle or dial on the meter face turns whenever water is moving through the line. If it's spinning with every fixture in the house off, water is running somewhere it shouldn't be.
A change in any one of these on its own is worth a look. Two or more together is worth calling a plumber before the situation escalates.
Sudden drop in water pressure
A pipe that's cracked but not fully burst can leak enough water to noticeably weaken flow at every fixture in the house, not just the one nearest the break.
Hissing, dripping, or banging inside a wall
Water moving where it shouldn't makes noise. A hissing sound behind a wall or under a floor, even faint, usually means an active leak rather than something structural settling.
Discolored or rust-colored water
Rusty or cloudy water points to corrosion working on an older metal line from the inside, often well before that corrosion progresses to an actual break.
Warm or damp spots on the floor
A warm patch on a slab floor, especially over a hot water line, or a damp spot with no obvious source above it, is one of the few early signs of a slab leak, since there's rarely a visible point of failure.
An unexplained jump in the water bill
A leak that's too small to notice by sound or sight can still run continuously for weeks, and a bill that jumps for two billing cycles in a row with no change in household usage is worth investigating even if the increase looks small at first.
Any of these signs, caught early, are exactly the kind of thing worth confirming against the fuller list of signs of water damage, which covers detection methods beyond what a homeowner can spot by sight and sound alone. A moisture meter reading, for example, can confirm a wet wall cavity days before any staining becomes visible on the surface.
Tracing a leak to its source
Tracing a hidden leak to its source means using sound, fixture-by-fixture pressure checks, and touch to narrow down roughly where a pipe has failed before a plumber arrives. This matters most when the warning signs are clear but there's no standing water yet pointing to a location.
 A cold or slightly damp patch through paint or drywall often shows up before any visible staining does, since heat and moisture both travel through a wall faster than a stain becomes visible on the surface.
Follow the sound
Walk slowly along walls and under cabinets near where you first noticed the hissing, dripping, or banging, and listen close to baseboards, since sound travels along a wall cavity farther than it seems.
Check pressure fixture by fixture
Turn on each faucet in the house one at a time rather than all at once. The fixture with the weakest flow is often the one closest to the actual break, since it's competing hardest with the water escaping upstream.
Feel for temperature and dampness
A cold or faintly damp patch on drywall or flooring, especially along an exterior wall or near a slab, often marks the general area of a cavity that's holding water even though nothing is visible yet.
Narrowing the location this far is usually enough for a plumber to know where to start, even without pinpointing the exact spot, and it saves diagnostic time once they're on-site. Some plumbers also use acoustic leak detection equipment that can pinpoint a break through a wall or slab to within a few inches, though that service usually costs extra.
How to prevent a pipe from bursting
The most effective prevention against a future burst pipe is keeping the thermostat above 55°F during cold-weather absences, the threshold the Insurance Institute for Business and Home Safety (IBHS) recommends to keep pipes from freezing, and insulating exposed lines before winter, since freezing is responsible for the majority of burst pipes nationally. Knowing your main shutoff valve location well in advance matters just as much, since even well-maintained pipes can still fail and the response time after a break outweighs prevention of every possible cause.
 Foam pipe insulation is one of the cheapest fixes here, usually a few dollars per linear foot, against a repair that can run into the thousands once a line actually freezes and splits.
Beyond the thermostat and basic insulation, extending pipe insulation to unheated spaces like garages, attics, and crawl spaces, and disconnecting exterior hoses before the first hard freeze each year close the remaining gaps in freeze protection. Heat tape, faucet dripping, and what to do during a power outage round out preventing pipes from freezing as a fuller system for homes at real freeze risk. Water pressure above roughly 80 psi is a second common driver worth checking with an inexpensive gauge at an outdoor spigot, since a pressure-reducing valve is a relatively low-cost fix compared to what a pressure-related burst typically costs to repair.
A full, room-by-room water damage prevention system covers shutoff valve testing, leak sensors, and appliance supply line checks in more depth than pipe failure alone, since plumbing is only one of several ways water damage reaches a home over time. A monitored smart shutoff valve, for instance, can detect a burst and cut water automatically even when no one is home to hear it.
Frequently asked questions
How do I know if my water damage is from a burst pipe rather than another source?
Check for pipe-specific clues first: sudden onset, water near a visible supply line or fixture, and a drop in water pressure elsewhere in the house. If none of those apply, the water is more likely coming from a roof leak, an appliance, or condensation, since a burst pipe almost always announces itself with a pressure change somewhere in the plumbing system, not just a stain.
Do you need to turn off your water heater when a pipe bursts?
Only if the burst affects the water heater's supply line or the unit itself is at risk of sitting in standing water. If the break is elsewhere in the house, the water heater can usually stay on, though shutting off its cold water supply valve prevents it from continuing to feed hot water into a system that's already lost pressure.
Can a small, slow leak eventually turn into a full pipe burst?
Yes, a slow leak can progress to a full burst as continued pressure or corrosion weakens the pipe wall further at the same weak point. A pinhole leak or a joint that's already dripping is a sign the material has started to fail, and it rarely gets stronger on its own.
How long does a plumber take to respond to a burst pipe emergency?
Most emergency plumbers arrive within one to three hours in urban and suburban areas, though this varies by region, time of day, and demand during widespread cold snaps. Call as soon as the water is shut off rather than waiting to see how bad the damage looks first.
Does a burst pipe always cause mold?
No, a burst pipe does not automatically cause mold. Materials dried within roughly 24 to 48 hours typically avoid growth, while anything left wet longer, especially inside a wall cavity, has a much higher chance of developing it. For the full timeline and where it tends to hide, mold from a burst pipe goes into more depth than the summary above.
Can you still drink water from other taps after a pipe bursts?
Yes, in most cases, since a burst pipe is a mechanical failure rather than a contamination event and the rest of your plumbing system stays connected to the same clean supply. The exception is if the break allowed backflow from a non-potable source or if your water utility issues a boil notice for the area.
What's the difference between a burst pipe and a slab leak?
A burst pipe is a visible or fast-developing break in an accessible line, usually inside a wall, ceiling, or under a fixture. A slab leak happens in a supply line embedded under or within a concrete foundation, so there's rarely a single visible source, and a plumber typically has to reroute the line above the slab or tunnel underneath to reach it.
Will insurance deny a claim if the pipe froze and burst while I was away?
Possibly, if the policy has a vacancy clause or requires the heat to be maintained at a minimum temperature while the home is unoccupied. Many standard policies expect the thermostat to stay above 55°F during cold weather absences, and a claim can be reduced or denied if an adjuster determines that requirement wasn't met. For the fuller reasonable-care standard and what counts as evidence the heat was running, frozen pipes goes into more depth than the summary above.
How many years does a pipe typically last before it's at high risk of bursting?
Copper pipes commonly last 50 years or more, while galvanized steel installed before the 1960s and polybutylene installed from the 1970s through the 1990s are both well past a safe service life today and carry a meaningfully higher failure risk regardless of how well they've been maintained. Age alone doesn't guarantee failure, but it does mean a plumber should treat any leak in a pipe that old as a possible sign of broader wear rather than an isolated event.
Sam Hickerson is the founder of RestoreAdvisor and writes consumer guides on mold remediation, water damage restoration, inspection, testing, and home recovery. His work focuses on helping homeowners understand costs, risks, and when to call a professional. He draws on guidance from the EPA, CDC, IICRC, and other authoritative sources to make complex home issues easier to navigate.