
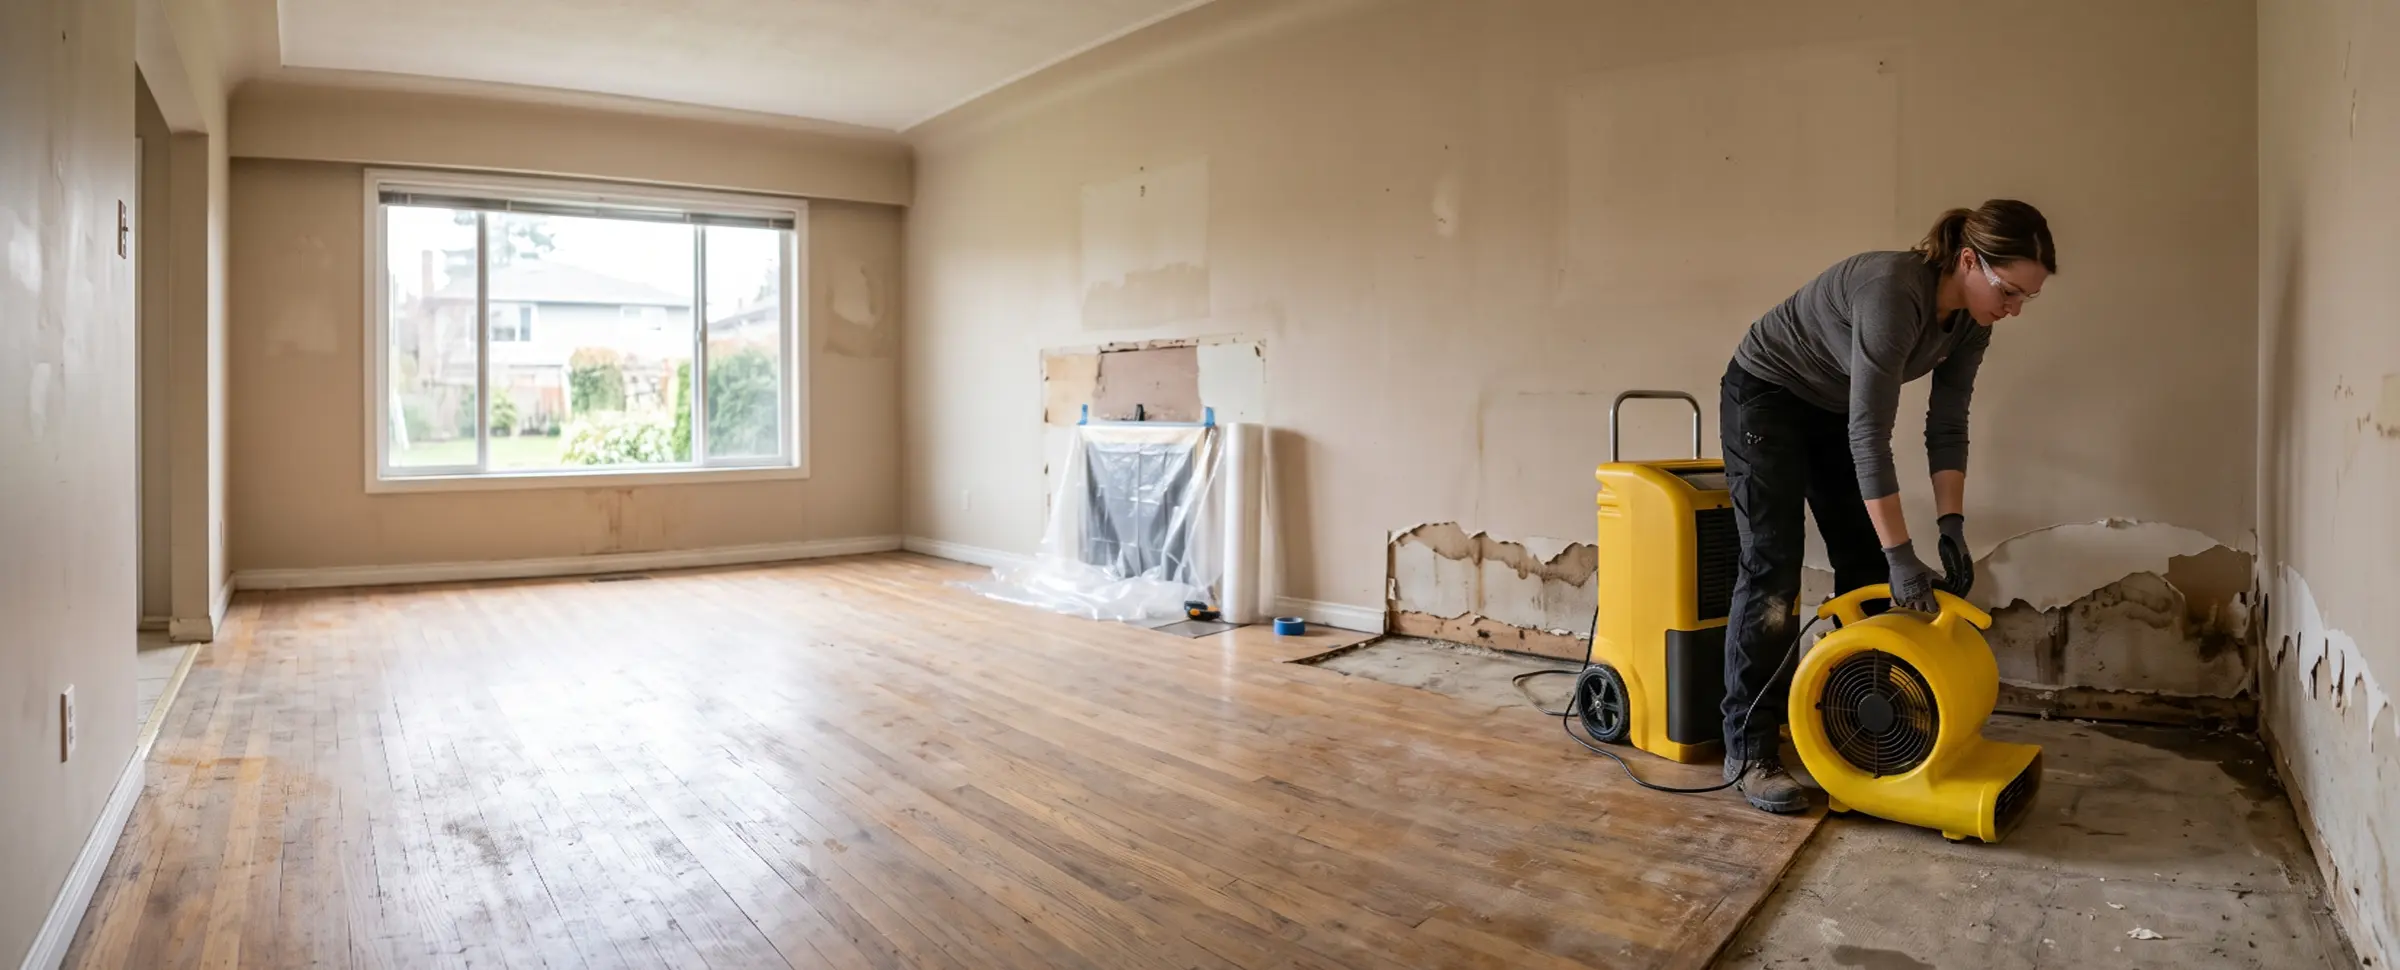

Watching a restoration crew move through a flooded room for the first time is disorienting when you don't know what each piece of equipment is supposed to accomplish or how long it's meant to stay there. A certified technician works through the same core sequence of phases on nearly every job, from the first walk-through to the final moisture check, though which ones apply and how much they overlap depends on the scope of the loss.
Water damage restoration is the structured sequence of inspection, extraction, drying, cleaning, and repair that returns a property to its pre-loss condition, carried out according to the IICRC S500 Standard for Professional Water Damage Restoration. The process covers more ground than mitigation alone, since mitigation only stops the loss from getting worse while restoration finishes the job by rebuilding what was removed.
Key insights
- Eight phases, but not always in strict order. Emergency response, inspection, extraction, and drying follow a fixed sequence, while cleaning and contents restoration often overlap with the later part of drying rather than waiting for it to finish.
- Classification happens before any equipment runs. A technician determines the water's category and the damage class first, since both decisions set the PPE, containment, and drying targets for everything that follows.
- Drying is the longest phase for most jobs. Structural drying typically runs 3 to 5 days for Class 1 to 2 losses and can extend past a week for dense materials like hardwood or concrete.
- A property is dry when a meter confirms it, not when it looks dry. Technicians compare moisture readings on affected materials against an unaffected reference point in the same room.
- Repairs don't start until drying is verified complete. Rebuilding over material that hasn't reached the dry standard risks trapping moisture behind new drywall or flooring.
- Category 3 water changes the entire process. Sewage backups and floodwater require PPE, containment, and disposal decisions that clean-water losses don't.
The water damage restoration process at a glance
Most water damage restoration follows the same core sequence regardless of what caused the event, though the pace and intensity of each phase shift with the water's category and the damage class. That sequence comes from IICRC S500 rather than any individual company's preference, which is why a homeowner can expect the same general order and the same technical checkpoints from any qualified restoration company they hire.
 A reading above 30 percent on a pinless moisture meter signals wet material behind the surface, well past the range where materials are considered dry under IICRC S500.
A residential job affecting a single room and a large commercial loss spanning several floors both move through the same core phases, differing mainly in how many technicians and how much equipment each phase requires, and in how much cleaning and contents work overlaps with the tail end of drying.
| Phase | What happens | Typical duration |
|---|---|---|
| 1. Emergency response | Stop the water source, cut power to affected circuits, clear hazards | 1–4 hours from the call |
| 2. Inspection and classification | Determine water category, damage class, and moisture map the space | 30–90 minutes |
| 3. Water extraction | Remove standing and surface water with pumps and extraction tools | 2–6 hours, same day |
| 4. Drying and dehumidification | Run air movers and dehumidifiers, monitor daily | 3 days to 2 weeks |
| 5. Cleaning and sanitizing | Treat surfaces, HEPA vacuum, run air scrubbers if needed | 1–2 days, often overlapping day 4 |
| 6. Contents and belongings | Inventory, clean, or pack out furniture and personal items | 1–3 days, often overlapping cleaning |
| 7. Repairs and reconstruction | Rebuild drywall, flooring, insulation, and trim | 1 day to several weeks |
| 8. Final inspection | Confirm moisture readings and close out documentation | Same day, once drying is verified |
Step 1: emergency response and safety assessment
Emergency response is the first phase of water damage restoration, when a technician arrives on-site, usually within 1 to 4 hours of the initial call, to address emergency water damage by stopping active water flow and clearing immediate safety hazards before any equipment starts running. Safety checks take priority over water removal at this stage, since confirming electrical and structural risk before anyone steps into the affected area matters more than how much water is sitting on the floor.
 Confirming a working shutoff, whether the homeowner already closed it or not, is the first action taken, since every phase that follows depends on the water source actually being stopped.
The technician confirms the water source is off, shutting it off at the fixture supply valve or the home's main if it hasn't already been stopped before the crew arrives. Power to any circuit near standing water gets cut at the breaker, since electrical current and water together create a shock hazard that OSHA's flood response guidance treats as a priority safety step before cleanup begins. The crew also checks for sagging ceilings, warped subflooring, or other structural red flags that would make an area unsafe to enter, and photographs the damage before anything is moved so there's a documented record for the insurance claim.
Step 2: inspection and damage classification
Inspection is when the technician determines which of the water damage categories applies and the class of damage using moisture meters, thermal imaging, and a hygrometer, since both classifications set every decision that follows in the restoration process. Getting this step right matters more than any single decision later on, since an inaccurate category or class assessment cascades into the wrong PPE, the wrong equipment count, and a drying timeline that doesn't match what the materials actually need.
Category describes the water's contamination level. Category 1 is clean water from a supply line or appliance, Category 2 is gray water from sources like a washing machine or dishwasher overflow, and Category 3 is grossly contaminated water from sewage backups or flood water damage. Class describes how much moisture the affected materials absorbed, ranging from Class 1, limited absorption confined to one material, through Class 4, deep saturation into low-porosity materials like concrete or hardwood that require specialized drying methods. The technician maps moisture behind walls and under flooring during this same visit, since surface appearance alone under-reports how far water has traveled.
Step 3: water extraction
Water extraction is the physical removal of standing and surface water using pumps, wet vacuums, and weighted carpet wands, completed as quickly as possible because each hour water sits in place increases how far it wicks into subflooring and drywall. Extraction is considered complete once no more free water can be pulled from the surface, at which point the moisture that remains is saturated deep into materials rather than sitting on top of them, handing the job off to the drying phase that follows.
 Extraction that removes water within hours of the loss, rather than days, limits how far it wicks into subflooring and the drywall beneath baseboards.
Submersible pumps handle deep standing water, while truck-mounted or portable extraction units pull surface water from floors and carpet. Weighted extraction tools press down on wet carpet to force out water trapped in the fibers and padding below. Carpet padding is almost always discarded at this stage rather than dried, since it holds moisture the drying equipment can't reach efficiently and drying it in place usually costs more than replacement.
Step 4: drying and dehumidification
Drying and dehumidification is the multi-day phase when air movers and dehumidifiers pull residual moisture out of walls, flooring, and framing until each material reaches a moisture content within a few percentage points of a dry, unaffected reference reading. Doors and windows in the affected area typically stay closed throughout this phase, since a sealed, controlled space lets the equipment lower ambient humidity faster than open airflow to the rest of the house would.
Axial and centrifugal air movers circulate air across wet surfaces to speed evaporation, while low-grain-refrigerant dehumidifiers or, on larger jobs, desiccant dehumidifiers pull that moisture out of the air before it resettles elsewhere in the room. The EPA recommends drying begin within 24 to 48 hours of a water event to limit conditions that allow mold to establish. A technician typically revisits daily to check psychrometric readings, temperature, relative humidity, and moisture content, adjusting equipment placement as materials dry unevenly. Class 1 and 2 losses usually reach the dry standard in 3 to 5 days, while Class 3 and 4 losses, or dense materials like solid hardwood and concrete slabs, can take a week or more.
Step 5: cleaning, sanitizing, and odor control
Cleaning and sanitizing addresses the bacteria, residue, and mold spores that remain in a space after moisture has been removed, using antimicrobial treatments, HEPA vacuuming, and air scrubbing calibrated to the water's contamination category, since mold after water damage sets in fastest on materials that stayed wet through the earlier phases. Full cleaning typically waits until surfaces are dry enough to treat effectively, though antimicrobial applications on non-porous surfaces can start earlier in the drying phase to get ahead of bacterial growth.
Category 1 losses typically need only surface cleaning and a light antimicrobial application. Category 2 and 3 losses call for more, including HEPA air scrubbers with negative air containment to keep contaminants from spreading to unaffected rooms, and technicians handling Category 3 materials wear PPE consistent with the exposure protocols in OSHA's bloodborne pathogens standard. Lingering odor after a Category 2 or 3 event is usually treated separately with thermal fogging or hydroxyl generators once the space is clean and dry, since masking odor before the source is removed just delays the problem.
Step 6: contents and belongings restoration
Contents and belongings restoration is the process of inventorying, cleaning, and in some cases removing furniture, electronics, and personal items from the affected area so they can be treated separately from the structural drying already underway. This step often begins while structural drying is still running, since belongings don't need to wait for the walls and flooring to reach the dry standard before they're inventoried and moved.
 Items in the affected room get inventoried and moved for cleaning separately from the structure itself, since drying and repair timelines rarely match what belongings need.
Lower-risk items in Category 1 losses are often cleaned on-site and returned to the room once it's dry. Larger losses, or anything touched by Category 2 or 3 water, more often go through a pack-out, where items are inventoried, photographed, and moved off-site for ultrasonic cleaning, ozone treatment, or specialty drying. Electronics that were submerged are rarely worth restoring once water reaches internal components, since the safety risk and repair cost usually exceed replacement. Most homeowners' policies separate contents coverage from dwelling coverage, so the inventory list generated during this step typically feeds directly into that portion of the insurance claim.
Step 7: repairs and reconstruction
Repairs and reconstruction is the rebuilding phase, replacing drywall, insulation, flooring, and trim that were removed during extraction, and it typically starts only once moisture readings confirm the structure has reached the dry standard. Some restoration companies handle reconstruction with the same crew that performed drying and extraction, while others bring in a separate contractor for the rebuild, which is worth confirming upfront since it affects both scheduling and who to contact with questions.
Minor repairs might mean patching a section of drywall and reinstalling baseboards, while major reconstruction can involve rebuilding a wall cavity, replacing subflooring, or restoring an HVAC run that sat in contaminated water. Scope drives most of the variation in water damage restoration cost at this stage, since a one-room drywall patch and a full basement rebuild sit on opposite ends of the same process. Some homeowners handle minor cosmetic repairs themselves once the drying phase closes, though structural and electrical work generally calls for a licensed contractor.
Step 8: final inspection and moisture verification
Final inspection is a walkthrough where the technician rechecks moisture readings against the dry standard, confirms repaired areas match the original space, and closes out documentation for the homeowner and insurer. If a reading comes back outside the dry standard in any material, that area goes back to drying rather than closing out, since signing off ahead of confirmed dryness risks trapped moisture and a mold problem later.
 The walkthrough relies on moisture readings taken against the same reference point used throughout drying, not a visual check, since materials can look and feel dry before they actually are.
Moisture can persist in materials that look and feel dry, particularly framing lumber and subfloor, which is why the sign-off relies on meter readings rather than a visual check alone. The technician compares final readings against the same unaffected reference point used earlier in the drying phase, provides a written summary of the work performed, and hands over the moisture logs an insurer may request as part of the claim file.
How long water damage restoration takes by damage class
Total time from the first call to the final walkthrough runs anywhere from 3 days to several weeks, and matching the loss to one of the classes of water damage is the single biggest driver of where a given job falls in that range, covering all eight phases from the first emergency call through the final moisture check rather than just the multi-day drying period most homeowners focus on. Category adds its own pull on the timeline within each class: a Class 2 loss involving gray or black water often runs closer to the Class 3 range of 7 to 10 days than to the Class 2 low end of 5 days, since the added cleaning and containment steps extend the schedule even when the physical footprint is the same.
| Damage class | Materials affected | Time to complete |
|---|---|---|
| Class 1 | Limited absorption, one material or area | 3–5 days |
| Class 2 | Entire room, carpet and cushion | 5–7 days |
| Class 3 | Ceiling, walls, and floor all affected | 7–10 days |
| Class 4 | Deep saturation into hardwood, concrete, or plaster | 10–21+ days |
What affects how long each phase takes
Damage class sets the general range, but several other factors shift how long water damage restoration takes within that range for any given property. Two homes with the identical Class 2 rating can still finish days apart once category, square footage, and how quickly the crew got on-site are factored in.
 Square footage feeds directly into how many air movers and dehumidifiers a room needs, which is why measurement happens before equipment gets placed rather than after.
Water category
Category 3 losses add containment setup, PPE changes, and disposal steps that clean-water Category 1 jobs skip entirely. A Category 2 loss that sits too long without extraction can reclassify to Category 3, which restarts those requirements partway through a job that had already been running under a lighter protocol.
Square footage affected
A larger footprint needs more air movers and dehumidifiers to hit the same drying targets, which can extend the monitoring phase and add to the water damage restoration cost per square foot even at the same damage class. A single bedroom and an open-concept living and dining area rated at the same class can still differ by several pieces of equipment and a full extra day of monitoring, simply because of how much air volume needs to be conditioned.
Material type
Porous materials like carpet and drywall dry faster than dense materials like concrete slabs, solid hardwood, or plaster, which can add several days to the drying phase regardless of class. Concrete slab floors are typically the slowest of all, since moisture trapped beneath the surface has to migrate up through the material itself before a dehumidifier can pull it out of the air.
Cause of the water event
A sewage backup typically brings a higher category and broader area than an isolated supply line break, pushing more of the process into the slower end of its range and often requiring full sewage backup cleanup rather than a same-day fix. A roof leak or a failed appliance hose usually falls in between, affecting one or two rooms without the containment and disposal steps a Category 3 loss requires.
Technician response time
The gap between the water event and the first extraction visit matters directly, since water that sits for 24 hours before extraction has already traveled further into materials than water addressed within the first few hours. Companies running a 24-hour emergency line typically dispatch within an hour or two of the call, while a job that waits until the next business day starts extraction with meaningfully more water already absorbed.
Homeowner access and readiness
Equipment can't run effectively in a space that's still full of furniture or belongings, so how quickly a homeowner can complete that initial diy water damage cleanup, separate from the fuller inventory and cleaning process professionals handle for those same belongings, factors into how soon drying actually starts.
What to expect from technicians during each visit
A routine monitoring visit during the drying phase takes 15 to 30 minutes, when a single technician checks moisture readings, verifies the air movers and dehumidifiers are running correctly, and repositions equipment as materials dry unevenly. A reading that comes back higher than expected during one of these checks usually triggers an equipment adjustment on the spot rather than waiting for the next scheduled stop, which is why the visit cadence can shift by a day or two once drying is actually underway.
 A visit that turns up a reading outside the target range usually ends with an on-the-spot equipment adjustment rather than waiting for the next scheduled stop.
The first visit, covering inspection and extraction, is the longest and most staffed, often running 2 to 4 hours with 1 to 3 technicians depending on the size of the loss. Daily or every-other-day monitoring visits after that are shorter and typically handled by one person, since the work is mostly reading equipment and logging numbers rather than active labor. Every visit adds to the same documentation file, moisture readings, photos, and notes, that gets handed over at the final walkthrough, so a homeowner following a water damage restoration checklist to track progress can usually ask to see the log at any point rather than waiting until the job closes out.
Frequently asked questions
How soon should water damage restoration start after a leak or flood?
Within 24 to 48 hours of the water event. The EPA identifies that window as the point at which mold growth becomes likely on wet porous materials, so the emergency response and extraction phases are timed to beat it whenever possible.
Can I stay in my home during water damage restoration?
Yes, in most Category 1 and Category 2 jobs, as long as the affected area can be closed off from the rest of the house while equipment runs. Category 3 losses, and homes with young children, older adults, or residents with respiratory conditions, often call for temporary relocation during the extraction and cleaning phases, a point the CDC raises in its guidance on flooded home reentry.
Will the restoration company remove all my wet carpet and drywall?
Only what can't be dried in place. Carpet padding is almost always discarded once wet because it holds moisture the drying equipment can't reach, while carpet itself, drywall below the flood line, and trim are evaluated case by case based on category and how long they sat wet.
Do I need to be present for every restoration visit?
No, most homeowners aren't home for daily monitoring visits once equipment is placed. The technician typically needs access for the initial inspection, extraction, and the final walkthrough, with monitoring visits handled on a schedule the company confirms in advance.
Should I turn off the drying equipment to save on electricity?
No, turning equipment off resets drying progress and can add days to the overall timeline. Air movers and dehumidifiers are designed to run continuously until moisture readings confirm the dry standard, and most restoration companies factor the added electricity cost into their estimate rather than leaving it entirely on the homeowner.
What's the difference between water mitigation and water restoration?
Mitigation stops the water source and removes water and moisture to prevent further loss, while restoration covers the repairs and reconstruction that bring the property back to its pre-loss condition. Both fall under the same overall water damage restoration process, just at different stages.
Will my restoration company handle my insurance claim?
Most document the loss with photos, moisture logs, and a written scope you can submit to your insurer, and many work directly with adjusters. The company itself isn't your insurer, so final coverage decisions still come down to whether homeowners insurance covers water damage and what your claims adjuster determines.
What happens if mold is found during the restoration process?
Work pauses in that area until the mold is addressed, since drying alone won't resolve active growth, a distinction the CDC: Basic Facts About Mold draws between moisture control and active remediation. Depending on the extent, this can mean a same-visit cleanup or a referral to a dedicated mold remediation crew before drying resumes.
Sam Hickerson is the founder of RestoreAdvisor and writes consumer guides on mold remediation, water damage restoration, inspection, testing, and home recovery. His work focuses on helping homeowners understand costs, risks, and when to call a professional. He draws on guidance from the EPA, CDC, IICRC, and other authoritative sources to make complex home issues easier to navigate.