
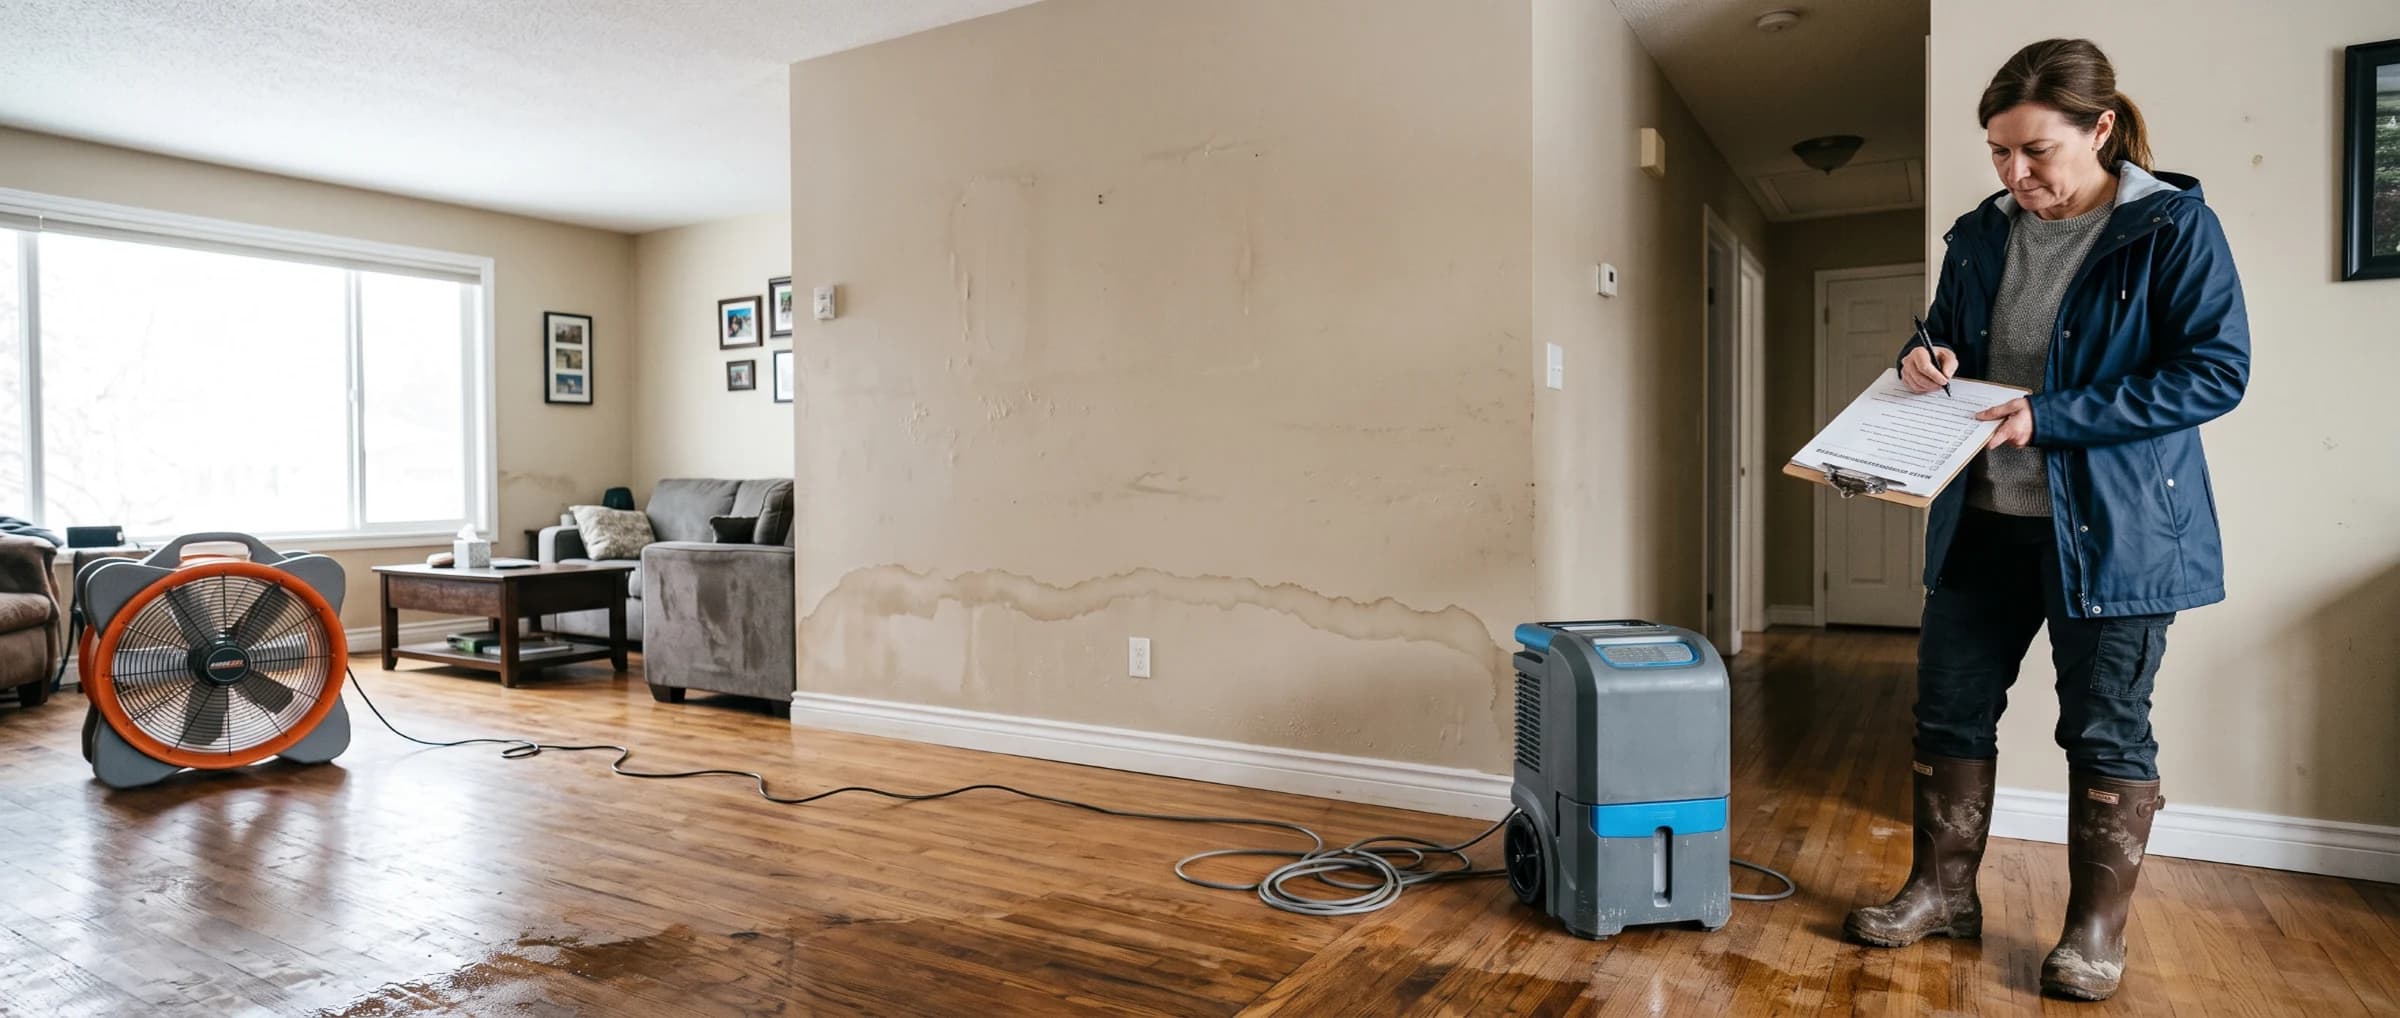

Water actively spreading through a room is stressful, and the next few decisions matter more than the next few days: what you do first affects how much can be saved and how your insurance claim goes. Safety comes first, then stopping the source and documenting the damage, then extraction, drying, cleaning, and prevention, roughly in that order, though real jobs often overlap several steps at once. A water damage restoration checklist is the ordered sequence of those steps, based on the practices set out in the ANSI/IICRC S500 standard, the industry reference for water damage cleaning and restoration.
None of these steps require special training, but knowing when a job has moved past what a homeowner can safely finish themselves is part of getting water damage restoration right from the first hour.
Key insights
- Mold risk starts fast. Conditions for mold growth can begin within 24 to 48 hours of water exposure, so the drying phase is time-sensitive from the first hour.
- Category can change while you wait. Clean water left standing can shift toward gray or black water as it sits and picks up contaminants from flooring, walls, and furnishings.
- Soak time decides what's salvageable. Porous materials like carpet padding and insulation soaked longer than 48 hours are usually not worth saving, regardless of the cause.
- Documentation comes before cleanup. Most insurers expect photos and a written record of the damage before any materials are removed or repairs begin.
- A visual check isn't proof of dry. A moisture meter reading, not how a surface looks or feels, confirms a space has actually finished drying.
- Three inches is a rough professional threshold. Standing water beyond a few inches typically calls for pump or truck-mounted extraction equipment rather than a wet/dry shop vacuum.
Safety checklist before you start
Personal safety comes before any cleanup step: electrical hazards, structural instability, and contaminated water are the three risks that aren't always visible until you're already standing in the room. Water and electrical components remain a shock hazard even after power is shut off at the panel, since some circuits may still be live depending on how the panel is wired, a risk OSHA flags specifically in flood response guidance.
 OSHA recommends confirming a circuit is de-energized before contact, since floodwater can leave wiring live even when a room appears to have lost power. A reading here should come before touching anything else in the affected area.
Before you enter
- Rubber boots, waterproof gloves, and an N95 mask worn, especially if the water source is unknown
- Ceilings, walls, and flooring checked for sagging, bulging, or soft spots before stepping in; back out and wait for an inspection if anything feels unstable
- No exposed or submerged wiring visible, and power confirmed off at the breaker
- Children and pets kept out of the affected area until the water is cleared and its category is known
- Appliances, extension cords, and outlets that got wet left unplugged and unused until an electrician confirms they're safe
- Windows opened if there's a chemical or sewage smell, and the area treated as Category 3 until proven otherwise
Emergency response checklist: the first 24 hours
The first 24 hours determine how much material can be saved: stopping the source, cutting power to the affected area, and documenting the damage before touching anything are the priorities, in that order. Work through them once the area has been confirmed safe to enter.
 Closing the main valve stops new water from entering the home, but it does nothing for water already inside, extraction still has to happen separately once the source is off.
First 24 hours
- Power cut at the breaker for any circuit serving the flooded room, following OSHA's guidance on floodwater electrical hazards
- Water source stopped: main shutoff valve closed, appliance supply line turned off, or a roof leak temporarily patched
- Every affected room photographed and filmed from multiple angles, including water lines, the source, and anything in the water's path, before anything is moved
- Insurance company called the same day; ask what's covered, what documentation is needed, and whether they have approved contractors
- Standing water extraction started once the area is confirmed safe
Extraction, drying, cleaning, and repairs make up the water damage restoration process that follows, eight phases from here through final inspection, each with its own equipment and expected timeline.
When to call a professional
Call a professional when water covers more than one room or floor, when the source is Category 2 or 3, when water reached electrical systems or wall cavities, when standing water has sat more than 24 hours, or when a household member is very young, elderly, or immunocompromised. Any one of these alone is reason enough to bring in help, not a combination requirement.
Recognizing that threshold early saves both money and time, since each of these situations only gets more expensive to fix the longer it's handled without the right equipment.
Choosing the right company matters as much as the timing. Confirming a technician holds water damage restoration certifications like WRT or ASD is one concrete way to verify they're trained for the category and class involved.
Licensing, insurance, and red flags to watch for before signing anything are the core of choosing a water damage restoration company, and that vetting matters more the larger the job gets.
Supplies and equipment checklist
A basic equipment list covers most Category 1 and Category 2 losses without needing to rent professional-grade machinery. Category 3 water or damage spanning multiple rooms usually calls for equipment beyond what's practical to keep on hand at home.
Basic equipment
- Wet/dry shop vacuum for standing water up to a few inches deep
- Box fans to circulate air across wet surfaces and speed evaporation
- Residential dehumidifier, 30 to 50 pint capacity for most single rooms, to pull the moisture fans release back out of the air
- Moisture meter to confirm a material is actually dry rather than just dry to the touch
- Rubber gloves, boots, and an N95 mask for protection against contaminated water and airborne particles
- Heavy-duty trash bags to contain and seal unsalvageable, contaminated materials for disposal
Water extraction and removal checklist
Extraction removes standing water from floors and low-lying areas before it spreads further into walls, subflooring, and furnishings. The method that makes sense depends almost entirely on how much water is on the floor, and choosing the wrong tool either wastes time on equipment that can't keep up or brings in professional-grade machinery for a job a shop vacuum could have handled.
 A wet/dry shop vacuum handles standing water up to a few inches deep; anything beyond that calls for a submersible pump or professional truck mounted extraction equipment.
Match method to water depth
- Under 1 inch: towels, a mop, or a wet/dry shop vacuum, manageable for a single room without specialized equipment
- 1 to 3 inches: a wet/dry vacuum or a small submersible pump, typical for basement and appliance-leak scenarios
- 3 inches or more: truck-mounted or portable extraction equipment, beyond typical homeowner equipment and a call-a-professional threshold
What to keep and what to remove
Whether a wet material can be saved comes down to two things: how porous it is and how long it stayed wet, not how it looks once dried. Non-porous materials generally clean and dry without issue, while porous materials hold contamination and moisture in ways that surface cleaning can't fully reach.
Set aside anything you're unsure about rather than deciding on the spot, since a material that looks fine at hour six can still fail a moisture check at hour thirty. How a material is handled also depends on water damage categories, since gray or black water contamination changes the calculus even for a short soak time.
Soaked under 24 hours
- Carpet padding usually replaced regardless; carpet itself often salvageable if cleaned promptly
- Drywall may dry in place if not swollen
- Solid wood furniture cleans and dries well
- Particleboard or pressed wood frequently swells even with quick drying
- Insulation often needs removal regardless of soak time
Soaked over 48 hours
- Carpet and padding typically discarded
- Drywall usually cut out and replaced
- Solid wood furniture still often salvageable, though refinishing may be needed
- Particleboard or pressed wood not salvageable
- Insulation always removed
Drying and dehumidification checklist
Drying is the phase most homeowners underestimate, since a room can look and feel dry within a day while the material behind the wall or under the floor stays wet for a week. Complete drying, confirmed with a moisture meter rather than a visual check, is what prevents mold, and the EPA ties that same 24 to 48 hour window to when mold risk begins.
 A reading of 28.4 percent is well above the 5 to 12 percent range considered dry for drywall and framing, meaning equipment stays running here regardless of how the surface looks or feels.
Drying and monitoring
- Fans positioned for cross-ventilation across wet surfaces; windows opened if the weather allows outside air to help rather than add humidity
- Dehumidifiers run continuously rather than cycled on and off, since interrupted drying gives moisture time to settle back into materials
- Moisture readings checked at the same spots daily, tracking the trend toward the 5 to 12 percent dry range typical for drywall and framing
- Equipment kept running until readings confirm dry, not stopped early because a surface feels dry to the touch, since it can still register wet a half inch below the surface
- Class rechecked with the technician if drying stalls past the expected timeline
A room that isn't drying on schedule may fall into a higher one of the water damage classes than first assessed, since higher classes involve more absorbed water and take longer regardless of equipment.
Cleaning and sanitizing checklist
Cleaning removes residue and contamination that extraction and drying leave behind, and it matters even after clean-water losses, since standing water picks up bacteria from flooring and furnishings the longer it sits.
Cleaning and sanitizing
- Hard surfaces, walls, floors, and countertops, washed with an antimicrobial cleaner and disinfected, not just wiped down
- Salvageable belongings disinfected individually rather than given a general wipe of the room
- HVAC ductwork and components cleaned if water reached the system, since a contaminated unit can recirculate contamination through the whole house
- Treated areas checked for a returning musty smell over the following week
A returning smell is often the first sign that moisture is still present somewhere the cleaning pass missed. The CDC notes mold can begin colonizing within this same early window, so it's worth investigating right away rather than masking it.
Common mistakes to avoid
Running fans without a dehumidifier, saving contaminated materials, and finishing repairs before the space tests dry account for most of the repeat damage and drawn-out timelines homeowners run into. Each one is easy to avoid once you know to watch for it.
Avoid these
- Dehumidifier running alongside fans, not fans alone circulating humid air without removing it
- Contaminated porous materials, carpet padding, insulation, drywall that contacted Category 2 or 3 water, discarded rather than saved
- Moisture behind walls and under flooring checked, not assumed dry just because the surface feels dry
- Paint and finish work held off until the space tests fully dry, not applied over any remaining moisture
- Windows and equipment kept running during drying rather than shut off early to save on energy costs
Documentation and insurance checklist
Documentation protects your claim, and the strongest claims are the ones built before any cleanup starts rather than reconstructed afterward from memory, particularly for confirming whether homeowners insurance covers water damage for your specific cause of loss. Insurers weigh time-stamped, itemized records far more heavily than a general description of what happened.
 Insurers weigh time-stamped photos taken before any materials are moved more heavily than a written description alone, since they establish the extent of damage at first discovery.
Documentation
- Photos and video continued through each stage as extraction and drying progress, not just the initial damage, for a visual record of the full timeline
- Damaged items listed with an estimated value, even roughly, rather than reconstructed from memory later
- Every receipt tied to the loss kept, cleanup supplies, equipment rental, and any temporary repairs, since many policies reimburse protective measures separately from the main claim
- Written scope of work obtained, spelling out category, class, and pricing structure
- All correspondence with the insurer followed up in writing, even after phone calls, so there's a paper trail if a coverage question comes up later
That level of written detail is what separates a real water damage restoration cost estimate from a rough verbal number.
Prevention checklist
The best outcome for any water damage checklist is never having to use it, and most water damage traces back to a handful of predictable failure points, including washing machine water damage from a cracked supply hose, that a short routine catches early.
Building a maintenance habit around these checks, including testing for sump pump failure before storm season, costs far less than a single restoration job, and the early ones are the same signs of water damage most homeowners catch too late.
Monthly
- Sinks and toilets checked for slow leaks, which often go unnoticed until they've caused hidden damage
- Washing machine supply hoses inspected for cracking or bulging, a leading cause of sudden, high-volume indoor flooding
Quarterly
- Sump pump tested, if the home has one; a pump that fails during a storm removes the home's main defense against basement flooding
- Gutters and downspouts cleaned so water is redirected away from the foundation rather than toward it
Annually
- Water heater and HVAC system professionally serviced before aging components fail without warning
- Soil graded away from the foundation so rainwater doesn't channel against it with every storm
A typical crew visit brings more noise and more approval decisions than any checklist can capture, which is the day-to-day reality behind what to expect during water damage restoration.
Frequently asked questions
How long does it take to dry out a house after water damage?
Most homes take three to seven days to dry fully with professional air movers and dehumidifiers running, though the exact time depends on the damage class, the materials involved, and the square footage affected.
What should I not do after water damage?
Stopping too early is the short answer: stopping fans and dehumidifiers before a moisture meter confirms dry, stopping documentation before the claim is filed, or stopping at cleaning without checking behind walls all lead to the same outcome, damage that resurfaces weeks later.
Do I need to throw away everything that got wet?
No, not everything needs to go. Non-porous items like metal, solid wood furniture, and glass usually clean up fine once dried and disinfected. Porous materials soaked more than 48 hours are the ones that typically can't be salvaged.
Is water damage restoration covered by homeowners insurance?
Yes, in most cases, when the cause was sudden and accidental, such as burst pipe water damage or a failed appliance. Flooding from an external source is excluded under standard policies and covered separately through the National Flood Insurance Program, and damage traced to long-term neglect is typically denied as well.
Can I run a dehumidifier and fans at the same time?
Yes, and running both together is the standard approach. Fans move air across wet surfaces while the dehumidifier removes the moisture that circulation releases.
How much water damage means I should call a professional instead of handling it myself?
More than a few inches of standing water, or any water that reached electrical systems or wall cavities, is a reasonable threshold. Category 2 or 3 water should go to a professional regardless of the volume involved.
What's the difference between water mitigation and water restoration?
Mitigation stops the damage from getting worse: extraction, drying, and containment. Restoration rebuilds what was lost, replacing drywall, flooring, and other materials once the space is confirmed dry.
Do I need a permit for water damage repairs?
Sometimes, mainly for structural or electrical work. Replacing drywall or flooring like-for-like usually doesn't require one, but rebuilding a wall, rewiring an outlet, or replumbing typically does. If you're weighing a full restoration against smaller repairs, the questions to ask a water damage restoration company include this one directly, since a licensed contractor will know your local permit rules.
Sam Hickerson is the founder of RestoreAdvisor and writes consumer guides on mold remediation, water damage restoration, inspection, testing, and home recovery. His work focuses on helping homeowners understand costs, risks, and when to call a professional. He draws on guidance from the EPA, CDC, IICRC, and other authoritative sources to make complex home issues easier to navigate.