
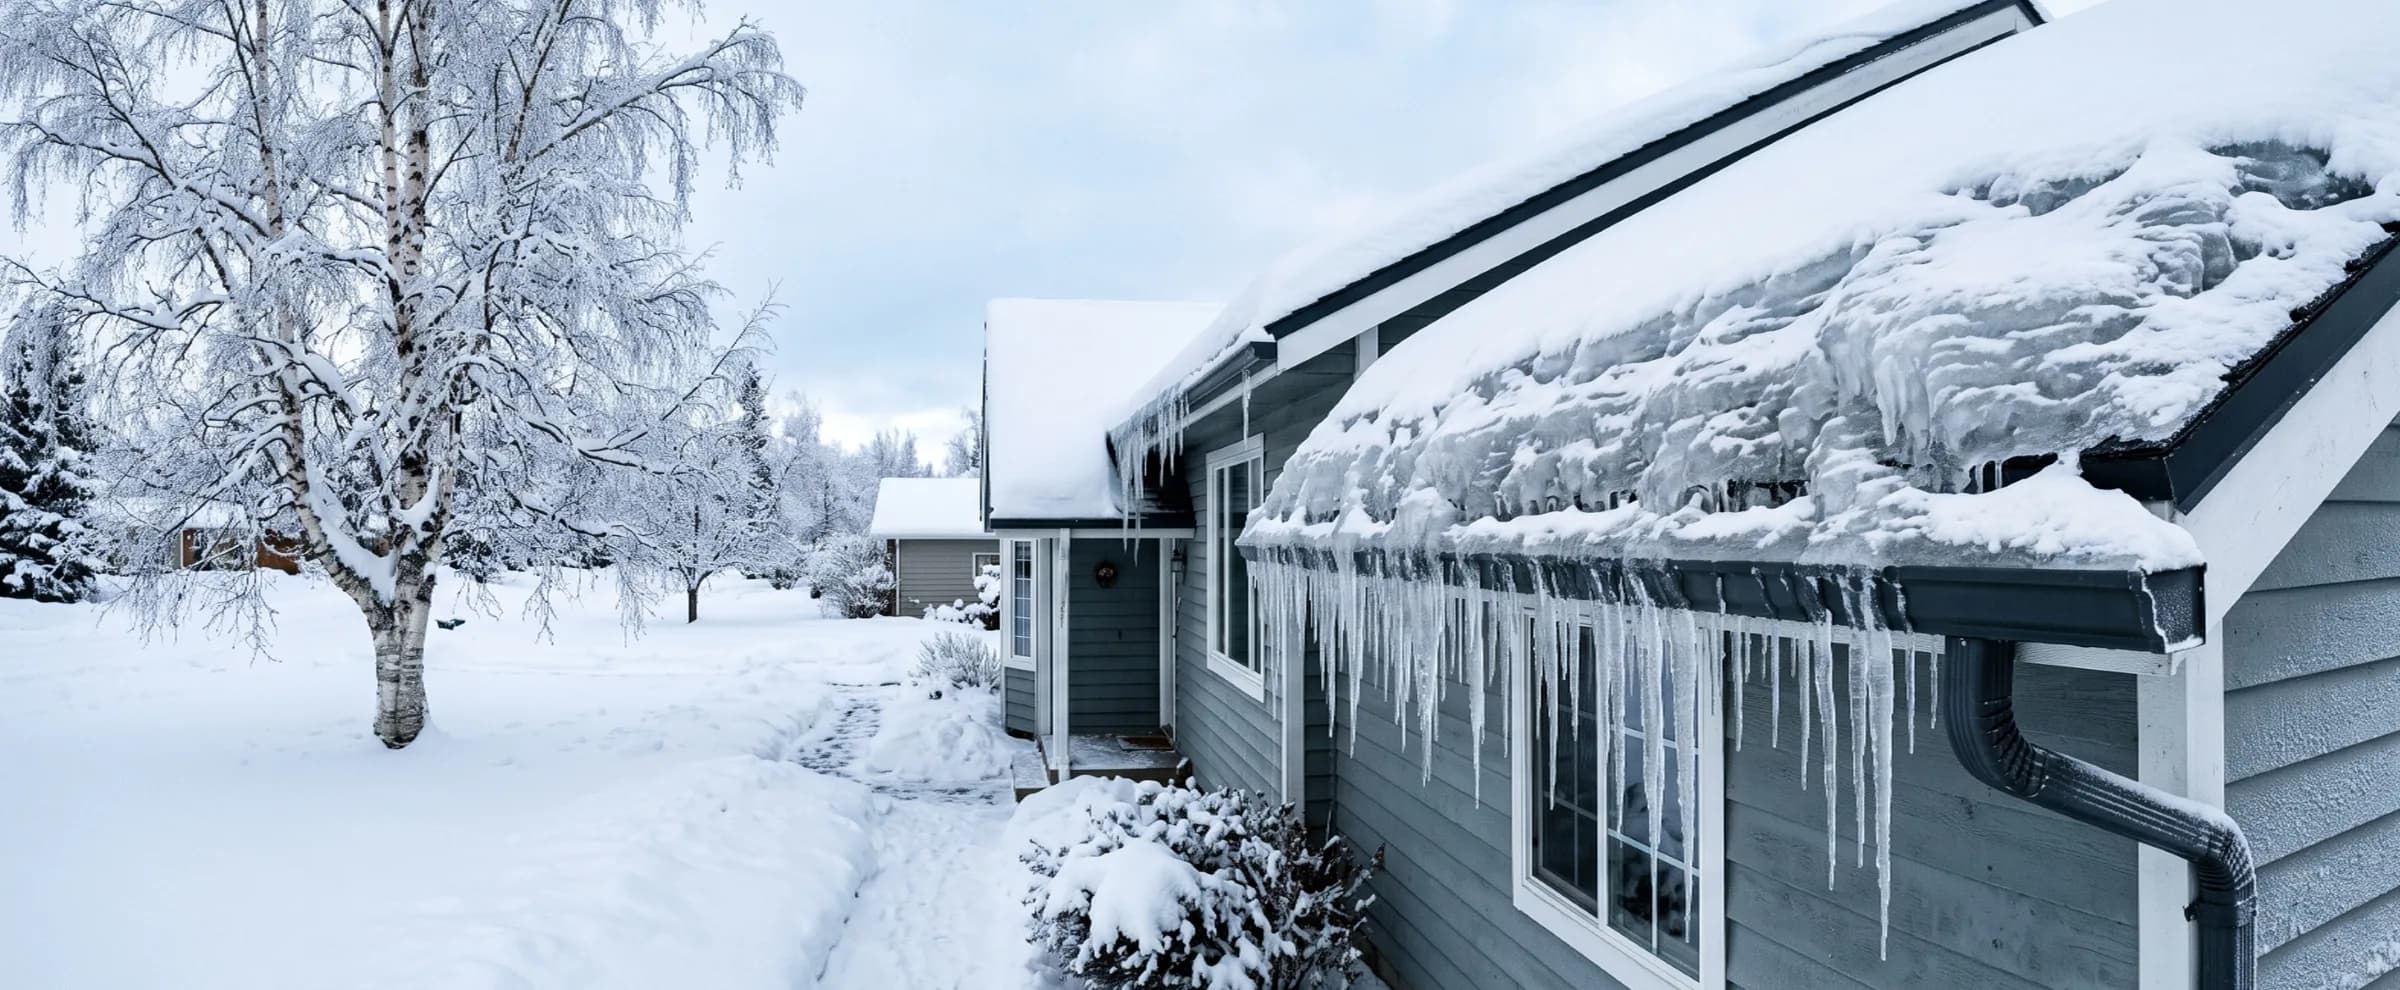

Finding water dripping from a ceiling in the middle of a cold snap is unsettling, especially when the cause is a visible wall of ice hanging over the gutter. An ice dam is a ridge of refrozen snowmelt that builds up along a roof's colder edges, and once it's thick enough, it blocks the path for meltwater draining off the roof above it, a formation mechanism the National Weather Service and IBHS both document as a function of attic heat loss meeting a cold roof edge. That water has nowhere to go but backward, under the shingles and into the attic, ceiling, or exterior wall below. At the point it enters your home, that water is Category 1 clean water under IICRC S500, the industry standard restoration professionals use to classify contamination level, though it can degrade to Category 2 the longer it sits trapped in insulation or behind drywall.
Here's what to do in the next few minutes if water is actively coming through, what removing the ice dam and repairing the resulting damage typically costs, and how insurance treats a claim like this. The fix that actually stops the same dam from forming again next winter has less to do with the roof than most homeowners assume.
Key insights
- Ice dams form from a warm roof, not bad weather alone. Attic heat escaping through the roof deck melts snow on the upper roof even while outside temperatures stay well below freezing, and that meltwater refreezes the moment it reaches the unheated eave.
- The water is Category 1 at first contact. IICRC S500 classifies ice dam meltwater as clean water where it enters the home, though prolonged exposure inside a wall or attic cavity can shift that classification.
- Professional ice dam removal runs $400 to $2,000. Steam removal, the method roofers recommend most, typically costs $400 to $800 on an accessible roof and can reach $2,000 on a large or steep one.
- Interior water damage restoration is billed separately from ice dam removal. Cleanup and repair for the ceiling, insulation, or wall the water reached typically runs $500 to $15,000 depending on how far the water traveled.
- Insurance usually covers the interior damage, not the roof work. Most HO-3 policies pay for the water damage under the sudden-and-accidental standard but exclude ice dam removal and roof repair unless a specific endorsement applies.
- Removing the ice doesn't fix the cause. Without correcting the attic insulation and ventilation gap that let heat escape in the first place, the same dam typically re-forms in the same spot the next cold snap.
What to do right now
If water is actively dripping through a ceiling or running down an interior wall, the first priority is containing it and getting the right two calls made, not diagnosing the roof. Move fast on the water inside before worrying about the ice outside.
 A controlled puncture releases trapped water on your terms rather than waiting for the ceiling to fail on its own, the same mitigation step IICRC S500 recognizes as standard practice.
Contain the water
Set buckets, towels, or a tarp under the active drip and move furniture, electronics, and anything absorbent out of the path. A few minutes here prevents a contained ceiling leak from becoming a flooring and furniture problem too.
Relieve a bulging ceiling if it's visibly sagging
Trapped water adds weight fast, and drywall holding back a pocket of water will eventually fail on its own, usually at the worst possible moment. A controlled puncture with a screwdriver, directed into a bucket, releases the water on your terms instead of the ceiling's.
Cut power to the area
Shut off the breaker for any outlets, switches, or fixtures near the leak before the water spreads further. Wet drywall in contact with live wiring is a shock hazard, and OSHA's flood response protocol treats this as a first step for exactly that reason.
Photograph the damage
Take clear photos of the ceiling stain, wall, and any standing water before you move belongings or start drying. This documentation becomes the backbone of the insurance claim, and it's far easier to gather before cleanup starts than to reconstruct afterward.
Call for ice dam removal and water damage restoration
These are two different jobs. A roofing or ice dam removal service handles the ice itself, while a water damage restoration company handles extraction, drying, and repair of whatever the water reached inside. Calling both in the same window keeps the ice from re-forming while the interior is still drying out.
What not to do
Climbing onto an icy roof, chipping at the ice with a hammer or chisel, and spreading rock salt across the roof are among the most common mistakes homeowners make with an ice dam. Each one either adds an injury or roof-damage risk on top of the existing problem, corrodes gutters and flashing, or slows down the interior drying process that actually needs to start first.
 Striking the ice directly routinely cracks or dislodges shingles and can puncture the roof deck, turning a contained leak into a structural repair.
Climbing onto an icy roof to inspect it yourself
An ice-covered roof pitch in freezing weather is one of the more dangerous DIY situations a homeowner can put themselves in, and it's rarely necessary. A roof rake used from the ground handles the accessible portion of the job safely.
Chipping or hammering at the ice
Striking the ice dam directly, with a hammer, ax, or ice pick, routinely cracks or dislodges shingles and can punch straight through the roof deck. That turns a contained leak into a structural repair.
Spreading rock salt on the roof or gutters
Rock salt is corrosive to metal flashing, gutters, and fasteners, and it works too slowly on a thick, established dam to be worth the tradeoff. Calcium chloride ice-melt tablets are the safer, faster-acting alternative.
Waiting on insurance approval before drying anything
Most policies expect homeowners to take reasonable steps to prevent further damage, and delaying extraction and airflow while waiting for an adjuster call typically makes the eventual claim larger, not smaller. Start the water damage restoration checklist the same day.
Why ice dams form
An ice dam forms when heat escaping through an attic and roof deck melts the snow sitting on the upper portions of a sloped roof, while the unheated eave below stays at or below freezing. The meltwater runs down until it hits that cold edge, refreezes, and builds into a ridge of ice that blocks further drainage, a mechanism confirmed by both NOAA's cold-weather guidance and IBHS's winter readiness research.
 The melt-refreeze cycle needs attic surfaces above 32°F meeting outside air in the low 20s°F for several days straight, the specific gap NOAA and IBHS both point to as the trigger.
Three conditions have to be present at once: a layer of snow acting as insulation, an attic warm enough to melt the snow's underside, and outside air cold enough to refreeze that meltwater at the eave. Remove any one of the three and an ice dam can't form, which is why the long-term fix always points back to the attic rather than the roof surface itself. This is a different failure mechanism than a roof leak caused by a gap in flashing, a cracked shingle, or a membrane failure, and it's unrelated to frozen pipes, which fail from ice expanding inside a supply line rather than snowmelt backing up on a roof.
Attic insulation gaps around recessed lighting, plumbing vents, and the attic hatch are the most common heat-loss points that create the warm roof surface in the first place. Poor attic ventilation compounds the problem, since a properly vented attic pulls in cold outside air that keeps the entire roof deck closer to the outdoor temperature, minimizing the melt-refreeze cycle even when some heat does escape.
Some roofs are more prone to this than others regardless of attic condition. North-facing and heavily shaded roof planes stay colder for longer and refreeze meltwater faster, low-pitch sections and roof valleys hold snow longer than steep runs that shed it quickly, and older homes built before current insulation standards carry a structural head start toward the problem that newer construction doesn't have.
Ice dams are primarily a northern-climate problem, concentrated in New England, the Mid-Atlantic snowbelt, the Upper Midwest, and the Mountain West, the regions where sustained sub-freezing stretches combine with regular snow cover on rooflines. NOAA's National Weather Service tracks the freeze conditions that drive this pattern regionally. Homes farther south can still see an isolated ice dam during an unusual cold snap with snow, but the recurring, every-winter version of the problem stays largely confined to the traditional snow belt.
Signs of ice dam damage
The most obvious sign is a ceiling or wall stain that appears or grows during a thaw and stops spreading once the weather warms, a pattern distinct from a leak that's active regardless of temperature. Icicles along the eave and visible ice ridges at the gutter line are the outdoor warning signs that typically precede an interior stain by hours to days.
Beyond the obvious stain, watch for peeling or bubbling paint near the ceiling-wall joint, a musty smell in an upstairs room or closet, and sagging drywall directly below a known ice buildup area. Gutters pulling away from the fascia or visibly bowed under ice weight are a structural warning sign, and photographing them before any interior evidence shows up strengthens the eventual insurance claim. Moisture meter and infrared imaging can confirm signs of water damage before a stain ever reaches the surface, detection methods that apply regardless of what caused the leak.
Where the water travels
Once meltwater backs up behind an ice dam, it works its way under the shingle edge and follows whatever path offers the least resistance, which is rarely a straight line down. Gravity and the direction of the roof's framing usually decide the route more than the location of the original ice buildup.
 Water rarely stops at the first material it reaches, insulation, drywall, and the wall cavity all sit in its path before it ever shows up as a visible ceiling stain.
Water most often moves through a roof assembly in a predictable order once it gets past the shingles, from the deck into insulation and eventually to drywall and framing, though a fast, heavy melt can push water into several of these layers at once rather than one at a time. Which layer ends up worst off usually comes down to how long the leak went unnoticed before someone caught it.
| Location | How water gets there | What it damages |
|---|---|---|
| Roof deck and underlayment | Direct entry point under lifted or backed-up shingles | Delamination, rot, staining on the underside of the deck |
| Attic insulation | Gravity pull once past the deck | Compressed, saturated fiberglass or cellulose loses R-value |
| Ceiling drywall | Insulation saturation reaching the drywall from above | Staining, sagging, bubbling paint, eventual collapse if untreated |
| Exterior wall cavity | Water traveling along a top plate or stud bay | Hidden staining inside the wall, insulation loss, trim damage |
| Interior wall and trim | Wall cavity water reaching baseboard or window trim | Peeling paint, warped trim, staining at the wall-ceiling joint |
Water rarely stays confined to the room directly below the ice dam. A common pattern is water entering near a roof valley or chimney flashing point and traveling several feet along the top plate before it ever shows up as a ceiling stain, which is why a technician's moisture mapping often finds wet material well outside the visible damage. The water damage categories system that governs the rest of the restoration industry applies here too, sorting the water by contamination level rather than by what caused it.
Class works alongside category rather than in place of it, and the two answer different questions about the same loss. How much material absorbed water and how far it spread determine water damage classes, not the ice dam that caused the leak in the first place.
Exterior and structural damage
Ice dams damage a roof independently of the water they let inside, through sheer weight and through the ice's grip on shingles and gutters. Gutters and downspouts are the first casualty in most cases, since IBHS's winter-readiness research notes that even a modest ice buildup can exceed the weight rating of a typical residential gutter system, pulling brackets loose or tearing the run away from the fascia entirely.
 Even a modest ice buildup can exceed the weight rating of a typical residential gutter system, pulling brackets loose or tearing the run away from the fascia entirely.
Shingles take damage even without a leak forming. The freeze-thaw cycle breaks shingle seals that don't reliably reseal once warm weather returns, and granule loss along the affected edge accelerates aging on that section of roof regardless of whether water ever made it past the deck. Once temperatures climb enough for the ice to loosen, chunks can shear off and fall with real force, which makes standing or working directly beneath a large ice dam a genuine hazard, not just a water-intrusion problem.
Full roof collapse from ice and snow load is uncommon but not theoretical, and it scales with total accumulated weight rather than the ice dam alone. A roof already carrying a heavy snow load plus a substantial ice dam can approach the structural limits IBHS's winter-readiness research cites for typical residential framing, particularly on additions, porches, or flat sections not built to the same load rating as the main roof. Sagging ceiling joists, new cracks in interior drywall near the roofline, or doors and windows that suddenly stick are urgent signs, not cosmetic ones, and warrant the same immediate response as any other emergency water damage restoration situation rather than a wait-and-see approach.
Removing an ice dam
Low-pressure steam is the removal method roofing and ice dam specialists recommend most, since it melts a channel through the ice without the shingle damage that chipping or hammering causes. A technician works from the ground or a ladder, directing steam along the dam to open a drainage path, typically completing the job in one to three hours depending on the dam's size and the roof's accessibility. Cost scales with roof pitch, height, and how many separate ice dams have formed along the eave, since each one needs its own drainage channel opened.
 Steam opens a drainage channel without the shingle damage that chipping or hammering causes, which is why roofing professionals recommend it over mechanical removal.
Method choice affects both price and risk to the roof, which is why a homeowner comparing quotes should ask which method a company plans to use before assuming the lowest bid is the better deal. A quote noticeably lower than the others is often a sign the company plans to chip or hammer rather than steam, a tradeoff worth knowing before accepting it.
| Method | Typical cost | Notes |
|---|---|---|
| Low-pressure steam | $400–$800 | Preferred method, minimal shingle risk, most jobs finish same-day |
| Calcium chloride tablets | $100–$150/hour | Effective for smaller dams, slower-acting, DIY-safe from the ground |
| Chipping or mechanical removal | $200–$300/hour | Fastest but highest risk of shingle and roof deck damage |
| Large or multi-story roof, steam | $1,200–$2,000+ | Additional labor and equipment for steep pitch or hard-to-reach eaves |
Placed in a nylon stocking laid perpendicular across the dam, calcium chloride tablets open a drainage channel that lets backed-up water start moving within a few hours rather than waiting for the whole dam to melt. For anything requiring a ladder or roof access, a certified roofing or ice dam removal technician costs more than doing it yourself, but the injury and shingle-damage risk of a roof-access job makes that difference an easy trade. If the interior damage is significant, coordinate timing with a restoration company so drying can start as soon as the source is under control rather than after the ice is fully gone.
Not every ice dam needs a service call right away, and matching the situation to the right response avoids paying for help a roof rake would have handled just as well. A second factor, whether the dam already has an active interior leak, matters more than its size when deciding how fast to move.
| Situation | Best approach | Why |
|---|---|---|
| Small dam, no leak, thaw expected within days | Wait, or clear roof snow with a rake | Removes the fuel feeding the dam without touching the ice itself |
| Small to medium dam, ground-reachable, no active leak | DIY with calcium chloride tablets | Opens a drainage channel safely from the ground |
| Large dam, no leak yet, roof access required | Professional steam removal | Avoids the injury and shingle-damage risk of DIY roof access |
| Any dam with an active interior leak | Professional removal, same day if possible | Stops the water source while restoration work starts in parallel |
DIY vs. professional
A small, contained ceiling stain from a brief ice dam, caught and dried within a day, is reasonable to handle without a water damage restoration company, provided the affected area is limited to a few square feet and no drywall or insulation needs removal. Anything larger, anything involving standing water inside a wall cavity, or any stain that's still growing after the weather warms up needs professional moisture confirmation.
The risk with ice dam damage specifically is that the visible ceiling stain is often smaller than the actual wet area, since water traveling along a top plate or through insulation doesn't always show up directly below where it entered. A moisture meter reading above 17 percent in drywall, or any reading that doesn't drop within a few days of fan-assisted drying, is the signal to call a professional rather than continue drying on your own. The same tools, technique, and safety threshold that apply to DIY water damage cleanup for any other cause hold here too, for a small, confirmed-contained leak.
What it costs to repair
Ice dam water damage repair typically runs $400 to $15,000 total, split between two separate line items: ice dam removal ($400 to $2,000) and interior water damage restoration ($500 to $15,000). Homeowners are sometimes surprised the two totals don't overlap the way a single line-item quote might suggest, since a roofing or ice dam removal company and a restoration company bill independently for different work. Comparing a contractor's rate against water damage restoration cost per square foot benchmarks is one way to catch an over-priced quote before signing.
 Removal and restoration are billed as two separate line items, and it's scope like this, cutting drywall and pulling insulation, not the ice dam itself, that pushes a job from the low end of the repair range toward the high end.
Room count, ceiling height, and whether the water reached an occupied living space rather than just the attic all push a given job toward the higher end of these ranges. An attic-only leak caught within a day typically lands at the low end, while a multi-room spread that sat undetected for a week pushes toward the top of every range.
| Scope | Typical cost | What's included |
|---|---|---|
| Ice dam removal only | $400–$2,000 | Steam or chemical removal, no interior repair |
| Minor interior water damage | $500–$1,500 | Small ceiling stain, spot drying, no material removal |
| Moderate interior water damage | $1,500–$6,000 | Drywall and insulation removal, multi-day drying, repainting |
| Extensive interior water damage | $6,000–$15,000+ | Multi-room spread, structural drying, mold remediation add-on |
| Roof repair (shingles, flashing, gutters) | $300–$1,500 | Isolated damage; separate from a full roof replacement |
Square footage, how many days the water sat before extraction started, and whether insulation needs full replacement rather than drying all move the total within these ranges. The same water damage restoration cost logic, driven by category and class rather than the cause itself, applies once a restoration company is on-site, regardless of what caused the leak.
Insurance coverage
Standard HO-3 homeowners insurance generally covers the interior water damage an ice dam causes, since NAIC treats the water intrusion as sudden and accidental, the standard most insurers apply. What frequently isn't covered is the ice dam removal itself and the roof repair, particularly if an adjuster determines the underlying cause was inadequate attic insulation or ventilation, which some policies classify as a maintenance issue rather than a covered peril. Structural damage from ice and snow weight sits on the other side of that line: if accumulated load causes a roof to sag or partially collapse, dwelling coverage typically does apply to the repair or replacement, since a collapse is treated as a sudden structural failure rather than gradual deterioration.
A handful of insurers in colder states now offer an ice dam damage endorsement that specifically covers removal costs, an option to ask about at renewal if the home has had repeat ice dam issues. Documentation matters more than usual on an ice dam claim, since the adjuster is often weighing whether the damage resulted from a sudden weather event or from a known, unaddressed attic problem. The photos taken during the immediate response, plus a contractor's written assessment of the attic's insulation and ventilation condition, both support the sudden-and-accidental argument. The same sudden-and-accidental standard governs homeowners insurance and water damage claims broadly, with the full coverage and claims process running deeper than this narrower ice-dam angle needs to cover.
How to prevent ice dams from forming again
Removing an ice dam solves the immediate leak but not the underlying cause, and the same roof sections almost always develop another dam the next time snow sits on the roof for several days. Preventing recurrence means addressing the attic's heat loss and ventilation, not the roof surface itself.
 Most older homes fall well short of current insulation recommendations, and topping up to code level does more to stop the melt-refreeze cycle than any fix applied to the roof surface itself.
Seal attic air leaks
Recessed lighting, plumbing and exhaust vent penetrations, and the attic access hatch are the most common paths for warm air to escape into the attic. Sealing these with foam or caulk reduces the heat reaching the roof deck more directly than any roof-surface fix.
Add attic insulation to code-recommended levels
Most older homes fall short of current insulation recommendations, and topping up to code level is one of the higher-return fixes available. This works alongside ventilation rather than instead of it.
Improve soffit and ridge ventilation
Balanced intake at the soffit and exhaust at the ridge, per the International Residential Code's attic ventilation requirements, keeps the entire roof deck closer to outdoor temperature, which minimizes the melt-refreeze cycle even where some attic heat still escapes.
Keep gutters and downspouts clear before winter
Debris-clogged gutters give meltwater fewer places to drain even after an ice dam is removed, worsening the next cycle. A fall gutter cleaning is a low-cost step that pays off during the first hard freeze.
Install a self-sealing ice-and-water membrane at re-roofing time
If a roof replacement is already planned, an ice-and-water shield membrane along the first few feet of eave prevents backed-up water from reaching the roof deck even if an ice dam forms again. This doesn't stop ice dams from forming but removes their ability to cause interior damage.
These attic-specific fixes are one piece of a broader seasonal routine, the same one that handles water damage prevention for the rest of the house, including the freeze protection steps that matter for plumbing during the same cold snap. Handling the attic and the pipes together is more efficient than treating winter prep as two separate projects.
Frequently asked questions
Does homeowners insurance cover ice dam water damage?
Yes, in most cases. Standard HO-3 policies generally cover the interior water damage an ice dam causes under the sudden-and-accidental standard, since the water intrusion itself is treated as an unexpected event rather than gradual wear. What's frequently excluded is the cost of removing the ice dam and repairing the roof itself, particularly if an adjuster attributes the ice dam to inadequate attic insulation or ventilation, which some policies treat as a maintenance issue.
Is it safe to remove an ice dam myself?
Yes, for a small dam reachable from the ground with a roof rake. Climbing onto an icy roof, using a ladder in freezing conditions, or chipping at ice with a hammer or ax is not safe, and it's the leading cause of ice-dam-related injuries and additional roof damage each winter.
How much does professional ice dam removal cost?
$400 to $800 for a straightforward steam removal on an accessible roof, and $650 to $2,000 or more for a larger, steeper, or harder-to-reach roof. Chemical or chipping methods run cheaper per hour but carry a higher risk of shingle damage, which can add to the total cost.
What temperature causes ice dams to form?
32°F at the roof surface combined with outside air in the low 20s°F or colder for several consecutive days, with snow cover on the roof the whole time. The specific outdoor number matters less than the sustained gap between a warm attic and a cold roof edge.
Will the same ice dam problem happen again next winter?
It will, if the underlying cause isn't fixed. Removing the ice itself only solves the immediate leak. Ice dams return year after year on the same roof sections unless the attic's heat loss and ventilation problem that created the warm roof surface in the first place gets corrected.
How long does it take for mold to grow after ice dam water damage?
24 to 48 hours under the right conditions, per the EPA. Ice dam damage often sits hidden in attic insulation or a wall cavity longer than that before anyone notices a ceiling stain, which is part of why professional moisture confirmation matters even after a small, contained leak, and why the CDC treats prompt drying as the priority over cleaning products.
Can I use rock salt to melt an ice dam?
Rock salt isn't recommended. It's corrosive to metal gutters, flashing, and fasteners, and it does little for a thick, established ice dam. Calcium chloride ice-melt tablets in a nylon stocking, laid perpendicular across the dam, are the safer chemical option most roofing professionals use instead.
Does an ice dam mean I need a new roof?
No, not usually. Most ice dam damage is limited to a section of shingles, flashing, or a gutter run, plus the interior ceiling or wall the water reached. A full roof replacement is only warranted when the ice dam recurs for years and has degraded the roof deck or underlayment across a wide area.
What's the difference between ice dam damage and a regular roof leak?
Ice dam damage is a seasonal, cold-weather event caused by backed-up meltwater rather than a failed shingle, flashing point, or membrane. The immediate response and restoration steps overlap heavily with water damage from a roof leak, but the cause, timing, and prevention fix are different, which is why insurers and roofers often ask which one you're dealing with before dispatching.
Sam Hickerson is the founder of RestoreAdvisor and writes consumer guides on mold remediation, water damage restoration, inspection, testing, and home recovery. His work focuses on helping homeowners understand costs, risks, and when to call a professional. He draws on guidance from the EPA, CDC, IICRC, and other authoritative sources to make complex home issues easier to navigate.