
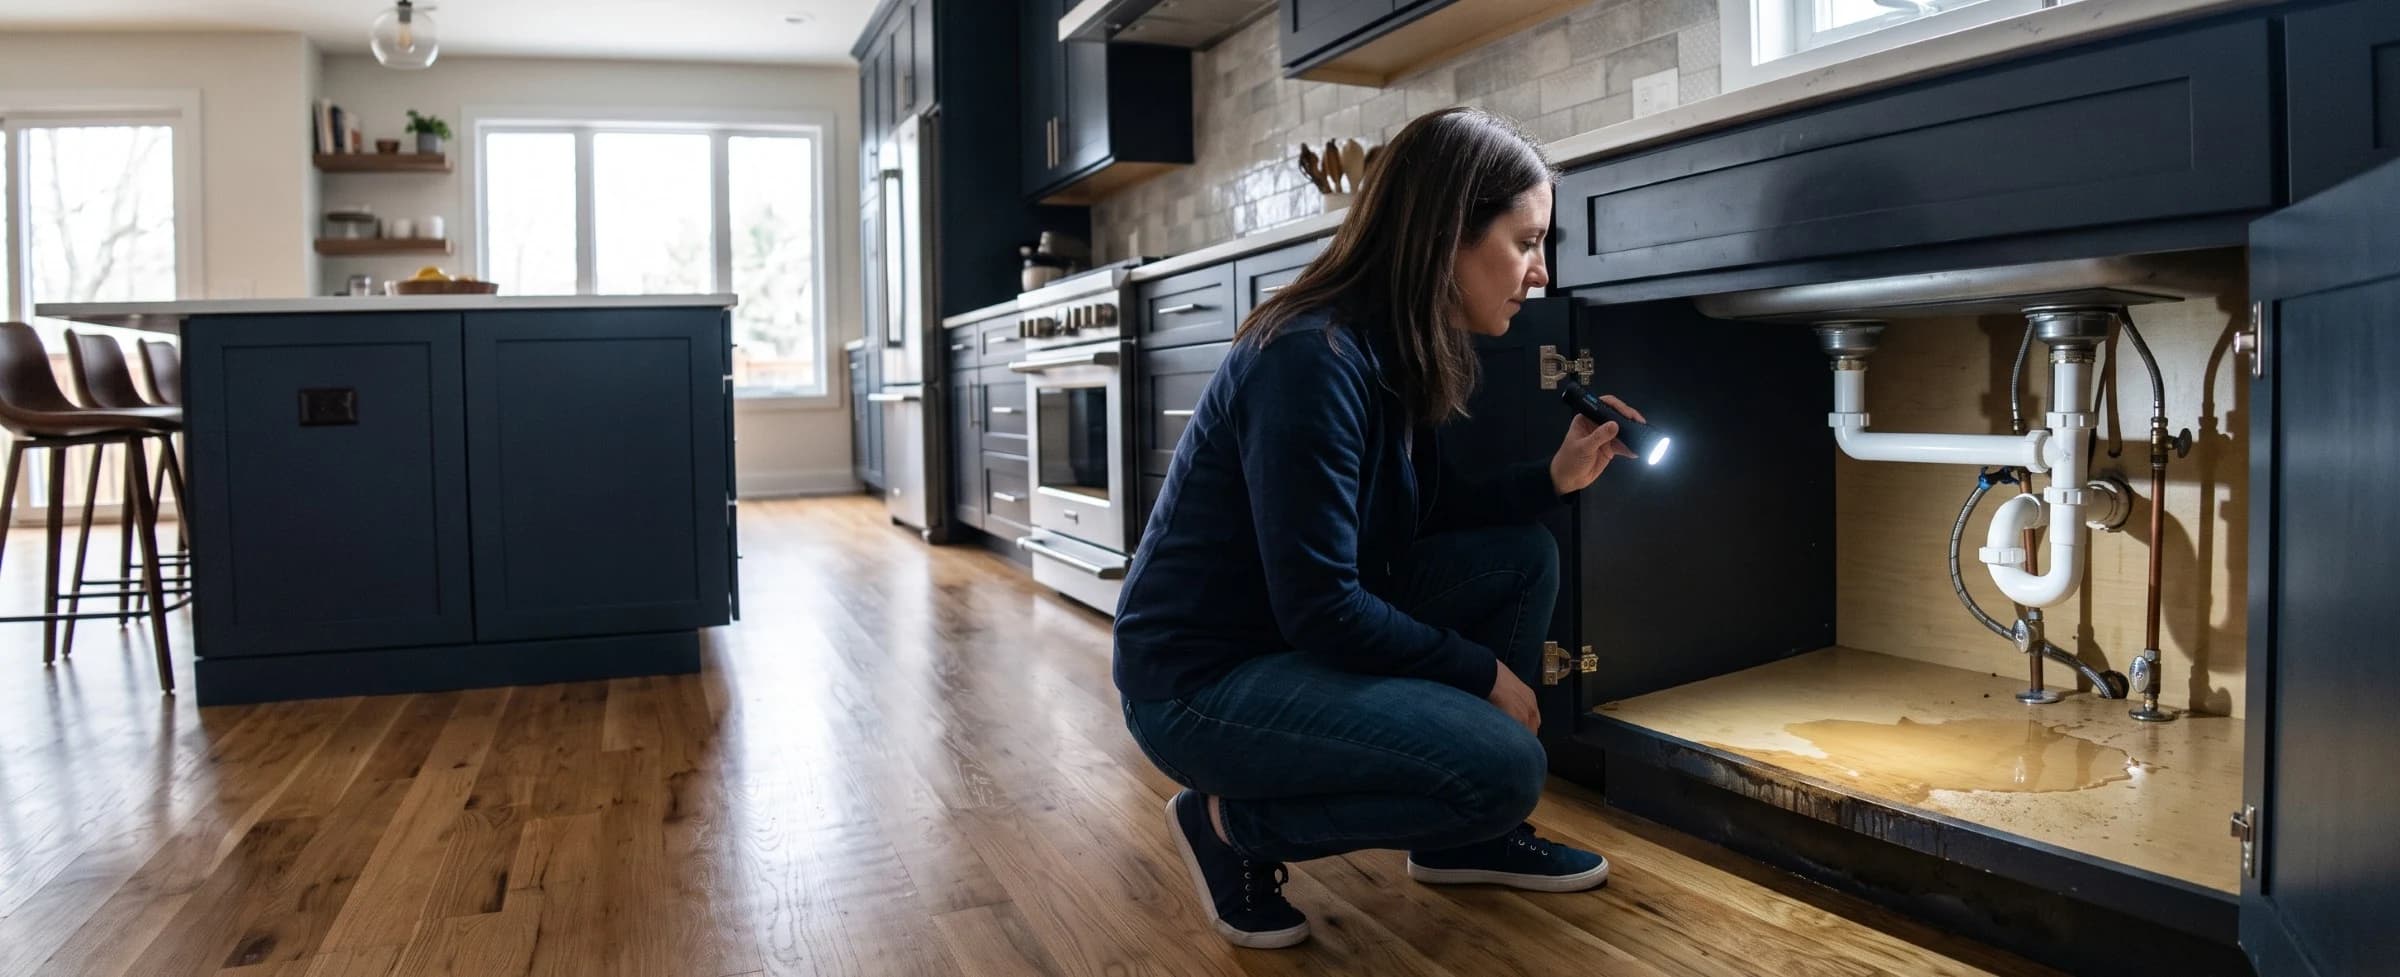

A wet cabinet floor, a puddle behind the refrigerator, or a stain spreading across the ceiling below the kitchen are rarely tied to a single obvious source. Kitchens run more water-carrying lines through a smaller footprint than almost any other room: a dishwasher supply and drain, a sink's hot and cold lines and P-trap, a garbage disposal, and often a refrigerator's ice maker line, all tucked into a few feet of cabinetry. Kitchen water damage is water intrusion from a fixture, appliance, or supply line failure in the kitchen, assessed under the same ANSI/IICRC S500 category and class system used for water damage anywhere else in the house, based on the water's contamination level and how far it has soaked into surrounding materials rather than which appliance produced it.
The first step is figuring out which fixture or appliance is actually responsible, since a dishwasher hose failure, a cracked P-trap, and a refrigerator supply line all call for a different first move and a different repair. From there, cleanup cost, cabinet and flooring repair, and whether insurance pays depend heavily on how long the water sat and how far it traveled before anyone noticed.
Key insights
- Four sources cause most kitchen leaks. The dishwasher, the sink's supply and drain lines, the garbage disposal, and a refrigerator's water line account for the large majority of kitchen water damage, and each one carries a distinct diagnostic signal.
- Kitchen water damage restoration typically costs $150 to $20,000 or more. A caught-early appliance leak might only need drying, while a leak that has soaked cabinets, subflooring, and the ceiling below can require demolition and reconstruction.
- Kitchen leaks fall under Category 1 to Category 3. A refrigerator supply line starts clean, a dishwasher drain leak is typically gray water, and a backed-up garbage disposal drain can carry Category 3 contamination depending on what's in the line, under IICRC S500.
- Mold can begin growing within 24 to 48 hours of a kitchen leak, according to the EPA, particularly inside cabinets where airflow is limited.
- Cabinet materials react differently to water. Particleboard and MDF, the core of most cabinet boxes, swell and lose structural integrity faster than solid wood, often before a stain is visible on the surface.
- Standard homeowners insurance covers sudden appliance failures but not gradual leaks. A supply line that bursts is typically covered; a slow drip behind the refrigerator that went unnoticed for months typically is not.
What to do right now
Shut off the water at its source, cut power to anything nearby that's wet, and document the damage before cleaning up. If the water is actively spraying or spreading beyond the kitchen, treat it as an emergency water damage restoration situation and move through these steps quickly.
 A spill caught within the first hour, before it reaches the cabinet base, is usually safe to dry without a professional.
1. Shut off the water at the source
If it's the dishwasher, close the angle stop valve under the sink that feeds it, usually the same valve that feeds the cold water line. If you can't immediately tell which line is leaking, shut off the main water valve for the house rather than guess, then narrow it down once the water is contained.
2. Cut power to nearby outlets
Standing water near an outlet, a dishwasher, or a garbage disposal is an electrical shock hazard. Cutting power at the breaker is safer than unplugging an appliance that's sitting in water, per OSHA's flood response guidance, since reaching into wet conditions to unplug something creates the same risk it's meant to avoid.
3. Contain and remove standing water
Towels, a wet/dry vacuum, or a mop will handle a small pool. For anything covering more than a few square feet, or water that's already reached the cabinet toe kick, extraction needs to happen fast enough that it doesn't sit long enough to soak into particleboard cabinet bases, which absorb and swell faster than almost any other kitchen material.
4. Photograph the damage before cleaning
Wide shots of the room, then close-ups of the source, the standing water, and anything already showing staining or swelling. This documentation matters for both the appliance repair and any insurance claim, and it's much harder to reconstruct after the area is dry and cleaned.
5. Call the right professional
A slow, contained leak under the sink might only need a plumber. Anything that's soaked cabinets, spread under flooring, or been running for more than a few hours usually needs a water damage restoration company alongside the plumber or appliance technician, since drying materials correctly is a different skill set than fixing the leak itself.
What not to do
Running the dishwasher or disposal again to test it, vacuuming standing water with a household vacuum, sealing over a damp stain, and waiting on the insurer before drying are the four moves worth skipping. Each one either makes the damage worse or destroys evidence you'll need later.
Don't run the dishwasher or disposal again to test it
Running the appliance again before you've identified the failure point can push more water into the same spot, or worse, into a spot you haven't checked yet.
Don't use a household vacuum on standing water
A household vacuum isn't built for water and creates a shock hazard on contact. Use towels or a wet/dry shop vacuum instead.
Don't paint or reseal over a stain before it's confirmed dry
A cabinet base or a section of flooring that looks dry on the surface can still be wet underneath, and sealing over it traps moisture in conditions the CDC associates with faster mold growth.
Don't wait on the insurer before you start drying
Insurers expect prompt mitigation. Waiting several days for a claim number before extracting water and running fans typically increases both the damage and the chance of a denied or reduced claim.
Is it actually a leak?
Not everything that looks like a kitchen leak is one. Condensation, cooking steam, and a normal appliance cycle can all leave water in the same places a real leak would, and telling them apart takes about thirty seconds of checking.
 A cold supply line below room temperature attracts humidity from the surrounding air, especially in summer, and the light film that returns after wiping is condensation rather than a supply line failure.
The distinction matters because chasing a plumber for condensation, or ignoring a slow leak because it looked like a spill, both waste time. A quick pattern check, does it come back after wiping it dry, does it only appear during a specific activity, settles the question fast.
| Looks like | Common cause | How to tell |
|---|---|---|
| Water pooling under the sink | Condensation on a cold supply line, especially in summer or with a high water heater setting | Wipe dry and check again in an hour with nothing run; condensation returns as a light film, a leak returns as a puddle |
| Water on the counter near the dishwasher | Steam venting during the dry cycle, normal on most models | Only appears during or right after a cycle, and stops entirely between loads |
| Water on the floor after cooking | A spill or splash from the sink, stovetop, or a dropped ice cube | One-time event, doesn't reappear once wiped up and nothing is running |
| Water under or behind the refrigerator | Defrost cycle drainage routed to a drip tray, or a supply line issue if the tray is cracked or overflowing | Check the drip tray first before assuming the water line has failed |
If any of these keep recurring under normal conditions, or if wiping the area dry doesn't solve it, treat it as an actual leak and start narrowing down which fixture is responsible. A one-time explanation that keeps repeating usually isn't the explanation.
Where the leak is coming from
Kitchens run water through more fixtures in a small footprint than almost any other room, which makes source identification the first real diagnostic step. The dishwasher, the sink's supply and drain lines, the garbage disposal, and a refrigerator's water line account for the large majority of kitchen leaks, each with a different signal that points to it.
 A refrigerator's water line runs continuously and is rarely inspected, which is why a connection failure here can stain flooring for days before anyone notices.
Checking each fixture takes only a few minutes and narrows the search before a plumber or restoration company arrives. A flashlight, a dry paper towel run along each connection point, and a look at the cabinet floor beneath each fixture will usually locate the source without needing to remove anything.
| Source | Signal | Typical category |
|---|---|---|
| Dishwasher | Water pooling directly under the unit during or right after a cycle | Category 1–2 |
| Under-sink supply line | Steady drip or spray at a fitting, active even when nothing is running | Category 1 |
| Under-sink drain or P-trap | Water appears only when the sink is used, smells faintly of standing water | Category 1–2 |
| Garbage disposal | Water at the base of the disposal, sometimes with a faint sewage odor if it's a backup rather than a seal leak | Category 1–3 |
| Refrigerator water line | Water behind or under the unit, sometimes not noticed for days | Category 1 |
| Sink overflow | Water across the counter and down cabinet fronts, source is obvious | Category 1–2 |
| Ceiling stain, no visible kitchen source | Water is coming from an upstairs bathroom or the roof, not the kitchen itself | Varies |
The category assigned during inspection determines which materials must be removed versus dried in place. That determination follows the same water damage categories system used across every type of water event in the house.
Common causes of kitchen water damage
Most kitchen leaks trace back to one of six failure points: a dishwasher door gasket or hose, a refrigerator water line, a corroded supply line fitting, a garbage disposal seal, a P-trap connection, or a drain backup. A cracked or corroded supply line fitting behaves like a small-scale burst pipe, spraying steadily rather than dripping, and it's one of the more common causes.
 Compression fittings corrode gradually, especially with hard water, so a fitting that looks weathered rather than freshly installed is worth checking even before a drip becomes visible.
Appliance age is the single strongest predictor behind nearly all of these failures, since gaskets, hoses, and seals all wear out on a fairly predictable schedule rather than failing at random. A unit past 8 to 10 years old is worth inspecting proactively rather than waiting for a failure to force the issue.
| Cause | Why it fails | Category |
|---|---|---|
| Dishwasher door gasket or hose | Most common on units past the 8 to 10 year mark, as the rubber seal loses flexibility from repeated heat cycling | Category 1–2 |
| Refrigerator water line | Plastic tubing kinks or splits at the connection point behind the unit | Category 1 |
| Supply line fitting (corrosion or pressure) | Compression fittings corrode over time, especially with hard water or pressure above 80 psi | Category 1 |
| Garbage disposal seal or mounting gasket | The rubber gasket between the disposal and sink flange wears out, or the mounting bolts loosen | Category 1 |
| P-trap or drain connection | Slip nuts loosen from vibration and use, or the trap itself corrodes | Category 1–2 |
| Drain or sewer backup | A clog, grease buildup, or a blockage further down the line forces water back up | Category 2–3 |
A leaking disposal and a backed-up disposal look similar at first glance but aren't the same problem. A leak comes from a worn seal or a loose connection at the flange, the side hose fittings, or the unit's housing, producing a slow, steady drip. A backup pushes water up through the disposal from further down the drain line, which is a contamination question rather than a hardware failure.
Where the water travels
Kitchen water rarely stays contained to where it started. It moves downward through cabinet bases and subflooring, and sideways under baseboards into adjoining rooms, following gravity and whatever gap it can find rather than staying under the sink where it began.
 Staining that reaches several feet from the cabinet, as it does here, means the leak has been running long enough to travel under the flooring rather than staying contained to where it started.
A refrigerator sitting against a wall rarely gets moved for cleaning or service, so a leak behind one can travel along the subfloor for days before showing up as staining elsewhere in the room, longer than most other kitchen sources typically go unnoticed. How much of that travel path needs to be dried versus removed depends on the materials involved, since particleboard cabinet bases, laminate flooring, and vinyl sheet flooring all react differently to standing water.
| Material | How it responds | Typical handling |
|---|---|---|
| Particleboard or MDF cabinet base | Swells and loses structural strength within hours of standing water | Usually removed and replaced, not dried |
| Solid wood cabinet | Slower to absorb, can sometimes be dried and refinished | Dry first, assess after |
| Laminate or vinyl flooring | Water travels under seams even if the surface looks dry | Often lifted to dry and inspect the subfloor |
| Tile | Tile resists water, but grout and the subfloor beneath don't | Grout and subfloor are the real risk, not the tile |
How long the subfloor and cabinet bases need to stay open and drying depends on the water damage class assigned during inspection, the same four-tier system IICRC S500 uses everywhere else in the house. A Class 1 kitchen leak with minimal absorption dries faster than a Class 3 loss where water has wicked broadly across cabinetry and flooring.
Signs of kitchen water damage
A kitchen leak often shows up somewhere other than directly under the source, which is why the visible signs matter as much as tracing the fixture itself. Musty odor, a swollen cabinet toe kick, or a soft spot in the flooring near an appliance are usually the first indicators, and mold risk climbs fast once any of them appear, within the EPA's 24 to 48 hour window for growth to begin.
 Peeling that starts at a cabinet's base rather than higher up points to moisture wicking up from the floor, since water reaches the bottom of a cabinet well before it travels upward.
Where a sign shows up narrows down the source faster than what it looks like. A stain at the cabinet base points to the fixture directly above it, while discoloration on the ceiling below or along a baseboard several feet away means the water has already traveled well past where it started.
| Sign | What it usually means |
|---|---|
| Musty odor near the sink or dishwasher | Moisture trapped in cabinetry, mold risk climbing quickly |
| Swollen or discolored cabinet toe kick | Water has been sitting at the cabinet base longer than a single spill |
| Soft or spongy flooring near an appliance | Subfloor is absorbing water, not just the surface material |
| Rising water bill with no explained cause | Points to a slow, ongoing leak rather than a one-time event |
| Peeling laminate or bubbling paint on cabinets | Moisture has been present long enough to affect the finish, not just the substrate |
| Ceiling stain in the room below the kitchen | Water has traveled through the subfloor, a sign the leak has been running longer than surface signs suggest |
These line up with the broader list of signs of water damage that apply throughout the house, with cabinets and the toe kick as the kitchen-specific hot spots to check first. Catching any of these within the first day keeps a repair contained to one cabinet run instead of the whole kitchen.
Countertops and backsplash
Countertops and backsplash tile sit closer to the water source than almost anything else in the kitchen, and each material fails differently. Butcher block absorbs and swells at the seams, laminate delaminates where water gets under the edge, and backsplash grout fails the same way tile grout does anywhere else in the house.
 An unsealed counter edge sitting directly above a dishwasher takes on steam and splash with every wash cycle, which is why this failure point often shows up years before a full leak ever does.
How each material responds determines whether it needs replacement or just a thorough dry-out, and the answer differs a lot by material. Stone and quartz themselves resist water almost entirely, which shifts the real risk to the grout lines and the substrate underneath rather than the countertop surface itself.
| Material | How it responds | Typical handling |
|---|---|---|
| Butcher block or wood | Absorbs at seams and around the sink cutout, can warp or blacken with mold if untreated | Sand and reseal if caught early; replace if swelling has set in |
| Laminate | Water gets under the edge and delaminates the top layer from the substrate | Usually replaced once delamination starts, since it doesn't reverse |
| Stone or quartz | Resists water well, but grout lines and seams around the sink don't | Regrout and reseal rather than replace the countertop |
| Backsplash tile | Tile itself is fine; grout and the wall behind it absorb water | Grout repair, or removal if water reached the wall material behind the tile |
A countertop or backsplash repair adds to the timeline beyond how long water damage restoration takes for drying alone, since resealing or regrouting typically happens after the area is fully dry rather than during the initial mitigation. Factor an extra day or two if either one needs attention.
Kitchen islands and peninsulas
An island or peninsula sink or dishwasher routes its supply and drain lines under the floor rather than through an adjacent wall, which changes both detection and cost. There's no cabinet wall to check for early staining, so a leak under an island often isn't caught until it surfaces somewhere else in the room.
Fixing it usually means cutting into the floor to access the line, not just opening a cabinet panel, which adds a demolition step that a wall-mounted sink or dishwasher never needs. This is worth flagging to a plumber right away if the kitchen has an island or peninsula sink, since access alone can add meaningfully to the repair beyond the cost of the leak itself.
DIY vs. professional cleanup
A leak caught within the first hour, before water reaches a cabinet base or spreads under flooring, is usually safe to handle without a restoration company. Anything involving Category 2 or 3 water, a soaked subfloor, or more than a day of unnoticed leaking calls for a professional.
 A reading above roughly 15 percent confirms elevated moisture even when the surface looks dry to the eye, which is why a meter check matters more than a visual inspection before deciding an area is safe to close back up.
The determining factor is response time, not which fixture caused the leak. A small appliance leak and a small supply-line drip are equally DIY-appropriate if both are caught and dried within the same short window.
| Factor | DIY-safe | Call a professional |
|---|---|---|
| Response time | Caught within the first hour | Unnoticed for several hours or more |
| Water source | Clean supply line or refrigerator line | Drain backup or disposal overflow |
| Materials affected | Surface only, cabinet base still dry | Cabinet base swollen, subfloor damp |
| Confirmed dryness | Verified with a moisture meter reading under 15 percent | No way to confirm moisture below the surface |
A dishwasher leak caught mid-cycle and cleaned up within the hour rarely needs more than towels and a fan running overnight. The same leak left soaking into the cabinet base overnight moves into professional territory regardless of the total water volume.
The general steps, tools, and drying method for DIY water damage cleanup apply directly to a small, contained kitchen leak. The cabinet-material caution is the main kitchen-specific addition worth keeping in mind beyond that general process.
Who to call
A plumber or appliance repair technician fixes the leak itself; a restoration company dries and repairs everything the leak touched. Most kitchen leaks worth calling a professional for need both, often on the same day.
If the water came up through the disposal or drain rather than leaking from an appliance or supply line, treat it as a sewage backup and call a certified restoration company before doing any cleanup yourself. The contamination level changes what protective equipment and disposal method the job requires.
Confirm IICRC certification and ask whether the company handles both extraction and the cabinet or flooring repair, or only the drying portion of the job. Some restoration companies subcontract reconstruction work, which is fine, but it's worth knowing upfront so scheduling expectations are set correctly.
Cost of kitchen water damage restoration
Kitchen water damage restoration typically costs $150 to $20,000 or more, depending on how much water was involved, how long it sat, and whether cabinets, flooring, or the ceiling below need replacing. A caught-early appliance leak sits at the low end; a multi-day undetected leak that reached the subfloor and an adjoining room sits at the high end.
 Walking through the visible damage before pricing it out is standard practice, since the extent of what's affected, not just the leak's source, determines where an estimate lands.
Appliance repair and water damage restoration are billed separately, and homeowners sometimes assume the restoration estimate includes fixing the dishwasher or replacing the disposal when it doesn't. Getting a separate figure for each keeps the total from being a surprise.
| Scenario | Typical cost |
|---|---|
| Caught immediately, DIY dry-out | $0–$150 in supplies |
| Contained under-sink leak, plumber repair plus drying | $500–$2,500 |
| Cabinet and flooring replacement in one area | $2,500–$8,000 |
| Undetected leak reaching subfloor and an adjacent room | $8,000–$20,000 |
| Extensive damage with ceiling or lower-level involvement | $20,000–$35,000+ |
These figures track closely with the national numbers on water damage restoration cost. A kitchen loss is priced using the same category, class, and material factors as any other room.
Square footage affects the total less in a kitchen than in an open living space. Most of the damage concentrates in cabinetry and a fairly small flooring footprint rather than spreading across a large open area.
For a rough sanity check on a contractor's estimate, water damage restoration cost per square foot runs $3 to $7.50 for mitigation and $20 to $37 for repair work. Kitchen jobs often price by cabinet linear footage rather than pure square footage, though, given how much of the cost sits in cabinetry.
Does insurance cover kitchen water damage
Standard homeowners insurance covers a kitchen leak that happens suddenly, like a burst supply line or a dishwasher hose failure, but not one that developed gradually over weeks or months. The appliance itself, the dishwasher or refrigerator that failed, is typically excluded from coverage regardless of cause.
The same sudden-and-accidental standard that applies to homeowners insurance covers water damage everywhere else in the house governs a kitchen claim. An adjuster will look at how long the water was likely present as the deciding factor, per NAIC's consumer guidance on homeowners coverage.
A slow drip behind the refrigerator that ran for months before anyone noticed usually gets classified as a maintenance issue rather than a covered loss, since insurers treat gradual damage as something a homeowner should have caught. Keeping receipts for appliance inspections and repairs helps establish that a failure was sudden rather than the result of neglect.
Renters and condo owners face a slightly different split. A renter's own dishwasher or a landlord-supplied one falls under different responsibility depending on who owns the appliance and whether the failure was due to normal wear or misuse, and most leases put appliance maintenance on the landlord while personal belongings stay on the tenant's own renters insurance. In a condo, a kitchen leak reaching the unit below typically involves both the individual owner's HO-6 policy and the building's master policy, similar to how any other water event is handled between units, and reporting the leak to the HOA or property manager immediately keeps the claim moving on both sides.
Preventing kitchen water damage
Preventing kitchen water damage means inspecting the dishwasher hose and door gasket, the under-sink supply line fittings, and the garbage disposal seal on a predictable schedule rather than waiting for one to fail. Checking each once or twice a year catches most problems before they become a restoration job.
 A sensor placed at the base of the cabinet catches a leak within minutes of contact, well before the slow drips this article covers ever reach the cabinet base itself.
Inspect the dishwasher supply hose and door gasket annually
Look for cracking, stiffness, or a gasket that's lost its seal. Both are cheap to replace proactively and expensive to ignore.
Check under-sink supply line fittings for corrosion or slow drips
A flashlight and a dry paper towel run along each fitting once or twice a year catches most failures before they become active leaks.
Test the garbage disposal seal and mounting connection
Run the disposal with the cabinet door open and check for water at the base afterward. A worn mounting gasket is a common, inexpensive fix.
Replace supply lines with braided stainless steel
Braided stainless resists the cracking and splitting that plastic and rubber lines are prone to over time, for the dishwasher, the sink, and the refrigerator alike.
Install a leak sensor under the sink and behind the refrigerator
A sensor catches a slow leak within minutes rather than days, especially useful behind a refrigerator that rarely gets moved or inspected directly.
These fit into the same water damage prevention system used for the rest of the house, with the kitchen's own appliance-heavy layout as the main reason it deserves its own inspection routine. None of these checks take more than a few minutes, and most catch a failure while it's still a small part rather than a full repair.
Frequently asked questions
Is water under the sink always a leak?
No, it can be condensation on a cold supply line, especially in summer, or overflow from a cracked refrigerator drip tray. Wipe the area dry and check again in an hour with nothing run; condensation returns as a light film, while an actual leak returns as a puddle.
How do I tell if it's the dishwasher or the sink drain leaking?
Run the sink alone first, then run the dishwasher alone, and check under each fixture separately after each test. Water that only appears during the dishwasher's drain cycle points to the dishwasher; water that appears whenever the sink is used points to the P-trap or drain connection. The fuller isolation method, including how to read the timing if you can't watch the cabinet directly, is on dishwasher leak.
Can a kitchen leak damage the ceiling in the room below?
Yes, if the kitchen is on an upper floor and water has soaked through the subfloor. This usually means the leak has been running longer than any visible sign in the kitchen itself suggests, since it takes real volume or real time for water to travel all the way through a subfloor.
Do kitchen cabinets always need to be replaced after a leak?
Not always, but particleboard and MDF cabinet bases, the most common material, swell and lose structural strength quickly once wet and usually can't be dried and reused. Solid wood cabinets have a better chance of being dried and refinished if the leak was caught within the first day.
Do countertops need to be replaced after water damage?
Not always. Stone and quartz resist water well and usually only need regrouting, while laminate that has delaminated at the edge typically can't be reversed and needs replacing.
Does a leak under a kitchen island cost more to fix?
Often yes, since island and peninsula plumbing runs under the floor rather than through an adjacent cabinet wall. Repairing it usually means cutting into the floor to reach the line, which adds a demolition step a wall-mounted sink or dishwasher doesn't need.
Is it safe to keep using my kitchen while it dries?
Generally yes, for a small, contained leak under one cabinet, as long as power is confirmed safe and the water source is off. A larger leak involving the disposal, a sewage backup, or multiple cabinets is better treated as off-limits until a professional has assessed it.
Will my dishwasher repair be covered by the same insurance claim as the water damage?
No. Most homeowners policies exclude the appliance itself from coverage even when the resulting water damage is covered, so the dishwasher repair is a separate expense from the restoration estimate.
How long does it take for a kitchen floor to dry after a leak?
A surface-level spill dries within a day with normal airflow. A leak that soaked into subflooring or under vinyl or laminate seams can take three to five days or longer with commercial drying equipment running.
Does mold grow in kitchen cabinets after a leak?
Yes, mold can begin developing within 24 to 48 hours in a damp, poorly ventilated cabinet, according to the EPA. Cabinet and under-sink kitchen mold often follows that same window, with detection and cleanup steps specific to enclosed, low-airflow spaces.
Sam Hickerson is the founder of RestoreAdvisor and writes consumer guides on mold remediation, water damage restoration, inspection, testing, and home recovery. His work focuses on helping homeowners understand costs, risks, and when to call a professional. He draws on guidance from the EPA, CDC, IICRC, and other authoritative sources to make complex home issues easier to navigate.