
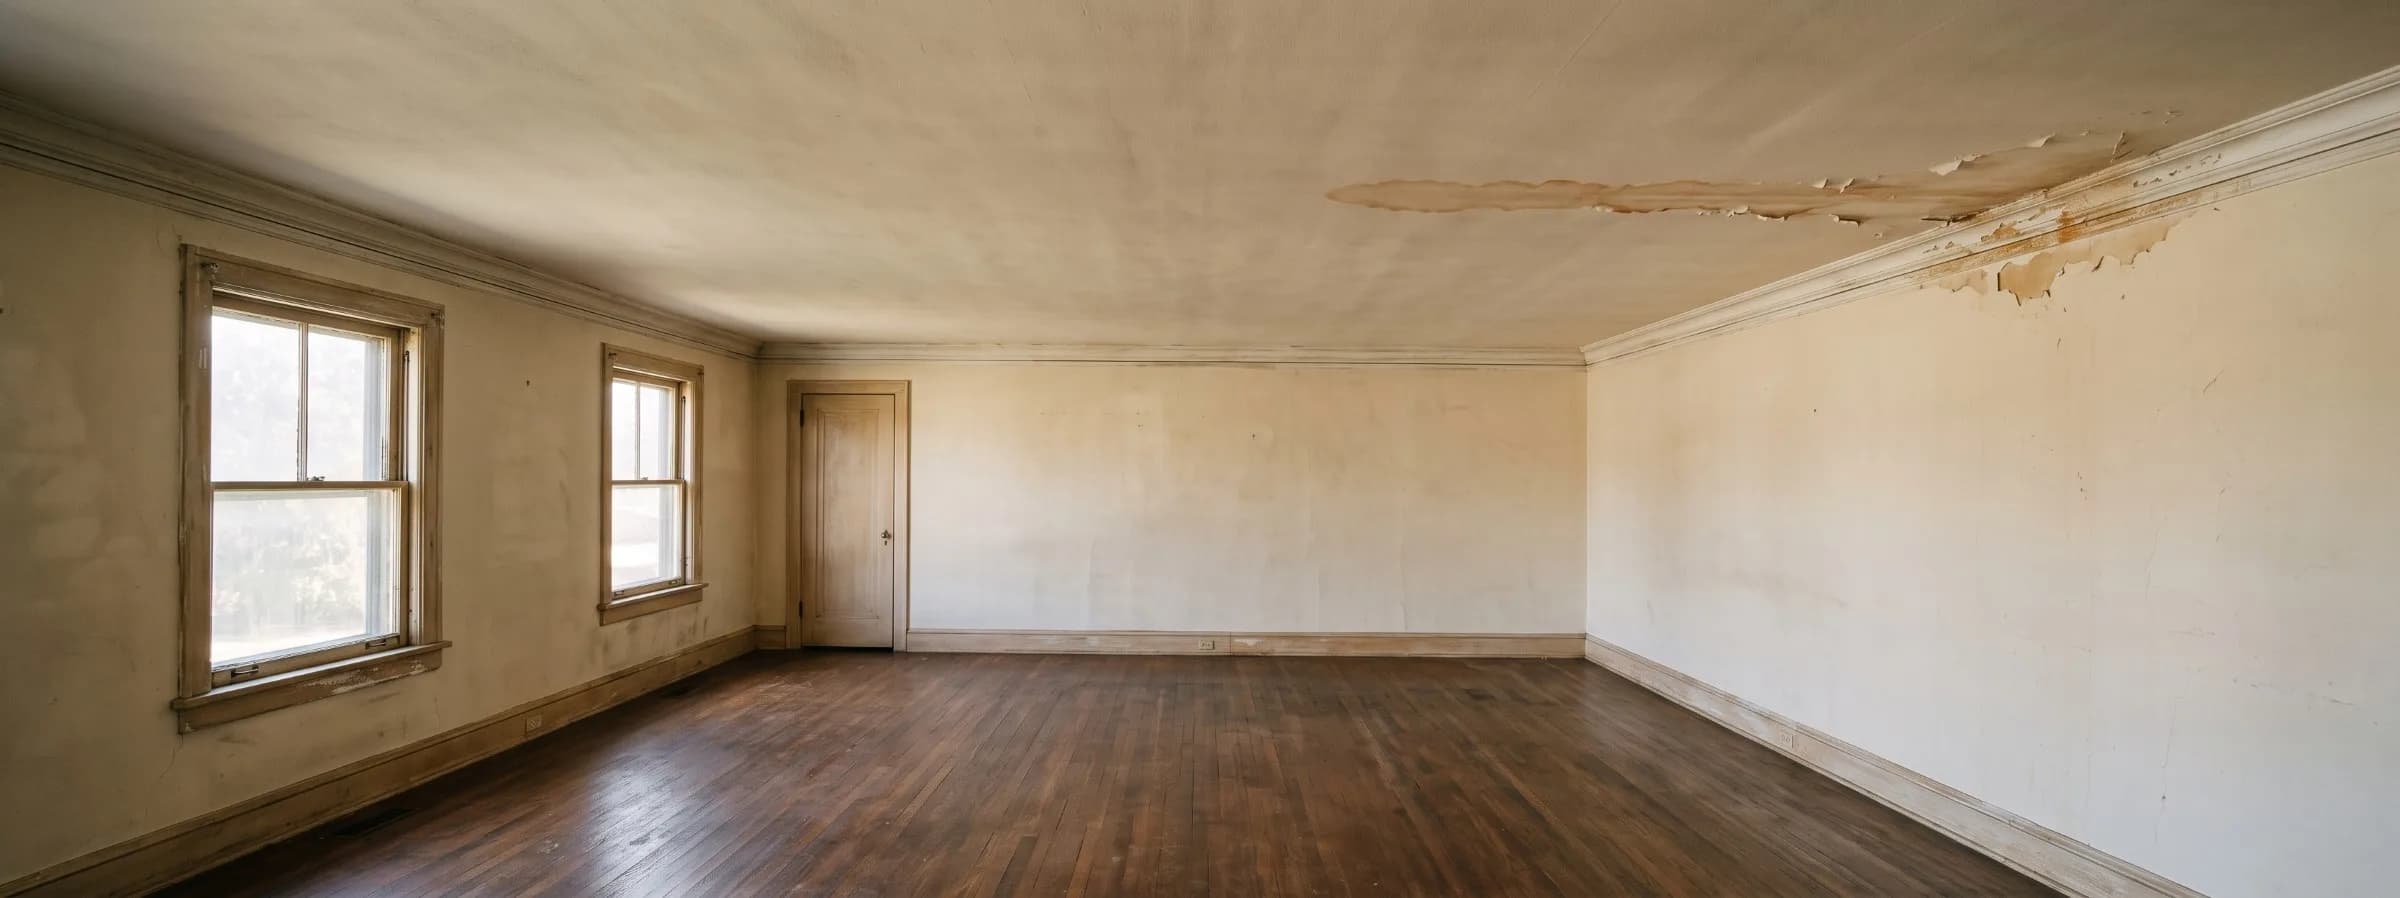

Water on the floor of an older house raises a different set of worries than the same leak in a newer one: whether the plaster will survive, whether the pipes inside the walls are about to fail, and whether cutting into anything will release lead or asbestos. Those worries are reasonable, and most of them can be settled in the first two days with a few decisions made in the right order. Knowing what to do in the first hour, which materials can be saved, and what the repair typically costs keeps the work from damaging the features that give an older house its value.
Water damage in an older or historic home is water intrusion into plaster and lath walls, original plumbing, solid wood framing, and masonry in a house built before roughly 1960, and it is classified and dried under ANSI/IICRC S500, the professional standard for water damage restoration. The standard applies to every house, but older ones bring plaster, old growth lumber, and stone that release moisture slowly, along with lead paint in homes built before 1978 and asbestos in many built before the 1980s.
A job in an older home follows the same core sequence as any water damage restoration project: stop the source, remove standing water, dry the structure, and repair. The difference is in the pace and the precautions, because drying runs longer, demolition needs a lead and asbestos check first, and original plaster, floors, and trim are usually worth saving.
Key insights
- Plaster is usually repairable. Firm plaster that is still attached to its lath can typically be dried in place, and the National Park Service recommends repairing historic plaster rather than replacing it whenever possible.
- Drying takes longer. Plaster, brick, stone, and old growth lumber release moisture slowly, and ANSI/IICRC S500 treats deeply saturated, low permeance materials as Class 4 specialty drying.
- Test before demolition. The EPA reports that 87% of homes built before 1940 have some lead based paint, and asbestos appears in many materials in homes built before the 1980s.
- Original pipes fail without warning. Galvanized steel supply lines are commonly cited as reaching the end of their life after 40–50 years, and one leak often signals corrosion along the rest of the run.
- Insurance covers sudden losses. Homeowners policies generally exclude wear and tear and gradual leaks, so records of pipe condition and pre-loss photographs carry extra weight in an older home.
- Historic status can change the rules. A designated historic structure may need review before repairs, and FEMA allows floodplain officials to exempt qualifying historic structures from the 50% substantial damage rule.
What to do first in an older home
In an older home, the first steps are to stop the water, cut power to the wet area, photograph everything, and hold off on scraping, sanding, or demolition until lead and asbestos are ruled out. Those steps match any water loss, with two additions: old shutoff valves and wiring need extra care, and plaster and paint should not be disturbed while they are wet.
 A valve that has not moved in years can seize or snap at the stem, which is why the main shutoff should be turned slowly rather than forced.
Speed still matters. The EPA advises drying or removing wet materials within 24–48 hours to prevent mold growth, and plaster and old lumber take longer to dry than drywall, so starting airflow early shortens the job.
1. Stop the water at the source
Close the main shutoff valve slowly, because valves that have not moved in decades can seize, snap, or leak at the stem. If the valve will not turn, do not force it; call the water utility to close the curb stop at the street and a plumber to replace the valve.
2. Cut power to the wet area
Turn off the breaker or pull the fuse for any circuit near water, and stay out of the room if the panel itself is wet or standing water reaches outlets. OSHA identifies electrical shock as a primary hazard in flooded buildings, and older wiring may lack a ground wire or GFCI protection, so a licensed electrician should check electrical outlets after water damage before anyone plugs anything back in.
3. Photograph and video before anything moves
Record wide and close shots of the plaster, moldings, wallpaper, floors, and decorative details, because insurers and preservation reviewers both rely on the pre-repair condition. Label and bag any trim, hardware, or plaster fragments that come off later, since original pieces can often be reinstalled.
4. Remove standing water and start airflow
Extract standing water with a wet dry shop vacuum, not a household vacuum, and run fans to move air across wet surfaces, opening windows when outdoor air is drier than indoor air. Skip heat guns and space heaters aimed at plaster or wood, because rapid drying can crack plaster and split old growth boards.
5. Hold off on scraping, sanding, and demolition
In a house built before 1978, disturbing painted plaster, trim, or windows can create lead dust, and older flooring, insulation, and ceiling coatings can contain asbestos. Do not sweep or household vacuum debris, keep children and pregnant household members away from dust, and wait for testing before removing anything beyond what the water forces.
6. Call your insurer and a restoration company
Report the loss the same day and tell the restoration company the year the house was built, the heating type, and any known materials such as plaster walls or galvanized pipes. A company that knows the house's age before it arrives can bring the right moisture meters and start lead and asbestos testing early.
Water that is still flowing, contaminated by sewage, or close to electrical service is an emergency water damage situation, and it warrants a same-hour response from a restoration company rather than a scheduled estimate next week. In a plaster home, an active leak above a ceiling also carries a collapse risk that a newer drywall ceiling does not, so treat a bulging or dripping ceiling as a reason to clear the room, not just call for service.
Why older homes take damage differently
Water damage is different in an older home because the building materials absorb and release moisture more slowly, hide it inside layered assemblies, and often contain hazardous substances that limit how they can be repaired. The National Park Service calls uncontrolled moisture the most prevalent cause of deterioration in older and historic buildings, a description that fits plaster over wood lath, old growth framing, stone or brick foundations, and original plumbing far more than it fits drywall, modern lumber, or PEX.
 A single wall cavity like this can hold plumbing and wiring from different decades, so a leak often means checking both systems rather than just the pipe.
That same Preservation Brief 39 notes that moisture in these materials often travels far from its source, which is why a stain in one corner of a plaster ceiling can trace back to a leak in a roof valley or a bathroom two floors up. That distance is why a moisture meter reading, not the visible stain alone, should decide where a technician opens a wall or ceiling to check for hidden damage.
| Feature | How it changes water damage | What to do differently |
|---|---|---|
| Lath and plaster walls | Thick, heavy, and slow to dry; plaster can detach from the lath | Dry in place, test for detachment, repair before replacing |
| Galvanized or lead soldered supply pipes | Corrode from the inside and can fail at several points along a run | Plan a section or full replacement after any leak |
| Cast iron or clay drain lines | Crack, fill with roots, and collapse, causing sewage backups | Camera inspect the drains after a backup |
| Knob and tube or ungrounded wiring | No ground wire and fragile insulation once wet | Shut off power and have an electrician inspect before reuse |
| Stone, brick, or rubble foundations | Seep through mortar joints and lack modern waterproofing | Fix drainage first and avoid sealing coatings |
| Balloon framing and open wall cavities | Cavities can run from foundation to roof, letting water travel vertically | Check walls above and below the visible damage |
| Original wood windows and doors | Leak at sills, glazing putty, and worn flashing | Repair the seal before repainting stained trim |
| Layers of lead paint and wallpaper | Release dust when scraped, sanded, or demolished | Test first and use lead safe practices |
| Steam or hot water heating | Old pipes and radiators leak hot water and split when frozen | Service the system and shut it down before cleanup |
Old growth framing lumber is dense and resists rot while dry, but sustained moisture readings above about 20% can support decay. A soft spot in a joist, sill, or stud belongs in a structural water damage assessment before finish repairs begin.
Can plaster and lath walls be saved
Yes, in most cases: plaster that is still firm and attached to its lath can usually be dried in place and repaired, while plaster that has softened, bulged, or lost its grip on the lath needs to be re-secured or replaced. The National Park Service recommends leaving historic plaster in place and repairing it whenever possible.
 Plaster grips a wall through keys that push between the lath strips during application, and the National Park Service's Preservation Brief 21 notes that re-keying loose sections with screws and plaster washers can save plaster even after the original keys have broken.
Traditional plaster is applied in coats over narrow wood lath strips, and the wet plaster pushes between the strips to form keys that hold it to the wall. The National Park Service's Preservation Brief 21 explains that plaster fails when those keys break, and that re-keying with screws and plaster washers can reattach loose sections when the lath behind them is sound, so large areas of wall and ceiling can often be saved.
| Condition | What it usually means | Typical outcome |
|---|---|---|
| Stained but firm and tight to the wall | Surface wetting with the plaster still keyed | Dry in place, then seal the stain and repaint once readings match dry |
| Damp and cool with no visible movement | Moisture held in the plaster and lath | Continued drying with monitoring before any finish work |
| Hollow, drum like sound when tapped | Plaster has separated from the lath | Re-key or secure with plaster washers |
| Bulging, map pattern cracks, or sagging ceiling | Keys broken by saturation and weight | Support the area, then re-key or replace the section |
| Soft, crumbling, or powdery plaster | The plaster itself has broken down | Remove and replaster the area |
| Loose or rotted lath, rusted nails behind | Fasteners and lath have failed | Repair the lath before replastering |
Ceilings carry the most risk because gravity works against saturated plaster and the lath above it. The same tests used to evaluate ceiling water damage apply, but plaster weighs far more than drywall, so a bulging plaster ceiling should be treated as a collapse hazard before it is treated as a cosmetic problem.
Wallpaper and layered paint on old plaster often carry decorative history, so photograph them and, where possible, leave them in place while the wall dries. Stain blocking primer and new paint should wait until moisture readings match an unaffected wall in the same house, because sealing damp plaster traps moisture and the finish fails again.
Plaster from before the mid 1900s is sometimes coated in calcimine, a chalk based whitewash that has little binder to hold a new coat, rather than modern paint. A water stain on a calcimine ceiling should not simply be repainted, because ordinary paint applied directly over calcimine peels and flakes within months; the calcimine layer needs to be washed off or sealed with a calcimine coater or oil based primer first.
When original plaster cannot be saved, the Park Service describes veneer plaster over rigid base boards as a replacement that keeps a plaster surface and a similar look. Patching a plaster wall with drywall is a common shortcut, but the patch sits at a different thickness and can crack where it meets the old material, and standard water damaged drywall repair rules apply only to the patch itself.
Lead paint and asbestos hazards
Homes built before 1978 may contain lead based paint, and many homes built before the 1980s contain asbestos in flooring, insulation, ceiling coatings, or plaster, so both should be tested or assumed present before any demolition, sanding, or scraping. Water damage repair often disturbs exactly these materials, and disturbed lead and asbestos are the hazards, not the water.
 A pink or red reaction like this on a rhodizonate swab means the chipped paint layer tests positive for lead, which is why the EPA's rule requires lead safe practices before sanding or scraping.
The EPA reports that 87% of homes built before 1940 have some lead based paint, compared with 24% of homes built between 1960 and 1978, and the federal government banned lead paint in housing in 1978. The older the house, the more layers of it tend to sit under the current paint.
Lead paint rules for water damage repairs
The EPA's Renovation, Repair, and Painting Rule requires paid contractors working in homes built before 1978 to be lead safe certified and to follow lead safe work practices when a project disturbs more than 6 square feet of painted surface per room indoors or 20 square feet outdoors. Certified renovators must contain the work area, use wet methods that limit dust, and verify the cleanup with the EPA's required cleaning verification test before leaving the room.
The rule includes a narrow emergency provision for work that is immediately necessary to protect property and public health, so emergency extraction can proceed, but planned demolition, plaster repair, and repainting that follow are covered. Homeowners working on their own house are generally not covered by the rule, and the EPA still recommends containing dust, using wet methods, and cleaning with a HEPA vacuum.
Asbestos in older materials
Asbestos was used in pipe and boiler insulation, vinyl floor tile and its adhesive, textured ceiling coatings, joint compound, some plaster, and vermiculite attic insulation through the 1970s and into the 1980s. Intact, undisturbed material is generally low risk, and the EPA says a home with undamaged materials that will not be disturbed does not need testing.
Water damage changes that calculation, because wet floor tile lifts, wet insulation crumbles, and demolition cuts into ceilings and walls. Sampling should be done by a trained and accredited professional, according to EPA asbestos safety recommendations, because improper sampling can release fibers, and homeowners should avoid sawing, sanding, scraping, or drilling suspect material.
What this means for water damage work
Testing before demolition turns unknowns into a plan, and the materials below are the ones water damage work most often disturbs. A single lab result usually covers one material at a time, so a room with several suspect materials, such as tile, plaster, and pipe wrap in the same basement, may need more than one sample before demolition can start.
| Material | Where it turns up | First step before work |
|---|---|---|
| Lead paint | Plaster walls, trim, windows, doors | Test or assume present, contain dust, and use a lead safe certified contractor for paid work |
| Asbestos floor tile and adhesive | Kitchens, bathrooms, basements | Leave in place and test before lifting flooring |
| Asbestos pipe and boiler insulation | Basements, crawl spaces, mechanical rooms | Do not touch damaged wrap; call an abatement professional |
| Textured ceiling coatings and joint compound | Ceilings and drywall seams | Test before scraping, cutting, or removing |
| Vermiculite attic insulation | Attics of mid century homes | Do not disturb; test before roof or ceiling repairs |
| Some plaster and patching compounds | Walls and ceilings | Test before demolition |
Common causes of water damage
The most common causes of water damage in older homes are aging supply and drain pipes, worn roofs and flashing, leaking windows and masonry, seeping foundations, and old heating systems, and most of them develop slowly before failing suddenly. Galvanized steel supply pipes alone are commonly cited as lasting only 40 to 50 years, and a house built before the 1960s that still has its original plumbing is likely already past that window.
 Roof flashing, window sills, and the foundation joints shown here are the points a professional inspects first, since most water damage in older homes starts at one of these three areas rather than inside the house itself.
A leak in an older house also tends to have a history. Previous owners' patches, painted over stains, and half fixed leaks mean a fresh loss can sit on top of older hidden damage, and moisture readings in the surrounding area often reveal both.
| Cause | Why it's more prone | Typical warning sign |
|---|---|---|
| Galvanized steel supply pipes | The zinc lining wears away and rust builds inside | Low pressure, brown water, pinhole leaks |
| Cast iron drain stacks | Corrode from the inside and fail at joints | Gurgling, odors, stains below fixtures |
| Clay or fiber sewer laterals | Roots and collapse from age | Slow drains and repeated backups |
| Original roof and flashing | Worn shingles, slate, and flashing at chimneys and valleys | Ceiling stains after rain |
| Single pane wood windows and doors | Failed putty, caulk, and sill flashing | Stains below windows, peeling trim |
| Brick, stone, and stucco walls | Open mortar joints and cracks | Damp interior walls after storms, white mineral deposits |
| Rubble or masonry foundations | Seepage through joints with no modern drainage | Damp cellar walls and floors |
| Steam and hot water heating | Corroded radiators, valves, and pipes | Wet floors near radiators, split pipes after a freeze |
| Clogged gutters and poor grading | Water collects at the foundation | Damp cellar after heavy rain |
| Prior repairs and hidden past leaks | Old moisture was never fully fixed | Recurring stains and soft spots |
Original plumbing
That service life runs out from the inside, since the zinc lining that protects galvanized pipe erodes years before a wall shows any sign of trouble. When one fails, a burst pipe inside a wall can release water for hours before anyone notices, and the failure point is usually one of several weak spots along the same run.
Pipes and solder installed before 1986 can also contain lead, and the EPA notes that lead particles can attach to galvanized pipe surfaces and later enter drinking water. A plumber can identify the pipe material, and replacing only the failed section often leads to another leak elsewhere on the same line.
 The zinc lining that protects galvanized pipe corrodes from the inside, so a pipe can look sound on the outside while its usable opening has already narrowed to a fraction of its original size.
Drain lines have their own lifespan. Cast iron stacks, clay laterals, and bituminous fiber sewer pipe from the mid 1900s can crack or collapse, and a sewage backup from a failing drain is Category 3 water that changes how the cleanup must be done.
Roofs and masonry
Brick, stone, and stucco walls let water in through open mortar joints, cracked stucco, and failed sealants, and the dampness often appears indoors long before the outside looks damaged. The National Park Service cautions against sealing above ground masonry with waterproof coatings, because the coating can trap moisture behind it and cause the wall to fail.
Original roofs, especially slate, clay tile, and old shingles, leak most often at the flashing around chimneys, valleys, and dormers rather than across the field of the roof. The resulting roof leak usually shows up as ceiling staining a room or two away from the actual opening.
Foundations and cellars
Many houses built before 1940 rest on stone or brick foundations laid in lime mortar, often with dirt or thin slab floors and no drain tile. Water moves through the joints under pressure after heavy rain, and cellars that stayed dry for decades can start seeping when grading, gutters, or nearby construction change.
Persistent dampness at a foundation wall is a foundation water damage problem that has to be solved with drainage and grading before interior finishes are replaced. Repairs made only on the interior surface tend to fail when the water source outside remains.
A flooded cellar in an old masonry or rubble foundation should not be pumped out quickly. Saturated soil pushes against the foundation from outside, and the standing water inside is bracing the wall against that pressure, so pumping it out too fast can let the wall buckle or the floor slab heave. Extension guidance from North Dakota State University on flooded basements recommends waiting for the water level outside to drop first, then removing only about a third of the remaining water per day until the levels equalize.
Steam and hot water heating
Radiators, cast iron boilers, and the pipes that feed them are common in houses built before the 1950s, and the pipes are often run inside plaster walls and floors. A cracked radiator or failed valve releases hot water, and in a cold snap a system that is switched off can freeze and split its fittings.
Hot water from a boiler or radiator leak can scald and may contain treatment chemicals, so shut the boiler down and let it cool before cleanup begins. A cast iron boiler that has flooded its own base often needs a technician's inspection before restart, since water in the combustion chamber or electrical controls can make relighting it unsafe.
Signs of hidden water damage
Hidden water damage in an older home shows up as stains, peeling paint, white mineral deposits, hollow sounding plaster, a musty odor, and sticking doors, often in places far from the leak. ANSI/IICRC S500 calls for reading a moisture meter against a dry reference area in the same house rather than a fixed number, since plaster and masonry do not have a single universal dry threshold.
 A hollow, drum-like sound under the knuckle means the plaster has separated from the lath behind it, a sign a moisture reading alone can miss.
The tap test is a plasterer's basic check that catches what a meter reading alone might miss: knuckle tapping produces a solid sound when plaster is attached and a hollow, drum like sound when it has separated from the lath. Ceilings deserve the most attention with this test, since a hollow sound overhead can mean the plaster is only being held up by paint and old nails.
| Sign | What it usually means | How urgent |
|---|---|---|
| White powder or crust on plaster or masonry | Water is moving through the wall and leaving mineral salts | Moderate; find the source |
| Peeling paint or lifting wallpaper | Moisture behind the finish | Moderate; check for an active leak |
| Yellow or brown stain with soft edges | Water has passed through the plaster or lath | Moderate to high if it grows |
| Hollow, drum like plaster | Plaster has separated from the lath | High on ceilings |
| Sagging or bulging ceiling | Saturated plaster and lath | Emergency; stay out of the room |
| Musty odor with no visible stain | Moisture trapped in a wall or floor cavity | Moderate; open access and test |
| Sticking doors or windows | Swollen framing or structural movement | Moderate; check moisture readings |
| Rising water bill | A hidden supply leak | High; run a meter test |
Seasonal patterns help sort the causes. Stains that appear after rain point to the roof, windows, or masonry walls, while stains that grow during dry weather point to plumbing or heating pipes, and marking the edge of a stain with a pencil and checking it a day later shows whether it is still spreading.
How drying works in old homes
Professionals dry older homes more slowly and monitor more locations, because plaster, brick, stone, and old growth lumber release moisture at a slow rate, and ANSI/IICRC S500 classifies deeply saturated, low permeance materials like these as Class 4 specialty drying situations. The goal is a reading that matches an unaffected reference wall, not a fixed number.
 A pinless meter reads moisture without puncturing the plaster, and ANSI/IICRC S500 calls for comparing a reading like this to an unaffected reference wall rather than judging it against a fixed number.
Technicians use air movers and dehumidifiers to lower the humidity around wet materials, and they often dry wall cavities through removed baseboards or small access points instead of cutting plaster away, which preserves more of the original surface. Drying continues until readings from the plaster, lath, and framing match the dry reference, and daily monitoring shows whether the drying rate is holding.
Plaster and masonry
Plaster is thicker and denser than drywall and should dry gradually, because drying that is too fast can crack the surface and cause paint and wallpaper to fail. Solid masonry can hold moisture long after the surface feels dry, so readings from inside the wall or below the surface matter more than a touch test.
Wood framing, floors, and trim
Structural lumber is generally considered dry near 15% moisture content or below, and readings that stay above about 20% can support decay. Old growth boards are dense and dry from the surface inward, so forcing heat can cup or split them.
Saving original floors and trim
Original floors, trim, and windows can usually be saved when they are dried promptly, because old growth lumber, cut from trees that grew for a century or more before harvest, is denser than the fast grown wood milled today. The decision to replace depends on whether the material stays structurally sound and flat after drying, since stains and surface wear can be refinished.
 Labeling each board before removal is what makes reinstallation possible, since trim milled a century ago rarely matches a modern replacement profile exactly.
Solid hardwood floors and wide trim boards can be sanded, refinished, and reinstalled, which makes them worth removing carefully and labeling rather than discarding. Plaster moldings and medallions can be repaired or recast from the originals, but they are usually lost if the ceiling section behind them collapses, so photograph and support them early.
| Feature | Salvage odds | How to handle it |
|---|---|---|
| Solid hardwood floors | Good if dried within days | Dry slowly, then refinish after readings match the reference |
| Ornamental plaster moldings and medallions | Fair | Photograph, support if loose, and repair with a plaster conservator |
| Wood trim and casings | Good | Remove carefully, label, dry, and reinstall |
| Original wood windows | Good if the frame is sound | Repair the sash and sill, reseal, and keep original glass where possible |
| Built in cabinets and shelving | Fair | Dry in place if solid; replace swollen particleboard |
| Cast iron radiators and clawfoot tubs | Excellent with clean water | Drain, dry, and check valves and fittings |
| Plaster walls with original decorative paint | Depends on the plaster | Test before removal and document each layer |
Original wood windows leak at the sill, at aged glazing putty, and under the flashing above the frame, and staining below a window usually means water is moving through the wall. Repairing the source of a window or door leak protects the plaster and trim from a repeat loss, and rebuilding a sash typically costs less than replacing an original window.
Historic designation and permits
If a home is individually listed, in a local historic district, or subject to a preservation easement, repairs that change visible features may need approval before work starts. FEMA also lets local officials exempt a qualifying historic structure from the National Flood Insurance Program's 50% substantial damage rule, which otherwise forces a home repaired for half its market value or more into full flood code compliance.
 A historic commission's approval covers exterior appearance only, so a project still needs separate building department sign-off for structural, electrical, and plumbing work.
Many jurisdictions allow emergency mitigation such as extraction and temporary protection right away, but permanent repairs are reviewed. Rules vary widely: a local historic commission usually reviews exterior changes, some review interiors, and a state historic preservation office (SHPO) advises on appropriate treatments and state tax credits. Four offices usually decide what a repair may look like:
- Local historic preservation office or commission: reviews exterior changes and, in some cities, interior work in designated districts
- Building department: issues permits for structural, electrical, plumbing, and roofing work
- State historic preservation office: advises on treatments and state tax credit programs
- Floodplain administrator: decides whether substantial damage rules apply in a mapped flood zone
That exemption, detailed in FEMA's floodplain management bulletin on historic structures, holds only as long as the work does not cost the building its historic designation. The local floodplain administrator makes that determination before a permit is issued, so confirm it applies before assuming a repair is exempt.
Reviewers and adjusters both look for evidence of what was original, so keep photographs, salvaged pieces, and written notes on materials and dates. Some commissions accept replacement materials that match the profile and finish of the original, so ask before purchasing.
Standard permit rules for water damage repairs still apply on top of preservation review: electrical, plumbing, structural, and roofing work usually needs a permit even in a historic home, and a historic commission's approval does not replace the building department's. Starting demolition or repair before both approvals are in hand can force a stop-work order, which adds weeks to a timeline that is already slower than a non-historic repair.
Does insurance cover the damage
Yes, homeowners insurance generally covers sudden and accidental water damage in an older home, but the National Association of Insurance Commissioners confirms that policies broadly exclude damage from neglect and lack of maintenance. An older house gives the insurer more room to argue that a loss falls into one of those excluded categories, since the age of the pipes, roof, and wiring becomes part of the claim.
 Photos taken before repairs begin are what an adjuster uses to separate sudden damage from wear and tear, since a policy's neglect exclusion turns on that distinction.
A sudden pipe failure is typically treated differently from a slow leak that went unnoticed for months, and some insurers deny claims outright when records show long term corrosion or an unrepaired earlier leak. Photographs and maintenance records that predate the loss carry more weight with an adjuster than a homeowner's account alone, particularly when the policy's language leaves room for a neglect argument.
| Older home issue | How it affects the claim | What to do |
|---|---|---|
| Galvanized, lead, or cast iron pipes | The insurer may cite corrosion or age, and may require replacement at renewal | Keep a plumber's report and records of any replacements |
| Knob and tube or ungrounded wiring | Some carriers decline or surcharge, and electrical damage may be limited | Ask your agent about requirements before a loss |
| Actual cash value settlements | Depreciation lowers payment for old roofs, finishes, and plaster | Check whether the policy pays replacement cost |
| Historic materials | The estimate may price modern equivalents instead of restoration | Ask for lath and plaster to be priced if that is what the walls contain, and ask about coverage written for historic homes |
| Ordinance or law coverage | Pays part of the cost of code upgrades triggered by repairs | Confirm the limit, which is often a small percentage of the dwelling coverage |
| Prior damage and unrepaired leaks | Can reduce or void the claim | Keep repair invoices and photographs |
Filing a water damage insurance claim on an older home follows the same sudden versus gradual test used everywhere, with age related conditions layered on top. Photographs of the pre-loss condition help an adjuster price plaster and millwork correctly, and repair records answer most wear and tear questions before they become disputes.
What water damage costs to repair
Water damage in an older home typically costs $1,000–$12,000 for a single room, depending on whether plaster can be dried and repaired or has to be replaced, and lead and asbestos work adds to the total. Costs run higher than in a newer home because plaster repair requires skilled labor, drying takes longer, and materials from before 1980 may need testing or abatement before demolition.
 Equipment stays running longer in an older home than in a newer one, since plaster and old growth wood release moisture at a slower rate than drywall and dimensional lumber, and that extra runtime is what drives up the labor portion of the bill.
These figures are RestoreAdvisor estimates built from typical mitigation and repair ranges, and local labor rates and access conditions move them. A written estimate that separates extraction, drying, testing, and repair shows where the older home premium comes from.
| Scenario | Cost | What drives it |
|---|---|---|
| Extraction and drying of one room with plaster intact | $1,000–$3,500 | Room size, water category, drying days |
| Mitigation plus a plaster patch or ceiling re-keying | $2,000–$6,000 | Plasterer availability, ceiling height, access |
| Full room plaster replacement after saturation | $4,000–$12,000 | Square footage, lath repair, finish coats |
| Burst galvanized pipe with wall opening, pipe repair, drying, and patch | $3,000–$10,000 | Wall access, plumbing scope, water volume |
| Whole house repipe from galvanized to PEX or copper (plumbing only) | $4,000–$15,000+ | House size, access, wall repair |
| Multi room loss with asbestos or lead abatement | $10,000–$40,000+ | Abatement scope, testing, containment |
The national benchmarks for water damage restoration cost still apply to the extraction and drying portion of an older home loss, and plaster, lead, and asbestos work sits on top of those figures. Lab analysis of a suspect material typically costs under $100 per sample plus an inspector's visit fee, which is small compared with the cost of contaminating a whole floor by demolishing without testing.
The federal historic rehabilitation tax credit applies to income producing buildings rather than owner occupied homes, and state programs vary, so ask the state historic preservation office before assuming any credit will offset repair costs. Some states and cities also offer property tax abatements tied to historic designation rather than a repair credit, which is a separate program worth asking about even when no rehabilitation credit applies.
Choosing a contractor for the job
The right contractor for an older home combines an IICRC certified restoration firm that has dried plaster before with EPA lead safe certification for paid work in homes built before 1978, plus access to accredited asbestos professionals and a plasterer or carpenter for repairs. A general water damage company without those credentials can dry the house but may damage original features or break lead rules.
 A contractor who dries plaster in place first, rather than defaulting to demolition, is doing exactly what the National Park Service recommends for salvageable historic plaster.
Ask about plaster experience
Ask how many plaster and lath homes the company has dried and whether it dries plaster in place before cutting it out. A plan that removes all plaster by default is a warning sign in a house where the plaster is repairable.
Confirm lead safe certification
Ask for the firm's EPA lead safe certification if the house was built before 1978, and ask how dust will be contained during demolition. A firm that cannot answer specifically probably has not done the work.
Ask how asbestos is handled
Ask whether the company tests suspect materials before demolition and which accredited abatement contractor it uses when results come back positive. Testing should happen before crews open ceilings or lift flooring.
The standard contractor selection checks still apply, with plaster, lead, and asbestos experience layered on top. Ask for photos of a completed job in a similarly aged home, since a portfolio of drywall jobs does not show whether the crew can dry and re-key plaster without cracking it.
Preventing the next leak
Preventing the next leak in an older house means keeping water away from the exterior, replacing plumbing that has reached the end of its service life, and inspecting the hidden areas where old leaks start. The National Park Service emphasizes maintenance, drainage, and ventilation as the main tools for controlling moisture in older buildings.
 A sensor placed at the water heater and the main supply valve catches a slow drip long before it saturates the surrounding plaster or framing.
Keep gutters and grading working
Clean gutters twice a year, extend downspouts well away from the foundation, and grade soil away from the house. Clogged gutters and short downspouts send water to the foundation, and gutter and downspout overflow is one of the fastest ways to start seepage in an old masonry cellar.
Maintain masonry and roofs
Repoint open mortar joints with mortar matched to the original, keep flashing sealed, and avoid waterproof coatings on above ground masonry. Inspect the roof after every major storm, since old flashing fails at chimneys and valleys first.
Replace end of life plumbing on your schedule
Have a plumber assess galvanized supply lines, lead solder, and old drain lines, and plan replacement before a failure. Replacing pipes on your own schedule usually costs less than replacing them after a burst, when wall repair and drying are added.
Service heating systems each fall
Have the boiler and radiator system inspected before heating season, bleed the radiators, and confirm that valves and pressure relief devices work. A system that is drained or shut off in a cold snap should be checked for freeze damage before restart.
A leak sensor near the water heater, boiler, and any galvanized supply run catches a slow failure early, and a dated record of past leaks and repairs settles wear-and-tear disputes with an insurer later. Neither costs much compared with a single after-hours emergency call.
Frequently asked questions
Can I paint over a water stain on old plaster?
No, not until the plaster is dry and the source is fixed. Painting over damp plaster traps moisture, and the stain usually returns. In a house built before 1978, scraping or sanding old paint can also create lead dust, so paid work should go to a lead safe certified contractor and do it yourself work needs containment and wet methods.
Will mold grow in plaster walls?
Yes, mold can grow on plaster surfaces and in the wood lath behind them. Plaster itself is mineral, but paint, wallpaper paste, dust, and lath give mold something to feed on when they stay damp past the EPA's 24–48 hour window. Visible growth after prolonged dampness is handled as mold after water damage, which follows separate removal rules.
Do I have to replace knob and tube wiring after water damage?
Not automatically, but a licensed electrician should inspect it before it is used again. Knob and tube wiring has no ground wire and fabric based insulation that can degrade when wet, so wet runs are often replaced rather than dried. Insurers may also require replacement before renewing coverage.
Should I replace galvanized pipes after a leak?
Usually yes, if the pipes are original and corroded. A plumber can pressure test or camera inspect the line, and one leak often signals thinning pipe walls elsewhere on the same run. Full replacement is usually cheaper in the long run than patching each new leak as the rest of the line ages.
How can I tell if my pipes are galvanized or lead?
A magnet and a scratch test can help, but a plumber should confirm. Galvanized steel is magnetic and dull gray, while lead is soft, not magnetic, and scratches to shiny silver with a coin. A water quality test or a lab sample confirms lead content directly, which is more reliable than judging by the pipe's look alone.
Can my insurer deny a claim because my house is old?
Not for age alone. Insurers generally pay for sudden and accidental losses, but they can apply exclusions for wear and tear, neglect, and gradual damage, and an older house gives them more room to argue that a loss falls into one of those categories. Records of pipe condition, repairs, and pre-loss photographs help answer that argument.
Is veneer plaster a good replacement for original plaster?
Often yes, when original plaster cannot be repaired. The National Park Service describes veneer plaster over rigid base boards as a replacement option that keeps a hard plaster surface. A plasterer should apply it, since finish quality depends on the trowel work.
Can I stay in an older home while it dries?
Usually yes, if the water was clean and the electrical system is safe. Keep everyone out of rooms with a sagging ceiling, sewage contamination, or dust from demolition in a home that may contain lead or asbestos.
Can I dry an older home myself with fans and a dehumidifier?
Only for small clean water leaks. Plaster and old growth wood dry slowly and hide moisture, so a moisture meter reading is needed to confirm dryness. Plaster that is wet through, more than one room, or any contaminated water calls for a professional.
What should I do if I find water damage after buying an older home?
Document it and contact your agent and a real estate attorney quickly. Photograph the damage before repairs, review the seller's disclosure and inspection report, and notify your insurer if the loss looks sudden. Deadlines for claims against a seller vary by state, and a real estate attorney can confirm which options remain for buying a house with water damage history before that window closes.
- IICRC S500
- EPA: Flood Cleanup to Protect Indoor Air and Your Health
- National Park Service: Preservation Brief 39, Holding the Line
- National Park Service: Preservation Brief 21, Repairing Historic Flat Plaster
- EPA: Lead Renovation, Repair and Painting Program
- EPA: Protect Your Family from Exposures to Asbestos
- EPA: Sources of Lead in Drinking Water
- FEMA: NFIP Floodplain Management Bulletin, Historic Structures
- NAIC: A Consumer's Guide to Home Insurance
- NDSU Extension: How to Deal With a Leaking or Flooded Basement
Sam Hickerson is the founder of RestoreAdvisor and writes consumer guides on mold remediation, water damage restoration, inspection, testing, and home recovery. His work focuses on helping homeowners understand costs, risks, and when to call a professional. He draws on guidance from the EPA, CDC, IICRC, and other authoritative sources to make complex home issues easier to navigate.