
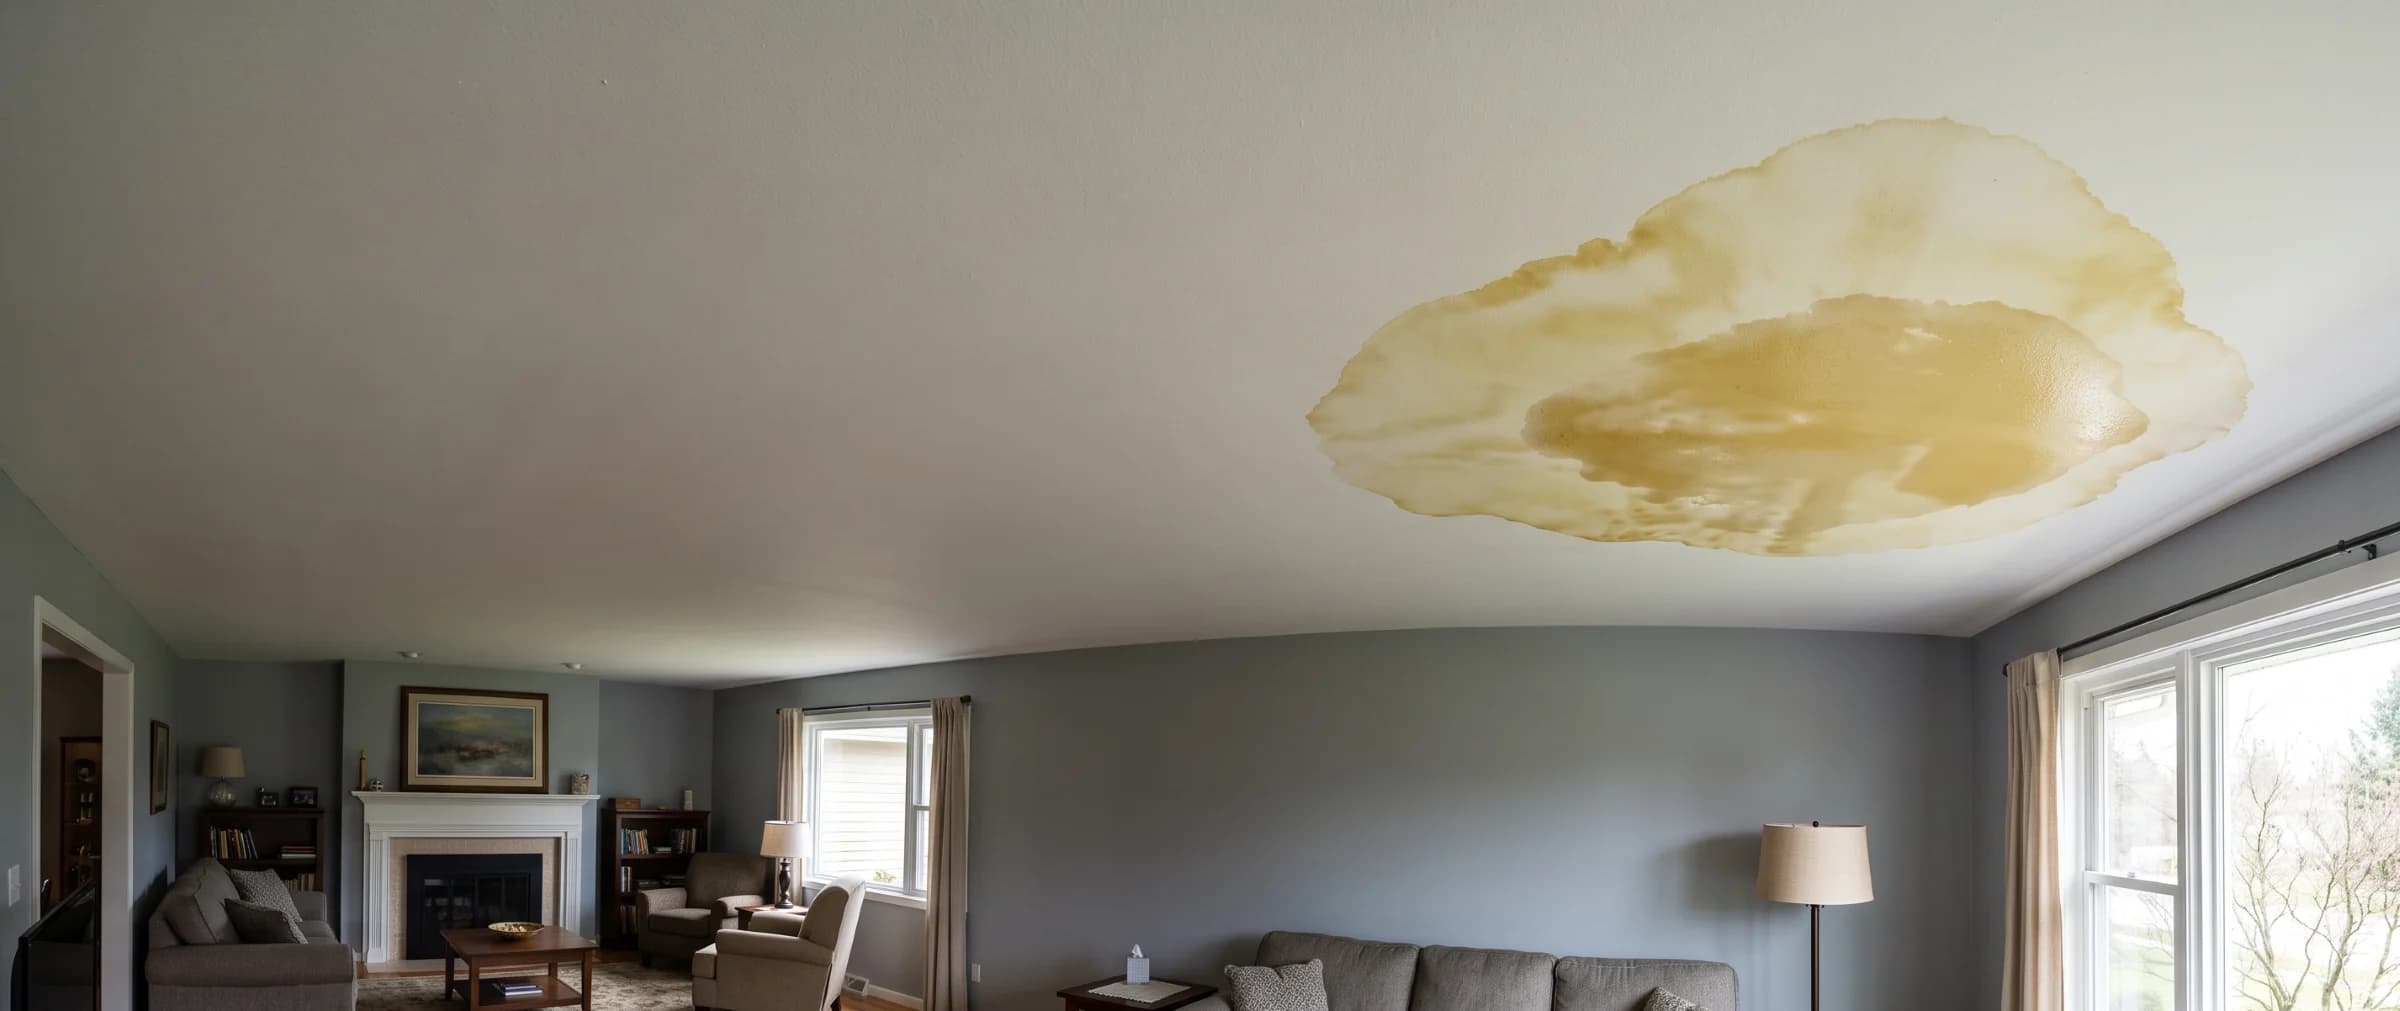

A stain spreading across your ceiling after a roof leak looks alarming, but in most cases the water itself is manageable once you know what to check first. Water damage from a roof leak is the saturation of a home's interior materials, roof deck sheathing, attic insulation, ceiling drywall, and wall framing, that occurs when water bypasses a compromised section of the roof and enters the structure below, a process governed by the same classification and drying standards that apply to any other water intrusion event under ANSI/IICRC S500, the industry standard for professional water damage restoration.
This covers the exact sequence to follow the moment you find water coming through a ceiling, how to tell whether that ceiling is actually at risk of failing, which contractor to call first, and what the repair typically costs depending on how far the water traveled before you found it. What happens in the first hour, before either contractor arrives, has more effect on the final repair bill than almost anything that happens afterward.
Key insights
- 24–48 hours. Per EPA guidance, mold can begin colonizing wet building materials within 24 to 48 hours of water exposure. Most roof leaks go unnoticed well past that window before a ceiling stain becomes visible.
- Two separate contractors. A roofer stops the water. A water damage restoration company extracts, dries, and repairs the interior. Interior repairs started before the roof is sealed will fail.
- A bulging ceiling needs relief, not just a bucket. A sagging or bowing section of drywall means water is pooling faster than it can drain through the existing gap, and a controlled puncture is safer than waiting for it to give way on its own.
- The stain rarely sits above the entry point. Water travels along the roof deck and rafters before dripping through drywall, so the actual leak in the roof is often several feet from where the stain shows up inside.
- Coverage depends on cause, not on the fact that a roof leaked. A sudden storm-caused leak is typically covered under a standard HO-3 policy. A slow leak from shingles that were never maintained is almost always excluded.
- Attic insulation usually gets replaced, not dried. Wet fiberglass and cellulose insulation lose their insulating value once saturated, and drying them in place rarely restores performance, which is why most restoration scopes include full removal.
What to do first when water is coming through your ceiling
The moment water starts coming through a ceiling, the priority order is safety, containment, then documentation, in that sequence, before any cleanup begins. Skipping ahead to cleanup before the source is addressed is the most common reason a small leak turns into a repeat problem.
 Puncturing the lowest point of a bulging ceiling releases trapped water in a controlled way, rather than waiting for the saturated drywall to fail on its own and drop without warning. A sagging section this size can be holding tens of pounds of retained water, weight the ceiling's fasteners were never designed to carry.
Start by clearing the room. Move people, furniture, and anything electronic away from the drip path and the section of wall it may be running down. Place a bucket or bin directly under the active drip, and lay towels or a tarp across the floor to catch runoff before it spreads. If the leak is dripping near a light fixture, outlet, or ceiling fan, shut off the breaker for that circuit before doing anything else in the room; the OSHA guidance on flood response identifies electrical contact as one of the leading causes of injury during water events, and a wet ceiling fixture carries the same risk as standing water near an outlet.
Watch the ceiling itself, not just the drip
A sagging or bowing section of drywall means water is pooling above it faster than it can drain through the existing gap. If you see this, puncture the lowest point of the bulge with a screwdriver, aimed directly into a bucket, to release the trapped water in a controlled way. This sounds counterintuitive, but a small deliberate hole is safer than waiting for an overloaded section to fail on its own, which usually happens with no warning and drops several pounds of wet drywall at once.
Photograph everything before you touch anything
Capture the ceiling stain, the active drip, and the room from multiple angles before any cleanup starts. This record supports the insurance claim and gives the restoration company a baseline for how far the damage has spread.
Once the room is safe and documented, call a roofer to stop the source and a water restoration company to begin extraction and drying. Standing water, a contaminated source, or a household member with a respiratory condition all raise this from a routine leak to an emergency water damage restoration situation that warrants immediate dispatch rather than a scheduled appointment.
What not to do
Certain instinctive responses to a roof leak, cleaning up immediately, patching the stain, or waiting on insurance approval before acting, tend to make the damage worse rather than better. Each one feels like the responsible thing to do in the moment, which is exactly why homeowners fall into them despite the added cost or risk they create. Every one of these mistakes shares a root cause, treating a roof leak like routine cleanup instead of a water damage event with its own safety and drying requirements, the same distinction that decides whether a leak is small enough for DIY water damage cleanup or needs a professional from the start.
 Painting over a stain before confirming dryness traps any remaining moisture behind the new coat and removes the visual cue used to track whether an area has fully dried.
Don't stand or sit directly under a sagging ceiling
Saturated drywall can hold together right up until it doesn't, and a bulging section can drop without warning. Treat any visible sag as a structural hazard until it has been relieved or inspected.
Don't run a household vacuum on standing water
Standard vacuums are not built for water extraction and create a serious shock hazard when used near wet electrical components. Wet vacuums rated for water pickup are the minimum equipment for interior extraction.
Don't ignore a small stain because it isn't dripping anymore
A stain that has stopped growing usually means the leak has stopped actively flowing, not that the materials behind it are dry. Insulation and drywall paper can stay wet for days after the visible dripping ends.
Don't wait for insurance approval before starting mitigation
Most policies require the homeowner to take reasonable steps to prevent further damage, and delaying extraction while waiting on an adjuster can itself become a coverage issue. Document first, then act.
Don't patch or paint over the stain before confirming the area is dry
Painting over a stain traps any remaining moisture and hides the exact indicator you would otherwise use to confirm the area has fully dried. Wait for a moisture meter reading before cosmetic repairs.
The water damage restoration checklist organizes this same sequence by phase, containment through final drying, rather than by mistake to avoid, for anyone who wants a printable version to follow step by step.
Is your ceiling at risk of collapse?
A ceiling is at meaningful risk of collapse when drywall is visibly sagging, bowing downward, or has separated from the framing at a seam, not simply because a stain is present. Most single-drip roof leaks never reach this point, but when they do, the weight of water absorbed into gypsum board can exceed what the material and its fasteners were designed to hold. That first assessment, whether the ceiling needs to come down now or can be dried in place, is the same call a technician makes during the initial visit described for what to expect during water damage restoration generally, just with higher stakes when a ceiling is already sagging.
 A seam that has visibly pulled apart, rather than just a flat stain, means the drywall is already holding more water weight than its fasteners were built for. Treat this as a structural hazard and clear the room until it's been assessed.
Standard half-inch drywall weighs roughly 1.6 pounds per square foot dry, and saturated drywall can absorb several times its dry weight in water before it fails. A sagging section a few feet across can be holding tens of pounds of retained water, concentrated at whatever point in the ceiling has pooled the most. That's the physical reason a controlled puncture, releasing the water through a single deliberate hole rather than letting the section fail unpredictably, is standard practice rather than something that damages the ceiling further; the ceiling is already compromised by the time it's bulging, and the puncture simply controls where and how the water comes down.
Signs the risk has moved from cosmetic to structural include: the drywall flexes noticeably when touched, a seam or tape line has separated and is visibly drooping, water is pooling audibly when you tap the ceiling, or the sag has grown visibly larger over a few hours. Any of these warrants clearing the room immediately and treating the space as off-limits until a professional has assessed it, not just documenting it for later. A ceiling this saturated typically falls into the higher end of the water damage classes scale, which affects both the drying timeline and how much of the ceiling assembly needs to come out.
Roofer or restoration company: who to call first
Call a roofer first. A water damage restoration company can extract standing water and dry the interior, but nothing they do will hold if water keeps entering through the same compromised section of roof. This is the same sequencing problem that applies to mold from a roof leak, and it applies just as directly to the water damage itself.
 A roofer has to confirm the leak is sealed before any water damage restoration company can begin drying the interior, since equipment run against an active source just gets wet again.
The correct order is straightforward. Get the roof inspected and repaired, or at minimum tarped, first. Once the source is confirmed stopped, bring in a water restoration company to assess category and class, extract any standing water, and set drying equipment. Contact your insurance company in parallel with both calls rather than waiting for either contractor to finish, since prompt reporting matters for the claim regardless of which repair happens first.
When a plumber gets confused with a roofer
Some homeowners assume any interior water problem calls for a plumber. A roof leak has nothing to do with plumbing, and a plumber has no way to diagnose or repair a compromised roof deck or flashing. If the water source is above the ceiling rather than behind a wall near a fixture, the roof is the starting point.
Verifying the restoration company before work begins
Verifying credentials matters just as much when choosing a water damage restoration company for a roof leak as it does for any larger water loss, since a company willing to skip the IICRC Certified Firm check on a small job usually skips it on a big one too. Ask for that certification directly, request a written scope before authorizing any material removal, and confirm the technician assigned to your job carries a current Water Damage Restoration Technician certification.
Where the water goes once it's inside
Water from a roof leak follows gravity and the path of least resistance, typically moving through the roof deck sheathing into attic insulation, then into ceiling drywall, and from there into wall framing and cavities below. A stain on the ceiling represents only the point where water finally became visible, not the full extent of where it traveled, and per EPA guidance on flood cleanup, materials that stay wet beyond 24 to 48 hours should be assumed to be at risk for mold regardless of how far the visible stain has spread.
 Insulation this saturated has already lost most of its R-value and is typically removed rather than dried in place, unlike drywall, which can sometimes be saved if caught early.
The first surface water reaches is usually the roof deck itself, plywood or OSB sheathing directly beneath the shingles or roofing membrane. From there, moisture wicks laterally along rafters before soaking into whatever insulation sits below. Once insulation is saturated, water continues downward into the ceiling drywall's vapor-side paper, which is why a stain often appears well after the leak actually started; drywall has to absorb enough moisture before it shows through to the painted surface. In older construction, gaps around ceiling light fixtures, fans, and HVAC boots give water a more direct path into the room, sometimes producing a stain days sooner than solid drywall would.
| Material | When wet | Typical response |
|---|---|---|
| Roof deck sheathing | Absorbs moisture, can delaminate or rot if exposure continues | Assessed and repaired by the roofer as part of the leak repair |
| Attic insulation | Compresses, loses R-value, rarely dries back to original performance | Removed and replaced rather than dried in place |
| Ceiling drywall | Softens, sags, and can fail structurally if saturation continues | Dried if caught early; removed and replaced if soft or sagging |
| Wall framing | Wicks moisture from ceiling connection points, can host mold if not dried | Moisture-mapped and dried to target threshold before closing walls |
How far the water has actually traveled beyond the visible stain is exactly what a restoration technician's moisture meter and thermal camera are checking for during the initial assessment; a wet-looking ceiling and a dry attic are a very different job than the reverse. Understanding water damage categories, which measure contamination level, and understanding classes, which measure how much of the structure absorbed water and how hard it will be to dry, both come from the same IICRC S500 assessment that happens at this stage, and both determine the scope of what gets removed versus dried in place.
What causes a roof to leak
Roof leaks most commonly start at damaged or missing shingles, failed flashing around penetrations like chimneys and skylights, ice dams, clogged gutters, and aging roofing material past its expected service life. Each cause tends to produce a different leak pattern, which is part of why a roofer's inspection, not a guess from the ground, is the only reliable way to confirm the source.
 A gap this size at a chimney corner lets water track sideways along the roof deck before it ever reaches the interior, which is why the entry point and the ceiling stain rarely line up.
Most leaks trace back to a roof's transition points, valleys, ridges, chimneys, and anywhere one roofing material meets another, rather than to the broad, uninterrupted field of shingles between them. A valley where two roof planes funnel water into a single channel, or a ridge that has lost its cap flashing, takes far more wear than a flat run of shingles, which is why a professional inspection starts at those transitions instead of scanning the roof as a whole. The same concentrated, single-point failure pattern shows up with a burst pipe inside a wall, both start at one compromised spot and spread outward from there, though the fix and the tradesperson you call are entirely different.
| Cause | How water gets in | Typical location |
|---|---|---|
| Missing or lifted shingles | Direct exposure of the underlayment to rain | Directly below the damaged section |
| Failed flashing (chimney, vent, skylight) | Gaps at penetrations where flashing has separated or corroded | Near the penetration, often tracking sideways along a rafter |
| Ice dam | Melted snow refreezes at the eave and backs water up under shingles | Along exterior walls or at the ceiling near an eave |
| Clogged gutters | Water backs up and saturates the roof edge instead of draining | Near exterior walls, particularly after heavy rain |
| Aging roof material | Granule loss and cracking reduce water resistance broadly | Scattered spots that appear after storms rather than one fixed location |
| Cracked vent boot or pipe collar | Rubber seal around a roof penetration degrades over time | Directly below the vent, often a small persistent drip |
Ice dams deserve a closer look because the mechanism is different from ordinary shingle failure. Per NOAA's National Weather Service guidance on ice dams, a dam forms when heat escaping from the attic melts snow on the upper roof, that water runs down to the colder eave, refreezes, and builds a ridge of ice that forces subsequent meltwater backward under the shingles instead of off the roof. Attic ventilation, keeping the roof deck uniformly cold, is the underlying factor that determines whether a given snowfall produces a dam at all, and a roof with adequate ventilation and insulation rarely develops one regardless of accumulation.
Flat roof leaks vs. pitched roof leaks: how the damage differs
A flat or low-slope roof and a pitched shingle roof fail in different ways, and the interior water damage pattern follows accordingly. Pitched roofs tend to produce a single, traceable drip path from one damaged point, while flat and low-slope membrane roofs are more prone to standing water and diffuse seepage that can show up as staining in several unconnected spots on the same ceiling.
 Sunrooms and window-heavy additions often get a flat or low-slope membrane roof instead of a matching pitch, since a steep roofline would cut into the headroom and sightlines the windows are there for. That tradeoff is also why the same home can face both failure patterns at once.
On a pitched roof, water enters at a specific failure point, a missing shingle, a flashing gap, an ice dam, and travels downslope along the rafters before finding a low point in the drywall to drip through. The damage stays relatively contained to one drip line, even if that line sits several feet from the actual entry point.
Flat and low-slope roofs (TPO, EPDM, and modified bitumen membranes) fail differently. Ponding water, standing water that hasn't drained within roughly 48 hours of the last rain, accelerates membrane wear at seams and around parapet walls, and once a seam opens, water can travel laterally across the deck before finding several separate low points to drip through. This is why a flat-roof leak often produces multiple ceiling stains from what turns out to be a single failed seam, rather than the one clean drip point typical of a shingle roof. Not every roofer works on both roof types, so confirming a contractor has membrane-specific experience matters more on a flat roof than it does on a standard pitched one.
How to trace a roof leak back to its source
Tracing a roof leak to its exact entry point usually requires attic access and a systematic check of likely failure points, not a guess based on where the ceiling stain appears. Because the stain marks only where water finally broke through, not where it entered, working from the roof surface down is far less reliable than starting in the attic and searching upward toward the source.
 Working upslope from directly above the ceiling stain, rather than guessing from the roof surface down, is what actually narrows a leak to its real entry point.
Follow the water uphill in the attic
Starting from directly above the ceiling stain, work upslope along the rafters with a flashlight, looking for dark streaks, active drips, or discolored sheathing. The true entry point is almost always higher on the roof than the stain suggests.
Check for daylight at penetrations
On a clear day, a dark attic with pinpricks of visible daylight at a vent boot, chimney base, or skylight frame confirms a gap large enough to let water through as well.
Have a roofer run a controlled water test
For leaks that don't reveal themselves on a dry day, a roofer can section off areas of the roof with a hose and work upward from the eave while someone inside watches or listens for the drip, isolating the exact section responsible.
Signs you have water damage from a roof leak
A ceiling stain, sagging drywall, or a persistent musty smell in one room are the three most common indicators that a roof leak has already caused interior water damage. Recognizing any one of them on its own is enough reason to investigate, since the visible sign rarely represents the full extent of what's wet above it.
 Paint bubbles because moisture trapped between the coating and the drywall has nowhere else to go, a sign the material underneath has absorbed water rather than just being marked by it.
Visual signs include a brown or yellow stain that expands over time, peeling paint near a ceiling edge, and bubbling or a soft texture when the drywall is pressed gently. Odor is often the earliest indicator, a musty or damp smell concentrated in one room, particularly noticeable after the space has been closed up for a few hours. A sudden, unexplained increase in your water bill can also point to water entering somewhere in the building envelope, though this is a less common signal for roof leaks specifically compared to plumbing failures.
If you have access to the attic, checking the underside of the roof deck and the top of the insulation directly above the stained area is worth doing before a contractor arrives, since a visibly wet or discolored patch on the sheathing confirms the leak's general location even before the source is pinpointed. The same signs of water damage apply whether the source is a roof leak, a burst pipe, or a slow plumbing failure, and professionals confirm what's hidden behind a surface that looks dry with a moisture meter rather than a visual check alone.
Is the ceiling stain old or is the leak still active?
A stain that has stopped growing and feels bone-dry to the touch is very likely an old, resolved leak rather than an active one, while a stain that's still expanding, soft, or damp to the touch means water is currently coming in. The distinction matters because an old stain can usually wait for a routine roof inspection, while an active one needs the same containment and same-day response as any leak that's still flowing.
 Checking the stain against this line after the next rain is a simple way to confirm whether the leak is still active, without needing a moisture meter or a professional visit.
The touch test
Press the stained area gently. A soft, spongy, or cool-to-the-touch spot indicates moisture is still present; a hard, dry surface suggests the water source has already stopped.
The mark-and-monitor test
Trace the outer edge of the stain with a pencil, then check it again after the next rain. A stain that has grown past the pencil line confirms the leak is still active; one that hasn't moved is likely old.
The paint condition check
Intact, unblistered paint over an old stain usually means the drywall beneath it dried out on its own. Bubbling, peeling, or a chalky texture points to moisture that is still present under the surface.
What water damage from a roof leak costs
Water damage from a roof leak typically costs $300 to $12,000 to repair, with the total driven almost entirely by how far the water traveled before it was addressed, a contained ceiling stain versus insulation and framing that stayed wet for days. Jobs involving extensive structural drying or ceiling replacement across multiple rooms can run higher than that range.
 Cutting back to a clean, dry section rather than patching just the stained area prevents moisture wicking in from an unseen wet edge left behind the new drywall.
Response time is the single biggest lever a homeowner controls. A stain caught and contained within the first day almost always lands in the lowest bracket, while the same leak left dripping into open insulation for a week can push a job two full pricing tiers higher before a contractor ever arrives.
| Scenario | Typical cost | What drives the range |
|---|---|---|
| Small ceiling stain, caught early, no drywall replacement | $300–$800 | Drying and repaint only; no material removal needed |
| Ceiling drywall replacement, insulation unaffected | $500–$1,800 | Patch or full-panel drywall replacement plus paint |
| Attic insulation and roof deck sheathing affected | $1,500–$4,500 | Insulation removal and replacement, sheathing assessment |
| Multi-room spread or wall framing involvement | $4,000–$12,000+ | Larger drying footprint, opened wall cavities, extended equipment runtime |
| Ceiling collapse or major structural repair | $8,000–$20,000+ | Framing replacement, full ceiling reconstruction, extended reconstruction timeline |
These figures cover water damage restoration only, extraction, drying, and repair of interior materials. Roof repair itself is a separate cost handled by the roofer and isn't included in a restoration company's estimate. That same category, class, and room-based pricing structure holds true for water damage restoration cost nationally, regardless of whether a roof leak, burst pipe, or appliance failure is what let the water in.
Does insurance cover water damage from a roof leak?
Whether homeowners insurance covers water damage from a roof leak depends on what caused the leak, not on the fact that water came through the ceiling. Standard HO-3 policies distinguish between sudden, accidental damage and gradual deterioration from lack of maintenance, and a roof leak can fall on either side of that line depending on its origin.
 Exterior evidence like torn shingles or hail marks gives an adjuster a timestamped record of a sudden cause, which matters most when distinguishing a covered storm event from a gradual, excluded one.
Ice dam coverage is the most frequently disputed category on this list. Some carriers treat it as a weather-driven event and cover it outright, while others classify it as a preventable maintenance failure tied to inadequate attic insulation and deny the claim. Checking your policy's specific ice dam language before winter, rather than after a claim has already been filed, avoids finding out the answer at the worst possible time.
| Roof leak cause | Coverage | Why |
|---|---|---|
| Storm damage (wind, hail, fallen branch) | Usually covered | Sudden, external event that damaged an otherwise sound roof |
| Ice dam causing sudden backup | Often covered | Some policies exclude ice dams specifically; check your declarations page |
| Gradual shingle deterioration over years | Excluded | Treated as a maintenance failure, not a covered peril |
| Long-neglected flashing leak | Excluded | Delayed repair and lack of maintenance are standard exclusions |
| Failed roof past its expected service life | Often excluded or limited | Insurers may apply age-based depreciation or deny outright |
The practical distinction insurers apply is whether a reasonable homeowner could have prevented the damage through routine upkeep. A single storm that damages an otherwise well-maintained roof reads very differently to an adjuster than a leak that's been staining the same ceiling spot for two years. Photograph the roof damage itself, not just the interior stain, since exterior evidence of a sudden cause (broken shingles, a fallen limb, hail marks) strengthens a claim considerably. Filing mechanics, documentation requirements, and what to do if a claim is denied work the same way for homeowners insurance and water damage generally as they do for a roof leak specifically, since insurers don't apply a different claims process based on what let the water in.
Preventing water damage from a future roof leak
The most effective prevention is catching roof damage before it becomes an interior leak at all, through routine inspection rather than waiting for a ceiling stain to appear. A roof inspection after any major storm, and at least once a year otherwise, typically costs far less than even the smallest interior water damage repair.
 Continuous airflow from soffit to ridge keeps the roof deck cold and dry enough to prevent both ice dams in winter and condensation buildup in summer.
Attic ventilation matters more here than most homeowners realize, since keeping the roof deck uniformly cold is what determines whether a given snowfall produces an ice dam at all. Proper intake and exhaust ventilation keeps the roof deck cold enough in winter to prevent ice dams and dry enough in summer to avoid condensation-driven moisture buildup. The International Residential Code's attic ventilation requirements set a minimum ratio of vent area to attic floor area that most under-ventilated older homes fall short of.
A quick attic check after any suspected leak, even a small one, is worth the five minutes it takes. Looking at the insulation and sheathing from the access hatch can catch a developing problem before it reaches the ceiling below, often well before a stain would otherwise appear.
Plumbing, appliances, and drainage carry their own failure points beyond the roof, and water damage prevention as a whole works best as a room-by-room habit rather than a single annual roof check.
Frequently asked questions
How do I know if my roof leak has caused water damage?
A ceiling stain, sagging drywall, or a musty smell in the room below the roof means water has already reached your interior materials. By the time a stain is visible on the surface, the insulation and roof deck above it have usually been wet for longer than the stain suggests.
Should I put a bucket under a roof leak or drill a hole in the ceiling?
Both, if the ceiling is bulging. A bucket catches the drip, but a bulging section means water is pooling above the drywall faster than it can drain through the existing gap. Puncturing that spot with a screwdriver, aimed into a bucket, relieves the weight in a controlled way instead of letting the ceiling fail on its own.
How much does water damage from a roof leak cost to fix?
Most roof leak water damage runs $300 to $12,000, depending on whether the water stayed at the ceiling surface or spread into the attic and wall framing. A contained drywall patch sits at the low end; a job involving insulation replacement and structural drying runs several thousand dollars higher.
Does homeowners insurance cover water damage from a roof leak?
Sometimes. A sudden roof failure from a storm or fallen branch is typically covered under a standard HO-3 policy. A leak that developed slowly from aging shingles or flashing that was never repaired is usually treated as a maintenance issue and excluded.
Can I stay in the room while it's drying?
Yes, in most single-room ceiling cases, as long as the ceiling has been checked for structural safety and drying equipment can run undisturbed. Rooms with active mold growth, exposed insulation, or a still-unstable ceiling section should stay closed off until a technician clears them.
How long does it take to dry out water damage from a roof leak?
A contained ceiling area typically dries in 3 to 5 days with commercial equipment running continuously. Attic insulation and structural framing take longer, since insulation is usually replaced rather than dried and framing needs to reach a specific moisture threshold before drywall goes back up. Severity, material, and climate all shift that water damage restoration timeline further for cases beyond a single roof leak, sometimes by a week or more in either direction.
Will a roof leak always cause mold?
Not always, but the risk is high. Per EPA guidance, mold can begin colonizing wet materials within 24 to 48 hours, and most roof leaks go unnoticed well past that window before a stain appears. Fast extraction and drying are what prevent a water event from becoming a mold remediation project. Where that mold actually hides, and how mold from a roof leak gets removed once it's established, involves a different contractor and a different remediation standard, IICRC S520, than the water extraction and drying itself.
Can I choose my own restoration company, or do I have to use my insurer's recommended vendor?
You can choose your own. Insurers often suggest a preferred vendor for convenience and direct billing, but using them isn't required. Get your own estimate if you have concerns about scope or pricing, and confirm your chosen company still bills your insurer directly if that matters to you.
What if I can't find where the roof is leaking?
Call a roofer for a proper inspection rather than searching the roof yourself. The ceiling stain marks where water finally broke through, not necessarily where it got in, and pinpointing the real entry point usually takes attic access and a systematic check most homeowners aren't equipped to do safely.
Sam Hickerson is the founder of RestoreAdvisor and writes consumer guides on mold remediation, water damage restoration, inspection, testing, and home recovery. His work focuses on helping homeowners understand costs, risks, and when to call a professional. He draws on guidance from the EPA, CDC, IICRC, and other authoritative sources to make complex home issues easier to navigate.