
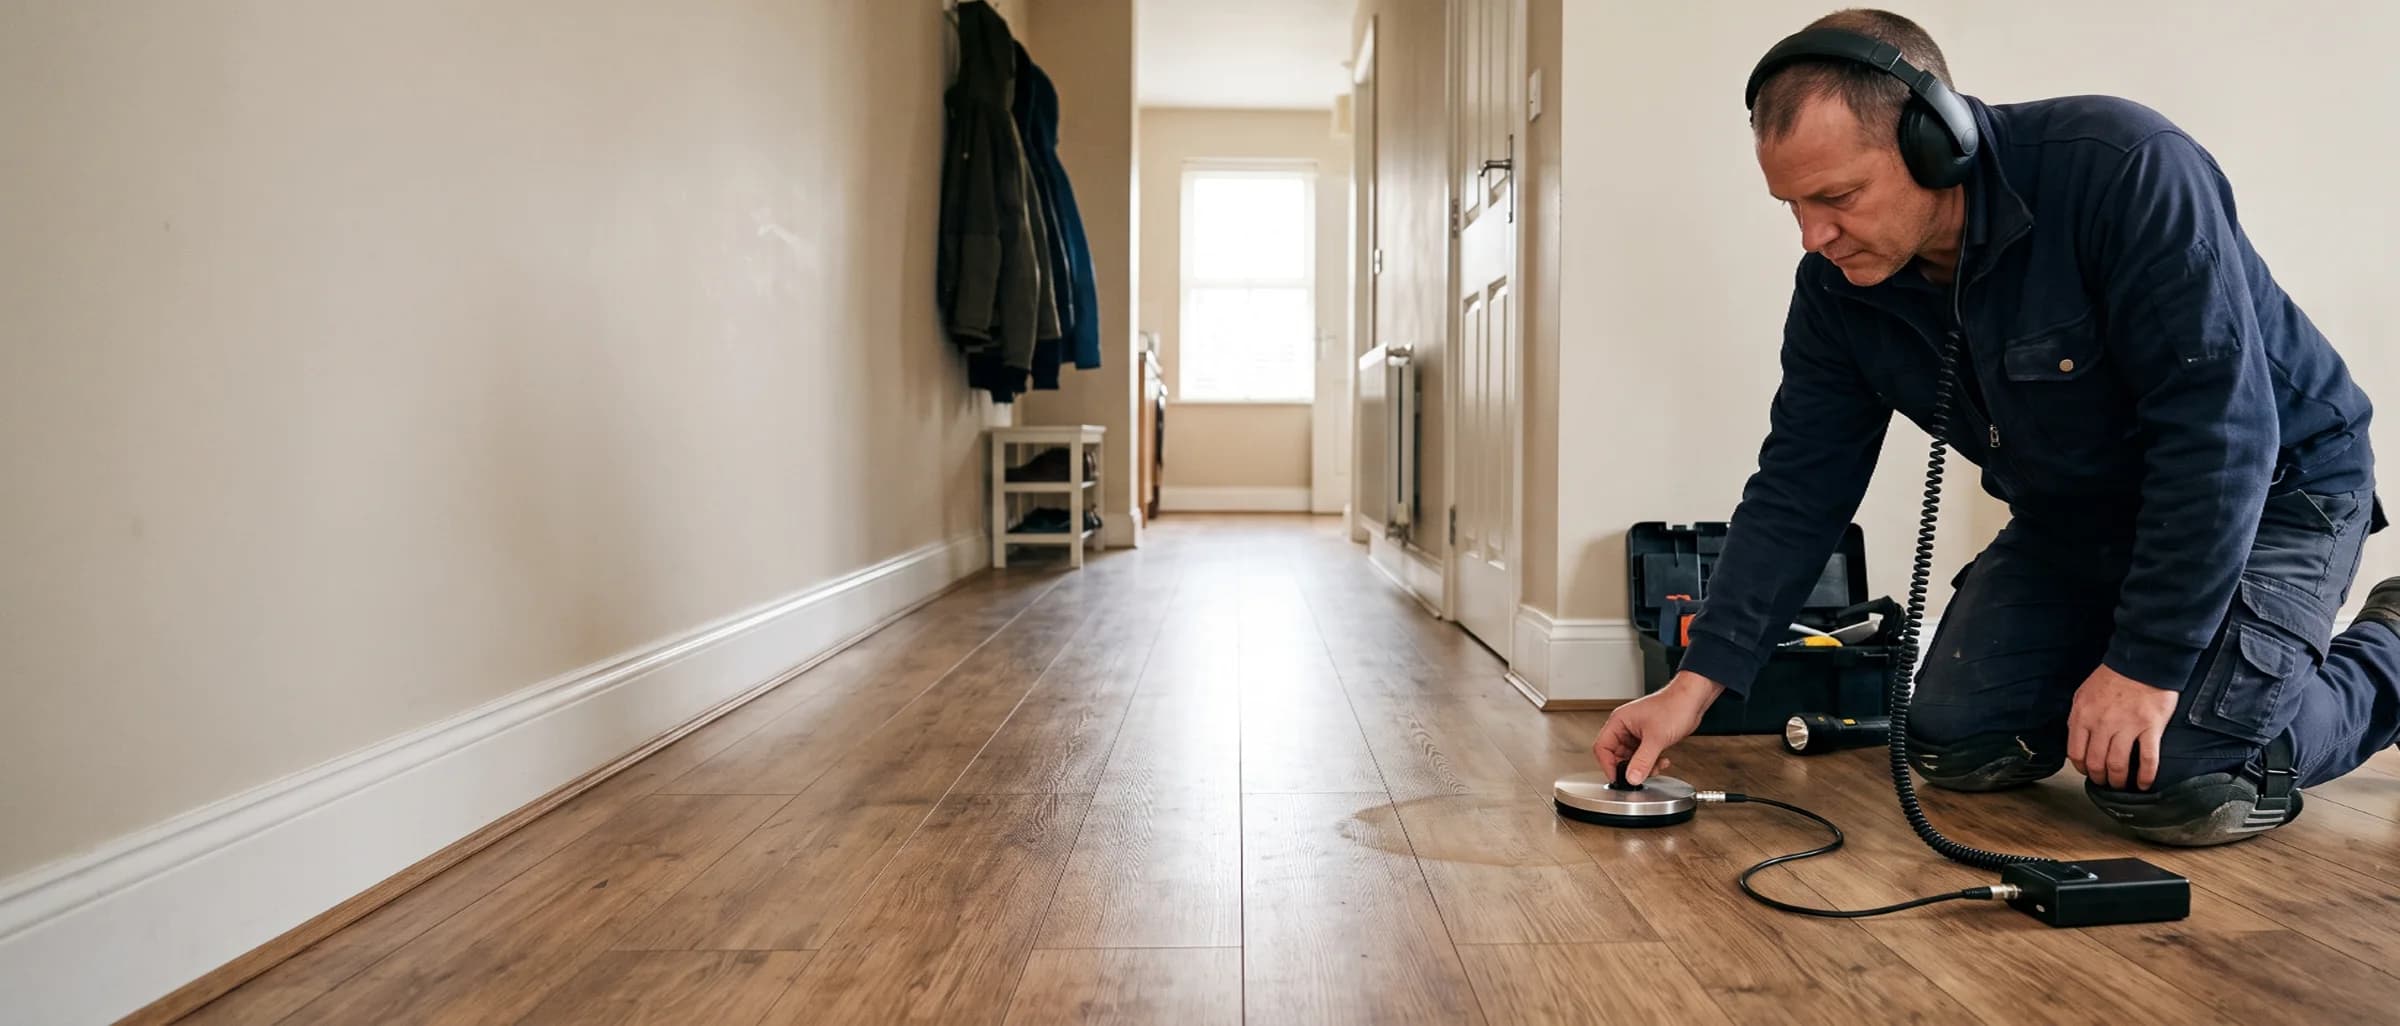

A rising water bill, a warm patch of flooring, or the sound of running water when every faucet in the house is off are usually the first clues a homeowner gets. None of those signs confirm a slab leak on their own, since the leak itself sits hidden under a concrete foundation. A slab leak is a leak in a hot or cold water supply line running beneath a home's slab foundation, and once confirmed it falls under the same IICRC S500 water classification and drying standards used for any other water intrusion in a home.
Most slab leaks start small and stay hidden for weeks or months before anyone notices, unlike a burst pipe that can flood a room within minutes. Confirming one takes a plumber with detection equipment rather than a visual check, and the repair itself is a plumbing job, separate from any water damage cleanup that follows once flooring or subfloor has been soaking. One insurance detail catches most homeowners off guard: a policy that pays to access the pipe under the slab often will not pay to repair the pipe itself.
Slab leaks only occur in homes built on a slab-on-grade foundation, not in homes with a basement or crawl space, where a similar leak is diagnosed and repaired differently. That foundation type now accounts for 73 percent of new single-family homes nationally, according to the National Association of Home Builders' analysis of Census Bureau construction data, which is part of why slab leaks have become a routine call for plumbers rather than a rare one.
Key insights
- Detection needs equipment, not a visual check. Plumbers confirm a slab leak with electronic, acoustic, or infrared detection tools, since the pipe sits under concrete and can't be inspected directly.
- Detection and repair are billed separately from cleanup. Detection typically runs $150 to $600, and repair method costs range from roughly $630 for a spot repair to $15,000 for a full repipe, before any water damage restoration cost.
- Insurance usually splits the claim in two. A standard HO-3 policy typically pays to tear out and access the slab if the leak is sudden and accidental, but not to repair the pipe itself.
- Slab leak water usually starts as Category 1. Under IICRC S500, water from a clean supply line starts as Category 1, though prolonged contact with soil under the slab can shift that classification.
- Mold risk begins fast once water surfaces. The EPA's 24 to 48 hour window for mold growth applies to a slab leak that has soaked flooring the same way it does to any other water event.
- The water rarely surfaces directly above the leak. Water under a slab follows the path of least resistance through soil and gravel, so the wet spot on the floor can sit several feet from where the pipe actually failed.
Signs of a slab leak
The clearest signs of a slab leak are a warm or damp spot on the floor, a sudden drop in water pressure, the sound of running water with every fixture off, and a water bill that rises without a change in usage. Any one of these is worth investigating, and two or more together are a strong indicator a plumber should confirm it.
 A warm patch that doesn't track with sunlight or a heating duct usually points to a hot water line leaking beneath the slab, one of the earliest signs that shows up before flooring or drywall takes visible damage.
Hot water line leaks tend to announce themselves first through a warm floor and a water heater that runs more often than usual, while a cold line leak is more likely to show up as pressure loss or a bill increase with no floor symptom at all. Most homeowners notice only one or two signs before calling a plumber, since a slab leak rarely produces every symptom on the list at once.
| Sign | What it typically means | How urgent |
|---|---|---|
| Warm spot on the floor | A hot water line leaking beneath that section of slab | Schedule detection within days |
| Sudden low water pressure | Water is escaping before it reaches the fixture | Schedule detection within days |
| Sound of running water with everything off | Active flow somewhere in the supply lines | Confirm with a meter test the same day |
| Unexplained rise in the water bill | Continuous water loss, even from a small leak | Schedule detection within a week |
| Damp or discolored flooring near a slab edge | Water has surfaced through the slab or a control joint | Call a plumber promptly; water damage may already be spreading |
| Musty smell or visible mold near baseboards | Water has been present long enough for mold growth | Treat as active; call both a plumber and a restoration company |
| Cracks in flooring, walls, or the foundation | Water eroding the soil support beneath the slab over time | Treat as urgent; structural risk increases the longer it runs |
These signs sit alongside the broader set of signs of water damage that apply to any cause, though a slab leak tends to announce itself through the floor and the utility bill rather than a ceiling stain or a musty closet. Catching two or more of them early is usually the difference between a $600 detection call and a repair that also involves flooring replacement.
Is it actually a slab leak
Several household problems mimic a slab leak closely enough to cause confusion: a slow drain leak, radiant floor heating, condensation, or an irrigation line running near the foundation. A short water meter test combined with a look at where the symptom appears is usually enough to narrow it down before calling a plumber.
 A leak indicator that keeps spinning with every fixture in the house off confirms water is flowing somewhere in the system, the fastest way to rule out radiant heat, condensation, or a nearby drain leak before calling a plumber.
The water meter test itself takes about half an hour: shut off every fixture and appliance, note the meter's current reading or leak indicator, then check again without using any water. If the reading moves or the indicator spins with everything off, water is flowing somewhere in the system, which turns the question from whether something is wrong into where to look.
| Symptom | Could also be | How to tell them apart |
|---|---|---|
| Warm spot on the floor | Radiant floor heating, sun through a window, a duct run below | Radiant heat tracks with the thermostat and stays within a mapped zone; a slab leak stays warm at all times and doesn't follow a duct or window pattern |
| Damp or musty carpet | A slow drain leak under a sink, high indoor humidity, condensation from an AC line | A drain leak stays close to the fixture it serves; a slab leak can surface several feet away from any plumbing fixture |
| Rising water bill | A running toilet, an outdoor irrigation leak, a dripping fixture | Shut off the main valve and watch the meter; if it still moves with the house isolated, the leak is inside the plumbing system, which includes the under-slab lines |
| Cracks in flooring or walls | Normal foundation settling, seasonal soil movement | Cracks paired with a warm or damp spot, or a new crack that follows a water bill spike, point toward water undermining the soil beneath the slab |
What causes a slab leak
Slab leaks come from five main causes: pipe corrosion, abrasion against soil or gravel, high water pressure, poor original installation, and pipe age. Copper supply lines, the material most commonly run beneath a slab in homes built before PEX became standard, are especially prone to the first two.
 Corrosion thins a copper supply line from the outside in, and a pipe that fails this way rarely stops at one weak point, which is why a plumber often recommends a full repipe rather than a single spot repair.
Corrosion and abrasion account for most slab leaks in older homes, while poor installation and water pressure issues show up more often in homes built within the past 15 to 20 years. Knowing which of these is likely at play helps a plumber gauge during detection whether to expect one isolated leak or a system nearing the end of its usable life.
| Cause | How it happens | Most common in |
|---|---|---|
| Corrosion | A chemical reaction between the copper pipe and surrounding soil, water, or oxygen thins the pipe wall from the outside in | Homes with copper supply lines older than 20 to 25 years |
| Abrasion | Pipe rubbing against gravel, rebar, or concrete as soil shifts slightly with seasonal moisture changes slowly wears through the pipe wall | Areas with expansive clay soil or significant seasonal temperature swings |
| High water pressure | Pressure above the level residential plumbing is built to handle stresses joints and thin spots in aging pipe | Homes on a municipal system without a pressure-reducing valve |
| Poor original installation | Pipe laid without adequate sand bedding, or with a joint routed under the slab instead of around it | Older construction or fast-build developments |
| Pipe age | Copper supply lines commonly reach the end of their service life around 40 to 70 years, depending on water chemistry | Any home approaching or past that range |
Water pressure above 80 psi is the one cause a homeowner can check directly with a hose-bib gauge, since the International Residential Code caps static residential pressure at 80 psi for exactly this reason. A pressure-reducing valve installed at the main line brings excessive pressure down and reduces stress on every pipe in the house, not just the ones under the slab.
The cause a plumber identifies often shapes the repair recommendation more than the size of the leak does. A pipe corroding from water chemistry rarely fails in only one spot, while abrasion tends to concentrate wear at a single point of contact with gravel or rebar. Homes built before 1960 sometimes have galvanized steel supply lines instead of copper, and those built between the 1970s and 1990s occasionally used polybutylene, a plastic pipe with its own separate failure pattern; a plumber identifies which material is present before recommending a repair method, since a galvanized or polybutylene system often points toward a full repipe rather than a spot fix.
Corrosion, abrasion, and pipe age develop slowly and out of sight, which is what separates a slab leak from a burst pipe: a burst pipe usually fails suddenly from freezing, a pressure spike, or a fitting failure above the slab and announces itself immediately, while a slab leak can run for weeks before anyone notices. That difference in urgency is also why a slab leak claim tends to draw more scrutiny from an insurer than a burst pipe claim, since there's rarely a single dramatic moment of failure to point to.
Pressure-side vs. drain-side slab leaks
A slab leak can occur on either side of a home's plumbing system: the pressure side, which carries fresh water to fixtures, or the drain side, which carries wastewater away. The two produce different signs, carry different contamination risk, and call for a different response.
 Drain-side leaks carry Category 3 contamination risk from the moment they surface, while pressure-side leaks start as Category 1 and only shift classification if the water sits under the slab for an extended period.
Pressure-side leaks are far more common, since a constantly pressurized line loses water and creates symptoms even when no one is using a fixture. A drain-side leak, by contrast, often stays quiet until someone runs water, since wastewater only moves through the line when a sink, tub, toilet, or appliance drains.
| Attribute | Pressure-side leak | Drain-side leak |
|---|---|---|
| Water source | Continuous, pressurized supply line | Wastewater draining after use, not constant |
| Typical signs | Warm floor spot, low pressure, rising water bill, sound of running water | Sewage odor, gurgling drains, water appearing only after using a fixture |
| Water damage category | Category 1 (clean), can shift over time | Category 3 (contaminated) from the start |
| How it's usually found | Water meter test, detection equipment | Odor or a drain backing up, sometimes before equipment is needed |
Drain-side slab leaks carry the same contamination profile as any other sewage backup, since wastewater sitting under a foundation is treated as Category 3 water from the moment it's found, regardless of how it got there. A plumber confirms which side is affected using the same detection equipment, though a drain-side leak sometimes reveals itself through smell alone before any equipment is needed.
Repair approach differs too: a pressure-side leak is fixed with a spot repair, rerouting, or a full repipe, while a drain-side leak more often requires trenchless pipe lining or full drain line replacement, since a compromised sewer line under a slab is rarely patched in place the way a supply line can be. Cost typically runs higher on the drain side as well, since sewer line access and disposal of contaminated soil add steps a clean-water repair doesn't require.
Where slab leak water travels
Water escaping under a slab doesn't rise straight up through the concrete above the leak. It follows the path of least resistance through the gravel and soil bed beneath the foundation, which means the wet spot or crack that surfaces can sit several feet from the actual failure point.
 Water follows the path of least resistance through the gravel bed beneath a slab, which is why the wet spot or crack a homeowner notices often sits several feet from where the pipe actually failed.
Left running, that migrating water erodes the soil supporting the slab, and a foundation that loses uniform support underneath it is what produces the diagonal cracking, uneven flooring, sticking doors, and in extreme cases a small sinkhole near the foundation that homeowners eventually notice. The longer the leak runs, the larger the area a plumber has to search before pinpointing it, which is the main reason detection equipment matters more here than on almost any other water damage cause.
Once water has surfaced, it's typically assessed and classified the same way any other water intrusion is, using the water damage categories system to determine contamination level and drying approach. That classification directly shapes how a restoration company scopes the drying and demolition work, not just which PPE a technician wears on site.
A plumber's detection report typically notes how long the leak appears to have been active, based on soil saturation and pipe condition, information a restoration company uses to decide how deep the drying and demolition needs to go. A leak active for several weeks usually means checking moisture levels in adjacent rooms as well, not just the one where the wet spot first appeared.
Left unaddressed for months, that quiet erosion is what turns a routine plumbing repair into a full water damage restoration project involving flooring, drywall, and in severe cases foundation stabilization. Confirming and repairing the leak within the first few weeks of noticing a sign is usually what keeps it a plumbing job rather than a structural one.
What to do if you suspect a slab leak
Responding to a suspected slab leak means confirming it with a water meter test, shutting off the main valve only if the flow is active, and getting a plumber with detection equipment on site before any repair decision gets made. Acting in that order avoids unnecessary demolition and preserves the documentation an insurer will ask for later.
 Documenting the water meter reading and any visible signs before calling gives the plumber a starting point and creates a record an insurer may request later.
Check the water meter
Turn off every fixture and appliance, then watch the water meter's leak indicator for movement. Any movement with everything off confirms water is flowing somewhere in the system, including possibly under the slab.
Shut off the main valve if the leak is active
If a warm or damp spot is spreading, a floor is visibly wet, or the meter test confirms ongoing flow, close the main shutoff valve to stop water reaching the failed section while you arrange for a plumber. Leave any affected fixtures alone rather than running them to test further.
Document the visible signs before anything is touched
Photograph warm or damp flooring, cracks, discoloration, and the water meter reading, and note the date you first noticed each one. This record supports both the plumber's diagnosis and any insurance claim that follows.
Call a licensed plumber or leak detection specialist
A slab leak needs a plumber with electronic or acoustic detection equipment to locate the failure point before any repair decision gets made, not a general contractor or a guess based on where the floor feels warm. Ask specifically whether they perform slab leak detection themselves or subcontract it, since not every plumbing company keeps that equipment in house.
Bring in a water damage restoration company if flooring or drywall is already wet
If water has been sitting long enough to soak carpet, laminate, or drywall, a restoration company can start extraction and drying as part of an emergency water damage restoration response while the plumber locates and repairs the pipe, cutting the window for mold growth before it starts. The two companies typically coordinate directly rather than working one after the other.
What not to do
The most common mistakes are prying up flooring before a plumber has located the leak, dismissing a warm floor spot as sunlight, and waiting for an insurance adjuster before starting mitigation. Avoiding these three missteps keeps the eventual repair simpler and keeps any insurance claim intact.
 The wet spot on top rarely sits directly above the pipe break underneath, so cutting at the stain itself is a common way to open the wrong section of floor.
Don't pry up flooring or cut into the slab yourself
Breaking tile, hardwood, or concrete before a plumber has pinpointed the leak often means cutting in the wrong spot, since the wet area on top rarely sits directly above the failure underneath. It also complicates an insurance claim if the insurer later disputes whether the damage was caused by the leak or by the demolition.
Don't dismiss a warm spot as sunlight or a heating vent
A consistently warm patch of flooring is worth a plumber's look rather than a guess based on how the floor feels, since a hot water line leak is one of the more common slab leak patterns and a short water meter check settles the question either way. Waiting to run that check costs nothing; waiting to act once it's confirmed does, since every week the leak runs adds to both the repair cost and the water damage underneath it.
Don't wait for the insurance adjuster before mitigating
Most policies expect the homeowner to take reasonable steps to limit further damage once a leak is discovered, and delaying mitigation to wait for adjuster approval can itself become grounds for a reduced payout. Photograph everything first, then start the plumber and restoration process using the water damage restoration checklist as a sequence to follow rather than relying on memory alone.
How professionals detect a slab leak
Professional slab leak detection relies on specialized equipment, electronic leak detection, acoustic listening, infrared thermal imaging, or pressure testing, rather than a visual inspection, since the pipe and the leak point sit under concrete and soil that can't be seen directly. Plumbers typically combine two of these methods depending on the suspected leak location and the home's plumbing layout.
 Infrared imaging maps temperature differences on the slab surface, making it especially effective for locating a hot water line leak before anyone opens the floor.
Most plumbers start by narrowing the search area using whatever signs are already present, a warm floor spot, a room where sound is loudest, or the fixture nearest a pressure drop, since scanning an entire slab blind takes considerably longer than confirming a suspected zone first. This is also why documenting exactly where a warm spot or sound was noticed matters before the plumber arrives.
| Method | How it works | Best for |
|---|---|---|
| Electronic leak detection | Sends a signal through the pipe and traces it with a receiver to locate a break in the line's continuity | Precisely locating a leak once the general area is known |
| Acoustic listening | Amplifies the sound of escaping water through the slab with sensitive microphones | Confirming an active leak and narrowing its location in quiet conditions |
| Infrared thermal imaging | Detects temperature differences on the slab surface caused by a hot water line leak or moisture buildup | Hot water line leaks and mapping the moisture footprint before excavation |
| Pressure testing | Isolates sections of the plumbing system and monitors pressure loss to confirm which line is leaking | Confirming a leak exists and which supply line, hot or cold, is affected |
Detection typically costs $150 to $600 and takes one to two hours for a straightforward case, though a large home or a leak with an ambiguous location can take longer. Most plumbers combine two methods rather than relying on one, using pressure testing to confirm which line is affected and acoustic or electronic detection to pinpoint the exact spot before anyone opens the floor.
The water damage classes system comes into play once detection confirms how much water has spread, since class measures drying difficulty and equipment needs rather than the leak's location, and a restoration company uses that class rating alongside the plumber's detection findings to plan extraction and drying. A small, recently discovered wet area typically dries in a few days with standard equipment, while water that has migrated under multiple rooms takes longer and needs more air movers and dehumidifiers.
Slab leak repair methods
Once a plumber has located the leak, four repair methods cover most situations: spot repair, pipe rerouting, full repiping, and, less commonly, tunneling to access the pipe from outside the foundation. Which one applies depends on the pipe's condition, the leak's location, and whether other sections of the same line show similar wear.
 A spot repair accesses only the failed section of pipe through a small opening, the least disruptive option but one that only addresses the section that failed, not the rest of the line.
A plumber typically presents the recommended method alongside at least one alternative once detection is complete, since a homeowner weighing a $600 spot repair against a $10,000 repipe deserves that trade-off in writing before agreeing to either. Warranty length is one of the clearest signals of confidence in a method: a spot repair warrantied for only a year or two suggests the plumber expects the rest of the system to need attention eventually.
| Method | What it involves | Typical cost | Best for |
|---|---|---|---|
| Spot repair or epoxy injection | Accessing the single failure point through a small cut in the slab and patching or lining the pipe | $500–$2,500 | An isolated leak in an otherwise sound pipe |
| Pipe rerouting | Abandoning the damaged under-slab section and running new line through walls or the attic instead | $2,000–$5,000 | A leak in a hard-to-reach spot, or a pipe with limited life left |
| Full repipe | Replacing all under-slab supply lines with new pipe routed above the slab | $4,000–$15,000 | Older copper systems with multiple leaks or a history of repeat failures |
| Tunneling | Excavating from outside the foundation to reach the pipe without cutting the interior floor | $4,000–$10,000+ | Leaks under a finished floor the homeowner wants to preserve |
Spot repair is the least disruptive option and the least expensive up front, but it only addresses the section that failed, and a copper system corroding from water chemistry or soil conditions often develops another leak elsewhere within a few years. A plumber who has just located one leak can usually tell from the pipe's overall condition whether a spot repair is likely to hold or whether rerouting or a full repipe is the better long-term call.
None of these repair methods are realistic as a DIY project, unlike the surface water damage that often follows a slab leak. A homeowner can safely run through the same DIY water damage cleanup steps used for any other cause once the plumber has stopped the leak, but locating and repairing the pipe itself requires licensed plumbing work and, in most cases, permitted excavation.
Who to call for a slab leak
A slab leak typically involves two separate calls: a licensed plumber or leak detection specialist to find and fix the pipe, and a water damage restoration company if the leak has already soaked flooring, subfloor, or drywall. The two work in parallel rather than in sequence when both are needed.
 Starting with the plumber first lets detection determine the leak's severity and repair scope before a restoration company is brought in, if one is needed at all.
Start with the plumber first regardless of whether a restoration company ends up involved, since detection determines the leak's severity and repair scope before anything else can be planned. A non-emergency slab leak typically gets a plumber on site within 24 to 48 hours of the call, faster if water is actively spreading, which leaves enough time to also line up a restoration company if the visible damage warrants one.
Vetting either company matters here as much as it does for any other water event: check for IICRC certification on the restoration side and a state plumbing license on the repair side, and use the same questions you'd ask when choosing a water damage restoration company for storm or appliance damage. A company that hesitates to answer basic licensing or certification questions on the phone is worth skipping regardless of how fast they can schedule.
Ask each company directly whether they coordinate with the other, since a restoration company that starts drying before the leak is actually fixed is working against itself, and a plumber who repairs the pipe without documenting the water damage extent leaves a gap in the insurance file. A single point of contact managing both, common with larger restoration companies that also handle mitigation-only jobs, can simplify this handoff.
On the restoration side, the water damage restoration certifications that matter most are IICRC's WRT for general water restoration and, for larger jobs, ASD for structural drying; either credential confirms the technician has been trained on classification and drying methodology rather than picking it up on the job. Checking a technician's card or the IICRC registry directly takes less than a minute and confirms the credential is still current.
Slab leak repair cost
Slab leak repair costs $630 to $4,400 for most homes when spot repair or rerouting resolves the leak, and $4,000 to $15,000 when a full repipe is needed, not including any water damage restoration cost from flooring or drywall that was already wet. Detection adds $150 to $600 on top of the repair figure, and most plumbers apply that fee toward the job if you hire them for the repair.
 A written estimate that separates detection, repair method, and any water damage cleanup gives a homeowner a clear basis for comparing quotes or filing an insurance claim.
That upfront cost difference between a spot repair and a full repipe, roughly $3,000 to $10,000, is worth discussing directly with the plumber rather than defaulting to the cheaper option. Some plumbers offer financing or a payment plan for the larger repipe cost, which can make the long-term option more comparable to paying for a spot repair now and a second repair later.
| Scenario | Detection | Repair | Cleanup |
|---|---|---|---|
| Caught early, no visible flooring damage | $150–$600 | $500–$2,500 (spot repair) | None |
| Moderate leak, small area of wet flooring | $150–$600 | $2,000–$5,000 (rerouting) | $500–$2,000 |
| Long-running leak, multiple rooms affected | $150–$600 | $4,000–$15,000 (full repipe) | $2,000–$8,000+ |
| Structural damage from soil erosion | $150–$600 | $4,000–$15,000+ | $5,000–$20,000+ |
Water damage cleanup here follows the same water damage restoration cost structure used for any other cause, priced by square footage, material, and how long the water has been sitting rather than by the leak's source. A restoration company estimating the cleanup portion of a slab leak job prices it exactly the same way it would price a burst pipe or an appliance leak of comparable size.
Tunneling adds cost over spot repair but preserves finished flooring the homeowner doesn't want cut into, which is why it's more common on tile or hardwood than on carpet, where cutting the slab underneath costs little extra to repair afterward. For the cleanup portion specifically, cost runs roughly $3 to $7.50 per square foot for mitigation and more where repairs involve flooring replacement, once the affected area is known.
Does insurance cover a slab leak
A standard HO-3 homeowners policy typically pays to tear out and access the slab to reach the leak if the cause is sudden and accidental, but it typically does not pay to repair or replace the leaking pipe itself. That split confuses more homeowners than any other part of a slab leak claim, since it means a single event can be partly covered and partly not.
 A standard policy typically covers tearing out and accessing the slab but not the pipe repair itself, a split worth confirming directly with an insurer before assuming either way.
Insurers draw the sudden-and-accidental line the same way they do for any other water claim: a pipe that failed abruptly from a documented cause, like a pressure spike or a defect, tends to qualify, while a leak attributed to gradual corrosion, wear, or lack of maintenance typically gets denied as a maintenance issue. Because most slab leaks develop slowly, this is the single most common reason a claim gets disputed.
The general homeowners insurance and water damage rules on sudden-and-accidental coverage, documentation, and the claims process apply here the same way they do for any other cause, and a homeowner filing a slab leak claim should expect to provide the plumber's detection report as evidence of when and how the leak occurred. Insurers weigh that report heavily, since it's usually the only third-party documentation of whether the leak was genuinely sudden or had been developing for some time.
A specific endorsement called Foundation Water Coverage, sold as an add-on in states with expansive or shifting soil, extends coverage to include the pipe repair itself and foundation stabilization if the leak caused soil movement, neither of which a standard policy includes. Homeowners in Texas, California, and other slab-heavy, soil-shifting regions are the most common buyers of this endorsement, and it's worth a call to your agent before a leak happens rather than after.
Renter, landlord, and condo liability
Responsibility for a slab leak typically follows who owns the plumbing system that failed: a landlord in a single-family rental, and either the unit owner or the HOA in a condo, depending on where the leak occurred relative to the building's shared systems. A renter is rarely responsible for the repair itself, though personal belongings damaged by the leak usually fall to renters insurance rather than the landlord's policy.
In a single-family rental, the landlord is responsible for the plumbing system itself under most state habitability laws, and a tenant who reports a suspected slab leak promptly is generally not liable for resulting damage even if the leak had been developing for some time before anyone knew. Delaying that report, on the other hand, can shift some responsibility back to the tenant if the delay is shown to have worsened the damage.
Condo and townhome ownership complicates this further, since the slab itself is often part of the building's shared structure rather than any single unit's property. Most master policies cover the building's structure, including the slab, while the unit owner's HO-6 policy covers everything from the drywall in, which means a slab leak claim in a condo can involve two separate policies and two separate adjusters before it's resolved.
Preventing a slab leak
The most effective prevention steps are installing a pressure-reducing valve if household pressure runs above 80 psi, scheduling a plumbing inspection on homes over 20 years old, watching the water bill for unexplained increases, and installing a whole-home leak detection sensor. None of these prevent a leak with certainty, since soil movement and pipe age are largely outside a homeowner's control, but they meaningfully reduce the odds and shrink the damage when a leak does occur.
 Residential water pressure above 80 psi accelerates wear on plumbing joints, and a fifteen-dollar gauge confirms your reading in under a minute.
Install or test a pressure-reducing valve
Residential water pressure above 80 psi accelerates wear on every joint and thin spot in a plumbing system, and a valve installed at the main line brings pressure down to a safer 50 to 70 psi range. A hose-bib pressure gauge, sold at any hardware store, confirms your current pressure in under a minute.
Schedule a plumbing inspection on homes over 20 years old
Copper supply lines under a slab don't announce wear the way an above-slab pipe does, so a periodic inspection, including a pressure test, catches thinning pipe before it fails. This matters most in homes with the original 1980s or 1990s copper system still in place.
Watch the water bill for unexplained increases
A jump in usage with no corresponding change in household habits is often the earliest and cheapest-to-catch sign of a developing leak. Comparing month over month rather than glancing at the total makes a small increase easier to spot.
Install a whole-home leak detection sensor
A flow-based sensor at the main line learns normal water usage and can alert a homeowner, or shut the water off automatically, when it detects continuous flow that doesn't match a known fixture running. Several homeowners insurance carriers offer a premium discount for this type of device, which can offset part of the installation cost.
Address drainage and grading issues near the foundation
Water pooling against the foundation from poor grading or a clogged gutter system increases soil movement near the slab, one of the mechanical stresses that contributes to pipe abrasion over time. Redirecting downspouts and confirming the ground slopes away from the house addresses this at minimal extra cost.
These steps sit alongside the broader water damage prevention system that covers plumbing, appliances, and drainage across the whole house, and a homeowner already following that routine has usually addressed the pressure and drainage factors that make a slab leak more likely in the first place. None of it requires major renovation, just a handful of inexpensive checks folded into a normal home maintenance schedule.
Frequently asked questions
How do you know if you have a slab leak?
The clearest signs are a warm or damp spot on the floor with no obvious source, unexplained low water pressure, the sound of running water with every fixture off, and a rising water bill with no change in usage. Two or more of these together, confirmed with a water meter test, are enough reason to call a plumber for detection.
Can a slab leak fix itself?
No, a slab leak never fixes itself. The pipe continues to corrode or wear at the same spot, and the leak typically gets larger over time rather than sealing on its own.
Is a slab leak an emergency?
Not usually in the way an active flood is, but it should be treated with urgency. A slab leak rarely floods a room the way a burst pipe does, but the longer it runs, the more it costs to repair and the more likely it becomes to cause structural or mold damage, consistent with the EPA's 24 to 48 hour mold-risk window once water has surfaced.
What does a slab leak sound like?
It sounds like running water, hissing, or a faint trickle audible when every fixture in the house is off, sometimes loudest near a wall or floor close to the affected pipe. Not every slab leak is audible, especially a small or slow one, which is why a water meter test catches leaks a homeowner can't hear.
How much does it cost to fix a slab leak?
Most slab leak repairs cost $630 to $4,400, covering detection and either a spot repair or pipe rerouting. A full repipe of an aging system runs $4,000 to $15,000, and any water damage cleanup from flooring or drywall that was already wet is priced separately, following the same water damage restoration cost per square foot range used for any other cause.
Does homeowners insurance cover a slab leak?
Partially, in most cases. A standard policy typically covers tearing out and accessing the slab if the leak was sudden and accidental, along with the resulting water damage, but it typically excludes the cost of repairing the pipe itself, consistent with NAIC's consumer information on homeowners coverage.
What's the difference between a slab leak and a burst pipe?
A slab leak is a slow, hidden leak in a supply line running under a concrete foundation, while a burst pipe is a sudden, usually visible failure above the slab. A slab leak can run for weeks before anyone notices; a burst pipe typically floods a room within minutes.
How long does slab leak repair take?
Detection takes one to two hours in most cases, and the repair itself takes anywhere from a few hours for a spot repair to two to four days for a full repipe. Any water damage restoration needed afterward runs on its own timeline, typically three to seven days for drying.
Can you ignore a slab leak?
No, ignoring a slab leak is one of the more expensive mistakes a homeowner can make. Continued water loss under the foundation erodes the soil supporting the slab, and what starts as a $600 detection call and a few hundred dollars in repair can turn into structural repair, full flooring replacement, and mold exposure for sensitive household members if left unaddressed for months, consistent with CDC information on mold growth.
Will a slab leak always show up on the water bill?
Not always, especially for a small or slow leak. A pinhole leak losing only a gallon or two per day may not move the bill enough to notice right away, which is why a warm floor spot, the sound of running water, or a routine water meter test catch leaks the bill alone might miss.
What should I ask a plumber before hiring them for a slab leak repair?
Ask which detection method they'll use, whether the quote includes both detection and repair, and whether they carry a warranty on the repair. Many of the same questions apply here as the broader questions to ask a water damage restoration company list, particularly around licensing, insurance, and getting the scope in writing.
Do I have to disclose a past slab leak when selling my home?
In most states, yes. Disclosure laws generally require sellers to report known material defects, including a past slab leak, even after it's been repaired, though the exact requirements vary by state. Keeping the plumber's detection report, repair invoice, and any insurance claim documentation makes that disclosure straightforward and can reassure a buyer the repair was done properly.
Will the same section of pipe leak again after repair?
Sometimes, depending on the repair method chosen. A spot repair fixes only the failed section, so if the underlying cause, corrosion or abrasion, affects the rest of the line, a new leak elsewhere is possible within a few years. A full repipe removes that risk for the replaced sections, which is why an older home with one confirmed leak often gets a repipe recommendation rather than a series of spot repairs.
Sam Hickerson is the founder of RestoreAdvisor and writes consumer guides on mold remediation, water damage restoration, inspection, testing, and home recovery. His work focuses on helping homeowners understand costs, risks, and when to call a professional. He draws on guidance from the EPA, CDC, IICRC, and other authoritative sources to make complex home issues easier to navigate.