
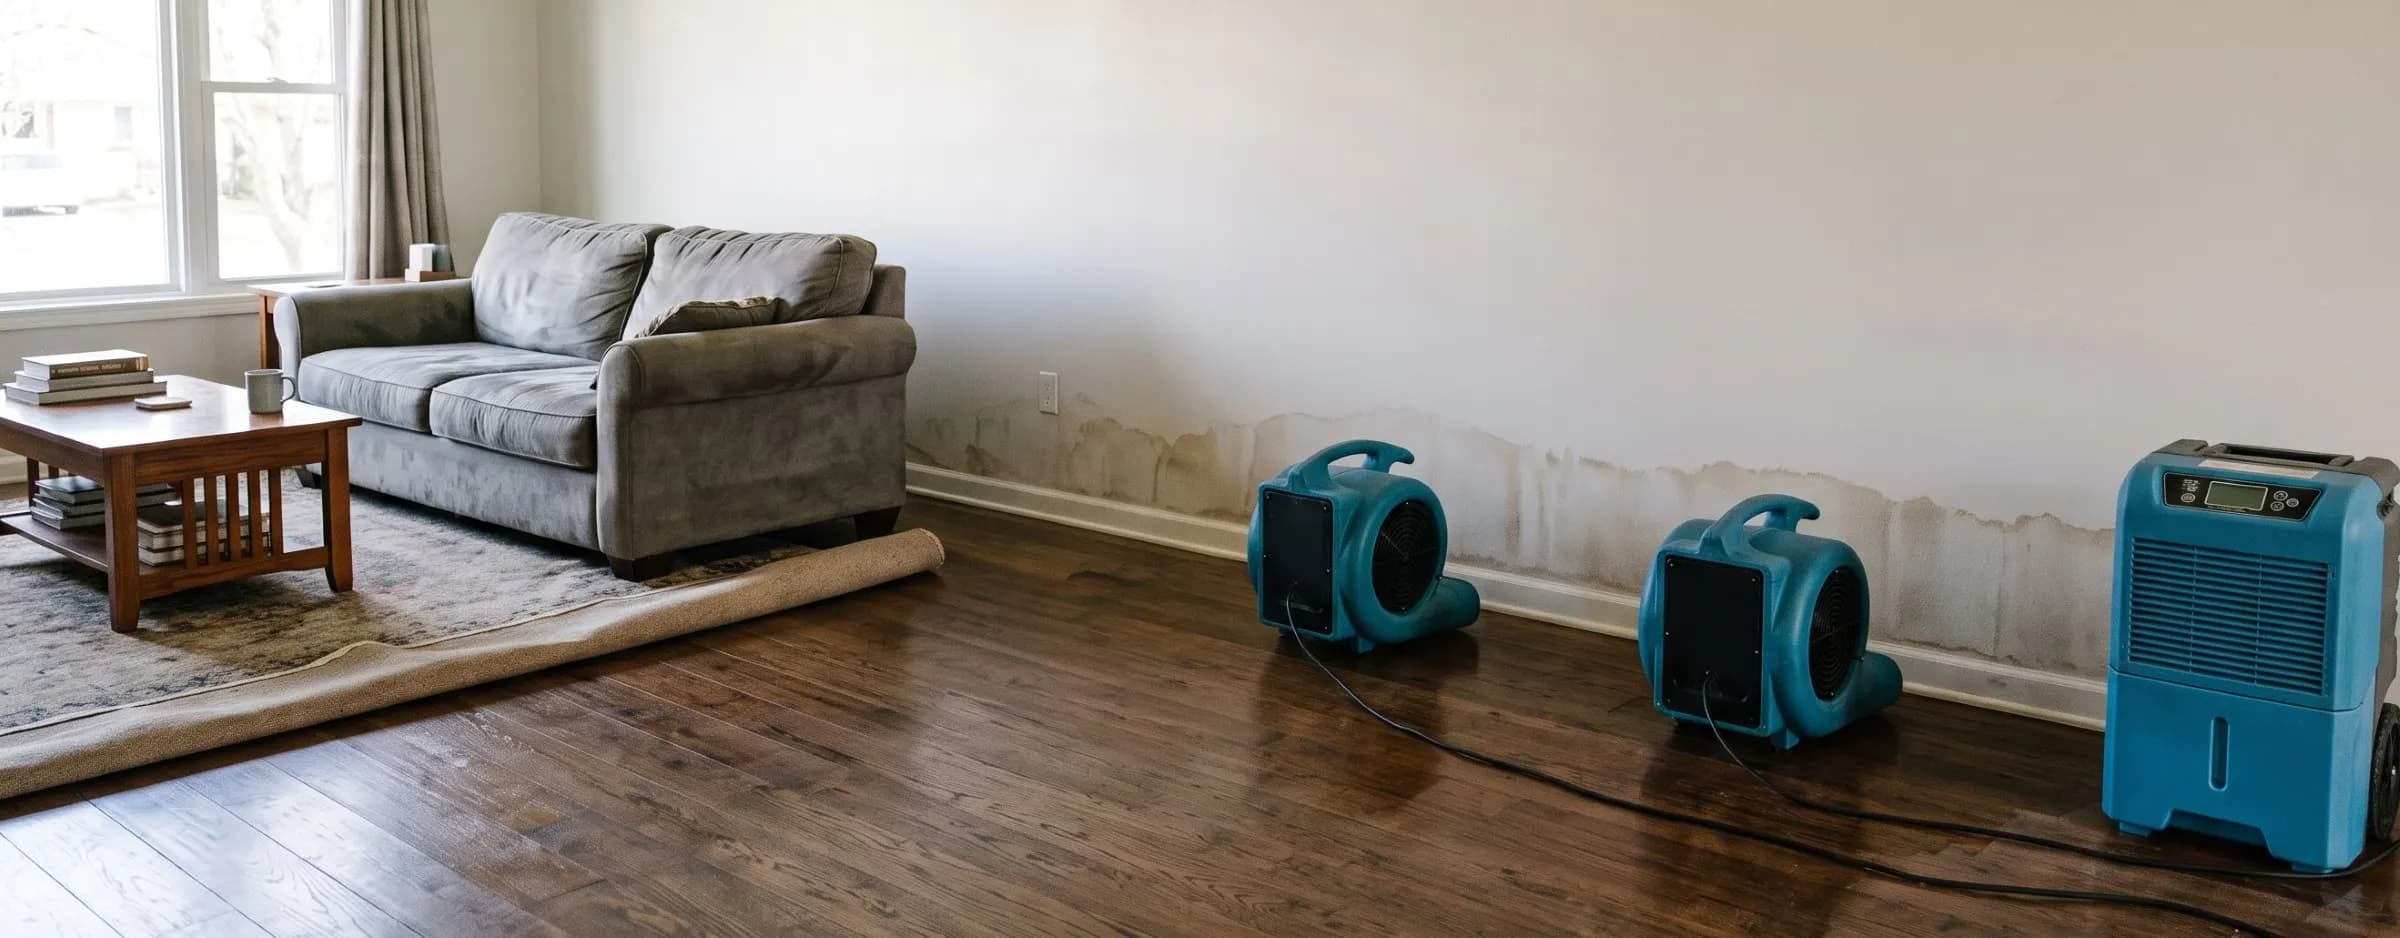

Water damage restoration does not end once standing water is gone. The materials left behind, drywall, subfloor, framing, insulation, still hold moisture that can warp wood, break down drywall, and feed mold within the EPA's 24 to 48 hour window if it is not pulled back out. The structural drying process is the phase of the job built specifically to solve that.
Under ANSI/IICRC S500, structural drying is the controlled use of airflow, dehumidification, and temperature to remove moisture from a building's framing, subfloor, drywall, and other structural materials while they stay in place, rather than by demolition and replacement. Knowing that science, how a drying chamber gets set up, and what a normal timeline and cost look like makes it easier to follow a technician's plan or check a contractor's proposed approach against the standard.
Key insights
- Drying is a three-part system. Airflow pulls moisture out of wet materials, dehumidification removes that moisture from the air, and temperature control speeds the whole process.
- Category and class set the equipment count. A single Class 1 room might need one air mover and a small dehumidifier, while a Class 4 loss with saturated framing needs specialty injection equipment and several days longer.
- Most jobs run 3 to 5 days. That timeline assumes equipment is sized correctly and running continuously from day one.
- Drying is confirmed by comparison, not a fixed number. A material is considered dry once its moisture reading matches an unaffected reference point in the same room.
- Underequipping is the most common mistake. Too few air movers or an undersized dehumidifier extends drying time and raises the chance of secondary damage like mold or warped flooring.
- Typical equipment cost runs $500 to $8,000, scaling with square footage, water category, and how many days the equipment has to run.
What is structural drying?
Structural drying is the process of removing moisture from a building's framing, subfloor, drywall, and other structural or semi-structural materials using controlled airflow, dehumidification, and temperature, rather than demolition and replacement. It is distinct from water extraction, which removes standing and surface water, and from repair, which replaces materials that could not be dried.
 A wall reading 24 percent moisture can look completely dry to the eye, well above the roughly 15 percent IICRC S500 treats as the dry standard. A visual check alone would miss this.
The term covers more than the room a homeowner can see. Moisture that has wicked into wall cavities, under cabinet toe kicks, or below hardwood flooring is still part of the structural drying job even after the visible surfaces look dry, and a technician treats those hidden zones as part of the same drying chamber rather than a separate concern. A structure is not considered dry until every one of those zones reads back to normal, which is why this phase is treated as part of the larger water damage restoration job rather than a standalone service.
The psychrometry of structural drying
Psychrometry is the branch of thermodynamics that describes how air holds and releases water vapor, and it is the science every structural drying decision is built on. Technicians use a handful of psychrometric readings, published in reference tables from ASHRAE, to decide where equipment goes and when a room is dry.
 A thermo-hygrometer's temperature and relative humidity readings, checked against ASHRAE psychrometric tables, tell a technician whether the air can still absorb more moisture or the room's evaporation rate has stalled.
Four readings do most of the work on an actual job: relative humidity, grains per pound, dew point, and vapor pressure differential. The first two describe the air's current moisture state, while the second two signal how close the room is to the point where drying stalls out entirely.
| Reading | What it measures | Why it matters for drying |
|---|---|---|
| Relative humidity (RH) | How much moisture the air holds compared to the maximum it could hold at that temperature | High RH slows evaporation because the air has less room left to absorb moisture from wet materials |
| Grains per pound (GPP) | The actual weight of water vapor in the air, independent of temperature | Lets a technician compare inlet and outlet air across a dehumidifier to confirm it is pulling moisture |
| Dew point | The temperature at which air becomes saturated and releases moisture as condensation | Warns a crew when a cold surface, like a slab or an exterior wall, risks new condensation |
| Vapor pressure differential (VPD) | The difference in moisture pressure between a wet material and the surrounding air | The actual driving force behind evaporation; drying stalls once VPD drops toward zero |
A room does not dry just because a dehumidifier is running. Evaporation only continues while there is a meaningful vapor pressure differential between the wet material and the air around it, which is why air movers and dehumidifiers have to work together rather than as separate steps.
How structural drying works
Structural drying works by combining three factors, airflow, dehumidification, and temperature typically held between 70°F and 90°F, into a closed system that keeps pulling moisture out of materials without letting the air reabsorb it. Skipping any one factor slows or stops the other two from doing their job.
 Air movers work only when angled to sweep across the wet surface itself, not the open room, since it's that direct airflow exchange that pulls moisture out of the material and into the air for the dehumidifier to remove.
Air movers create airflow across a wet surface, which breaks up the thin layer of humid air sitting against the material and replaces it with drier air. That exchange is what drives evaporation, since a wet material sitting in still air quickly saturates the air right next to it and evaporation slows to a crawl. A dehumidifier then removes the moisture that evaporation just released into the room, keeping relative humidity low enough for the cycle to keep repeating.
Warmer air can hold more water vapor before it saturates, which is why raising room temperature within that range speeds evaporation without needing more equipment. The sequence below is roughly how a restoration crew moves from extraction into a finished, verified drying job.
Confirm extraction is complete
A technician checks that bulk standing water has already been removed through water extraction before setting up drying equipment, since air movers and dehumidifiers are built to pull moisture out of materials, not out of a puddle on the floor.
Take baseline moisture readings
A moisture meter reads the affected drywall, subfloor, or framing, along with an unaffected reference spot in the same room, which gives the crew both a starting point and a target to dry back to.
Set up containment and airflow
Plastic sheeting isolates the drying zone when the loss is contained to part of a home, and air movers go in at the angle and spacing that keeps air moving across every wet surface rather than just the center of the room.
Add dehumidification sized to the space
A dehumidifier matched to the room's volume and moisture load removes the vapor the air movers are releasing, and an undersized unit lets humidity climb back up overnight, undoing a day of drying progress.
Monitor daily and adjust
A technician returns each day to log temperature, humidity, and material moisture readings, and repositions or adds equipment if two consecutive readings show little to no improvement.
Verify dry and remove equipment
Once the affected material's reading matches the unaffected reference point for a full day, the crew documents the result and pulls the equipment, closing out the drying phase of the water damage restoration process.
Structural drying equipment
Structural drying relies on two equipment categories working together: air movers, typically placed at a rate of one per 10 to 16 linear feet of wet wall, to create airflow across wet surfaces, and dehumidifiers to pull the resulting moisture back out of the air. The right combination depends on room size, water damage class, and how saturated the materials are.
 A low-profile centrifugal air mover reaches under cabinets and into tight spaces an axial unit cannot, while an LGR dehumidifier pulls moisture at lower humidity levels than a standard refrigerant unit, which is why most jobs mix equipment types rather than using one kind throughout.
Industrial drying equipment is not interchangeable with the box fans sold at a hardware store. Commercial air movers are built to direct high-velocity air at a low angle across a specific surface area, and IICRC S500 sets that placement rate based on how saturated the material is.
| Equipment | What it does | Best used for |
|---|---|---|
| Axial air movers | Push a wide, direct stream of air at a low angle across a surface | Open floor areas, walls, and general room drying |
| Centrifugal (low-profile) air movers | Concentrate airflow into a focused, higher-pressure stream | Wall cavities, under cabinets, and confined spaces |
| Refrigerant dehumidifiers | Cool air below its dew point to condense out moisture, then reheat and release it | Standard rooms at moderate temperature and humidity |
| Low-grain refrigerant (LGR) dehumidifiers | A refrigerant unit re-engineered to pull moisture at lower humidity levels than standard units can reach | Most professional jobs; the current industry default for mid-size rooms |
| Desiccant dehumidifiers | Pass air through a moisture-absorbing material rather than cooling it | Cold spaces, large or open commercial areas, and drying below roughly 40°F |
Sizing a dehumidifier wrong is one of the most common reasons a job runs longer than it should. A unit rated for a small bedroom cannot keep up with an open-concept living area with saturated flooring, and a technician who sizes to the room's cubic footage and moisture load, not just its square footage, avoids that mistake.
Specialty equipment for hidden moisture
Standard air movers and dehumidifiers dry exposed surfaces, but they cannot reach water trapped inside a wall cavity, under hardwood flooring, or beneath cabinetry without help. Injection drying systems, drying mats, and thermal drying equipment are built specifically for those hidden zones.
 Thermal units like this one often run in the 100°F to 120°F range, well above the 70°F to 90°F used in standard air-mover drying, speeding evaporation across large or hard-to-access areas.
Injection drying systems push warm, dry air directly into a wall cavity, beneath a floor, or into a stair stringer through small access points, drying the space from the inside without removing drywall or flooring. This matters most in a basement, where moisture regularly migrates into framing and subfloor cavities that a surface-only setup would miss entirely. Drying mats work on a similar principle for hardwood floors, creating a sealed chamber over a section of flooring and drawing moisture up through the wood without lifting the boards.
Injection drying (cavity drying)
Warm, dehumidified air is forced directly into a subfloor space, behind baseboards, or into a stair stringer through small, targeted access holes, reaching moisture that surface airflow alone cannot dry.
Drying mats
A sealed mat placed over hardwood or engineered flooring pulls moisture upward through the wood's surface using negative pressure, often saving a floor that would otherwise need to be pulled up.
Thermal (heat) drying systems
Specialized heating equipment raises the temperature of an entire structure to roughly 100°F to 120°F for a controlled period, well above the 70°F to 90°F range used in standard drying, speeding evaporation across large or difficult-to-access areas.
Category also shapes which specialty equipment gets used. A sewage backup or other Category 3 loss often adds antimicrobial treatment alongside drying, since the goal is not just moisture removal but limiting what that contaminated moisture leaves behind in porous cavities.
Materials that can't be dried
Some materials, like saturated fiberglass insulation or contaminated drywall below a flood cut, cannot be dried in place no matter how much equipment runs, so a technician removes them instead of extending the drying timeline. That decision usually comes down to the water's contamination level, how long the material sat wet, and whether it can hold up structurally once it is dry.
 A flood cut is made 12 inches above the visible waterline, per EPA flood cleanup guidance, since wicking often carries moisture higher into the drywall than the stain alone shows.
Category matters most here. A Category 2 or 3 loss, gray or black water under IICRC's water damage categories, often means porous materials in contact with that water get removed and replaced regardless of whether they could technically be dried, since drying does not remove contamination the way removal does. A clean, Category 1 loss almost never requires this step.
Drywall follows a specific convention when removal is needed: a technician typically cuts the panel 12 inches above the visible waterline, following EPA guidance on flood cleanup, since wicking often carries moisture higher than the water actually reached. The cut line gets set by that wicking height, not by where the stain stops being visible, which is why a repair can look more aggressive than the visible damage suggests.
Saturated fiberglass insulation
Wet insulation loses its R-value and rarely regains it even after drying, so it is typically removed and replaced rather than dried in place.
Carpet padding in a Category 2 or 3 loss
Padding absorbs and holds contaminated water more than almost any other material in a home, making it one of the first things removed on a gray or black water loss.
Drywall below the flood cut line
Drywall that sat in contaminated water, or stayed wet long enough for the paper facing to break down, gets cut out rather than dried, following the 12-inch convention above.
Delaminated engineered flooring or particleboard
Once the layers of an engineered floor or a particleboard cabinet base separate, drying no longer restores the material's structure, even if the moisture itself is successfully removed.
This call gets made early, typically during the first walkthrough, since delaying it just adds drying days to a material that was never going to dry anyway. A material that has already started to delaminate or lose structural integrity is a removal case regardless of category, since drying cannot reverse that kind of physical breakdown.
Setting up a drying chamber
A drying chamber is the sealed or semi-sealed area, typically built with plastic sheeting taped across doorways, that a technician creates around the affected space so equipment works on a controlled volume of air rather than an entire house. Setting one up correctly keeps equipment from being wasted on unaffected rooms and speeds the drying of the rooms that actually need it.
 Sealing the drying area lets a technician run equipment against a fixed volume of air instead of an entire house, and sometimes adds negative pressure to keep airborne particles from spreading past the containment.
Inside that containment, a technician may run the space under negative pressure, using an air scrubber or exhaust fan to pull air out faster than it comes in, which is common on a flooding or Category 2 to 3 loss where containing airborne particles matters as much as containing moisture. On a smaller, Category 1 job, a simpler sealed-room approach without negative pressure is often enough.
A crawl space or basement often needs its own contained zone rather than sharing equipment with the rooms above, since below-grade air behaves differently and can reintroduce moisture into a space that already tested dry. Running that zone separately also makes it easier to tell exactly which area is holding up the rest of the job.
Not every job needs full containment. A single wet corner of one room can often dry with equipment placed directly in the open space, while a multi-room or multi-floor loss almost always benefits from zone-by-zone containment so each area's readings can be tracked and dried independently.
How professionals verify drying
Structural drying is verified through daily moisture readings, taken with a moisture meter and a thermo-hygrometer, compared against an unaffected reference point rather than a fixed number or a visual check. A material is documented as dry once its reading matches that reference point and holds steady for a full day.
 A material is documented as dry only once its reading matches an unaffected reference spot in the same room for a full day, a comparison IICRC S500 requires rather than a fixed target number.
Each instrument does a different job. A moisture meter, either a pin-type unit that reads moisture content directly inside the material or a pinless unit that scans below the surface without puncturing it, gives the actual reading on drywall, subfloor, or framing. A thermo-hygrometer separately tracks the room's ambient temperature and relative humidity, confirming the drying chamber itself is performing the way it should.
| Instrument | What it confirms |
|---|---|
| Pin-type moisture meter | Moisture content inside the material at the depth the pins reach |
| Pinless moisture meter | Relative moisture level below the surface without damaging the material |
| Thermo-hygrometer | Ambient temperature and relative humidity inside the drying chamber |
Those readings get logged daily into a psychrometric record that becomes part of the job's documentation, and it is the same record an insurer typically reviews when evaluating a mitigation claim. A technician who cannot produce daily logs showing temperature, humidity, and moisture trends is not following the monitoring standard IICRC S500 calls for, regardless of how the equipment itself looks on-site. Verifying this level of monitoring is one of the things Applied Structural Drying training covers, alongside the broader water damage restoration certifications a technician can hold.
Signs structural drying isn't working
A drying job that isn't working usually shows up within the first three to four days: a smell that won't fade, a moisture meter reading that stops improving, or a material that stays soft well after equipment should have caught up. Catching those signs early matters because CDC guidance on mold points to sustained dampness, not a single wet day, as what actually drives growth.
 New bubbling or cupping that appears after equipment has already been running for a few days signals moisture still moving through the material, not a normal part of the drying timeline.
A musty odor that doesn't fade
If the smell is the same on day four as it was on day one, moisture is still trapped somewhere equipment isn't reaching, often behind baseboards or under flooring rather than in the open room.
A room that still feels damp or warm and clammy
Correctly running equipment should noticeably lower how humid a space feels within the first day or two, and a room that still feels heavy with moisture past that point usually means the dehumidifier is undersized for the space.
A stain that reappears or darkens
A stain that seemed to lighten and then comes back, or gets darker instead of fading, points to moisture still migrating through the material rather than actually leaving it.
New warping, cupping, or bubbling mid-job
Materials that looked stable at the start of drying but start to visibly deform partway through usually indicate the moisture never fully stopped moving into them in the first place.
No change after several days of equipment running
A moisture meter reading that hasn't moved in two consecutive daily checks is the clearest sign something in the setup, placement, sizing, or containment, needs to change.
Any of these on their own is worth a call back to the company handling the job rather than waiting it out. A technician can usually diagnose the cause with a fresh moisture reading rather than starting the whole job over.
Common drying mistakes
Most stalled drying jobs come down to a handful of preventable mistakes: equipment turned off, airflow blocked, or a space closed back up before it's actually confirmed dry. Avoiding these is usually enough to keep a job on its expected 3 to 5 day timeline instead of dragging into weeks.
 Furniture or boxes pushed back in front of an air mover before the room is confirmed dry create a dead zone that never reaches the same moisture level as the rest of the space.
Turning equipment off overnight or while away
Shutting down air movers or a dehumidifier for even a few hours lets humidity climb back up and moisture reabsorb into materials that were partway dry, undoing progress instead of just pausing it.
Blocking air movers with furniture or boxes
Equipment aimed at a wall or floor only works if the air can actually reach the surface, and items pushed back into place too early create dead zones that never dry at the same rate as the rest of the room.
Opening windows or running the AC during a contained job
Introducing outside air, or air conditioned to a different humidity level, into a sealed drying chamber throws off the psychrometric balance the equipment is working to maintain, often adding a day or more to the job.
Reinstalling flooring or closing up a wall before confirming dryness
Putting a surface back before a moisture reading confirms the material underneath matches the dry standard traps whatever moisture is left, often leading to a second, more expensive repair later.
Skipping a specialty step a hidden cavity actually needs
Relying on surface-level air movers and dehumidifiers when a wall cavity or subfloor needed injection drying leaves the room looking dry on top while staying wet where it counts.
Most of these come from good intentions, wanting quiet at night or trying to get a room back to normal sooner, rather than a lack of care. Most jobs that stay on schedule are the ones where a technician's equipment plan goes untouched, the same discipline the water damage restoration checklist reinforces across the rest of the job.
What affects drying time
Drying time depends primarily on water category, damage class, and how quickly equipment was deployed after the loss. A clean, Category 1 leak caught the same day usually finishes well within a week, while a Category 3 loss where materials sat wet for days before a crew arrived can run into a second or third week.
Material type plays a role too, since drywall and open framing dry faster than dense subfloor or saturated insulation. Category, class, and material together shape how long water damage restoration takes, often stretching a heavily saturated Category 3 loss past two weeks while a small, clean Category 1 spot still finishes in the standard 3 to 5 days.
Structural drying cost
Structural drying equipment typically costs $500 to $8,000 as part of a mitigation job, with the final figure driven by square footage, how many days the equipment runs, and how many specialty units the loss requires. A single-room Category 1 leak sits at the low end of that range, while a multi-room loss needing injection drying and several dehumidifiers over a week or more sits near the top. Equipment usually bills by the day rather than as a flat fee: a single air mover typically runs $40 to $75 per day and a commercial dehumidifier runs $75 to $200 per day depending on its capacity, so a job needing six air movers and two dehumidifiers for five days adds up well before extraction, monitoring visits, or repairs are factored in.
| Scenario | Equipment cost |
|---|---|
| Single room, Category 1, 3 to 5 days | $500–$1,500 |
| Multiple rooms, Category 1 to 2, up to a week | $1,500–$4,000 |
| Large loss with injection drying, over a week | $4,000–$8,000+ |
This figure covers drying equipment specifically, not the full mitigation job. Checking an estimate against the full national water damage restoration cost numbers by category, class, and room, before signing anything, is what actually catches a quote priced well outside the normal range.
DIY vs. professional structural drying
DIY structural drying can work for a small, clean-water spill caught the same day, using a rented dehumidifier and household fans over an area under roughly 10 square feet. Anything larger, contaminated, or involving saturated framing generally needs professional equipment and documentation.
 A rented dehumidifier removes roughly 30 to 50 pints of water a day under AHAM test conditions, well under the 150 or more pints a single commercial LGR unit can pull in the same period.
A typical consumer dehumidifier removes roughly 30 to 50 pints of water from the air per day under standard AHAM test conditions, while a single commercial low-grain refrigerant unit can pull well over 150 pints in that same period. That gap is why a DIY setup that seems to be keeping up on a small spill falls behind quickly once more than one room, or a porous material like drywall, is involved.
| Factor | DIY-appropriate | Call a professional |
|---|---|---|
| Water category | Category 1 only | Category 2 or 3 |
| Area affected | Under 10 square feet | Larger or multi-room |
| Materials involved | Surface-level, non-porous | Drywall, subfloor, or framing soaked through |
| Documentation needed | None, for an uninsured minor spill | Insurance claim in progress |
Household fans and a rented dehumidifier are not equivalent to commercial equipment, since consumer units move less air and pull far less moisture per hour. A DIY approach that looks dry on the surface after a day or two can still leave a wall cavity or subfloor damp underneath.
Professionals confirm a job is finished with a moisture meter rather than a visual check, and a small, caught-early leak is usually the only scenario where DIY water damage cleanup steps hold up on their own without commercial equipment. A same-day call to a restoration company, rather than a wait-and-see approach, is what actually keeps a minor leak from turning into a multi-day job.
Keep any daily equipment logs and moisture readings a restoration company provides if a claim is involved. Insurers typically expect that record as part of the mitigation line item before they release payment.
If a job needs commercial equipment instead, choosing a water damage restoration company means verifying credentials as much as comparing price, including confirming any technician handling a large or contaminated loss holds IICRC's Applied Structural Drying certification. A company that can't produce that credential on request, or that dodges the question, is a reasonable one to cross off the list.
Frequently asked questions
What is structural drying?
Structural drying is the process of removing moisture from a building's framing, subfloor, drywall, and other load-bearing or semi-permanent materials using controlled airflow, dehumidification, and temperature, rather than removal and replacement.
How long does structural drying take?
Most Category 1 losses dry in 3 to 5 days with correctly sized equipment. Category 2 or 3 water, saturated framing, or a slow-to-respond job can extend drying to 1 to 3 weeks or longer.
What temperature should a house be during structural drying?
Most technicians target 70°F to 90°F. Warmer air holds more moisture, which speeds evaporation, but temperatures much above 90°F can stress finishes and add little extra drying benefit.
Do dehumidifiers need to run 24 hours a day during drying?
Yes. Structural drying equipment is designed to run continuously, since shutting it off overnight or during the day lets the air reabsorb moisture from materials that are already partially dry, adding time to the job.
Can you stay in your home during structural drying?
Usually yes, for Category 1 water in a limited area. The noise from air movers, typically 60 to 80 decibels, and a warmer, sometimes 90°F environment are the main disruptions, and a Category 3 or whole-floor loss may call for temporary relocation.
How do technicians know when a structure is fully dry?
They compare moisture readings in the affected material to an unaffected reference point in the same room using a moisture meter, and the structure is considered dry once the two readings are within a few percentage points of each other for at least one full day.
What's the difference between an air mover and a dehumidifier?
An air mover moves air across a wet surface to speed evaporation, pulling moisture out of the material and into the air. A dehumidifier then removes that moisture from the air, and skipping either step stalls the drying process.
Does insurance cover the cost of structural drying equipment?
Usually yes, when the underlying water damage is a covered, sudden and accidental loss. Insurers typically pay for equipment rental days as part of the mitigation line item on the claim, documented through daily monitoring visits and psychrometric logs.
Can structural drying prevent mold growth?
Yes, if it starts within the EPA's 24 to 48 hour window and equipment is sized correctly for the affected area. Mold spores need sustained moisture to establish, and bringing materials below roughly 15 percent moisture content removes the condition mold needs to grow.
What happens if the drying equipment isn't enough?
Drying stalls, moisture readings plateau instead of dropping, and the job runs longer than it should. A technician who sees stalled readings typically adds equipment, repositions air movers, or opens a section of drywall to reach trapped moisture directly..
Sam Hickerson is the founder of RestoreAdvisor and writes consumer guides on mold remediation, water damage restoration, inspection, testing, and home recovery. His work focuses on helping homeowners understand costs, risks, and when to call a professional. He draws on guidance from the EPA, CDC, IICRC, and other authoritative sources to make complex home issues easier to navigate.