
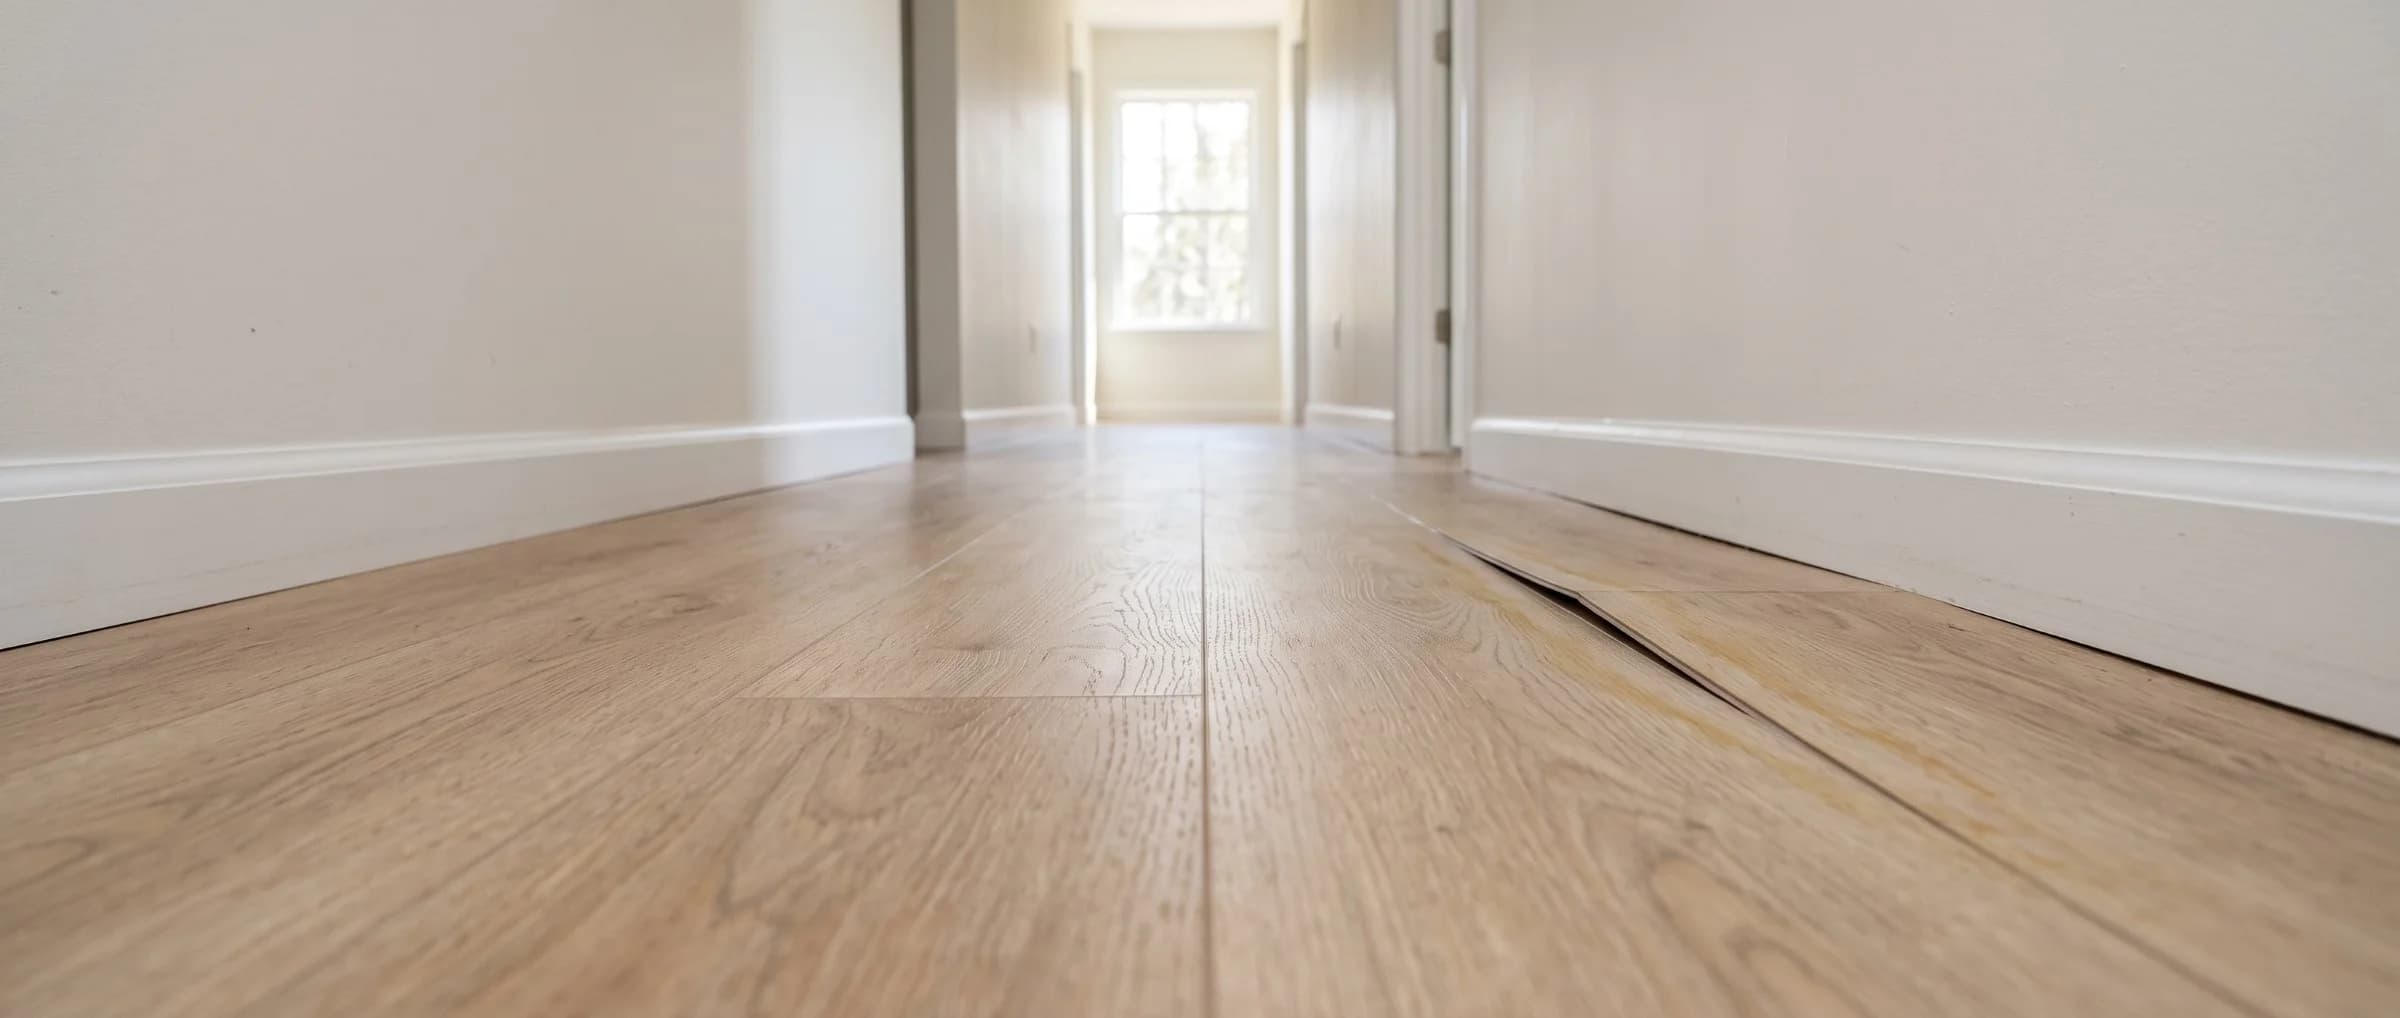

A wet spot on vinyl flooring rarely looks alarming right away. The surface is built to resist water, so it can look completely normal for days while water sits trapped underneath, and how long it's been there is what actually determines whether the floor needs nothing more than a quick dry-out or a full replacement. Catching that difference now, before the flooring or the subfloor beneath it gets disturbed, is what separates a small repair from a much larger one.
Water damaged vinyl flooring occurs when moisture becomes trapped between the vinyl surface and the subfloor beneath it, a condition governed by the same IICRC S500 water damage restoration standard used across water-resistant and porous flooring types. Vinyl itself, whether installed as sheet vinyl, luxury vinyl plank, or luxury vinyl tile, is designed to resist water on its top surface, while the subfloor, adhesive, and any wood-based backing underneath it are not. Whether that water has already worked its way underneath, and how long it's been sitting there, determines everything that follows, from whether the flooring can be lifted and dried to what a repair or replacement will cost.
Key insights
- Vinyl resists water on top, not underneath. Most vinyl flooring is water-resistant at the surface, but water that reaches a seam, edge, or transition strip can travel underneath and sit against the subfloor undetected.
- The first 24 to 48 hours decide the outcome. Vinyl flooring exposed to clean water and dried within this window is frequently salvageable, while water left standing longer usually forces a replacement of the flooring, the subfloor, or both.
- Vinyl plank and sheet vinyl behave differently. Floating or click-lock vinyl plank can usually be lifted piece by piece for drying, while sheet vinyl is installed as one continuous piece and is harder to access without cutting it.
- Bubbling and a spongy feel are the earliest reliable signs. Discoloration, lifting seams, and a musty odor typically show up only after water has already been trapped underneath for some time.
- Costs stay lower than other flooring types in most cases. Vinyl material itself is inexpensive to replace, so the largest cost driver is usually subfloor damage rather than the flooring surface.
- A concrete slab can be the water source. Groundwater and hydrostatic pressure can push moisture up through a slab and get trapped under vinyl with no leak visible anywhere in the room.
What to do if vinyl flooring gets wet
Stop the water source, remove any standing liquid, and check under the nearest edge of the flooring before assuming the damage is limited to what you can see on the surface. Acting within the first hour has the biggest effect on whether the vinyl and the subfloor beneath it can be saved.
 Standing water at the subfloor edge confirms the leak already reached beneath the flooring, not just the surface. Under IICRC S500, this calls for extraction and drying rather than a simple wipe up.
Stop the water source
Shut off the supply valve, appliance connection, or main shutoff feeding the leak before touching the flooring itself. A burst pipe or a failed appliance hose can keep adding water faster than any amount of mopping can remove it.
Remove standing water immediately
Use towels, a wet/dry shop vacuum, or a mop to clear water sitting on top of the vinyl. The longer water sits on the surface, the more time it has to find a seam, a transition strip, or a damaged edge and work its way underneath.
Check under the vinyl at the nearest accessible edge
Lift a baseboard, pull up a loose plank near the wall, or check a transition strip to see whether water has already reached the subfloor. This single check tells you whether you are dealing with a surface cleanup or a drying job that involves the layer underneath.
Move belongings and start airflow
Clear rugs, furniture, and boxes off the wet area and run fans or a dehumidifier to begin drying the room. Moving air across the surface speeds evaporation and reduces the window of time mold has to establish itself, per the CDC's guidance on mold growth conditions.
Photograph the damage and call for help
Document standing water, any lifted or discolored planks, and the source of the leak before you start cleanup. If the wet area is larger than a small spot, or you found water already under the flooring, call a plumber for the source and a water damage restoration company for the extraction and drying. Active flooding, sewage, or an electrical hazard near standing water needs a faster, emergency-tier response rather than standard next-day scheduling.
What not to do for wet vinyl flooring
A few common reactions to wet flooring actually make the outcome worse, from sealing moisture back in to skipping the documentation an insurance claim will need. These four missteps matter under general DIY water damage cleanup just as much as under a professional job, since any of them can undo the work regardless of who's doing it.
 Installing vinyl over subfloor that has not been confirmed dry traps moisture underneath, the exact condition mold needs to take hold within the 24 to 48 hour window the EPA cites. A moisture meter reading before reinstalling is the only reliable way to confirm the subfloor is actually dry.
Don't assume a dry-looking surface means the floor is fine
Vinyl's water-resistant top layer can look completely normal while water sits trapped against the subfloor underneath. A visual check from above is not a substitute for lifting a plank or checking an edge.
Don't run a household vacuum on standing water
A standard vacuum is not built for liquid and creates an electrical shock risk near standing water, a hazard OSHA's flood response guidance specifically warns about. Use a wet/dry shop vacuum or towels instead.
Don't glue or reinstall vinyl over a subfloor that hasn't been confirmed dry
Sealing wet plywood or OSB back under new or reinstalled vinyl traps the moisture in place, which is exactly the condition mold needs to take hold. Confirm the subfloor is dry with a moisture meter before anything goes back down.
Don't wait on the insurance company before you start drying
Extracting water and starting airflow right away is expected under most policies and limits the damage an adjuster will later evaluate. Photograph everything first, then dry the area while the claim is still being processed. For anything beyond a small spot, working from a water damage restoration checklist keeps the safety, documentation, and drying steps in the right order.
Is vinyl flooring actually waterproof?
Not entirely, even when the product is marketed as waterproof. The vinyl wear layer itself typically resists water penetration from above, but the seams between planks or sheets, the edges at walls and transitions, and the adhesive or subfloor beneath the surface are almost never part of that waterproof claim.
Manufacturers generally test and rate the vinyl surface, not the full flooring system once installed in a home. Water that reaches a seam, a scratch that has broken the wear layer, or a transition strip at a doorway can still travel underneath a "waterproof" floor and sit against the subfloor indefinitely, since the same surface that kept water out from above now keeps it from evaporating back out. That trapped-moisture pattern is the central reason vinyl water damage tends to be discovered later than damage to more absorbent flooring types like carpet or hardwood.
Signs of water damage in vinyl
Water damage under vinyl flooring shows up as bubbling, lifted seams, a spongy feel underfoot, or a musty odor, since the surface itself rarely stains the way a porous material does. Most of these signs appear only after moisture has already been trapped underneath for a period of time, which is why an early check at the nearest edge or seam catches problems that a visual scan of the surface misses.
 Cupping happens when the underside of a plank absorbs moisture faster than the top, pulling the edges upward relative to the center. Left uncorrected, the same moisture usually shows up as a gapping or separating seam next.
Several of these signs overlap with normal aging in an older vinyl floor, which is why timing matters as much as the sign itself. A single lifted corner that has been there for years is a different problem than one that appeared the same week a dishwasher started leaking, so it helps to note when each sign was first noticed rather than treating every imperfection as new damage.
| Sign | What it looks or feels like | What it usually means |
|---|---|---|
| Bubbling or blistering | Raised, air-pocket-like bumps in the surface | Trapped water has broken the adhesive bond between the vinyl and the subfloor |
| Lifting or curling edges | Plank or sheet edges no longer lying flat | Moisture has softened the adhesive at the perimeter of the affected area |
| Gapping or separating seams | Visible space opening between planks or at a sheet seam | Water has worked past the seam and is likely present underneath |
| Spongy or soft feel underfoot | The floor gives slightly when walked on | The subfloor beneath the vinyl has absorbed water and softened |
| Musty or damp odor | A persistent smell with no visible source | Moisture trapped under the vinyl is supporting mold or mildew growth |
| Discoloration or dark patches | Shading changes visible through or around the vinyl | Water has been present long enough to affect the subfloor or adhesive color |
A single sign is often enough to justify checking further, but bubbling and a spongy feel are the two that show up earliest and most reliably. Discoloration and odor tend to appear later, after water has had more time to sit against the subfloor and any wood-based backing underneath it, a pattern that mirrors the broader signs of water damage homeowners are trained to watch for across every flooring type.
Sheet vinyl vs. plank in water
Sheet vinyl and vinyl plank respond to water differently because they are installed differently, not because one material resists moisture better than the other. Sheet vinyl goes down as one continuous piece across a room, while vinyl plank and luxury vinyl tile are installed as individual pieces, either glued down or connected with a floating click-lock system, which changes how accessible the subfloor is once water gets underneath.
 A floating click-lock installation unlocks piece by piece, giving direct access to the subfloor for drying. Sheet vinyl has no equivalent seam to exploit, so reaching the same subfloor usually means cutting the material instead.
Most homes built or renovated in the last decade lean toward plank or tile rather than sheet vinyl, since click-lock and glue-down products became the more common choice as luxury vinyl grew in popularity. Older kitchens and bathrooms, particularly ones that haven't been updated since the 1990s or earlier, are more likely to still have the original sheet vinyl in place.
| Type | Installation | How water enters | Salvage likelihood |
|---|---|---|---|
| Sheet vinyl | One continuous piece, full-spread adhesive or perimeter glue | Seams, edges, punctures, or a failed perimeter seal | Lower; the whole sheet often must be lifted or cut to reach the subfloor |
| Glue-down vinyl plank | Individual planks fully adhered to the subfloor | Seams between planks | Moderate; damaged planks can sometimes be cut out and replaced individually |
| Floating click-lock plank | Individual planks locked together, not glued to the subfloor | Seams between planks | Higher; planks can often be unlocked and lifted for drying without cutting anything |
This distinction matters most when a homeowner is deciding whether a water damage restoration company can dry the subfloor without tearing out the entire floor. A floating click-lock installation gives a technician direct access to the water damage classes system's drying targets simply by lifting the affected planks, while sheet vinyl usually requires cutting a section out or accepting that the whole sheet will need replacement once it has been disturbed.
What causes water damage under vinyl?
Water gets under vinyl flooring through a leak source above or below the surface, a failed seam, or moisture pushing up through a concrete slab, and the source determines both the water's contamination level and the fastest path to the subfloor. Identifying that source also settles the water's category under IICRC S500, which shapes both the drying approach and how much of the floor ultimately needs replacing.
 A seam is the weak point in an otherwise water-resistant surface. Once water crosses one, the source, not the seam itself, decides how much of the floor is ultimately affected.
Kitchens, bathrooms, and laundry rooms see the majority of vinyl water damage simply because that's where the plumbing and appliance connections are concentrated. A slab-on-grade room with no visible plumbing nearby is the exception worth remembering, since moisture there can originate from the ground rather than any fixture in the room.
| Cause | How it typically happens | Classification |
|---|---|---|
| Appliance leak (dishwasher, washer, refrigerator) | A supply line, hose, or door seal fails near the flooring | Category 1, clean water |
| Burst or leaking pipe | A supply line inside a wall or under the floor fails | Category 1, clean water |
| Roof or ceiling leak | Water travels down through the structure and pools on the floor below | Category 1 to 2 depending on the path it traveled |
| Flooding or storm water | Water enters from outside the home in volume | Category 3, contaminated water |
| Sewage backup | Water backs up through a drain or floor fixture | Category 3, contaminated water |
| HVAC condensation | A condensate line or drain pan overflows near the flooring | Category 1, clean water |
| Spills and excess mopping water | Standing water is left on the surface long enough to find a seam | Category 1, clean water |
Appliance leaks are the most common source in kitchens and laundry rooms, since a dishwasher leak or a failed washing machine hose can sit against a vinyl seam for hours before anyone notices. A burst pipe inside a wall or beneath the floor produces a similar clean-water scenario but often with a larger volume in a shorter window. Sewage backup and flooding are the two causes most likely to force a full replacement rather than a dry-and-reinstall repair, since Category 3 water contaminates both the vinyl and the subfloor beneath it.
Where the water goes under vinyl
Once water reaches the subfloor under vinyl flooring, it spreads laterally beneath the surface rather than evaporating, since the vinyl above traps moisture against the material below it the same way it would keep water from soaking through from above. Plywood and OSB subfloor absorb that trapped moisture and can swell, delaminate, or begin developing mold within the same 24 to 48 hour window the EPA cites for mold growth after water intrusion.
 The vinyl surface above this spot still looked completely dry. Only lifting the plank at an edge or seam confirms what has actually happened to the subfloor underneath.
A concrete subfloor behaves differently. Concrete itself does not swell or rot, but it stays damp longer than wood-based subfloor and can hold moisture against the underside of the vinyl for an extended period, which is one reason floors over a slab sometimes need professional moisture testing even after the surface feels dry to the touch. Adhesive is the other material at risk in this path: water that breaks the bond between vinyl and subfloor is what produces bubbling and lifted seams, and once that bond fails in one spot it rarely reseals on its own.
| Slab moisture test | What it measures | When it's used |
|---|---|---|
| Calcium chloride test | Moisture vapor emission rate at the slab surface over 60 to 72 hours | Standard pre-installation check before new flooring goes down |
| In-situ relative humidity probe | Moisture percentage inside the slab itself | More accurate when a floor has already failed and the slab is the suspected cause |
Either test requires specialized equipment and a few days of undisturbed monitoring, so this is typically a professional flooring contractor or restoration technician's call rather than a homeowner DIY step. A slab that fails one of these tests needs to dry further, or needs a moisture-mitigating primer or membrane, before any new vinyl goes back down over it.
Can water damaged vinyl be saved?
Water damaged vinyl flooring can often be saved when the water was clean, the exposure was under 24 to 48 hours, and the flooring type allows planks to be lifted without cutting. Sewage-contaminated water, prolonged exposure, or a compromised subfloor are the conditions most likely to require replacement instead of repair.
 Side by side, the deciding factors become visible at a glance: water type, exposure time, and whether the plank still lies flat. One condition on the wrong side of that line is usually enough to rule out saving it.
None of these conditions works in isolation, so weigh them together rather than deciding based on any single factor. A floor that has been wet for three days but only involved a small, clean-water spill still has real odds of being saved, while a floor exposed to contaminated water for even a single afternoon usually doesn't.
| Condition | Worth saving | Replacement is likely |
|---|---|---|
| Water type | Category 1, clean water | Category 2 or 3, contaminated water |
| Time submerged or exposed | Under 24 to 48 hours | More than 48 hours, or unknown duration |
| Flooring type | Floating click-lock plank or LVT | Sheet vinyl with a compromised seam across a large area |
| Subfloor condition | Firm, no swelling or delamination | Soft, swollen, or visibly deteriorated |
| Adhesive bond | Intact outside the wet area | Failed across most of the affected room |
The water damage categories system is the fastest way to sort a borderline case, since Category 1 clean water gives a floor the best odds of survival while Category 2 or 3 water almost always means the flooring and any porous subfloor material underneath it need to go. A floor that's clean-water damaged, caught quickly, and sitting on a sound subfloor can frequently be dried in place, but a single opposite condition, particularly contaminated water or a compromised subfloor, usually outweighs the others.
How to lift and dry vinyl flooring
Lifting vinyl flooring to dry the subfloor underneath depends on how it was installed, since floating click-lock plank can be unlocked by hand while sheet vinyl and fully glued installations typically require cutting a section to reach the moisture below. Confirming the installation type before starting prevents unnecessary damage to material that could otherwise be reused.
For a floating or click-lock plank floor, start at the wall closest to the affected area and work the planks apart in reverse order from how they were installed, since most click-lock systems lock in one direction and separate cleanly when worked from the correct edge. Set the removed planks aside in a dry, flat location rather than stacking them, since stacking can trap residual moisture between pieces and warp them before they can be reinstalled. Run fans and a dehumidifier directly on the exposed subfloor, and confirm dryness with a moisture meter reading under roughly 12 to 15 percent for wood-based subfloor before reinstalling anything. Drying time varies with the extent of the loss, so checking how long water damage restoration takes for a comparable scenario helps set realistic expectations before planks go back down.
For glue-down vinyl or sheet vinyl, full removal usually isn't practical without damaging the material, so cutting out the affected section is typically the more realistic path. A restoration technician or flooring contractor scores and removes only the section over the wet subfloor, dries that area with the same equipment and moisture targets used on a plank floor, then patches the cut section with matching material once the subfloor tests dry. This is also the point at which a homeowner decides between a patch repair and a full-room replacement, a call usually driven by how visible the repaired section ends up being.
Could vinyl flooring contain asbestos?
Possibly, if the flooring or the adhesive underneath it was installed before 1980. OSHA requires this kind of material to be presumed asbestos-containing unless testing proves otherwise, and the risk comes from disturbing the material, not from water sitting on top of it.
Vinyl composition tile in the classic 9-inch or 12-inch square size, the felt backing under some older sheet vinyl, and the black mastic adhesive beneath both were commonly manufactured with asbestos before 1980. Intact material poses little risk while it's sitting under a wet floor, but cutting, sanding, prying up multiple planks or tiles, or aggressively scraping old adhesive can release fibers into the air, which is why cutting or extensive removal on older flooring calls for a testing step that a straightforward lift-and-dry job on newer vinyl doesn't need.
If a home was built or last had its flooring replaced before 1980, and drying the affected area would require more than lifting a single loose plank near the wall, pause before cutting or extensive removal and have a sample tested by a licensed inspector. A restoration company working in an older home should ask about the flooring's installation date as part of its initial assessment, the same way it checks moisture readings and water category before starting the rest of the job.
DIY vs. professional cleanup
A small, contained spill of clean water that's caught and dried the same day is generally safe for a homeowner to handle without professional help. A larger area, water that sat overnight or longer, any contamination, or uncertainty about whether the subfloor is actually dry are the points where a certified restoration company becomes the safer choice.
 A towel pulls water off the surface. Commercial extraction equipment pulls it from the seams and the subfloor beneath, the difference that usually decides whether a small spot dries in place or spreads.
Cost is rarely the deciding factor in this choice, since a misjudged DIY dry-out that leaves moisture trapped under the vinyl usually costs more to fix later than hiring a professional would have cost up front. A moisture meter reading is a far more reliable call than a rough guess at how the floor feels underfoot.
| Factor | DIY-safe | Call a professional |
|---|---|---|
| Water source | Clean water, source already stopped | Contaminated water, or source still unknown |
| Area affected | A single small spot | A full room or multiple rooms |
| Time before discovery | Caught within hours | Water sat overnight or longer |
| Subfloor moisture | Confirmed dry with a moisture meter | Unable to test or reading stays elevated |
A moisture meter is the deciding factor in most borderline cases, since a floor can look and feel dry while a reading against the subfloor still comes back elevated. Professional-grade meters read wood-based subfloor moisture directly and give a number to confirm against, rather than relying on a guess based on how the surface feels underfoot. A loss that started as flooding crosses into Category 3 contamination by default, another reason to bring in a professional rather than attempt DIY drying on that type of water alone. Anyone attempting a DIY dry-out on vinyl flooring should otherwise treat a moisture reading, not the appearance of the surface, as the actual test for whether the job is finished.
Who to call for water damaged vinyl
A plumber or appliance technician addresses the source of the leak, while a certified water damage restoration company handles extraction, drying, and confirming the subfloor is safe to cover again. Both calls typically happen the same day when the damage is more than a small, contained spot.
 Calling a plumber and a certified restoration company the same day, rather than one after the other, is what keeps the response on the same timeline as the damage.
Ask whether the restoration company holds IICRC Certified Firm status and whether the technician assigned to the job carries the Water Damage Restoration Technician, or WRT, credential, since both indicate training specific to structural drying rather than general cleaning. For a flooring-specific repair, such as patching a cut section of sheet vinyl or replacing individual planks, a flooring contractor typically handles the material work once the restoration company has confirmed the subfloor is dry. A job that started as a sewage backup also usually needs PPE and containment steps beyond what a clean-water vinyl loss requires, which a plumber alone won't provide.
A restoration company should walk through the drying timeline and equipment before the first visit ends, so there are no surprises about what happens next. Getting that scope in writing, along with the water's category and any moisture readings taken that day, gives a homeowner a paper trail if the insurance claim needs it later.
What to expect during a repair
A professional repair visit typically involves confirming the subfloor is dry, then either reinstalling the original planks or cutting in new material to match the existing floor. The room is usually out of use for part of that process, though rarely for as long as a comparable job involving carpet or hardwood. The same broad sequence applies to what to expect during water damage restoration generally, fans and dehumidifiers first, then material work, just compressed since vinyl involves less drying time than most other flooring types.
For a lifted-and-dried plank floor, reinstallation itself takes only a few hours once the subfloor tests dry, since the planks simply lock or glue back into place. A cut-in sheet vinyl repair takes longer and involves more disruption, since it means cutting out old material, prepping the exposed subfloor, applying new adhesive, and letting it cure, which can keep the room off-limits for a day or more depending on the adhesive used. Color and pattern matching is usually the biggest source of delay on an older sheet vinyl floor, since a patch cut from new material rarely matches a floor that has faded from years of sun exposure and foot traffic exactly.
How much does it cost to fix vinyl?
Fixing water damaged vinyl flooring typically costs between $150 and $8,000 depending on how much of the floor is affected, whether the vinyl can be reinstalled or needs full replacement, and whether the subfloor requires repair. Subfloor damage, not the vinyl itself, is usually the largest driver of cost on this type of job.
 New vinyl material itself runs only a few dollars a square foot. The stained area beside it, and whatever condition the subfloor underneath is in, is what actually sets the final bill.
Labor makes up most of a vinyl water damage bill rather than materials, since the vinyl itself is inexpensive per square foot compared to nearly every other flooring type on the market. That's part of why a job that stays contained to the flooring layer tends to cost a few hundred dollars, while anything that reaches the subfloor can push the total into the thousands.
| Scenario | Typical cost | What's included |
|---|---|---|
| Small spot, caught and dried by the homeowner | $0–$150 | Fans, a dehumidifier rental, no professional labor |
| Small area, professional extraction and drying, planks reinstalled | $300–$1,200 | Extraction, drying equipment, moisture verification |
| Full room, vinyl replacement plus drying | $1,500–$5,000 | Extraction, drying, new vinyl material and installation |
| Subfloor replacement required (single room) | $3,000–$8,000 | Subfloor removal and replacement, new vinyl installation |
| Multi-room damage with subfloor repair | $8,000–$20,000+ | Extraction, drying, subfloor repair, and flooring replacement across multiple rooms |
A whole-home water damage restoration cost figure tends to run higher than a vinyl-specific job since it accounts for every material in a loss, not just the flooring. Vinyl itself is inexpensive to replace per square foot compared to hardwood or tile, which is part of why a vinyl-only loss usually lands toward the lower end of a typical restoration bill, provided the subfloor underneath survived.
Does insurance cover water damage?
Homeowners insurance typically covers water damaged vinyl flooring when the cause was sudden and accidental, such as a burst pipe or a failed appliance hose, under the standard HO-3 sudden-and-accidental coverage standard cited by the NAIC. Coverage is generally denied for gradual leaks, a long-term moisture problem under a slab, or flooding from an outside source, which requires separate flood insurance rather than a standard homeowners policy.
An adjuster evaluating a vinyl flooring claim typically looks at the same sudden-versus-gradual distinction used across every cause of water damage on a property, so documentation matters as much for a flooring-only claim as it would for a larger loss. Photograph the standing water and any lifted or bubbled vinyl before cleanup starts, and keep a copy of the plumber's or restoration company's assessment naming the cause. The flooring itself is usually a smaller line item within a broader claim rather than a standalone one.
Who's responsible in a rental?
A landlord is typically responsible for repairing water damaged vinyl flooring caused by a plumbing or structural failure, while a tenant is usually responsible for damage they caused directly, such as an appliance they installed themselves or a spill left unattended. State habitability law and the specific lease terms both affect exactly where that line falls in a given situation.
Renters insurance, or an HO-4 policy, does not cover the flooring itself since the tenant doesn't own the structure, but it typically covers the tenant's own belongings damaged by the same water. A landlord's dwelling policy is the one that responds to the flooring, following the same sudden-and-accidental standard that governs how homeowners insurance covers water damage generally. Document the leak and notify the landlord or property manager in writing as soon as it's discovered, since delayed notice is one of the more common reasons a landlord later disputes responsibility for a flooring repair.
Is water damage covered by warranty?
Rarely. Most vinyl and luxury vinyl plank warranties cover manufacturing defects and normal wear, not water that was left standing on or trapped under the floor, even on a product marketed as waterproof.
Many manufacturers specifically exclude damage from standing water, flooding, or installation over a subfloor that wasn't moisture-tested before the vinyl went down, since those conditions fall outside normal use. A warranty claim denied for this reason is a separate issue from a homeowners insurance claim, which pays for the repair regardless of whether the manufacturer would have replaced defective material under warranty. Keep the original purchase and installation paperwork on file, since a genuine manufacturing defect, such as a seam that failed with no water event involved at all, is still worth pursuing with the manufacturer separately from any water damage claim.
How to prevent water damage to vinyl
Most water damage to vinyl flooring comes from a handful of preventable sources: standing liquid left too long, worn appliance connections, and failed seams. A short annual routine catches most of these before they reach the subfloor.
 A calcium chloride test measures moisture vapor coming up through the slab over 60 to 72 hours. Confirming a slab is dry before installation avoids trapping groundwater moisture under a brand new floor.
Wipe up spills and standing water right away
Even a floor marketed as waterproof depends on water not sitting long enough to find a seam or edge, so treat any standing liquid as something to clear promptly rather than something the floor will simply tolerate.
Check appliance hoses and connections annually
Dishwasher, washing machine, and refrigerator supply lines are among the most common sources of water reaching vinyl seams, and a worn hose is easy to catch during a quick yearly check.
Reseal or recaulk seams and transition strips as they wear
A failed seam is the most common entry point for water to reach the subfloor under vinyl, and resealing a worn seam is far cheaper than drying and replacing what's underneath it.
Have a concrete slab moisture-tested before new vinyl goes down
Moisture pushing up through a slab from below can cause the same trapped-water damage as a leak from above, so testing the slab before installation catches a problem that no amount of surface-level care can prevent.
Install a moisture barrier under vinyl in basements or slab-on-grade rooms
A vapor barrier between the subfloor and the vinyl reduces how much groundwater moisture reaches the flooring system in rooms most exposed to slab moisture, similar to the water damage prevention steps recommended for basements generally.
Frequently asked questions
Can I use a heater or heat gun to dry water damaged vinyl flooring faster?
No, avoid direct heat. High heat can further loosen the adhesive bond and warp the vinyl itself, so stick to fans and a dehumidifier for airflow rather than a heater or heat gun.
How do I know if there is water under my vinyl flooring?
Look for bubbling, a spongy or soft feel underfoot, gapping or lifting seams, and a musty odor. Vinyl's water-resistant surface hides moisture underneath, so a visible spill on top does not mean the area below is dry.
Does vinyl plank flooring always need to be replaced after water damage?
No. Vinyl plank and luxury vinyl tile that are individually removable, rather than glued down edge to edge, can frequently be lifted, the subfloor dried, and the same planks reinstalled if they were not soaking in contaminated water.
How long can vinyl flooring sit in water before it's ruined?
Clean water caught within 24 to 48 hours rarely causes permanent damage to the vinyl itself, though the adhesive or subfloor underneath can still be affected. Water left for several days or longer, or any water contaminated with sewage, typically forces a replacement.
Is sheet vinyl or vinyl plank more likely to survive water damage?
Vinyl plank and luxury vinyl tile installed with a floating or click-lock system usually survive water damage better, since individual planks lift out for drying and reinstallation. Sheet vinyl is installed as one continuous piece, so water that gets past a seam is harder to reach and the whole sheet is more likely to need replacement.
Can I dry vinyl flooring myself without hiring a professional?
Yes, for a small, contained spill of clean water caught quickly. A soaked subfloor, water that sat for more than a day, or damage spanning more than a room typically needs a certified water damage restoration company, and active flooding or an electrical hazard escalates that further into emergency water damage restoration territory rather than standard scheduling.
Will mold grow under vinyl flooring if it stays wet?
Yes. Vinyl's water-resistant surface traps moisture against the subfloor, and the CDC notes that mold can begin growing within 24 to 48 hours once conditions stay damp, so trapped water under vinyl is actually more likely to promote mold than a surface that dries in open air.
What documentation does an insurance adjuster need for a water damaged vinyl flooring claim?
Photos of the standing water and any bubbled or lifted vinyl, a written cause assessment from a plumber or restoration company, and moisture readings confirming the subfloor's condition. Gathering this from the moment the damage is discovered, rather than after cleanup starts, gives an adjuster the clearest picture of the loss.
Is it cheaper to dry and save water damaged vinyl flooring than to replace it?
Yes, usually. Lifting and drying an existing floor typically costs a few hundred dollars in labor and equipment, while a full room replacement adds the cost of new vinyl material and installation on top of that same drying work, and vinyl stays relatively inexpensive on a cost per square foot basis compared to other flooring types.
Can vinyl flooring over a concrete slab get water damage from below?
Yes, and because it develops gradually from below rather than from a single event, it's also one of the causes standard homeowners insurance is least likely to cover. A calcium chloride or relative humidity slab test is the way to confirm it before assuming a persistent musty smell or bubbling has some other cause.
Do I need to replace the subfloor under water damaged vinyl?
Only if the subfloor itself was compromised, not just because water reached it. A moisture meter reading under roughly 12 to 15 percent after drying usually means the same subfloor can go back into service, while a reading that stays elevated after several days is the sign it needs to come out.
Sam Hickerson is the founder of RestoreAdvisor and writes consumer guides on mold remediation, water damage restoration, inspection, testing, and home recovery. His work focuses on helping homeowners understand costs, risks, and when to call a professional. He draws on guidance from the EPA, CDC, IICRC, and other authoritative sources to make complex home issues easier to navigate.