
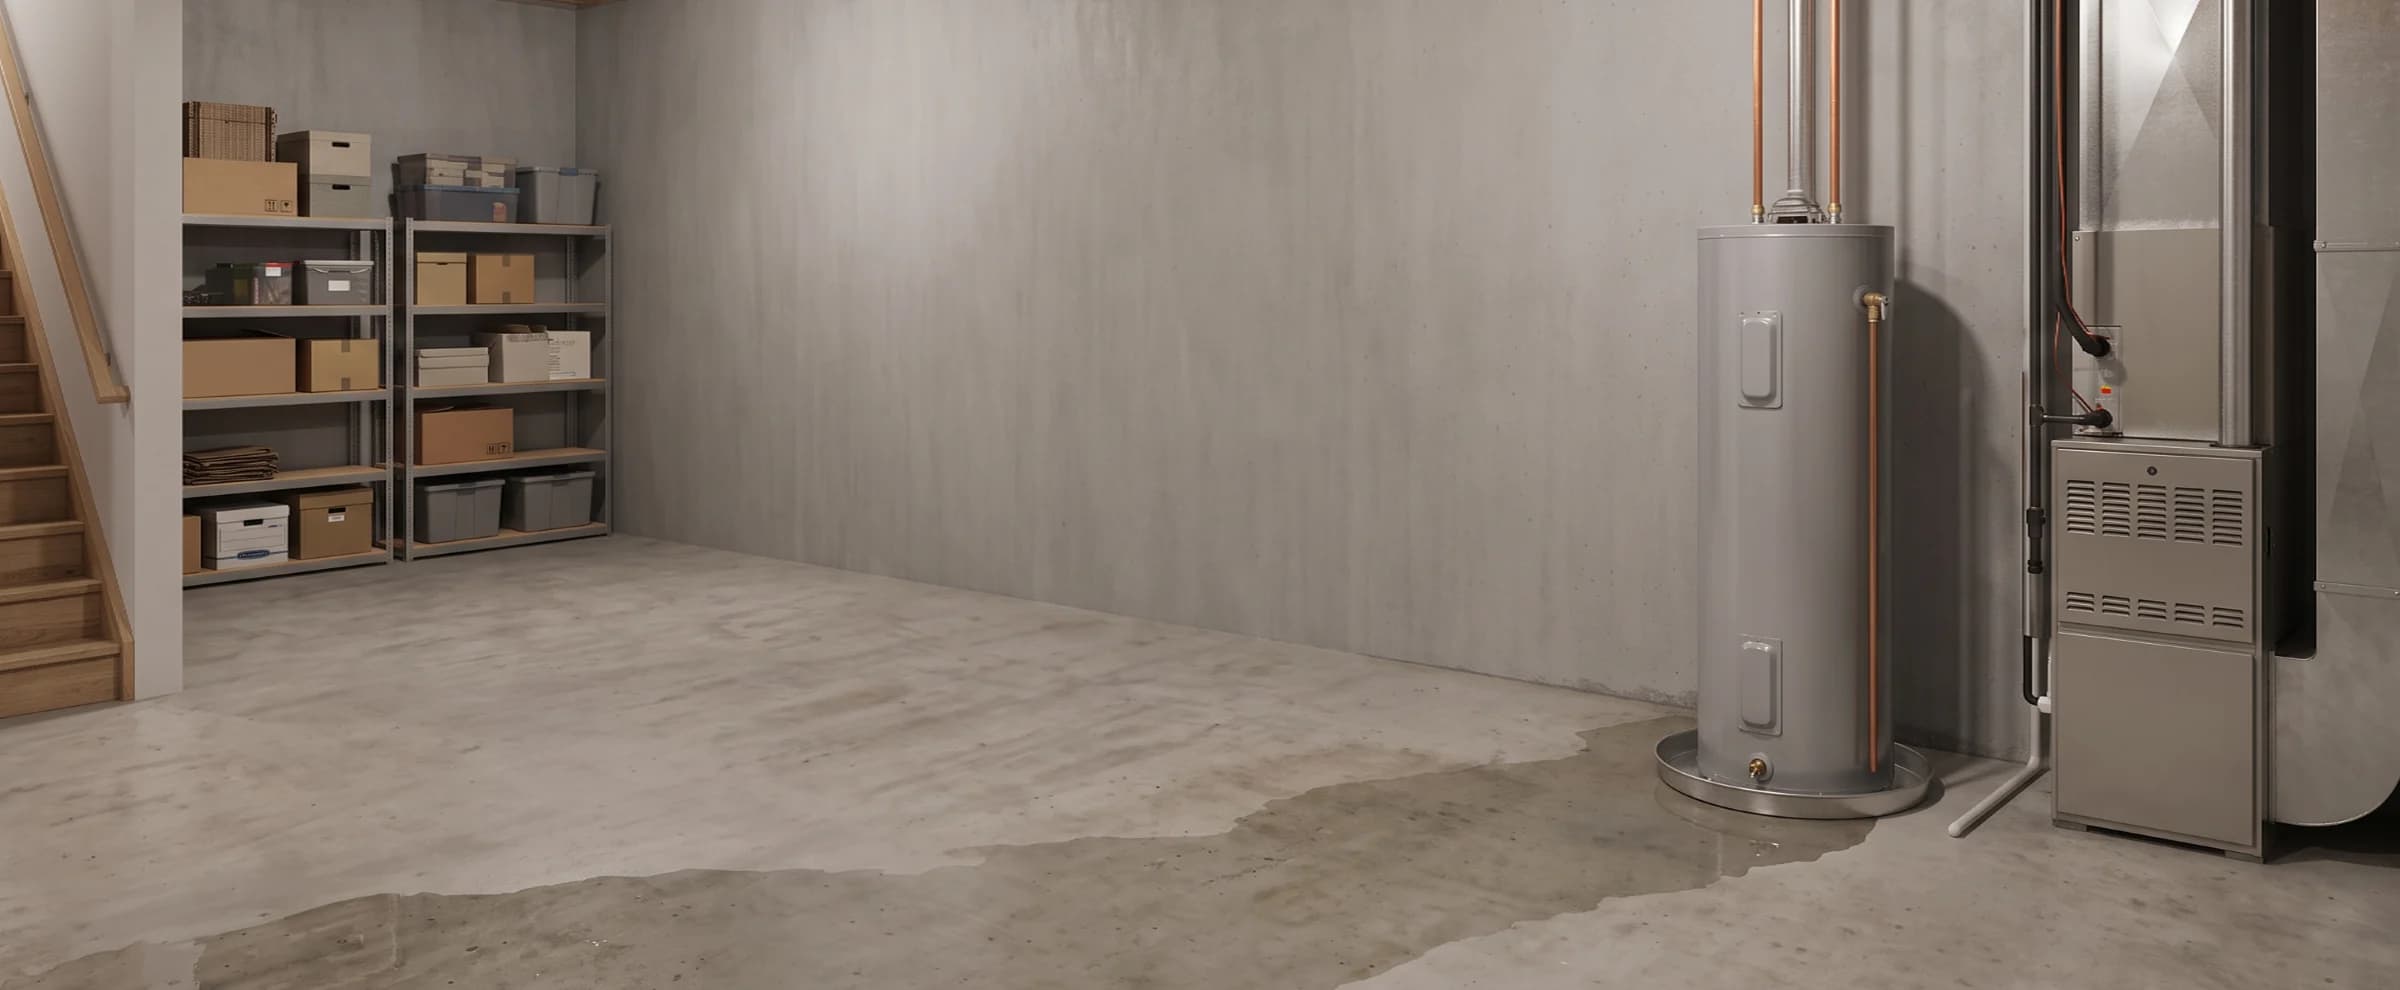

A water heater holds 30 to 80 gallons of water under constant pressure, and when a fitting lets go or the tank itself corrodes through, that entire volume can end up on your floor within minutes. Water damage from a failed water heater falls under the same ANSI/IICRC S500 restoration standard that governs any other clean-water loss, which means the response sequence, shutoff first, then drying, is the same regardless of what appliance caused it. Knowing where the shutoff valve is before a leak happens is the single biggest factor in how much damage you end up cleaning up.
Finding water pooled around your water heater is unsettling, especially when it's not obvious whether you're looking at a minor drip or the start of a full tank failure. Shutting off the right valve in the first few minutes is what actually decides whether this stays a small cleanup or turns into a five-figure restoration job, and that decision doesn't require waiting on a plumber to arrive.
Key insights
- Shutting off the cold water inlet valve stops the flood. The tank cannot refill once the supply line is closed, which turns an active leak into a contained puddle within seconds.
- Sudden failures are usually covered; slow leaks usually aren't. A cracked tank or a burst fitting typically meets the sudden-and-accidental standard most homeowners policies use, while gradual seepage from age or corrosion is commonly treated as a maintenance exclusion.
- Location changes the severity dramatically. A tank failure in a garage or basement drains toward a floor drain or slab; the same failure in an attic or an upstairs closet sends water straight through the ceiling into the rooms below.
- Most residential tanks last 8 to 12 years. Age is the single biggest driver of tank-body corrosion, and insurers frequently ask for the tank's install date when evaluating a claim.
- A drain pan only protects against small, slow drips. Required under the International Residential Code for exactly this reason, a pan has no capacity to contain a full tank rupture, which can outpace the pan's drain line in minutes.
- The water is almost always Category 1 at the start. Clean supply water that sits for more than a day or picks up sediment from an old tank can shift to a higher category, which changes how materials are handled during drying.
What to do if your water heater is leaking right now
Stop the water at the source, then cut power to the unit before you touch anything else. Everything after that, protecting belongings, documenting the damage, calling for help, matters less than getting those two steps done first, and OSHA's flood response guidance treats standing water near live electrical components as a shock hazard regardless of how the water got there.
 This shutoff valve on the cold water inlet is the fastest way to stop a leak, since it cuts the tank's water supply directly rather than waiting on a plumber to arrive.
Shut off the cold water inlet valve
Locate the valve on the pipe feeding into the top of the tank, usually a lever or a round knob, and turn it fully closed. This is the step that actually stops the flood. If you can't find or reach it, shut off your home's main water supply instead.
Cut power to the water heater
Flip the breaker labeled for the water heater if it's electric. If it's gas, turn the gas control knob to off rather than attempting to blow out or relight the pilot yourself. Water and live electrical components near the tank are a genuine shock hazard, and any emergency water damage restoration crew treats standing water near a breaker panel the same way: cut power at the main if there's any doubt.
Move belongings off the wet floor
Clear boxes, stored items, and anything fabric-based away from the spreading water. Porous materials wick water fast and can carry moisture into parts of the room the leak itself never reached.
Photograph the damage before you clean anything up
Get wide shots of the room and close-ups of the tank, the water line on the floor, and any affected drywall or flooring. This record matters for your insurance claim no matter how the coverage question turns out.
Call a plumber and a restoration company at the same time
The plumber deals with the tank. The water damage restoration side deals with the water that's already in your floors and walls. Calling both immediately, rather than waiting to hear back from one before contacting the other, is the difference between same-day drying and a delayed start that lets moisture spread further.
What not to do while you're waiting for help
Running a household vacuum on standing water, setting up fans before extraction, and waiting on the insurer before starting cleanup are the most common mistakes that turn a contained water heater leak into a larger loss. Avoiding them keeps the damage limited to what already happened rather than adding to it.
 Duct tape cannot hold against constant water pressure. The tank has already failed structurally at this point, and taping the joint only delays the call to a plumber.
Don't run a household vacuum on standing water
A shop vac rated for wet pickup is fine; a regular household vacuum is an electrocution risk and will be destroyed by the water.
Don't set up fans before the standing water is extracted
Blowing air across a wet surface before removing the bulk water pushes moisture into baseboards, walls, and adjoining rooms instead of drying the area you already have contained.
Don't ignore a sagging or discolored section of ceiling below the unit
If the water heater sits on an upper floor or in an attic, a stained or sagging ceiling below it means water has already saturated the material above your head, and it can fail without warning.
Don't attempt a permanent repair on the tank yourself
A leaking tank has already failed structurally in most cases; tape, epoxy, or a hose clamp buys you a few minutes at best and delays the plumber call you actually need to make.
Don't wait on the insurance company before starting mitigation
Most policies require you to take reasonable steps to prevent further damage regardless of when a claim gets approved. The EPA notes that mold can begin growing within 24 to 48 hours on wet materials, so starting extraction and drying right away, then documenting each step, protects both your home and your claim.
Call a plumber first, then a restoration company
Fixing the water heater and drying out your home are two separate jobs handled by two different professionals, and they need to happen close together rather than one after the other. A plumber diagnoses and repairs or replaces the unit itself; a restoration company extracts standing water, dries the structure, and handles any materials that need to be removed.
Sequencing matters here. Calling the plumber first makes sense since confirming the leak is actually stopped, not just slowed, lets the restoration crew start drying without worrying about a repeat event. In practice, most homeowners call both within the same hour rather than waiting for one to finish before contacting the other, and a responsive restoration company will coordinate directly with whichever plumber is already on site. When choosing a water damage restoration company, ask whether they regularly coordinate with plumbers on appliance-failure jobs, since that coordination is what keeps a two-contractor job from turning into a scheduling problem.
Before either professional starts work, confirm they're carrying current water damage restoration certifications, specifically an IICRC Water Damage Restoration Technician credential for whoever is running the drying equipment. A tank failure is a mechanical problem for a plumber, but the water itself is a restoration problem, and the two credentials aren't interchangeable.
Why the water heater's location matters
A water heater's location determines whether a failure stays contained or spreads through multiple rooms. The same tank, the same failure, produces a completely different damage scope depending on what's above and below it.
 Saturated drywall weighs roughly 1.6 pounds per square foot, which is why a bulging ceiling like this is a structural risk, not just cosmetic damage. A controlled puncture to relieve the trapped water is safer than waiting for the ceiling to fail on its own.
A unit in a garage, basement, or ground-floor utility closet generally fails toward a slab, a floor drain, or a small contained area, since gravity keeps the water low and there's often nothing but flooring to absorb it. A unit in an attic, a second-floor closet, or a space above finished living areas is a different situation entirely: the full tank volume drops straight through insulation, drywall, and framing into whatever room sits below, often before anyone notices. This is the scenario behind most of the largest water heater claims, a ceiling collapse that soaks flooring, furniture, and belongings in a room the homeowner wasn't even standing in when the tank failed.
The damage class assigned to the loss, part of the same water damage classes system used across every restoration job, tends to run higher for upper-floor failures simply because more materials absorbed water over a longer vertical path before anyone caught it. A ground-floor leak caught within an hour might be a Class 1; an attic failure discovered after a full night's drip through the ceiling can be a Class 3 or higher before a technician even arrives.
Location gets more complicated in a condo or apartment building, where a water heater failure on one floor routinely damages the unit below. Notify the downstairs neighbor and the HOA or property manager immediately, since their unit will need its own inspection and possibly its own restoration crew, and expect two separate insurance conversations: your policy for your unit and appliance, and either their policy or your liability coverage for the damage that reached theirs.
Renters face a different version of the same location problem. The water heater itself is almost always the landlord's property and the landlord's responsibility to repair or replace, but responsibility for a tenant's damaged belongings depends on the lease and on whether the tenant carries renters insurance. Report the leak to the landlord or property manager immediately in writing, since that notice is often what triggers the landlord's own liability coverage for the unit.
What causes a water heater to leak
Most water heater leaks trace back to one of six mechanical failure points, and where the water first appears usually points directly to the cause. A leak from the top of the tank is almost always a fitting or connection problem; a leak from the bottom or the tank body itself usually means the steel shell has corroded through and the unit needs replacement, not repair.
 Mineral sediment settles at the bottom of the tank over years of use, insulating the steel shell from the heating element and causing the localized overheating that leads to stress cracking near the base. A spent anode rod, visible here with heavy pitting, accelerates the same corrosion once it stops attracting rust away from the tank wall.
Most of these failure points sit in plain sight on the outside of the tank, which is why a five-minute visual check catches far more leaks before they flood a room than most homeowners expect. The exceptions are anode rod depletion and sediment buildup, both of which happen inside the tank and only become visible once the corrosion or overheating they cause reaches the shell itself.
| Cause | Where it shows up | What it usually means |
|---|---|---|
| T&P valve discharge | Water dripping from the discharge pipe on the side of the tank | The valve released pressure as designed, or it's malfunctioning and needs replacement |
| Tank corrosion from age | Water weeping from the tank body itself, often near the base | The steel tank has rusted through; this cannot be repaired |
| Anode rod depletion | Slow seepage with no clear point source | The sacrificial rod is spent and the tank has started corroding on its own |
| Loose or corroded fittings | Dripping from the top, where the cold inlet and hot outlet pipes connect | Often repairable by tightening or replacing the fitting |
| Drain valve failure | Steady drip from the valve at the base of the tank | The valve seal has worn out or was left slightly open |
| Sediment buildup | Popping or rumbling sounds, followed by a crack near the base | Mineral sediment insulated the tank bottom, causing overheating and stress cracking |
Under water damage categories, water from a fresh leak is almost always Category 1, clean supply water with no contamination. That classification can shift if the water sat in an older tank for years before the failure, since sediment and mineral buildup in the tank can carry into the water as it drains. The distinction matters for materials handling: Category 1 water in flooring or drywall can often be dried in place, while water carrying sediment from a decade-old tank may require a closer look before a technician decides the same materials are salvageable.
A burst pipe shares several of these same mechanics, particularly the pressure and corrosion angle, but a pipe fails along its length in a wall or ceiling, while a water heater fails at a fixed, findable point. That difference is actually useful: unlike a hidden pipe leak, a failing water heater usually gives off rust-colored water, unusual sounds, or a damp base well before it turns catastrophic.
Tankless water heaters leak differently
A tankless unit has no storage tank to rupture, so the catastrophic full-volume failure that defines a tank leak isn't part of its risk profile. Leaks on a tankless system instead come from the same inlet and outlet fittings, the pressure relief valve, or the internal heat exchanger, usually driven by mineral scale buildup in areas with hard water rather than age-related corrosion.
The water volume involved in a tankless failure is typically much smaller than a tank rupture, since there's no 30 to 80 gallon reservoir sitting behind the leak. That doesn't make it a non-event: a slow fitting leak left unnoticed for weeks can still saturate flooring and drywall, and the same shutoff-first, call-a-plumber-and-a-restoration-company sequence applies regardless of which type of unit failed.
How much does water heater leak restoration cost
Water heater leak restoration typically costs $500 to $12,000 for a leak that stays on the floor where the tank sits, and can reach $15,000 to $30,000 or more if the tank failed above a finished living space and opened the ceiling into the room below. A drip pan that caught a slow leak for a day costs far less to remediate than a full tank rupture that soaked an attic and the ceiling below it.
 Removing wet drywall down to a clean 12 inch flood cut, rather than drying it in place, is standard for materials that have absorbed water for more than 24 hours, since fiberglass insulation behind the wall traps moisture even after the surface looks dry.
The biggest cost jump on this range isn't the water heater's size or age, it's whether the leak stayed on one floor. A ground-floor loss that never left the utility closet caps out well under $10,000 in almost every case, while an upstairs or attic failure that opens a ceiling routinely pushes into five figures because it adds a second room's worth of materials to the loss.
| Scenario | Typical cost | Why |
|---|---|---|
| Caught by the drain pan, minor moisture only | $150–$600 | Little to no extraction needed; mostly inspection and spot drying |
| Small area of flooring affected, caught same day | $500–$2,000 | Limited extraction and drying, minimal material removal |
| Moderate spread, carpet or subfloor involved | $1,500–$5,000 | Extraction, drying equipment for several days, possible flooring replacement |
| Full tank failure on a main or ground floor | $5,000–$12,000 | Multiple materials affected, drywall and flooring removal likely |
| Full tank failure in an attic or upstairs closet | $15,000–$30,000+ | Ceiling collapse, multi-room spread, structural repair and reconstruction |
That figure covers the water damage restoration side only, drying, extraction, and any structural repair the water caused, and is separate from the cost of fixing or replacing the water heater itself. A standard 40 to 50 gallon tank replacement runs $1,200 to $2,800 installed; a tankless unit runs $2,500 to $4,500. Most insurance claims for a covered failure pay for the restoration side while the homeowner covers the appliance replacement, similar to how a burst supply line's water damage restoration cost is billed separately from the plumbing repair that caused it.
Does insurance cover water heater leak damage
Coverage depends almost entirely on whether the failure was sudden or gradual. A tank that suddenly cracks, a T&P valve that fails abruptly, or a fitting that blows out under pressure typically meets the sudden-and-accidental standard that triggers coverage under a standard homeowners policy, the same HO-3 standard used to evaluate every other cause of water damage. A tank that's been slowly weeping for weeks, especially with visible corrosion at the leak point, is far more likely to be denied as a maintenance issue the homeowner should have addressed.
Two things insurers commonly ask for on a water heater claim: the tank's age, usually visible on a manufacturer sticker, and evidence of how long the water had been present before it was discovered. A five-year-old tank with sudden fitting failure is a straightforward claim. A fourteen-year-old tank with rust staining that clearly predates the flood is a much harder one, and some adjusters will point to the tank's age alone as evidence of a maintenance failure rather than a sudden event. Photograph both the age sticker and the specific failure point before any cleanup starts, since that documentation is what an adjuster weighs most heavily.
The water heater unit itself is not covered by a standard homeowners policy under either scenario. Insurance pays to dry and repair the home; replacing the appliance is the homeowner's expense, the same way it would be for a failed refrigerator or dishwasher, regardless of what the resulting water damage cost to fix. A wide range of causes fall under this same sudden-and-accidental framework, which is how homeowners insurance covers water damage generally, and a water heater failure is evaluated by the same criteria as a burst pipe or a failed appliance hose.
Signs your water heater is about to leak
A leaking water heater almost always shows warning signs before it fails completely, including rust-colored water, popping or rumbling sounds from sediment buildup, and a damp base or corroded fittings. Catching one of these signs early is usually the difference between a plumber visit and a full restoration job.
 Rust-colored water from a hot tap is one of the earliest signs of internal tank corrosion, often appearing before any external leak is visible at the tank itself.
Rust-colored water from hot taps
This often means internal tank corrosion has already started, even before any external leaking appears.
Popping or rumbling sounds from the tank
Sediment buildup at the base causes trapped water to boil, which is the sound and precursor to base cracking.
A damp base, corroded fittings, or visible pooling
Even a small puddle at the base warrants immediate investigation rather than a wait-and-see approach.
A tank approaching or past 10 years old
Age alone doesn't mean an imminent failure, but it turns any other symptom from a minor concern into an urgent one.
Reduced hot water volume or inconsistent temperature
Internal sediment or a failing element can signal the same aging process that eventually causes a leak.
Watching for these signs of water damage around the water heater specifically, rather than waiting for a flooded floor, is the single most effective way to avoid this becoming a restoration job at all. A quick monthly glance at the base of the tank catches most of these before they turn into an emergency call.
How to prevent a water heater leak
Testing the T&P valve annually, checking the anode rod every two to three years, and confirming the drain pan has a working drain line catch most water heater failures before they cause damage. None of these take more than a few minutes, and most cost nothing beyond the time it takes to look.
 Lifting the test lever briefly once a year confirms the valve releases and reseats cleanly. A valve that keeps dripping afterward has failed and needs replacement before it's tested by real pressure instead.
Test the T&P valve annually
Lift the valve's test lever briefly to confirm it releases and reseats cleanly. A valve that doesn't respond, or one that keeps dripping afterward, needs replacement before it fails under real pressure.
Check the anode rod every two to three years
A spent anode rod is inexpensive to replace and directly extends the tank's working life. Once it's gone, the tank itself starts absorbing the corrosion the rod was designed to attract.
Confirm the drain pan has a working drain line
The International Residential Code requires a pan under water heaters in locations where a leak could cause damage, specifically because a pan with a functioning drain line catches minor drips before they reach flooring. A pan that drains to nowhere, or one that's cracked, provides no real protection.
Replace rigid or corroded fittings with braided stainless connectors
Flexible, corrosion-resistant connectors at the inlet and outlet reduce the fitting failures that account for most top-of-tank leaks.
Plan for replacement once the tank passes 10 years
Age is the single biggest predictor of tank failure. Replacing a unit proactively, especially before an extended trip or a home sale, avoids discovering a failure at the worst possible time.
These steps line up with the broader water damage prevention practices worth building into a regular home maintenance routine, since a water heater is just one of several appliances where a small annual check prevents a major loss. Pairing the water heater check with an existing seasonal task, like changing an HVAC filter, makes it easier to remember.
Frequently asked questions
Is a water heater leak covered by homeowners insurance?
Usually, if the failure was sudden. A cracked tank, a burst fitting, or a T&P valve that suddenly releases water typically falls under the sudden-and-accidental standard that most HO-3 policies use. A slow leak that built up over weeks or months is usually treated as a maintenance issue and excluded, especially if the tank shows long-term corrosion.
How do I know if my water heater is actually leaking, or just sweating with condensation?
Dry the tank and the floor completely, then check back in an hour. Condensation forms a light, even film across the tank's surface, usually when a cold water inlet runs through a warm, humid room, and it stops once the humidity drops. A true leak reappears as a wet spot or a growing puddle in the same location, usually at a fitting, the base, or the drain valve.
Can I keep using hot water while the leak gets fixed?
No, not until the source is confirmed and the water supply is shut off. Continuing to draw hot water keeps the tank refilling with cold water, which keeps the leak active and adds to the volume you're cleaning up. Shut off the cold water inlet valve above the tank first, then wait for a plumber before restoring supply.
How much does it cost to replace a water heater versus repair the leak?
A simple repair, a new T&P valve or a tightened fitting, typically runs $150 to $600. A standard 40 to 50 gallon tank replacement runs $1,200 to $2,800 installed, while a tankless unit runs $2,500 to $4,500 installed. This is a separate cost from water damage restoration. Insurance typically pays for drying and repairing the surrounding structure but not for the water heater unit itself, which is treated as a maintenance replacement.
Is it safe to be near a leaking gas water heater?
Yes, as long as there's no gas smell and the water hasn't reached the electrical panel or any outlets. Turn the gas control knob to off rather than trying to relight or adjust the pilot, and open a window if you smell gas at all. If standing water is anywhere near an outlet, breaker panel, or plugged-in appliance, treat it as an electrical hazard and cut power at the breaker before doing anything else.
At what age should I replace a water heater before it leaks?
Most plumbers recommend planning for replacement once a tank passes the 10 year mark, even if it's still working, especially before an extended trip or a home sale. Waiting until failure means dealing with both the flood and the replacement at the same time, usually on an emergency schedule with emergency pricing.
Does my water heater's warranty cover the water damage it caused?
No. A manufacturer's warranty covers the tank or its parts, not damage to your floors, walls, or belongings. Water damage from the leak is a homeowners insurance question, evaluated separately from whatever the warranty does or doesn't cover on the unit itself.
Does a drip pan under the water heater stop damage from happening?
Only for small, slow leaks, and only if the pan's drain line actually works. A drain pan is required by the International Residential Code specifically to route minor drips away from flooring, but it has no capacity to contain a full tank failure or a burst fitting, which can release the tank's entire volume faster than the pan can drain.
My water heater is leaking from the bottom. Does that mean I need a new tank?
In most cases, yes. A leak from the bottom of the tank usually means the steel shell has corroded through, which can't be patched or sealed. A leak from the top is more often a loose or corroded fitting, which a plumber can often repair without replacing the whole unit. Either way, confirming a technician's IICRC certification and asking about their questions to ask a water damage restoration company checklist before work starts protects you from paying to dry out a room a second time.
Sam Hickerson is the founder of RestoreAdvisor and writes consumer guides on mold remediation, water damage restoration, inspection, testing, and home recovery. His work focuses on helping homeowners understand costs, risks, and when to call a professional. He draws on guidance from the EPA, CDC, IICRC, and other authoritative sources to make complex home issues easier to navigate.