
A roof leak does not have to be large to cause a serious mold problem. Mold from a roof leak is fungal growth that establishes on wet building materials (attic sheathing, insulation, ceiling drywall, and wall framing) following water intrusion through the roof assembly, as defined under ANSI/IICRC S520, the industry standard for professional mold remediation. According to the EPA, mold can begin growing on damp building materials within 24–48 hours of water exposure, and most roof leaks go unnoticed for days or weeks before a stain appears on the ceiling. By the time you see visible damage, mold has often already established itself in the attic, behind drywall, or inside insulation where cleaning alone cannot reach it.
This guide covers where mold grows after a roof leak, how to identify hidden growth, which contractors to call and in what order, and what professional remediation looks like from start to finish.
Key insights
- 24–48 hours. Per EPA guidance, mold can begin colonizing wet building materials within 24–48 hours of water intrusion. By the time a ceiling stain is visible, active mold is almost certainly already present.
- Two contractors, not one. A roofer stops the leak. A mold remediation specialist removes the mold. These are separate trades, and mold remediation that begins before the leak is fixed will fail.
- Attics are the highest-risk zone. Warm, dark, and poorly ventilated, attics provide ideal mold conditions. Spores from attic growth can migrate into living spaces through ceiling gaps, fixtures, and the stack effect.
- Porous materials cannot be cleaned. Drywall, insulation, and wood framing absorb moisture and mold at a cellular level. The EPA and ANSI/IICRC S520 both require removal and replacement of saturated porous materials, not surface cleaning.
- Insurance coverage hinges on cause. Mold from a sudden, storm-caused roof failure is typically covered under a standard HO-3 policy. Mold from a slow, neglected leak is almost always excluded as a maintenance issue.
- 10 square feet is the EPA's DIY threshold. Patches under 10 square feet on non-porous surfaces may be handled by a prepared homeowner. Anything larger, or any growth in wall cavities or the attic, requires professional remediation.
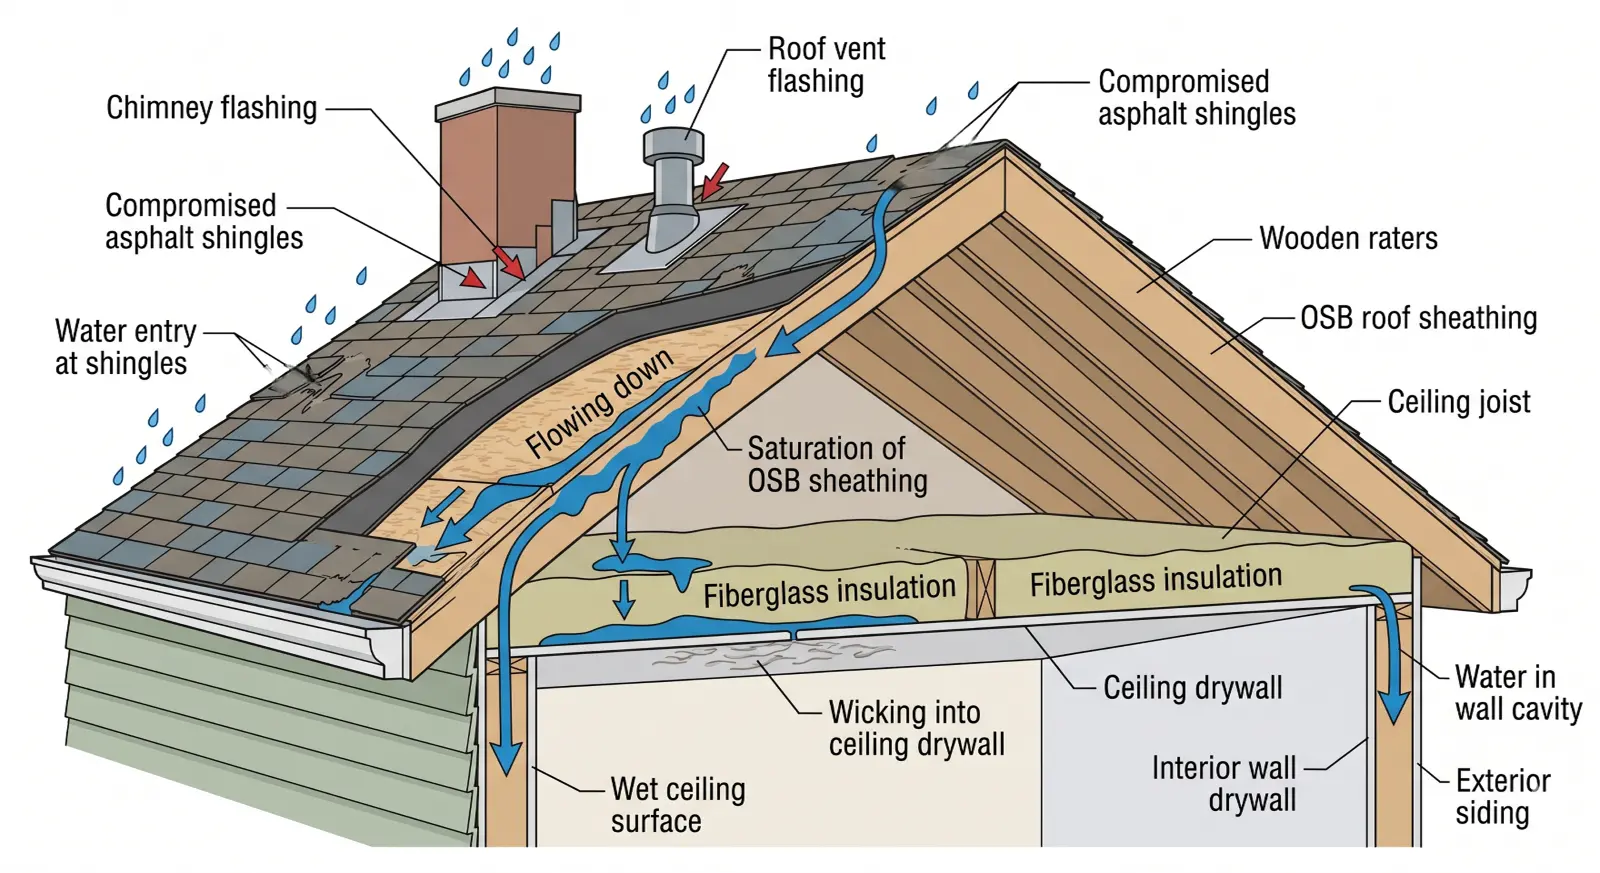
Why roof leaks cause mold so quickly
Mold growth after a roof leak begins fast because attics and ceiling cavities provide near-ideal conditions: organic materials like wood and drywall paper to feed on, warmth from solar heat gain, and minimal airflow to dry things out. The IICRC S520 Standard for Professional Mold Remediation identifies sustained moisture as the single controlling factor in mold establishment, and a roof leak delivers exactly that.
The timeline follows a predictable pattern. In the first 24 hours, water is absorbed into roofing materials, sheathing, insulation, and drywall. Mold spores, which are always present in the air, begin activating on any surface where moisture content stays elevated. Per EPA mold cleanup guidance, if wet or damp materials are not dried within 24–48 hours, mold growth should be assumed. By 48–72 hours, microscopic colonies are forming even if nothing is visible yet. Musty odors may appear around day three. Visible black, green, or white growth typically becomes apparent within 3–7 days, though growth inside wall cavities and behind drywall can develop undetected for weeks.
What to do when you find mold from a roof leak
When you discover mold from a roof leak, the order of actions matters as much as the actions themselves. Starting with the wrong contractor or skipping documentation can cost you a coverage denial or a failed remediation. Follow these six steps in sequence.
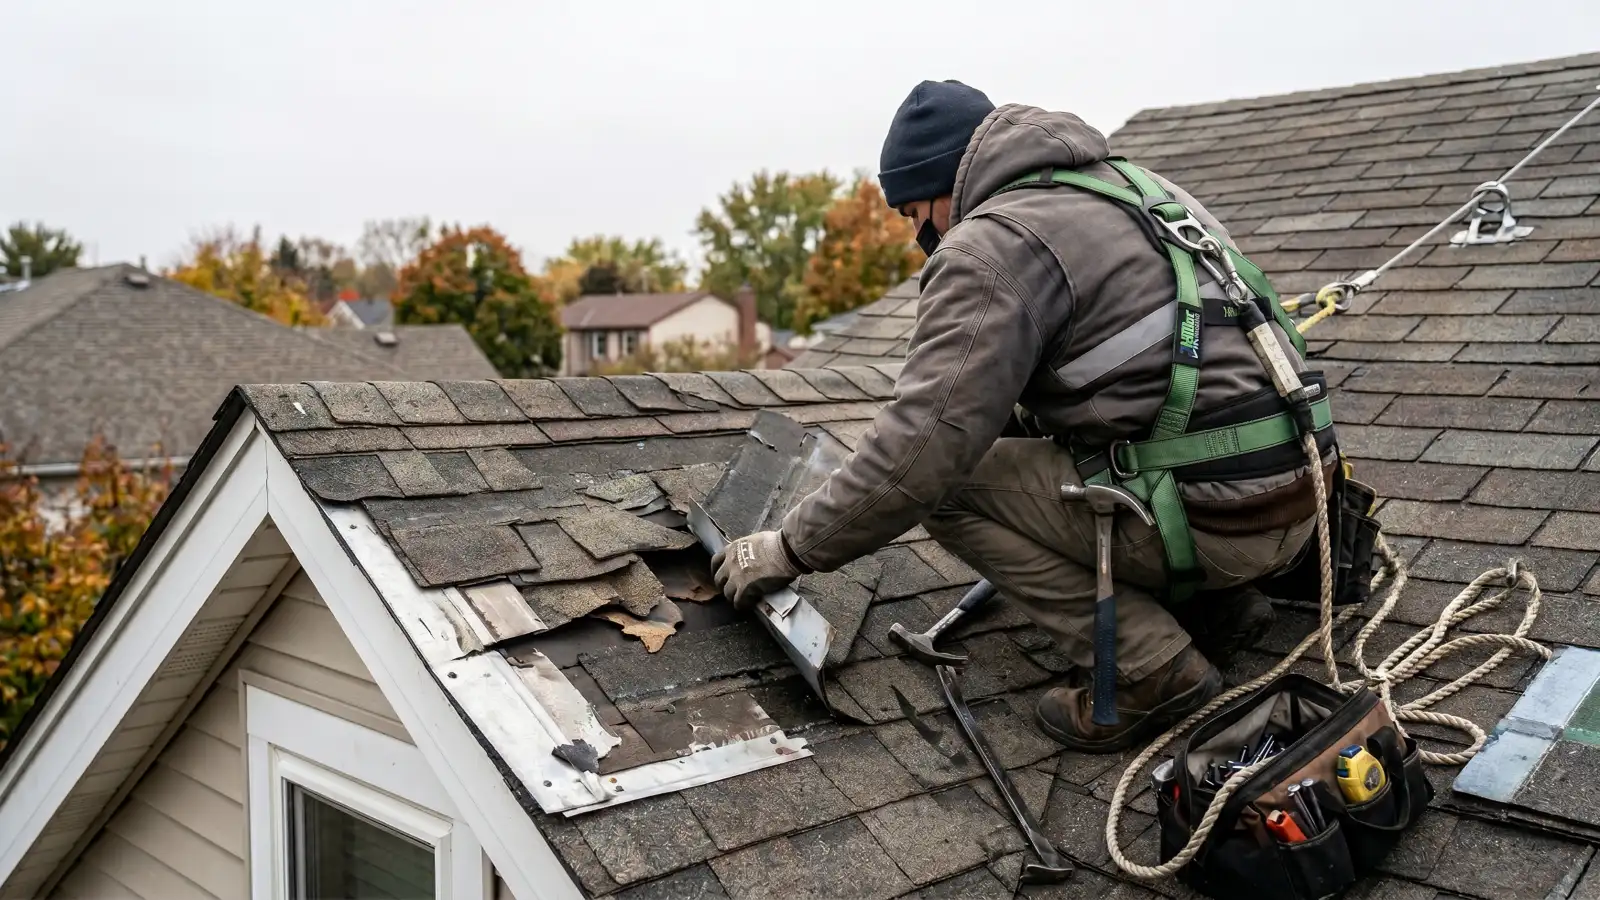
1. Stop the leak
Contact a licensed roofer to inspect and repair the source of the leak. If repairs cannot happen immediately, have a tarp installed over the affected section. No remediation should begin while moisture is still entering; treating mold on an active leak is the single most common reason remediation fails.
2. Document the damage
Photograph all visible water staining, mold growth, and damaged materials before any cleanup begins. Capture the ceiling stain, any attic growth, and the exterior roof damage. This documentation is essential for an insurance claim and for confirming the moisture source to the remediation contractor.
3. Assess the scope
Determine whether visible mold exceeds 10 square feet, whether it has reached the attic or wall cavities, and whether drywall or insulation is saturated. If any of these conditions are present, professional remediation is required. A certified inspector using a moisture meter can map the full extent of growth beyond what is visible from the surface.
4. Dry the affected area
Run dehumidifiers and increase ventilation as soon as the leak is stopped. Per EPA guidance, drying all wet materials within 24–48 hours can prevent mold from establishing. In most roof-leak situations this window has already passed by the time the stain is noticed, but drying still limits further spread while remediation is being arranged.
5. Hire a mold remediation professional
For jobs exceeding 10 square feet or involving attic framing, drywall cavities, or insulation, hire an IICRC-certified mold remediation contractor. Get a written scope of work before authorizing any removal. Confirm the contractor holds current AMRT certification and carries general liability, workers compensation, and pollution liability insurance.
6. Request clearance testing
After remediation is complete, independent post-remediation clearance testing confirms that airborne spore counts have returned to normal levels. This testing must be conducted by a separate inspector, not the remediation contractor. Clearance testing is the only objective confirmation that the job is done.
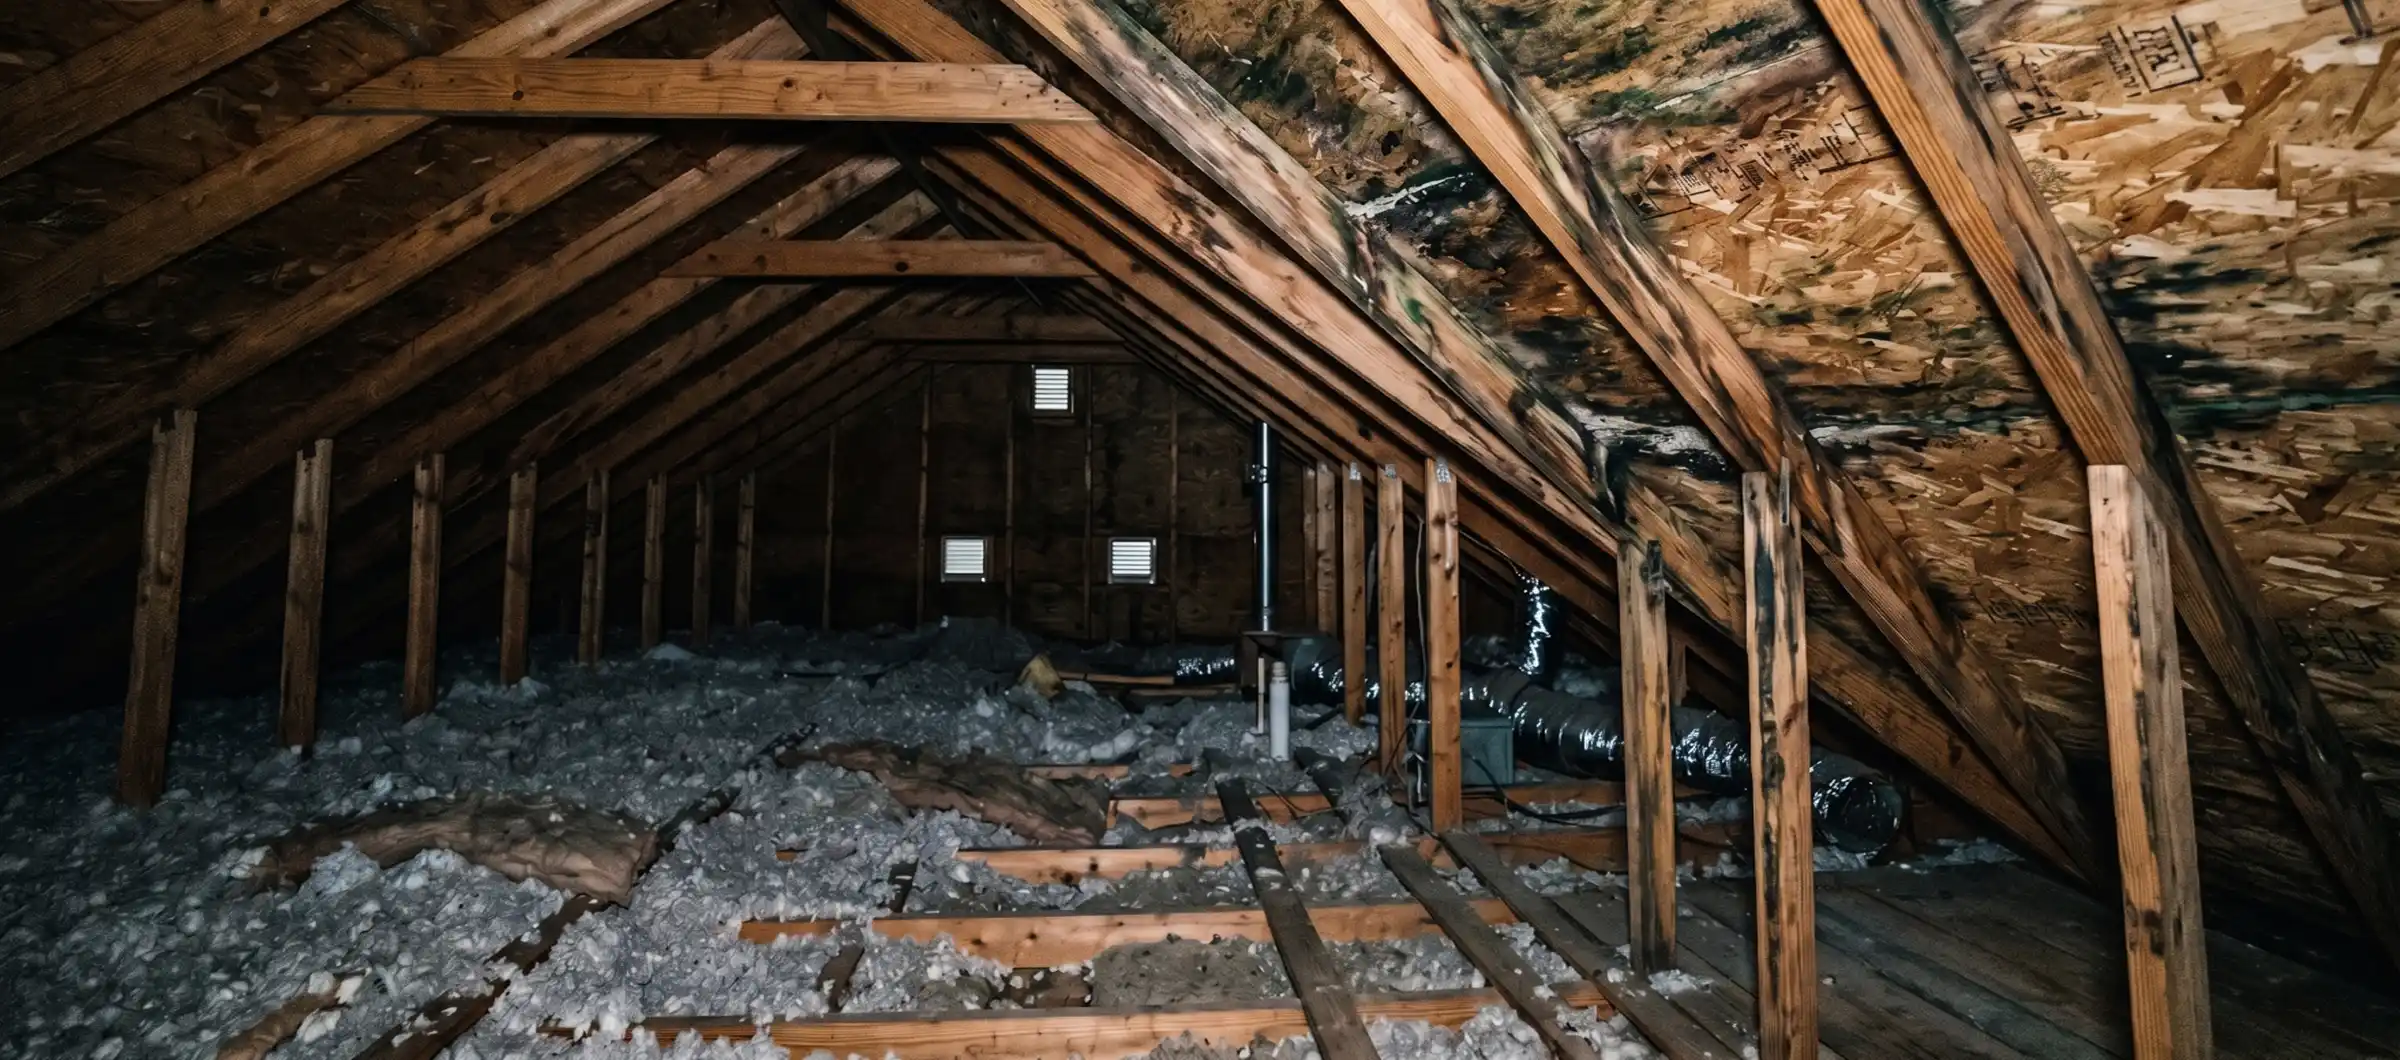
Where mold hides after a roof leak
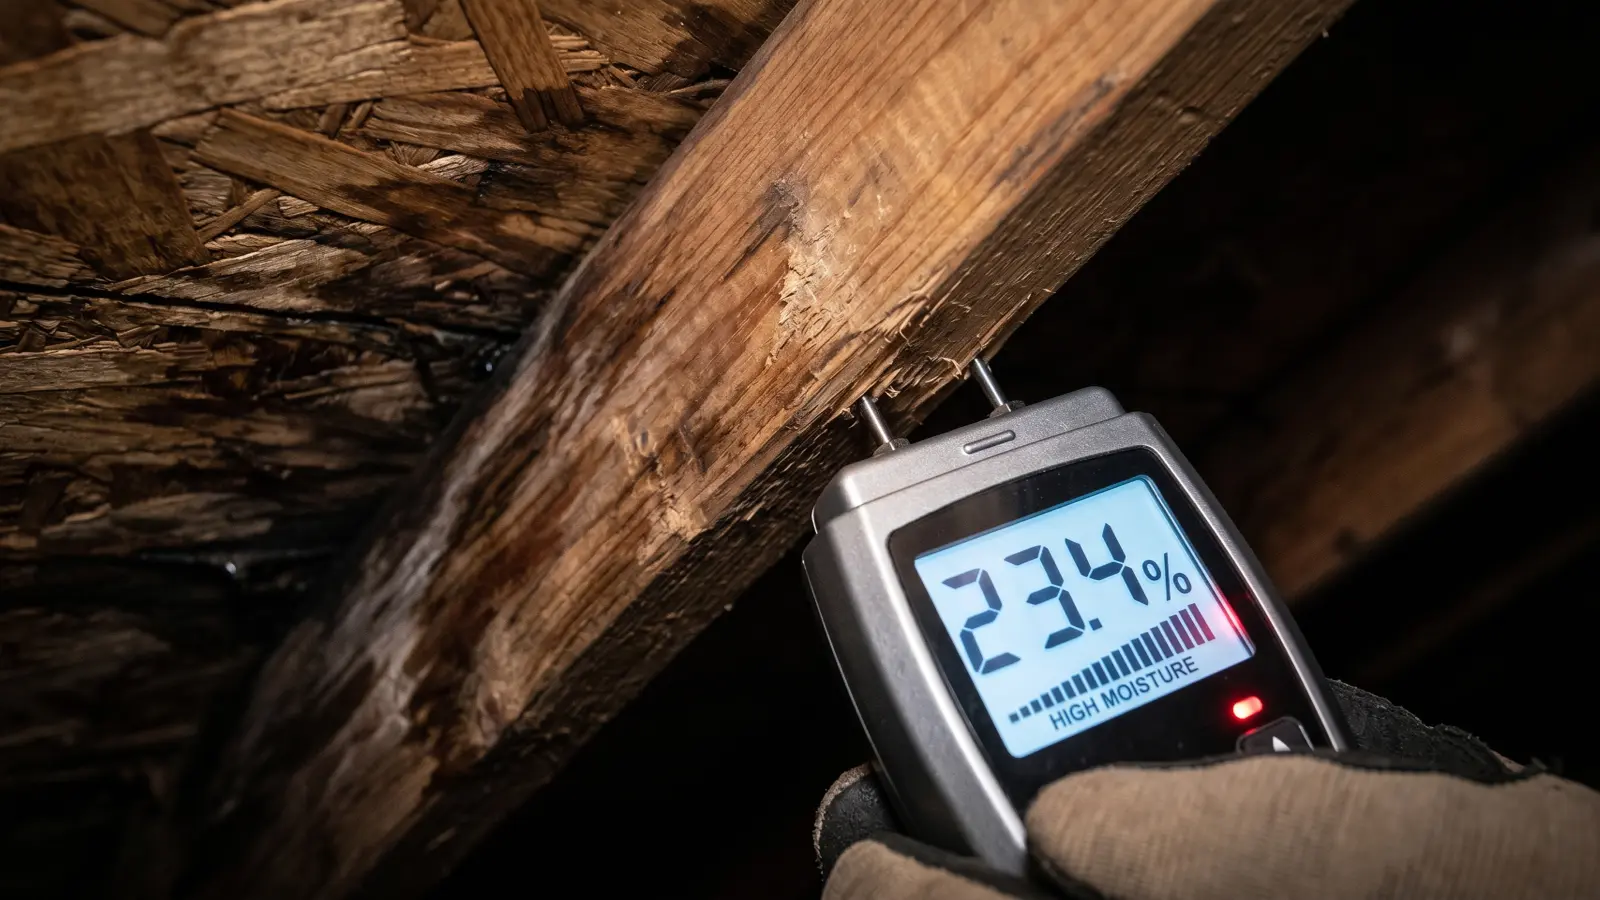
After a roof leak, mold most commonly hides in attic sheathing and rafters, ceiling drywall cavities, wall framing, attic insulation, and around ceiling fixtures and HVAC boot connections. Water follows gravity and the path of least resistance, traveling laterally along framing and vapor barriers before wicking into wall cavities, often appearing as mold at baseboard level in rooms directly below the leak, well away from the visible ceiling stain. A moisture meter reading above 19% in wood is the IICRC S520 threshold for active mold risk, and affected areas routinely extend two to three times further than the visible stain suggests.
The attic is almost always the first zone affected, but water does not stop there. From saturated sheathing, moisture wicks into insulation batts and then into the ceiling drywall below. In older homes, gaps around electrical boxes and light fixtures give water a direct channel into wall cavities, which is why mold sometimes appears at baseboard level in a room with no visible ceiling stain at all.
| Location | Why it is high-risk | What to look for | DIY or pro |
|---|---|---|---|
| Attic sheathing and rafters | First surface water contacts; warm, dark, low airflow | Black or green staining on OSB or plywood; white powdery coating on rafters | Pro |
| Attic insulation | Batt and loose-fill insulation traps moisture and cannot be dried | Discolored, compressed, or saturated insulation | Pro (remove and replace) |
| Ceiling drywall (top side) | Water pools on the vapor-side paper before showing through | Soft spots, bubbling, or brown staining on ceiling surface | Pro if over 10 sq ft |
| Wall cavities | Water runs down framing and wicks into drywall cores | Peeling paint, soft drywall, mold at baseboard level away from obvious source | Pro |
| Around light fixtures and HVAC boots | Gaps allow water to channel directly into living space | Water stains or mold ringing a ceiling light or vent | Pro |
Understanding where moisture has traveled is the primary reason a professional mold inspection uses tools beyond visual observation. Certified inspectors use moisture meters and thermal imaging cameras to trace water pathways and find growth that isn't visible from the surface. Reviewing the broader topic of mold after water damage covers how moisture migration works across different types of water events.
Signs you have mold from a roof leak
Roof-leak mold produces at least five distinct signal types before growth becomes obvious: ceiling staining, persistent odor, structural changes to drywall, health symptoms that clear when you leave home, and visible growth on attic sheathing. Recognizing any one of them warrants immediate investigation because the visible surface almost never represents the full extent of growth.
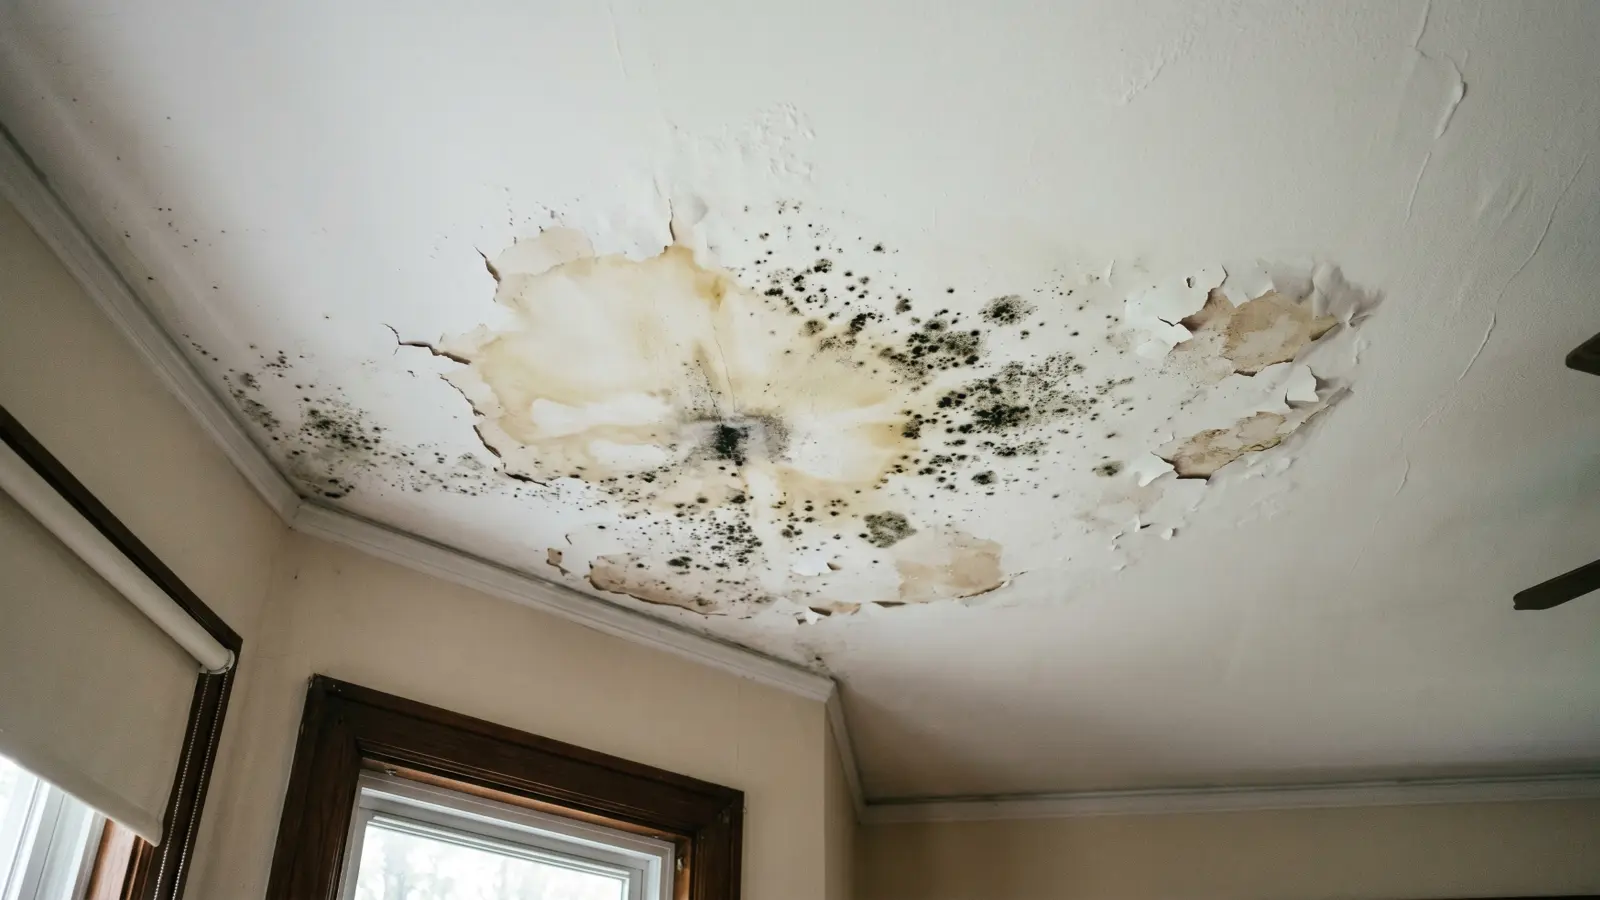
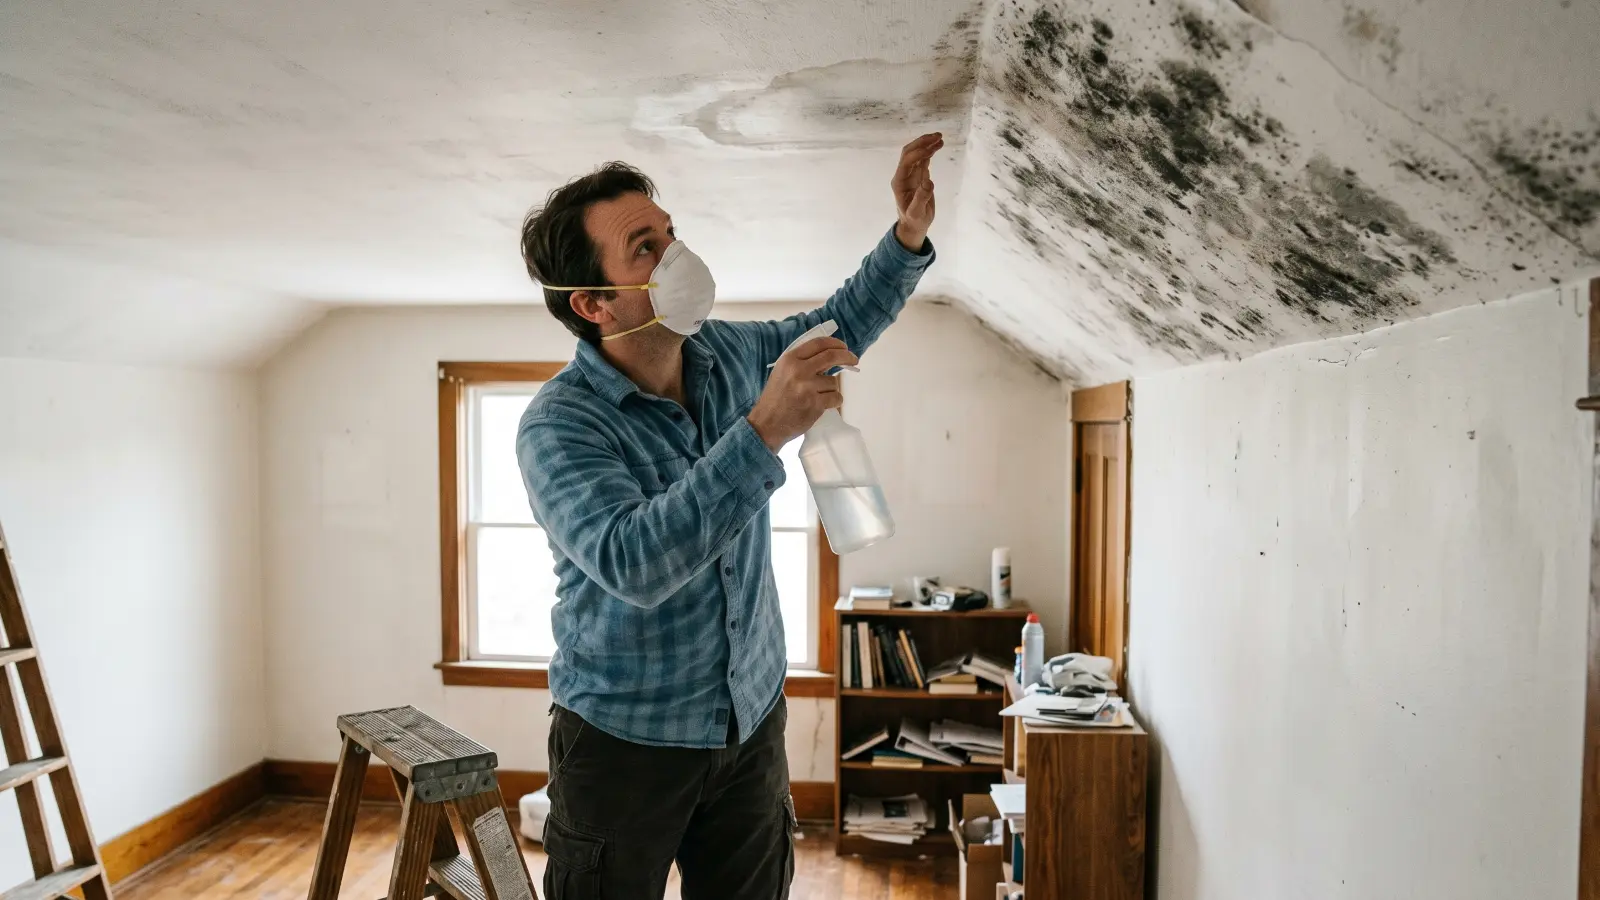
Visual signs on ceilings and walls
A brown or yellow water stain with dark spotting at the perimeter is the classic pattern. The stain marks where water pooled; the dark spots at the edges are often early mold growth on the drywall paper. Black, green, or white fuzzy patches anywhere within 2–3 feet of a stain confirm active mold. A full location-by-location breakdown of signs of mold by room covers what to look for in each area of the home.
Odor
A persistent musty or earthy smell in one room, particularly concentrated near an exterior wall, ceiling fixture, or attic access hatch, is a reliable early indicator. The smell often intensifies on warm days when temperature differential drives air movement through ceiling gaps.
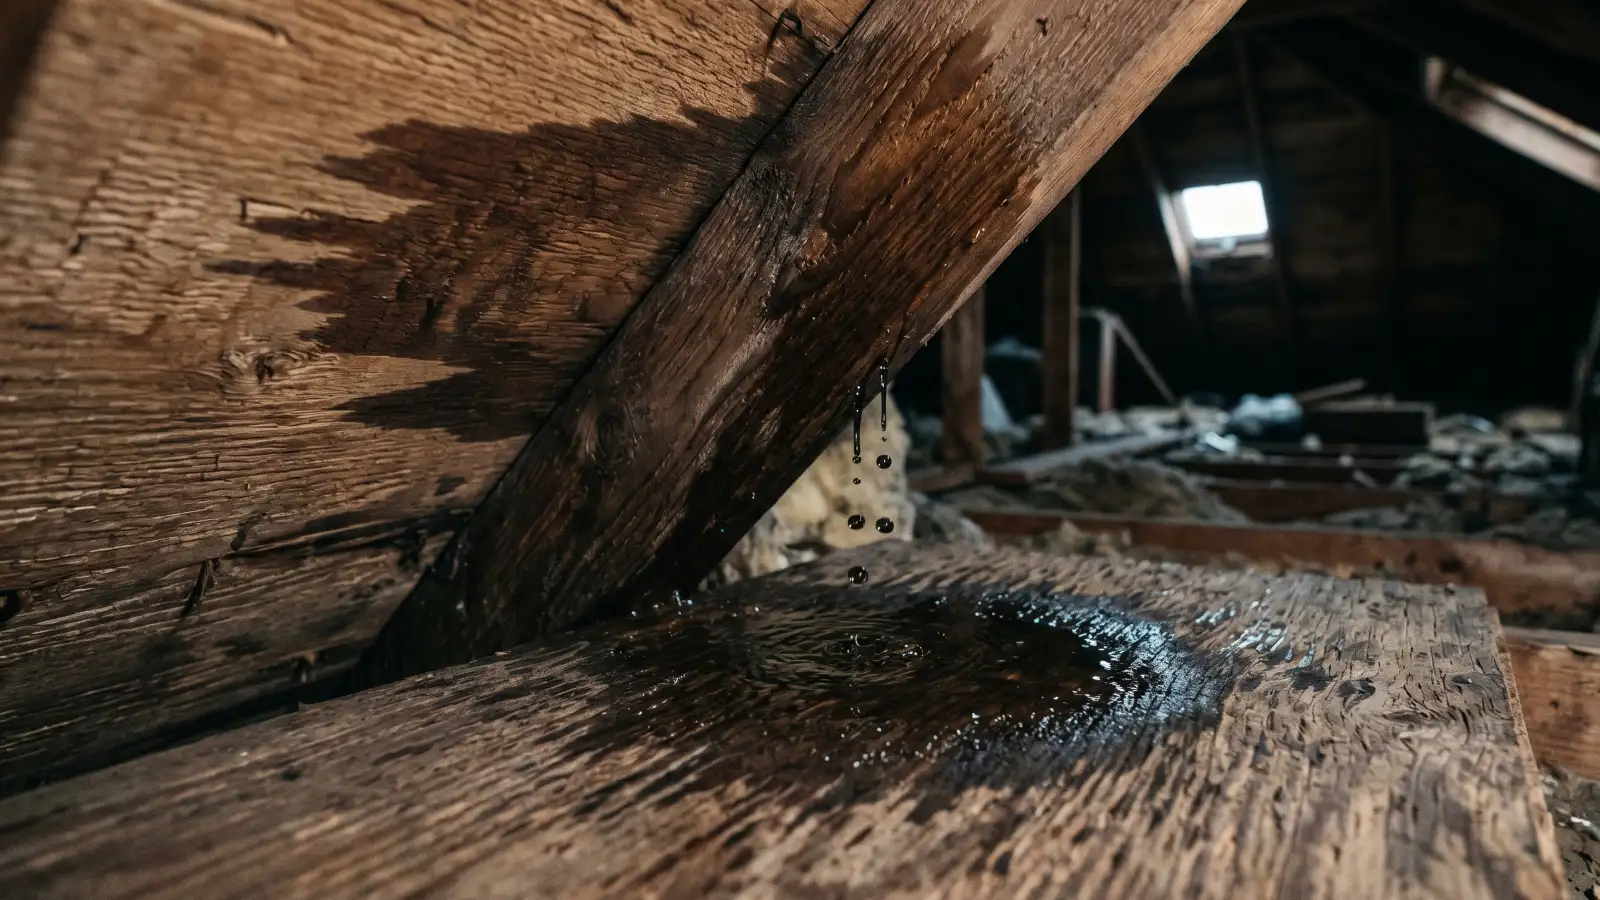
Structural changes
Drywall that feels soft, spongy, or shows surface bubbling has absorbed moisture and is likely harboring mold on its interior paper face. Peeling paint around ceiling edges and sagging ceiling material are later-stage indicators that typically mean the drywall needs replacement.
Health signals
Coughing, nasal congestion, or eye irritation that improve when you leave home and return when you come back is a recognized pattern associated with indoor mold exposure, as noted by the CDC: Basic Facts About Mold. This pattern warrants investigation even without visible growth.
Attic-specific indicators
Visible black, green, or white staining on OSB sheathing or roof rafters is the definitive sign of attic mold. White powder on rafters can be efflorescence from condensation, but it signals moisture problems that often co-occur with mold.
Systemic vs. limited mold growth
Limited mold growth from a roof leak stays in the zone directly around the leak entry point and can be remediated in a defined scope. Systemic growth spreads throughout the attic when sustained humidity elevates across the entire space, producing colonies on surfaces far from the original entry point. Whether a job is limited or systemic determines both the remediation approach and the cost.
Limited growth
Occurs when attic ventilation is adequate to exhaust the extra moisture introduced by the leak. Because humidity stays low outside the immediate wet zone, mold cannot establish elsewhere in the attic.
Systemic growth
Occurs when a leak is large enough, or attic ventilation poor enough, that humidity elevates across the entire space. Condensation forms on all cold surfaces and mold grows across wide areas of sheathing even in sections far from the original leak. Systemic growth is more common in humid climates, older homes with inadequate soffit and ridge ventilation, and homes where bathroom or kitchen exhaust fans vent into the attic rather than outside.
Distinguishing between the two requires more than a visual check near the obvious stain. A moisture meter reading above 19% in wood is the IICRC S520 threshold that indicates active mold risk; readings above 28% indicate wood rot risk. Systematic moisture mapping of the attic floor determines whether the problem is isolated or widespread before any removal begins.
Who to call first: the two-contractor problem
The most common mistake homeowners make after discovering mold from a roof leak is calling a mold remediation company first. Mold remediation professionals are not licensed to repair roofs, and any mold remediation performed while an active leak is still present will fail. Moisture will continue feeding new growth behind freshly treated surfaces.
The correct sequence is:
1. Call a licensed roofer first
Get the leak repaired or at minimum tarped before any other work begins. Obtain documentation of the repair, including photos of the damaged area and the repair method used. This documentation matters for both insurance purposes and confirming to the mold remediation contractor that the moisture source has been eliminated.
2. Call a mold inspector or remediation contractor second
Once the leak is confirmed stopped, schedule a mold assessment. A qualified inspector will map moisture, identify the full extent of growth, and provide a written scope of work. Inspection and remediation should ideally be performed by separate companies to prevent the same contractor from assessing and profiting from the same scope.
3. Contact your insurance company in parallel
Report the damage promptly. Many policies require timely reporting, and delayed claims for mold are among the most common reasons coverage is denied. Do not authorize major demolition or material removal before your adjuster has had a chance to document the damage unless immediate action is required to prevent further spread.
For jobs involving mold on ceilings or attic framing, both the roofer and the mold remediator may need to pull separate permits depending on your jurisdiction. Confirm permit requirements with your local building department before work begins.
DIY removal vs. professional remediation
The EPA's 10-square-foot threshold defines the outer boundary of practical DIY mold removal: patches smaller than roughly 3 feet by 3 feet on non-porous, cleanable surfaces. That rule applies to mold in general, but roof-leak mold specifically almost always falls outside it for two reasons.
First, the affected materials are almost always porous. Drywall, insulation, and wood framing absorb moisture and mold growth below the surface. Wiping or spraying the visible surface does not reach the mold embedded in the material's structure, and the EPA is explicit that porous materials with visible mold must be removed and replaced, not cleaned in place.
Second, the scope is rarely contained to what's visible. What appears as a 12-inch ceiling stain frequently corresponds to a much larger moisture-affected zone in the attic above. Attempting DIY removal of the ceiling patch without addressing the attic growth leaves the primary mold colony intact.
For the narrow cases where DIY is appropriate (a confirmed small patch on a non-porous surface, leak already fixed, no attic involvement), follow the DIY mold removal process. For the vast majority of roof-leak situations, at least one of those conditions fails.
Signs that professional remediation is required regardless of visible patch size:
- Any growth on attic sheathing, rafters, or insulation
- Drywall that is soft, bubbling, or saturated
- Growth inside wall cavities
- Musty odor persisting after surface cleaning
- Return of visible mold within a few weeks of DIY cleaning
- Any occupant with respiratory conditions, asthma, or a compromised immune system
- Suspected black mold removal scenario; Stachybotrys chartarum requires containment protocols beyond standard DIY scope
Reviewing when professional remediation is required provides the full decision framework including IICRC contamination levels L1, L2, and L3.
What the remediation process looks like
Professional mold remediation after a roof leak follows the seven-phase framework defined by ANSI/IICRC S520: moisture mapping, containment, porous material removal, structural wood treatment, drying to a target of 16% moisture content, clearance testing, and reconstruction. Each phase must be completed in sequence before the next begins.
Moisture mapping and scope definition
The remediation contractor confirms that the moisture source has been eliminated, then uses moisture meters and thermal imaging to establish the full boundary of affected materials. This step prevents incomplete remediation caused by removing only the visually obvious mold.
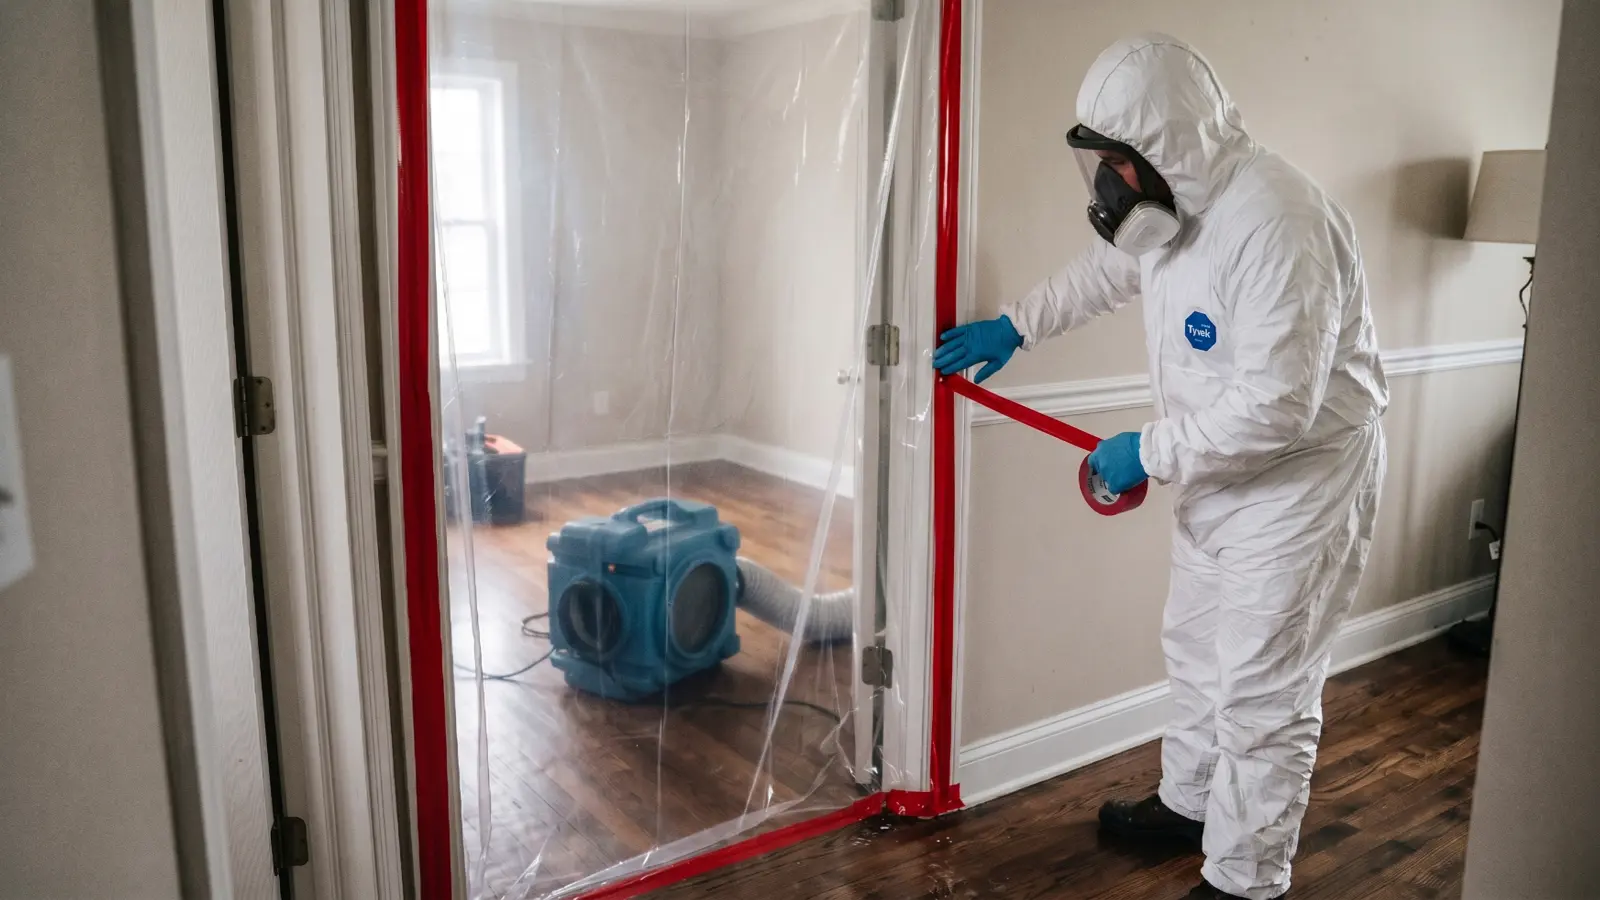
Containment
The work zone is isolated with 6-mil polyethylene sheeting and negative air pressure maintained by HEPA air scrubbers. Negative pressure prevents disturbed spores from migrating to clean areas of the home during removal work.
Removal of porous materials
Saturated drywall, insulation, and any wood framing that fails the IICRC moisture threshold is removed and bagged for disposal. Attic insulation is almost always replaced rather than dried in place.
Treatment of structural wood
Remaining structural wood (rafters, sheathing, joists) that shows surface mold but passes moisture threshold testing is mechanically abraded using wire brushes or soda blasting, then treated with an EPA-registered antimicrobial. Encapsulants may be applied after treatment per the contractor's scope.
Drying and verification
Industrial drying equipment runs until all remaining materials reach the IICRC S520 drying target of 16% moisture content or less. This phase can take 2–5 days depending on the volume of affected material and ambient conditions.
Clearance testing
Independent post-remediation testing by a separate inspector confirms that airborne spore counts have returned to acceptable levels before containment is removed and reconstruction begins. Clearance testing is not optional; it is the only objective confirmation that remediation was successful. Reviewing mold testing explains how clearance testing works and how to read lab results.
Reconstruction
After clearance, a general contractor replaces drywall, insulation, and any interior finishes removed during remediation. The remediator and general contractor are typically separate parties. Full professional mold remediation from assessment through reconstruction is the standard approach for any job involving structural materials.
Mold remediation cost after a roof leak
The cost of remediating mold from a roof leak varies primarily based on how far moisture traveled and which materials require replacement. A ceiling patch limited to a small section of drywall is substantially less expensive than a systemic attic job involving full sheathing treatment and insulation replacement.

The table below covers remediation only. Each scenario assumes the roof has already been repaired. Jobs involving multiple affected zones, inaccessible cavities, or confirmed Stachybotrys growth will fall at the higher end of each range or above it.
| Scenario | Typical cost | What drives the range | Materials affected |
|---|---|---|---|
| Small ceiling patch, drywall only | $500–$1,500 | Scope under 10 sq ft; no structural involvement | Ceiling drywall, limited drywall repair |
| Ceiling with wall cavity involvement | $1,500–$4,000 | Wall opening required; larger containment zone | Drywall, framing treatment, insulation |
| Limited attic mold (one section) | $2,000–$5,000 | Attic access, PPE requirements, spot sheathing treatment | Attic insulation, roof sheathing |
| Systemic attic mold (full attic) | $3,000–$10,000+ | Full attic insulation removal, soda blasting structural framing | All attic insulation, sheathing, rafters |
| Multiple rooms, hidden wall mold | $5,000–$15,000+ | Extensive moisture migration, multiple opening and closing cycles | Drywall, insulation, framing across rooms |
These figures cover remediation only. Roof repair costs are separate and range from $300–$1,500 for minor flashing and shingle repairs to $8,000–$20,000 or more for significant structural deck damage or full replacement. Post-remediation reconstruction (new drywall, insulation, paint) adds another $500–$3,000 depending on scope.
For full national cost data by contamination level, infestation size, and mold type, the mold remediation cost breakdown covers all scenarios.
Does insurance cover mold from a roof leak?
Whether homeowners insurance covers mold from a roof leak depends almost entirely on what caused the leak. Standard HO-3 policies use a covered-peril doctrine: mold resulting from a sudden, unexpected event that is itself covered will typically be covered up to the policy's mold sublimit. Mold resulting from a gradual or neglected leak is almost always excluded.
The distinction between sudden damage and gradual deterioration is the single most consequential factor in whether a claim is approved. Prompt reporting, clear documentation of the triggering event, and evidence that you acted quickly to stop further damage all strengthen a claim.
| Leak cause | Coverage likelihood | Notes |
|---|---|---|
| Storm damage (wind, hail, fallen tree) | Usually covered | Roof damage and resulting mold both covered under sudden-event clause |
| Ice dam causing sudden failure | Often covered | Some policies exclude ice dams; check your declarations page |
| Slow shingle deterioration over time | Excluded | Wear and maintenance are homeowner's responsibility |
| Neglected flashing leak (months unaddressed) | Excluded | Delayed reporting and lack of maintenance are standard exclusions |
| Construction defect | Excluded | Material or workmanship defects are not covered perils |
Most standard policies include a mold sublimit of $5,000–$10,000, which may not cover the full cost of a systemic attic remediation job. An optional hidden water damage endorsement (sometimes called concealed water damage coverage) can extend coverage for leaks that were not visible or discoverable without opening walls or ceilings. This endorsement typically costs $200–$500 per year and is worth considering for homes with aging roofs.
Document everything before cleanup begins. Photographs of the roof damage, the water entry point, all affected interior surfaces, and any mold growth are the foundation of a successful claim. Contact your insurance company before authorizing major demolition. The full cause-by-cause table and claims process are covered in depth on mold insurance coverage.
Preventing mold after a roof leak
The most effective prevention strategy is catching roof damage early, before a minor flashing gap or cracked shingle becomes a saturated attic. Annual roof inspections, particularly after storm seasons, keep repair costs at a fraction of what remediation costs once mold establishes.
Attic ventilation is the second line of defense. Proper intake ventilation at soffits and exhaust ventilation at the ridge creates continuous airflow that removes moisture before it can accumulate. The International Residential Code requires a minimum of 1 square foot of net free ventilation area per 150 square feet of attic floor area. Homes where bathroom or kitchen exhaust fans vent into the attic rather than outside are at significantly elevated mold risk and should have ventilation corrected regardless of roof condition.
Key ongoing maintenance actions that reduce roof-leak mold risk:
- Inspect roof and flashing annually and after any storm producing winds over 50 mph
- Keep gutters clear of debris to prevent water from backing under shingles at eaves
- Confirm all bathroom, kitchen, and dryer exhaust fans vent to the exterior
- Check attic insulation for compression or discoloration after any suspected leak
- Maintain attic humidity below 60% relative humidity using a hygrometer
- Address any ceiling stain immediately rather than monitoring it
Prompt action after discovering any ceiling stain is the single most important factor in limiting both the mold scope and the remediation cost. A mold inspection early in the process rules out hidden growth before it spreads to structural framing.
Frequently asked questions
How fast does mold grow after a roof leak?
Mold can begin colonizing damp building materials within 24–48 hours of a roof leak, per EPA and IICRC guidance. Visible growth typically appears within 3–7 days. In warm, humid attics, that window can be shorter. Most homeowners discover a ceiling stain well after the 48-hour window has passed, meaning active mold is already present even before visible growth appears.
Who do you call first for mold from a roof leak?
Call a licensed roofer first to stop the moisture source. Mold remediation contractors cannot permanently resolve mold caused by an active leak. Once the roof is repaired or tarped, schedule a mold inspection. These are two separate contractors and you will need both; no single company handles both trades.
Can I remove mold from a roof leak myself?
No, not in most cases. DIY removal is only appropriate for patches under 10 square feet on non-porous surfaces, per EPA guidance. Roof-leak mold almost always affects porous materials: drywall, insulation, and wood framing, all of which must be removed and replaced rather than cleaned. If there is any attic involvement, professional remediation is required regardless of how small the ceiling patch appears.
Does homeowners insurance cover mold from a roof leak?
Coverage depends on the cause. Storm damage causing a sudden leak is typically covered up to the policy's mold sublimit. Slow leaks from aging shingles or neglected flashing are almost always excluded as maintenance issues. Report the damage to your insurer promptly and document everything before authorizing demolition.
What does mold from a roof leak look like?
Mold from a roof leak typically appears as dark brown, black, or greenish spots clustered around a water stain, often with a fuzzy or slightly raised texture. A water stain alone, without visible spots, does not rule out hidden mold on the back face of drywall or on attic sheathing above.
How much does it cost to fix mold from a roof leak?
Remediation alone typically runs $1,500–$6,000 for most residential jobs. Systemic attic mold with full insulation replacement and structural wood treatment can reach $3,000–$10,000 or more. Roof repair costs are separate, as is post-remediation reconstruction.
Can attic mold from a roof leak spread into the house?
Yes. Mold spores from attic growth migrate into living spaces through ceiling gaps, light fixtures, HVAC returns, and the stack effect that draws attic air downward through the home's thermal envelope. Ceiling staining is often the first visible indicator that an attic mold problem has been developing for weeks.
What mold species grow after roof leaks?
Cladosporium, Aspergillus, and Penicillium are the most common species identified after roof leaks. Stachybotrys chartarum can establish when cellulose-rich materials like drywall paper and wood framing have been wet for an extended period. Species identification requires laboratory testing; visual inspection alone cannot confirm the species present.
Sam Hickerson is the founder of RestoreAdvisor and writes consumer guides on mold remediation, inspection, testing, and home recovery. His work focuses on helping homeowners understand costs, risks, and when to call a professional. He draws on guidance from the EPA, CDC, IICRC, and other authoritative sources to make complex home issues easier to navigate.