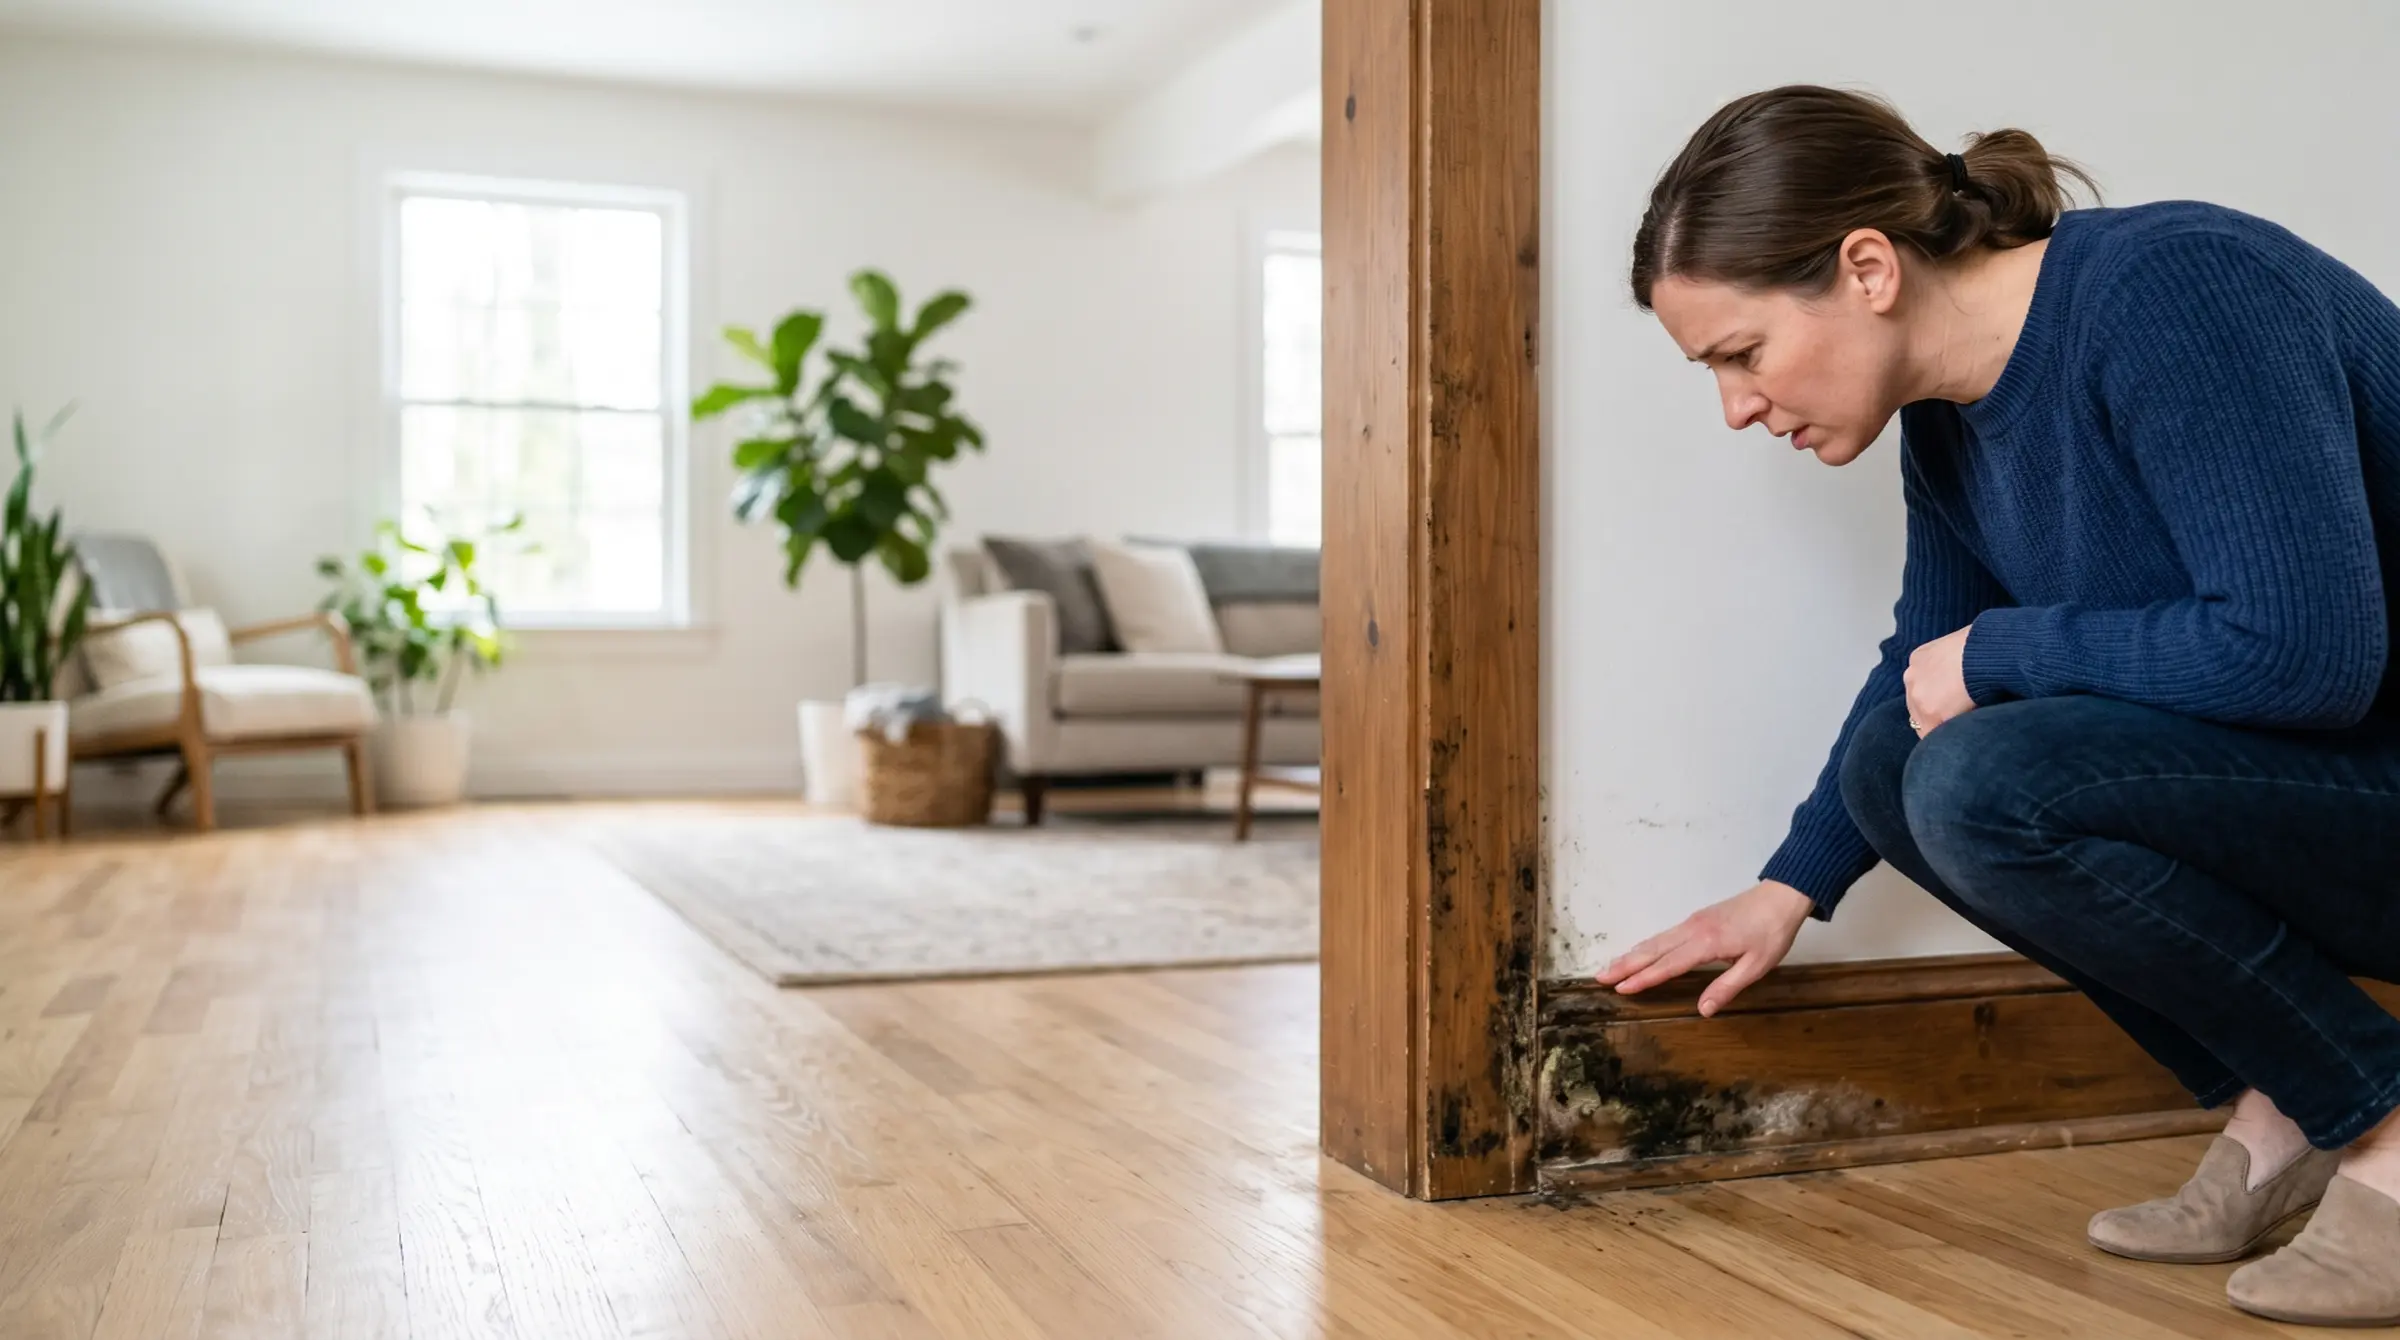

Finding mold on a wood floor, piece of furniture, wood trim, or cabinet is alarming, but it does not automatically mean the wood needs to go. Whether you can clean it yourself or need a professional depends on three things: how deep the mold has penetrated, what type of wood you are dealing with, and how large the affected area is.
Mold on wood is defined as fungal growth on wood surfaces driven by moisture intrusion, condensation, or chronically elevated humidity. According to the ANSI/IICRC S520, wood is classified as a semi-porous material, meaning mold can colonize both the surface and the outer wood fibers, but typically does not penetrate deeply into solid structural lumber the way it can in drywall or insulation. This distinction matters because it is what makes cleaning viable in many cases where other materials would require removal.
Key insights
- Surface mold does not weaken structural lumber. The USDA Forest Products Laboratory and Structural Building Components Association confirm that mold feeds on wood surfaces, not internal fibers, and does not reduce load-bearing strength.
- Moisture content above 19% triggers growth. Mold requires wood moisture content to exceed 19% for approximately one week before significant surface colonization begins. Keeping wood below this threshold stops mold from establishing.
- Bleach does not work on porous wood. Bleach's chlorine molecule cannot penetrate wood fibers. It kills surface spores while leaving subsurface hyphae intact, and the water carrier can worsen moisture conditions in the wood.
- The EPA's 10-square-foot threshold applies to wood. Jobs larger than roughly 3 by 3 feet warrant professional assessment, especially when structural framing is involved.
- Fixing moisture first is non-negotiable. Any cleaning method fails if the moisture source is not corrected. The EPA states explicitly that mold will return regardless of cleaning method if moisture problems persist.
- Wood rot and mold are different problems. Surface mold is cosmetic and cleanable. Decay fungi (wood rot) require sustained moisture above 28% and cause structural compromise that cleaning cannot reverse.
Why wood is particularly vulnerable to mold
Wood is uniquely prone to mold because it is both porous and organic, simultaneously absorbing the moisture mold needs to survive and providing the cellulose-based nutrients it needs to grow. No other common building material combines both properties at the same level, which is why mold establishes on wood faster and penetrates deeper than on concrete, metal, or vinyl.
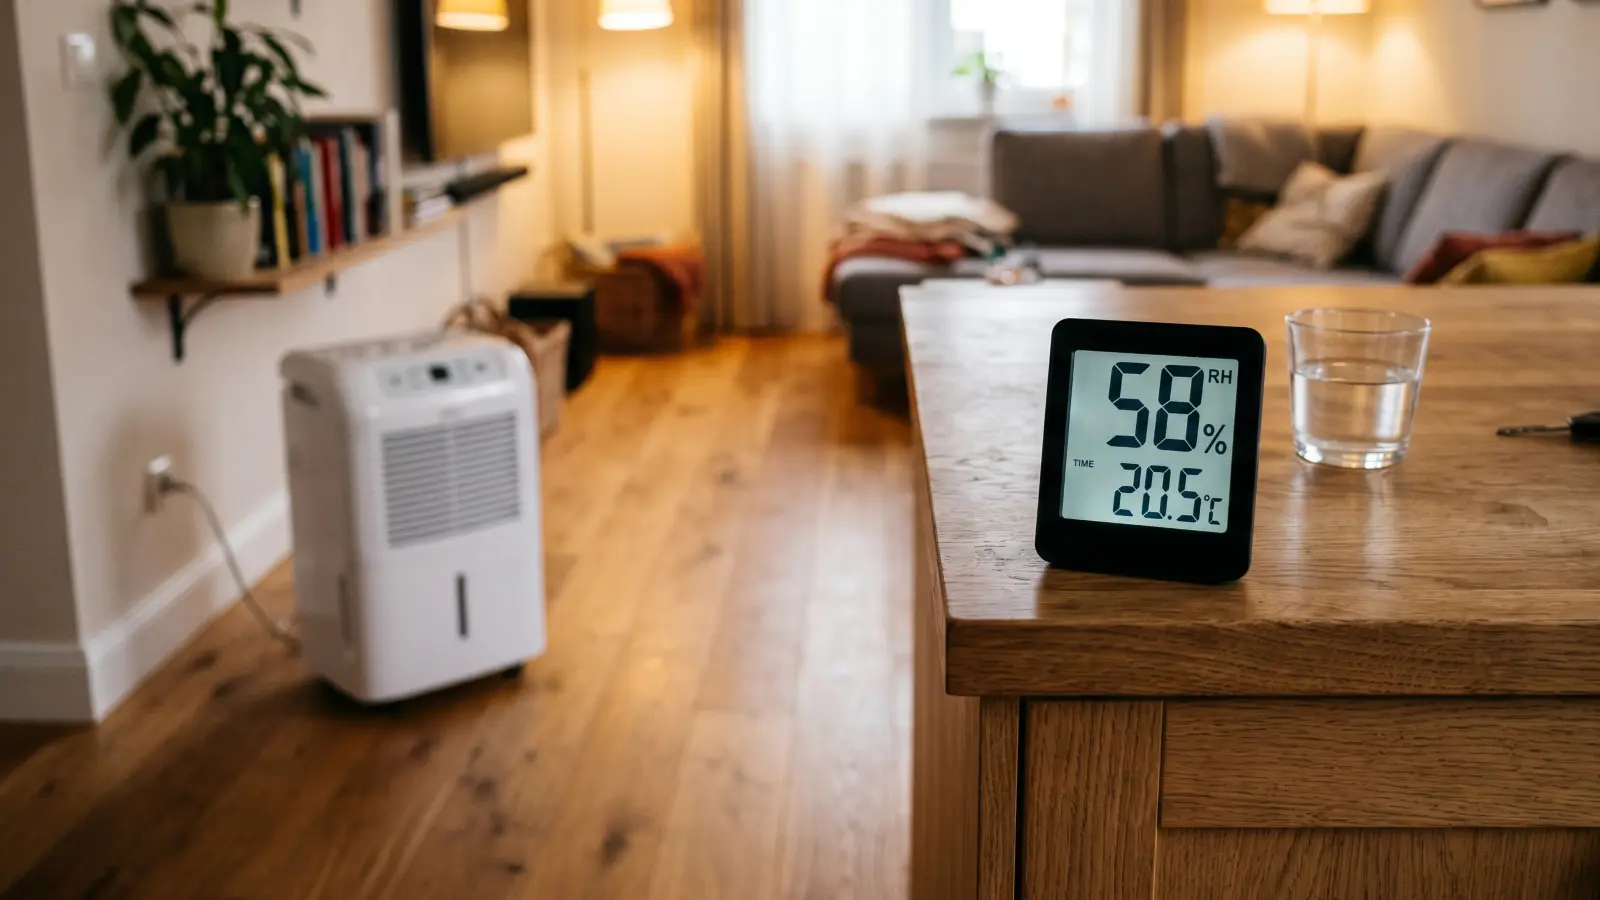
The location of wood in a home affects risk significantly. When indoor relative humidity rises above 60% or water intrudes from a leak or flood, wood surfaces can reach the moisture content threshold for mold growth within days. Furniture, wood floors, and trim in living spaces are at lower risk when climate control keeps humidity stable, but bathroom furniture, basement shelving, and any wood near a plumbing leak can develop mold quickly. Structural framing in basements, crawl spaces, and attics faces higher sustained risk because humidity fluctuates widely and ventilation is often inadequate in those zones.
Mold growth after water damage can begin in as little as 24–48 hours when wood moisture content climbs above 19%, which is why acting quickly on any water event near wood matters. The relationship between humidity and mold on wood is direct: sustained relative humidity above 60% indoors will eventually drive surface moisture content to the growth threshold.
Identifying mold on wood
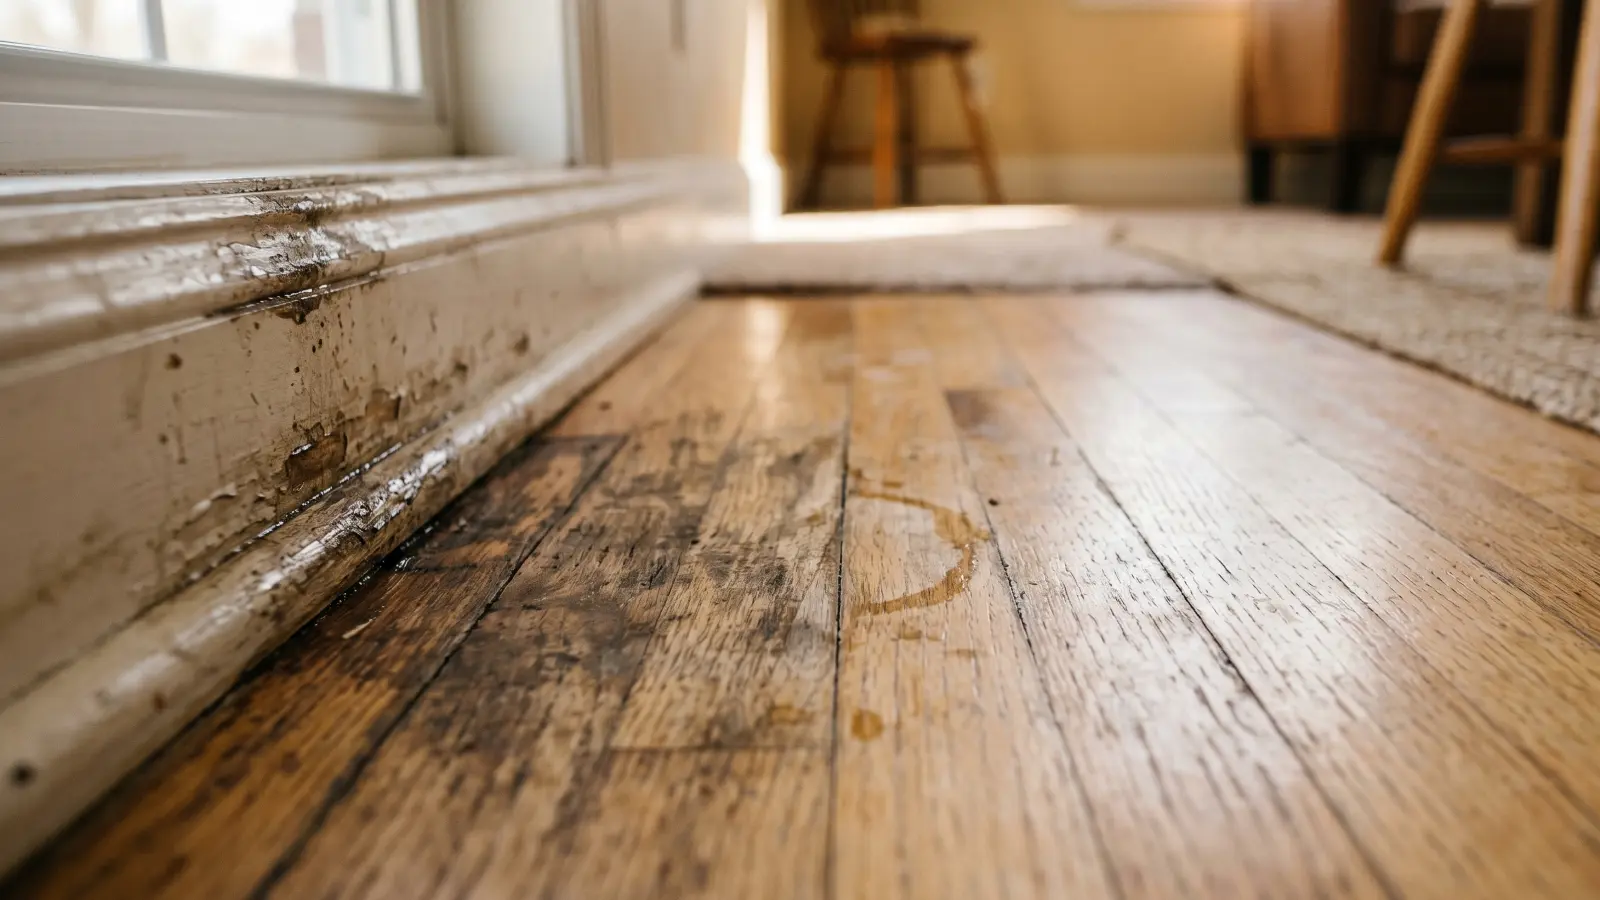
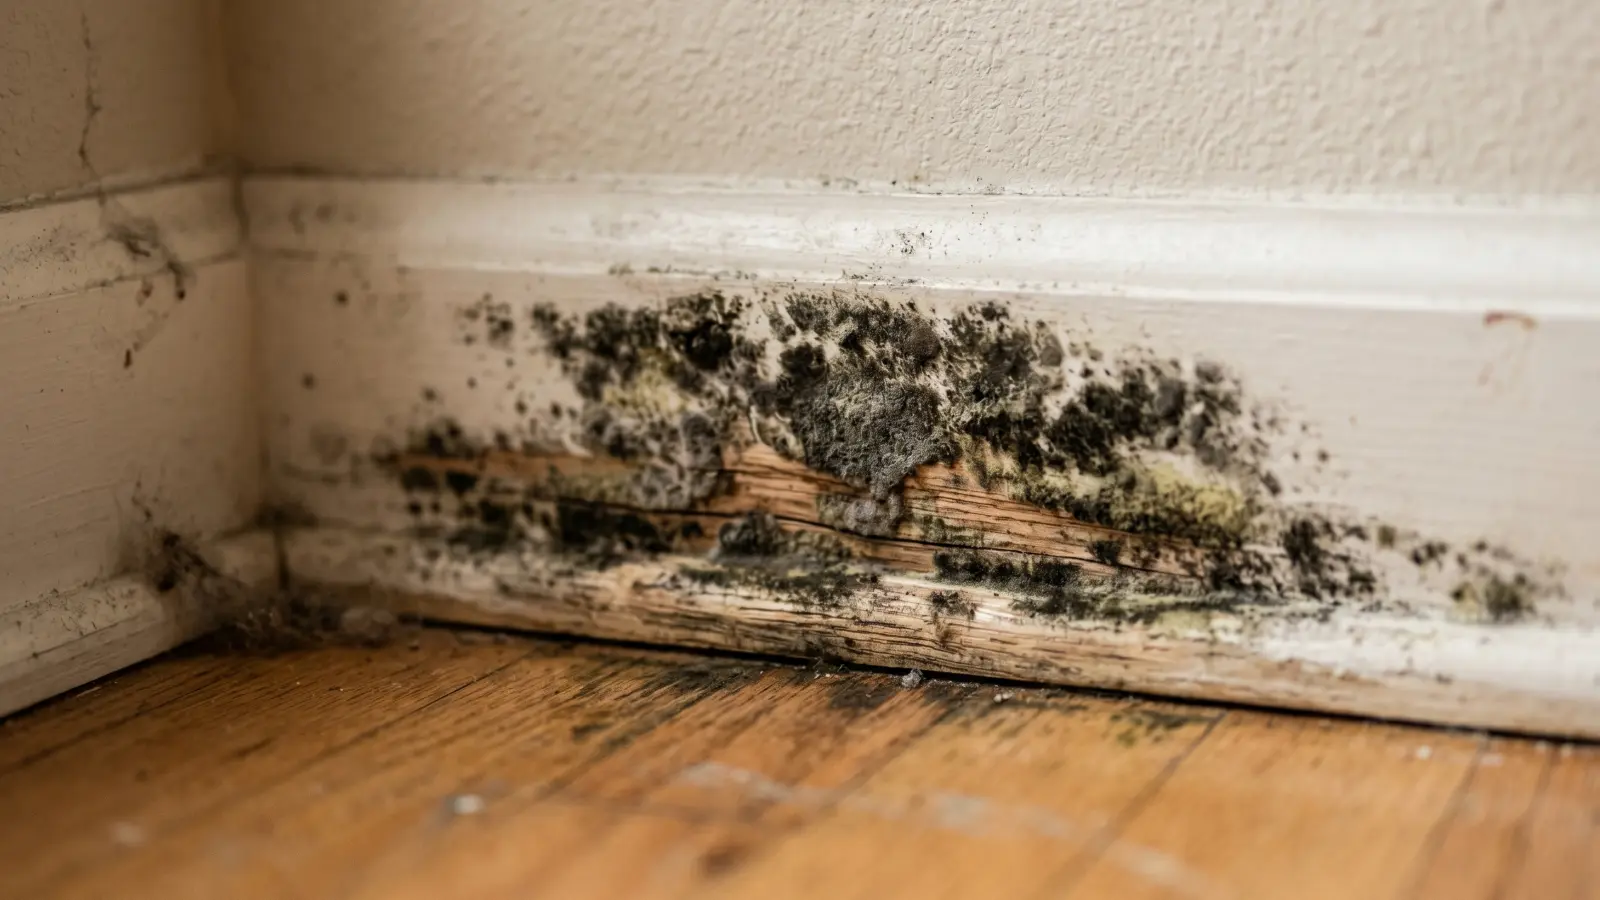
Mold on wood appears as discolored patches that may be black, green, gray, white, or brown depending on the species. Surface mold has a fuzzy, powdery, or velvety texture and typically spreads outward from a moisture source such as a leak, condensation point, or area of poor ventilation.
A persistent musty or earthy odor near wood surfaces can indicate mold even when visible growth is not yet apparent. Mold producing this odor is releasing microbial volatile organic compounds (MVOCs) as a byproduct of metabolism, which is detectable before a colony becomes visible.
Two field tests help confirm what you are dealing with. First, apply a small drop of bleach to the discolored area. If it lightens within a minute or two, it is likely mold. If the spot does not change color, it is probably dirt or a wood stain. Second, probe the discolored wood gently with a screwdriver. If the tip sinks in with light pressure, the wood has progressed beyond surface mold into rot and likely needs replacement rather than cleaning.
| Indicator | What it suggests | Next step |
|---|---|---|
| Dark fuzzy or powdery patches | Surface mold colony | Test moisture; assess DIY scope |
| Musty odor without visible growth | Hidden or early-stage mold | Inspect behind surfaces; consider mold inspection |
| Discoloration that does not bleach-test positive | Dirt, staining, or mineral deposit | Clean with soap and water |
| Soft or spongy wood when probed | Rot fungi active alongside mold | Professional assessment and possible replacement |
| Staining near fasteners or seams | Moisture intrusion path | Identify and fix moisture source first |
| White or gray powder on framing | May be surface mold or efflorescence | Bleach spot test to differentiate |
Common mold species found on wood include Cladosporium, which appears as dark green or black colonies and is among the most frequent in homes; Aspergillus, which presents as gray or green patches often associated with water-damaged building materials; Penicillium, recognizable by its blue-green color; and Stachybotrys chartarum, a slower-growing dark greenish-black mold associated with sustained high moisture on cellulose-rich materials. Species vary widely in how dangerous they are to different populations, particularly children, the elderly, and immunocompromised individuals. A mold inspection can confirm which species is present when that distinction matters for occupant health decisions.
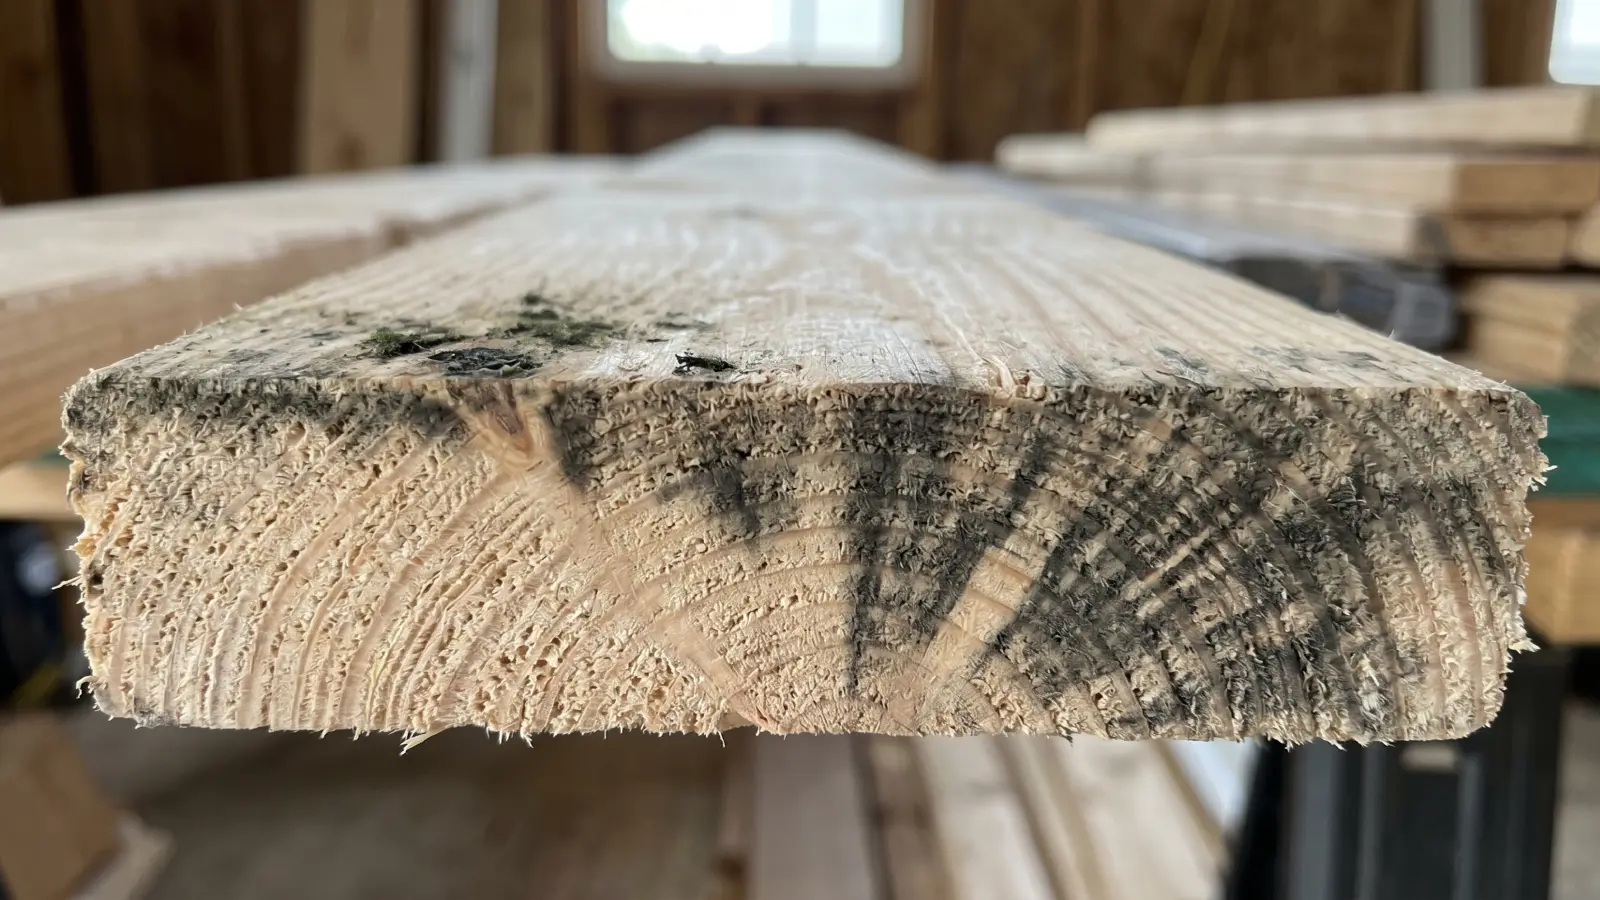
Wood type and penetration depth: how deep mold goes
How deep mold penetrates wood depends on the wood type: finished and painted surfaces typically see surface-only growth, raw solid wood can be colonized up to 1/4 inch deep, and engineered products like OSB and MDF absorb moisture unevenly and often require replacement rather than cleaning. The ANSI/IICRC S520 classifies wood as semi-porous, with penetration depth varying by wood type, finish, and moisture history. The right treatment depends on matching the approach to how far the mold has penetrated.
Finished or painted wood is the most forgiving scenario. Paint or sealant acts as a barrier that slows moisture absorption, which means mold typically stays on or just beneath the surface coating. A wipe-down with undiluted white vinegar followed by thorough drying often resolves finished wood mold. Furniture, trim, painted cabinets, and sealed hardwood floors generally fall into this category.
Raw, unfinished wood is significantly more porous. Deck boards, unfinished subfloor, raw lumber shelving, and furniture made from unsealed wood can harbor mold roots up to 1/4 inch deep in the wood grain. This depth means surface-only cleaning is insufficient. Solutions must have dwell time to penetrate, and sanding may be needed after cleaning to remove stained fibers.
Structural framing lumber (studs, joists, rafters, beams) is dense solid wood that is semi-porous. According to the Structural Building Components Association, mold growth on structural lumber is typically a surface phenomenon that does not penetrate deeply into solid lumber due to its density and cellular structure, which is why framing mold is often remediable rather than requiring replacement.
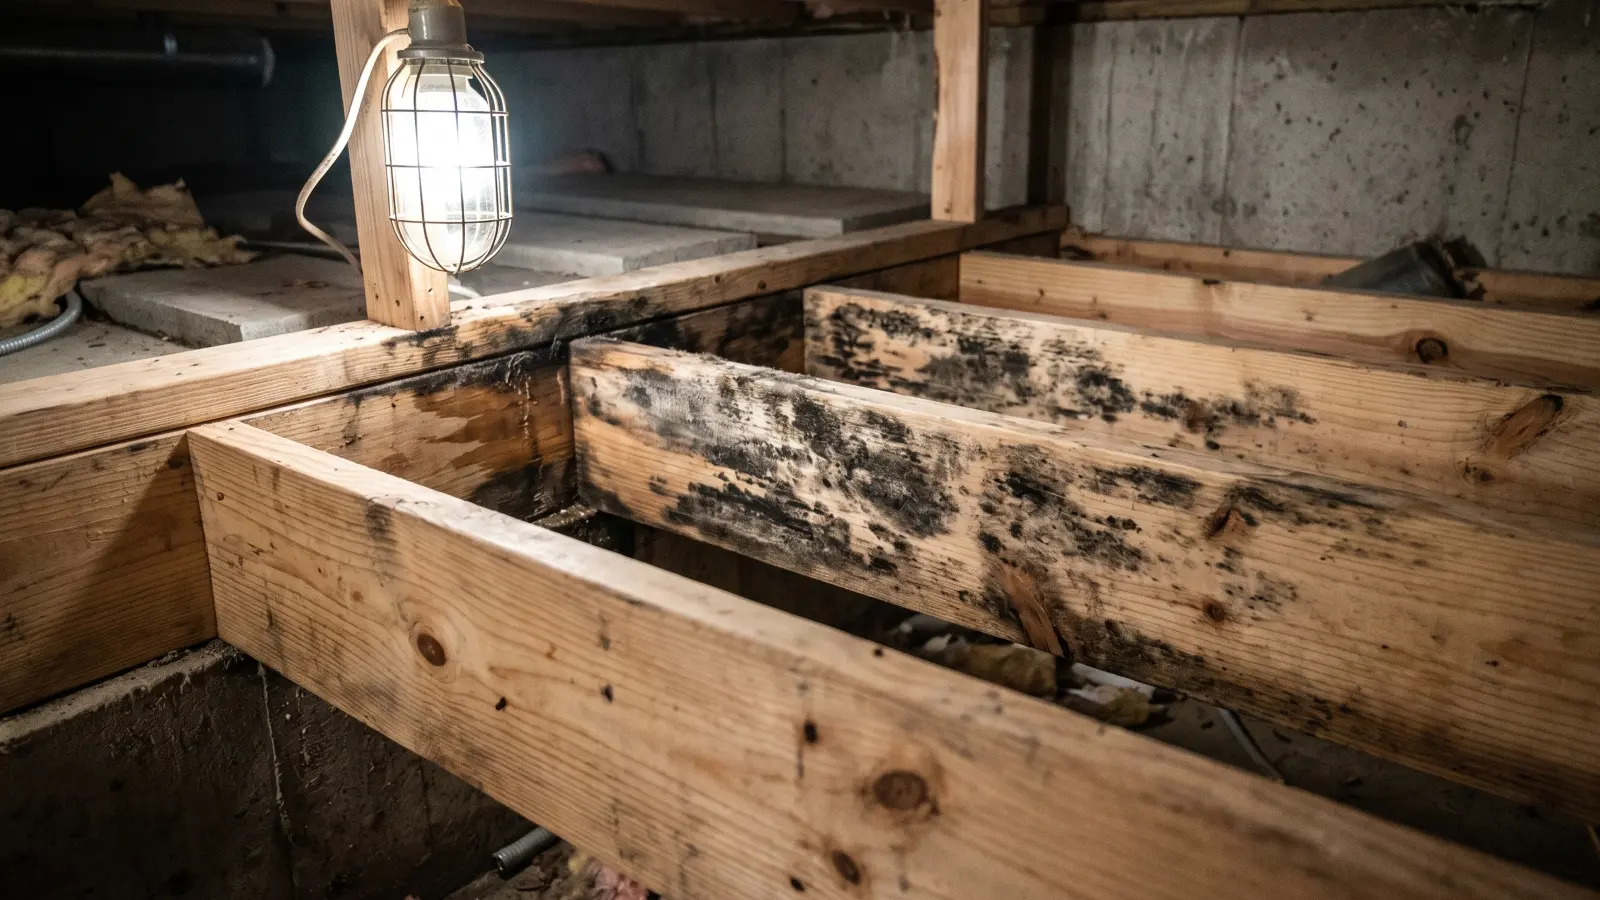
Engineered wood products including OSB (oriented strand board), plywood, particleboard, and MDF are more vulnerable than solid lumber. These products are made with adhesives and compressed wood fibers that absorb moisture unevenly. OSB used for roof sheathing and subflooring is a common site for mold in attics and crawl spaces. When the adhesive bond degrades from sustained moisture, the product is typically replaced rather than cleaned. Mold on OSB sheathing is one of the most common findings in attic mold jobs.
| Wood type | Mold penetration depth | DIY viable? | Notes |
|---|---|---|---|
| Painted or finished wood | Surface only | Yes, under 10 sq ft | Vinegar or soap; wipe dry |
| Raw solid wood | Up to 1/4 inch | Yes, under 10 sq ft | Borax or H2O2; may need sanding |
| Structural framing | Surface to shallow grain | Often yes | Detergent; encapsulant for enclosure |
| OSB / plywood sheathing | Variable; can delaminate | Pro assessment recommended | May require replacement |
| MDF / particleboard | Deep; swells and crumbles | No | Replace when moldy |
| Engineered I-joists | Surface on flange; web absorbs | Pro assessment | Do not sand flange web aggressively |
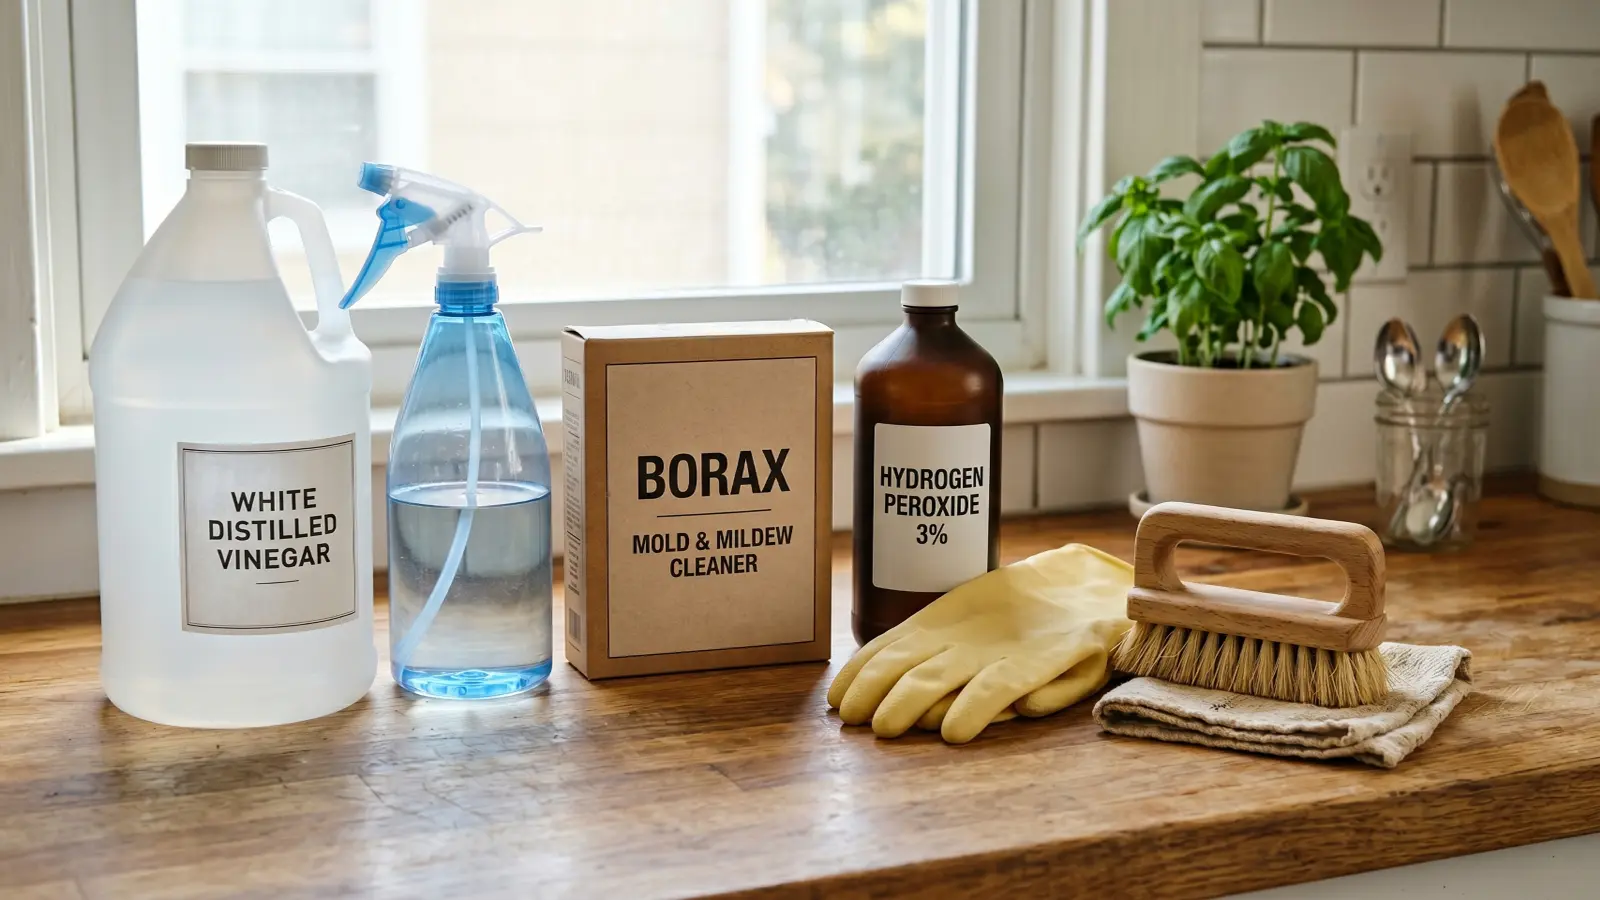
Cleaning products for wood mold
White distilled vinegar, hydrogen peroxide (3%), and borax are the three effective options for killing mold on wood. Bleach is not effective on porous wood surfaces because its chlorine molecule cannot penetrate wood fibers, and should be avoided despite appearing in many general mold-cleaning recommendations. The right choice among the three effective products depends on the wood type and the severity of penetration.
Bleach appears in the table for completeness but should not be used on wood. Its chlorine molecule cannot penetrate wood fibers, leaving subsurface hyphae intact, and the water carrier worsens the moisture conditions that enabled growth in the first place. The science behind why bleach kills mold on tile but fails on porous wood is worth understanding before choosing a cleaning approach.
| Product | Best for | Dilution | Dwell time | Limitation |
|---|---|---|---|---|
| White distilled vinegar | Finished and raw wood | Undiluted | 1 hour | May raise grain slightly on bare wood |
| Hydrogen peroxide (3%) | Raw and unfinished wood | Undiluted | 10 minutes | May lighten wood surface |
| Borax and water | Structural framing | 1 tbsp per cup of water | 10 minutes; do not rinse | Leaves protective residue; not for finished surfaces |
| Dish soap and water | Finished surfaces only | Mild solution | Rinse immediately | Does not kill mold roots; surface prep only |
| Bleach solution | Non-porous surfaces only | 1:10 bleach to water | 15 minutes | Not recommended for wood; chlorine cannot penetrate fibers |
| Commercial antimicrobial (EPA-registered) | Any wood type | Per label | Per label | Read label for wood compatibility before use |
Borax advantages for structural wood: A borax-water solution should not be rinsed from the wood surface after scrubbing. The borax residue raises the pH of the wood grain beyond what most mold species can tolerate, making it particularly useful for structural framing that will be enclosed in walls.
How to remove mold from wood: DIY process
DIY mold removal from wood is appropriate when the affected area is under 10 square feet (the threshold established in EPA mold cleanup guidance), the wood is not structurally compromised or rotting, the mold has not penetrated behind finished surfaces or into wall cavities, and no one in the household has asthma, severe mold allergies, or a compromised immune system. Jobs that fall outside those conditions warrant a certified remediator.
1. Fix the moisture source first
Before touching the mold, identify and correct the water source. This may be a plumbing leak, a condensation problem, a grading issue allowing water against the foundation, or a ventilation deficit. Mold will return regardless of how well you clean if the moisture is not corrected. Confirming the source is fixed is also the first step in the broader DIY mold removal process for any surface type.
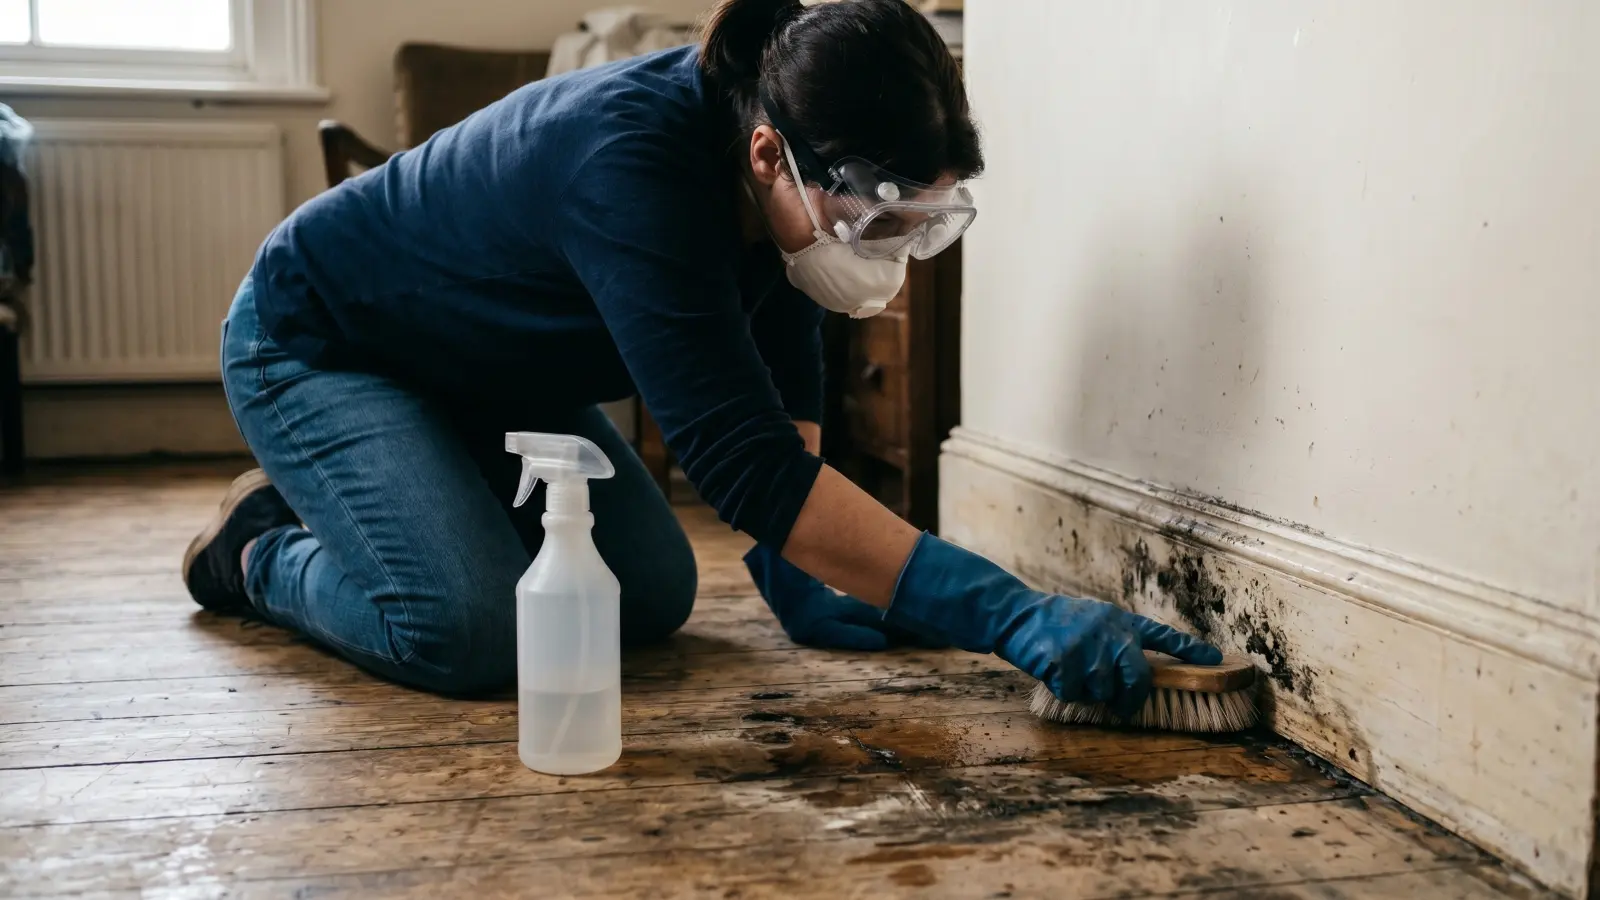
2. Gather PPE and set up the work area
Put on an N95 respirator, rubber gloves, and safety goggles. If working indoors, seal off the area with plastic sheeting to prevent spore dispersal. Open windows or use a fan directed outward to create ventilation and reduce airborne spore concentration during work.
3. HEPA vacuum the surface
Before applying any liquid, use a HEPA-filter vacuum to remove loose mold spores from the wood surface. This reduces the volume of spores that become airborne during scrubbing. After vacuuming, empty the canister outside into a sealed plastic bag.
4. Apply the appropriate cleaning solution
For finished or painted wood, apply undiluted white vinegar directly with a cloth or spray bottle held close to the surface to avoid misting. For raw or unfinished wood, apply a borax-water solution (1 tablespoon borax per cup of water) or 3% hydrogen peroxide with a brush. Allow a dwell time of at least 10 minutes to let the solution penetrate the wood fibers.
5. Scrub and wipe
Use a soft-bristled brush to scrub the mold from the surface. Work in one direction to avoid spreading spores to clean areas. Wipe away residue with a clean damp cloth. Do not rinse borax from the surface; allow it to remain in the wood. Avoid excessive water during this step.
6. Sand if staining persists
If dark staining remains on raw wood after cleaning, sand with 120 to 220 grit sandpaper until the surface is uniform in color and texture. HEPA vacuum again immediately after sanding to remove dust containing mold particles.
7. Dry completely and verify
Run a fan or dehumidifier to dry the wood thoroughly. Use a pin-type moisture meter to verify that moisture content has returned below 16% before enclosing or finishing the wood. Mold cannot grow on wood that is adequately dry.
8. Apply encapsulant for structural wood (optional but recommended)
For framing that will be enclosed, apply an antimicrobial encapsulant after the wood is fully dry. Encapsulants seal any remaining mold spores within the wood grain and create a surface that resists future growth. This step is standard practice for professional framing remediation before drywall installation.
Mold on wood framing and structural lumber
Mold on structural framing lumber can almost always be cleaned rather than replaced, because surface mold does not reduce load-bearing strength according to the USDA Forest Products Laboratory and Structural Building Components Association. The exception is when moisture has been sustained long enough to activate decay fungi, which require moisture content above 28% and cause the wood fiber deterioration that mold alone does not.
Mold on wood framing appears frequently during home construction when exposed lumber absorbs rain before the roof and sheathing are installed, and in existing homes when a basement, attic, or crawl space develops a moisture problem.
The critical finding from the USDA Forest Products Laboratory and Structural Building Components Association research is that mold feeds on the outer surface of wood fibers, not the interior cellular structure that provides load-bearing capacity. Decay fungi (wood rot) are what compromise structural integrity, and they require sustained moisture content above 28% to become active.
Visible framing mold still needs to be addressed because it produces spores, creates musty odors, and signals a moisture problem. For new construction where framing has been rained on, the SBCA recommends drying the lumber below 19% moisture content and then cleaning visible surface mold before enclosing with insulation and drywall. For existing structures the same principle applies: fix the moisture source, allow drying, then clean.
Framing mold that follows a flood or sustained water event requires a different approach because mold after water damage involves Category 2 or Category 3 contamination that introduces bacteria alongside mold, changing the remediation protocol.
When structural mold covers large areas in attics, crawl spaces, or basements, professional soda blasting or mechanical abrasion is typically more practical than hand-scrubbing. Both attic and crawl space jobs involve additional complexity around insulation removal and limited access that affects method selection and cost.
Professional wood mold treatment methods
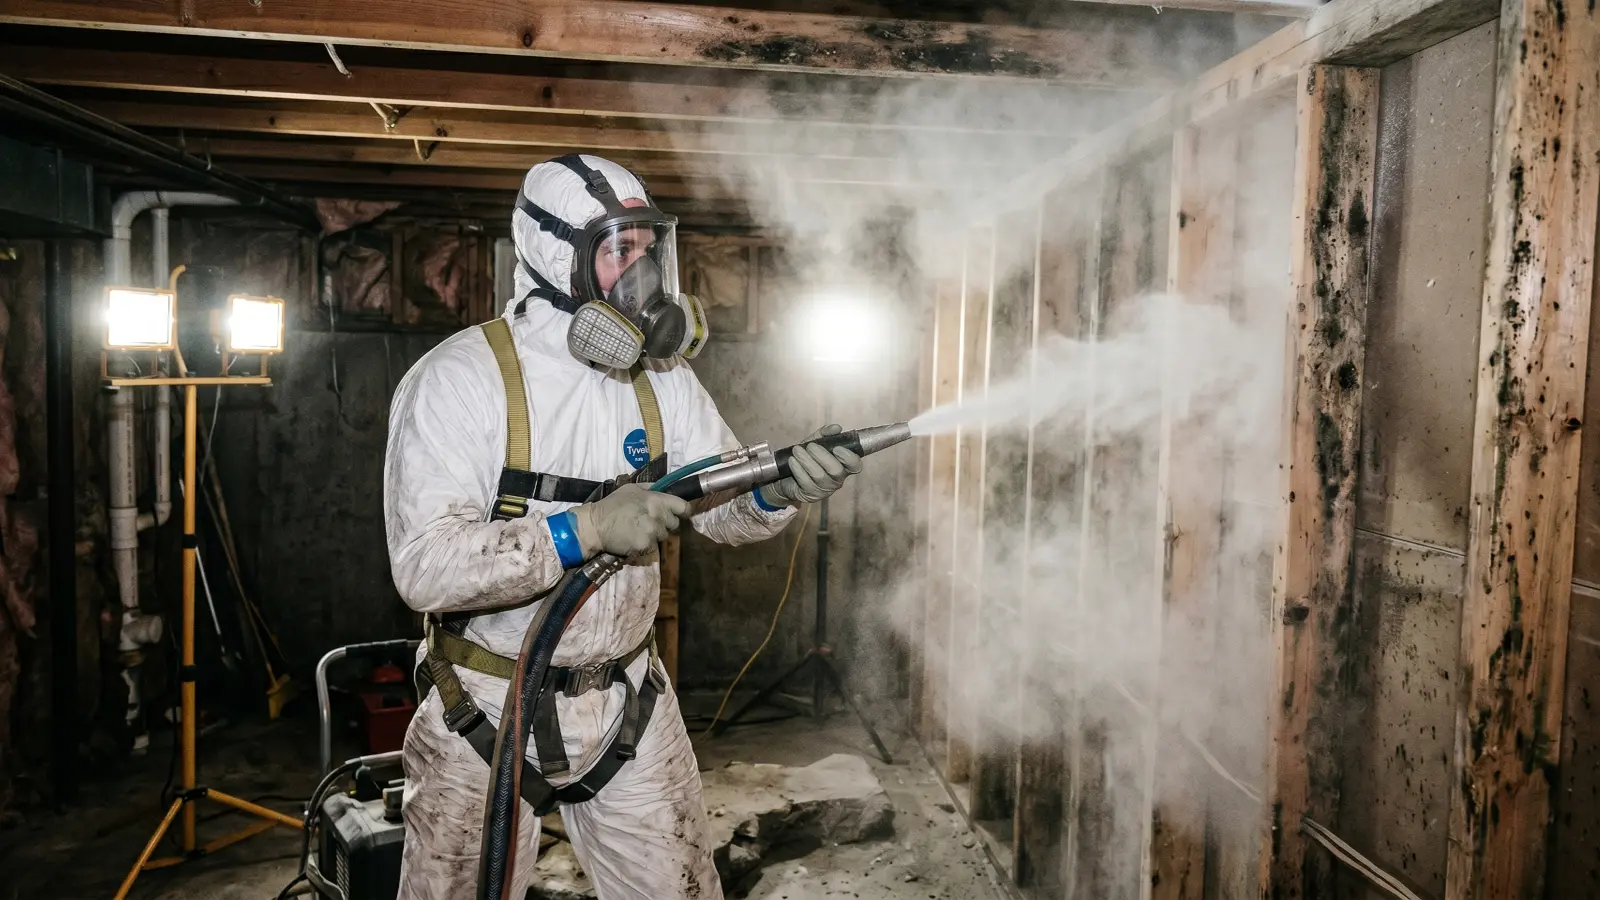
Professional wood mold treatment uses one or more of four methods depending on scope and location: mechanical abrasion with HEPA vacuuming, soda blasting, dry ice blasting, and antimicrobial encapsulant application. Each method is suited to different wood types and job sizes, and clearance testing is required after any professional mold remediation treatment to confirm spore levels have returned to acceptable levels.
Mechanical abrasion and HEPA vacuuming is the foundational professional method for accessible structural wood. Technicians scrub affected surfaces with wire brushes or sanding tools, collect debris with HEPA vacuums, apply antimicrobial solutions with defined dwell times, and conduct clearance testing before the work zone is reopened.
Soda blasting is sodium bicarbonate propelled at high pressure against mold-affected wood surfaces. On impact, the soda particles shatter in a micro-explosion that lifts mold growth and deep-set staining from the wood grain without damaging the underlying structure, since the particles are softer than the wood fibers. This makes soda blasting the preferred method for large areas with tight geometry, particularly attic rafters and sheathing, crawl space floor joists, and unfinished basement framing where hand-scrubbing is impractical. Soda blasting must be combined with HEPA vacuuming afterward to remove aerosolized spores from the work area, per IICRC S520 containment protocols.
Dry ice blasting uses solidified carbon dioxide pellets that sublimate on impact, generating a rapid gas expansion that lifts mold from the surface. The advantage is zero residue cleanup since the CO2 converts to gas. The method is more expensive than soda blasting and requires specialized equipment but produces minimal media debris.
Antimicrobial encapsulant application follows mechanical cleaning on structural framing. The encapsulant seals remaining spores in the wood grain and provides a barrier against future growth. This is not a standalone treatment and should not be applied over visible mold without cleaning first.
Professional wood mold treatment on structural lumber follows a defined sequence of containment, abrasion, antimicrobial treatment, drying, and clearance testing regardless of which mechanical method is used.
Clearance testing follows any professional remediation on structural wood. Air or surface sampling through mold testing confirms that spore levels have returned to acceptable levels before the space is enclosed or returned to use. The results become part of the documentation package for any insurance claim or future property disclosure.
Wood mold treatment costs
Wood mold remediation costs range from $0 for small DIY jobs to $6,000 or more for large professional treatments in attics or crawl spaces, with the primary drivers being square footage, wood location, and whether soda blasting or hand-scrubbing is required. Professional work on structural wood typically runs $8–$25 per square foot depending on method and access difficulty.
| Scenario | Typical cost | Method | Notes |
|---|---|---|---|
| Small furniture or trim (under 10 sq ft) | DIY: $0–$25 | Vinegar, borax, H2O2 | Supplies only |
| Small furniture or trim, professional cleaning | $200–$500 | Antimicrobial treatment | Includes clearance check |
| Crawl space joist mold, hand-scrubbing | $800–$2,500 | Mechanical abrasion + HEPA | Depends on linear footage |
| Crawl space or basement, soda blasting | $1,500–$5,000+ | Soda blasting + HEPA + clearance | Size and accessibility dependent |
| Attic sheathing mold, professional | $1,500–$6,000+ | Soda blasting or hand abrasion | Access difficulty affects cost |
| Structural framing replacement (partial) | $500–$3,000+ | Sistering or replacement | When rot present alongside mold |
| Encapsulant application post-treatment | $300–$1,000 | Spray application | Add-on to cleaning scope |
Wood mold is one component of overall mold remediation cost that tends to run toward the upper end of national ranges when structural framing is involved.
Factors that increase cost include low clearance in crawl spaces (under 3 feet adds labor time significantly), the need to remove insulation before cleaning framing, the presence of rot requiring structural assessment, and post-remediation clearance testing fees which typically run $150 to $400.
Insurance coverage for wood mold remediation depends on the cause. Mold resulting from a sudden, covered water event such as a burst pipe or appliance failure is more likely to receive coverage than mold from long-term condensation or deferred maintenance. Documentation of the moisture source and remediation scope strengthens insurance coverage claims significantly.
How to prevent mold on wood
Preventing mold on wood requires keeping moisture content below 19% consistently, which translates to maintaining indoor relative humidity below 50% and addressing any water intrusion immediately.
The most effective prevention actions are paired with the specific moisture source they address rather than given as a general list. Crawl space wood benefits most from vapor barriers, sealed vents in humid climates, and a properly sized dehumidifier. Attic wood benefits most from adequate soffit-to-ridge ventilation (typically 1 square foot of net free area per 150 square feet of attic floor) and ensuring bathroom and kitchen exhaust fans vent outside rather than into the attic space. Basement framing benefits from monitoring relative humidity with a hygrometer and running a dehumidifier when RH exceeds 50%.
| Prevention action | Target location | Frequency | Why it works |
|---|---|---|---|
| Monitor RH with a hygrometer | Basement, crawl space, attic | Monthly | Catches humidity spikes before mold establishes |
| Run a dehumidifier when RH exceeds 50% | Basement, crawl space | Continuous in humid months | Keeps wood moisture content below 19% |
| Inspect plumbing for slow leaks | Under sinks, around water heater | Quarterly | Catches drip-level moisture before wood saturation |
| Ensure exhaust fans vent outside | Kitchen, bathrooms | Verify annually | Prevents humid air from entering attic or wall cavities |
| Check attic ventilation is unobstructed | Attic soffit vents | Annually | Prevents condensation on cold sheathing in winter |
| Install or maintain vapor barrier | Crawl space ground | On installation; inspect annually | Blocks ground moisture from rising into joists |
| Seal wood surfaces exposed to humidity | Exterior decking, unfinished basement wood | Before exposure; reapply per product spec | Slows moisture absorption into wood fibers |
| Address roof or flashing leaks promptly | Attic, wall cavities | After any storm or visible staining | Prevents sustained saturation of framing |
Mold-resistant coatings and encapsulants applied to structural wood in high-humidity locations add a secondary line of defense. These products are not a substitute for moisture control but can extend the time before mold can establish on wood that experiences periodic humidity spikes. A complete mold prevention system addresses dehumidifier sizing, ventilation specs, and room-by-room moisture sources that wood treatment alone cannot resolve.
Both basement and crawl space mold involve moisture pathways specific to those locations, including hydrostatic pressure, ground evaporation, and foundation condensation, that wood treatment alone cannot address.
The line between cleaning and professional remediation is not always obvious, and the consequences of misjudging it on structural wood are significant. The criteria for when mold remediation is required include contamination level, affected area size, and occupant health factors that go beyond the visible mold footprint.
Frequently asked questions
Can mold on wood be cleaned, or does it always need replacement?
Mold on wood can usually be cleaned rather than replaced, particularly on solid structural lumber where mold is a surface phenomenon per ANSI/IICRC S520. Solid wood is dense enough that mold does not penetrate deeply into the load-bearing fibers. Exceptions include OSB, MDF, and particleboard, which absorb moisture more aggressively and may delaminate or crumble. Replacement is also indicated when mold has progressed to rot, identified by wood that feels soft or spongy when probed.
Does mold weaken wood structurally?
No, surface mold does not weaken structural wood. The USDA Forest Products Laboratory confirms that mold feeds on wood surfaces, not the internal fibers that carry structural load. Decay fungi (wood rot) are the organism that compromises structural integrity, and they require sustained moisture above 28% to become active. A screwdriver probe test quickly distinguishes mold from rot: if the tip penetrates more than 1/4 inch with light pressure, rot is present and structural assessment may be warranted.
What kills mold on wood?
Vinegar, hydrogen peroxide, and borax are the three products that effectively kill mold on wood. White distilled vinegar penetrates porous wood fibers and kills approximately 82% of common mold species without harming wood grain. Hydrogen peroxide (3%) provides strong antifungal action with minimal surface damage. Borax dissolved in water is effective and leaves a pH-raising residue that inhibits regrowth, making it the best choice for structural framing. Bleach is not effective on porous wood because its active chlorine cannot penetrate wood fibers.
Does bleach kill mold on wood?
Bleach does not effectively kill mold on porous wood. The EPA, IICRC S520, and the Structural Building Components Association all advise against bleach for wood mold remediation. The chlorine in bleach remains on the surface, killing visible spores while leaving subsurface hyphae alive. The water in the bleach solution is absorbed into the wood, potentially worsening the moisture conditions that caused the mold to begin with.
What is the moisture content threshold for mold on wood?
Mold requires wood moisture content above 19% for approximately one week to begin significant surface colonization. Most mold species grow most actively between 20% and 28% moisture content. Decay fungi become active above 28% and cause structural deterioration. A pin-type moisture meter is the reliable tool for measuring wood moisture content before and after remediation. Keeping wood below 16% after cleaning and drying is the standard before enclosing framing.
When should I call a professional for mold on wood?
Call a professional when mold covers more than 10 square feet (the EPA threshold for homeowner DIY), when mold appears on structural load-bearing members and the extent is unclear, when the wood feels soft or shows signs of rot alongside mold, when mold returns after one or more cleaning attempts, or when someone in the home has respiratory conditions or a compromised immune system. A professional mold inspector can clarify scope before committing to a remediation approach, and the remediation process for structural wood follows a defined sequence of containment, mechanical removal, antimicrobial treatment, drying, and clearance testing.
Can I paint over mold on wood?
No. Painting over mold does not kill it. Paint seals surface spores temporarily but mold continues to grow beneath the paint film, eventually breaking through with a larger footprint. The EPA explicitly warns against painting or caulking over mold without treating it first. If you discover mold beneath existing paint on wood, the paint must be removed, the mold treated, and the wood dried before repainting.
Is black mold on wood more dangerous than other mold?
The color of mold does not reliably indicate its species or toxicity. Many different mold species appear black or dark on wood, including common species like Cladosporium that pose low health risk. Stachybotrys chartarum, the species most associated with mycotoxin production, requires sustained high moisture on cellulose materials and grows slowly, appearing as a slimy dark greenish-black colony. Species identification requires laboratory analysis, not visual assessment, and the protocols for black mold removal differ from standard mold species in containment and disposal requirements.
- EPA: A Brief Guide to Mold, Moisture, and Your Home
- IICRC S520 Standard for Professional Mold Remediation
- USDA Forest Products Laboratory: Biological Decomposition of Solid Wood
- Structural Building Components Association: Mold on Wood Structural Building Components
- NIOSH: Dampness and Mold in Buildings
- EPA: Mold Cleanup in Your Home
Sam Hickerson is the founder of RestoreAdvisor and writes consumer guides on mold remediation, inspection, testing, and home recovery. His work focuses on helping homeowners understand costs, risks, and when to call a professional. He draws on guidance from the EPA, CDC, IICRC, and other authoritative sources to make complex home issues easier to navigate.