
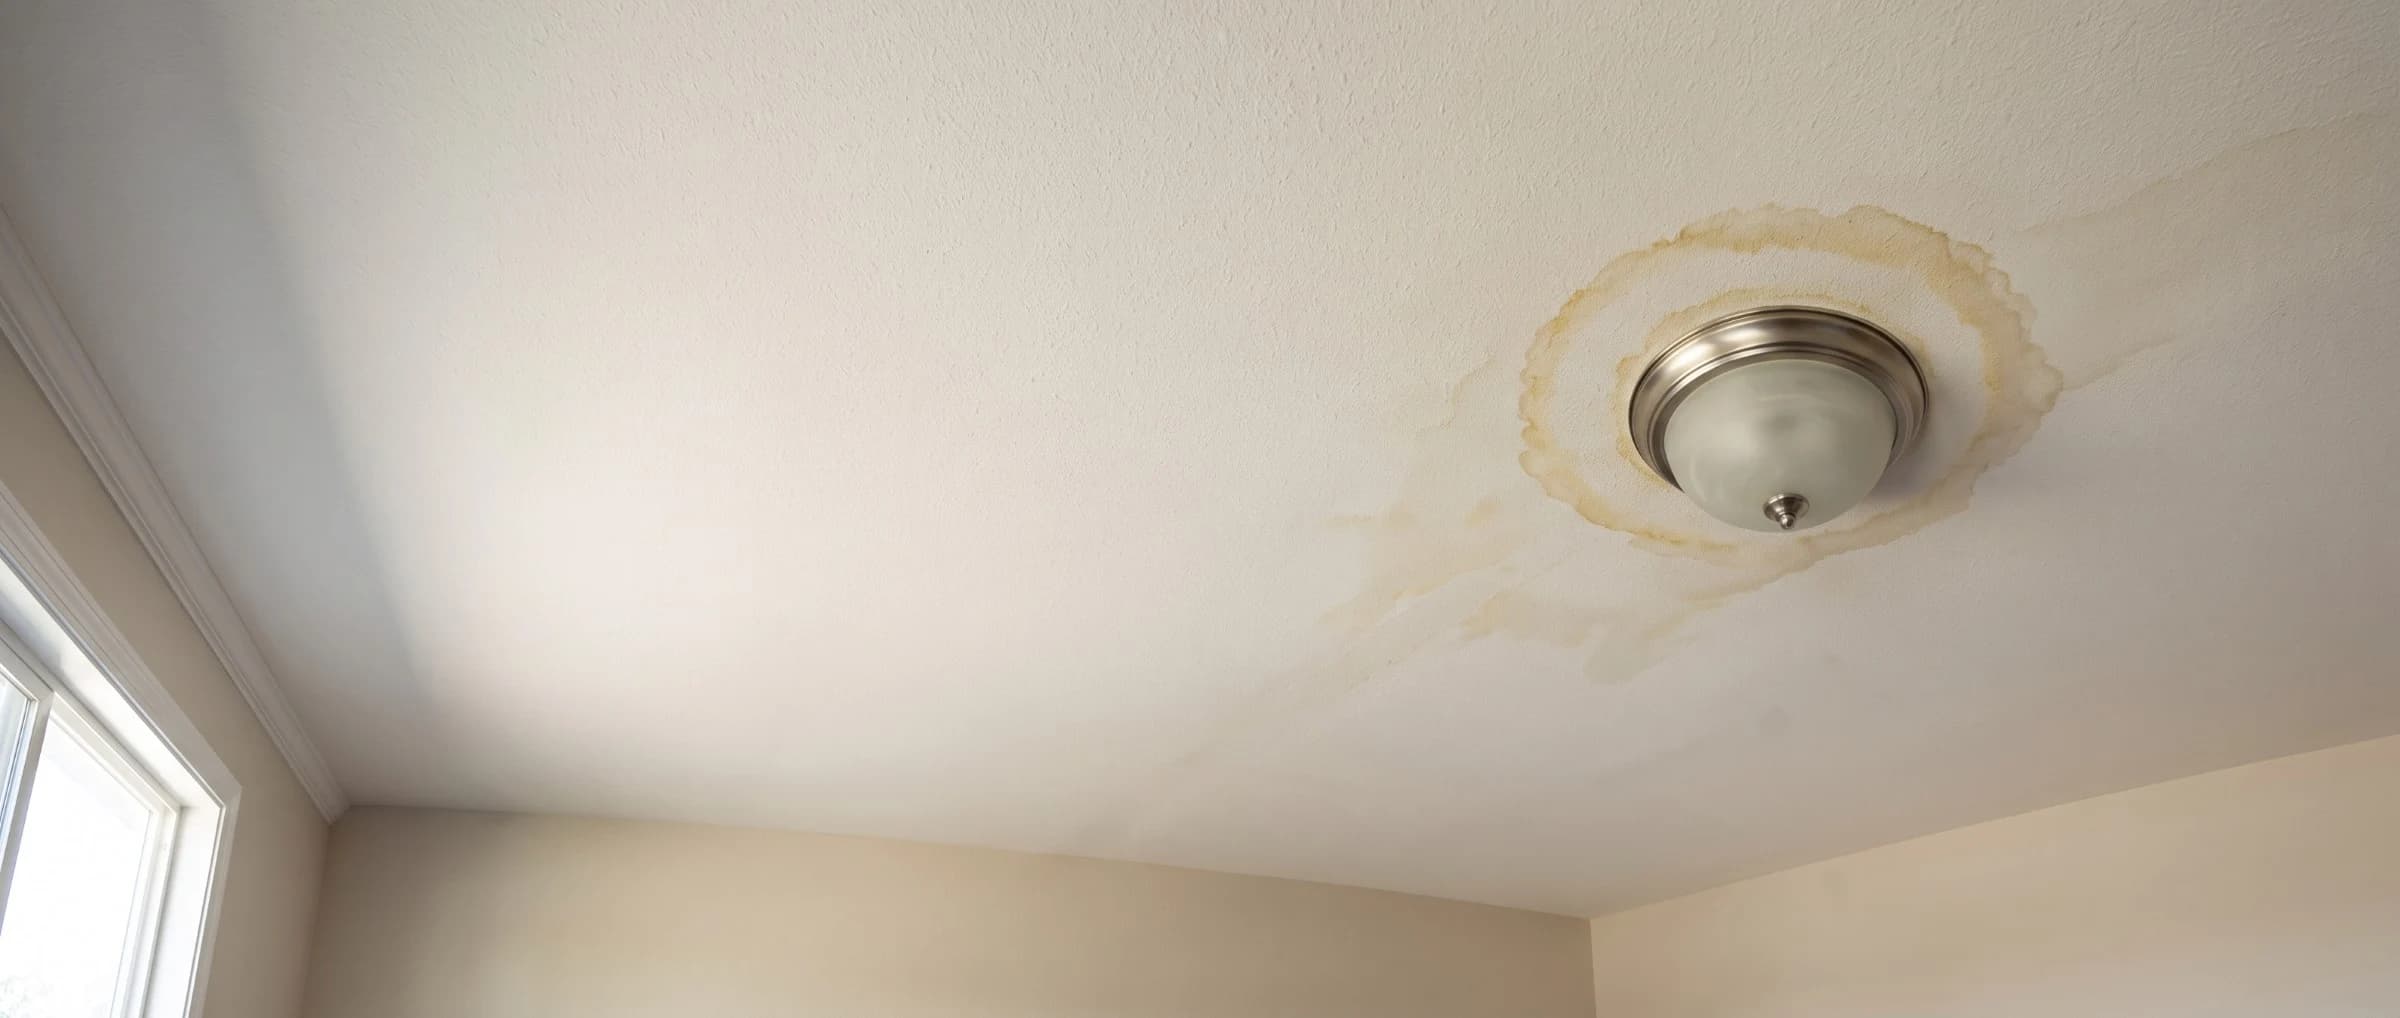

A stain spreading across your ceiling, or a section that has gone soft and started to sag, means water is currently trapped somewhere above it. That's an unsettling thing to notice, particularly if you can't immediately tell whether the source is a bathroom on the floor above, a roof leak, or a pipe running through the ceiling cavity itself. Water damage on a ceiling is classified under ANSI/IICRC S500, the water damage restoration industry's governing standard, based on how contaminated the water is (Category 1 through 3) and how much of the structure has absorbed it (Class 1 through 4).
The location of the stain relative to the rooms above it, along with its shape, color, and how quickly it's spreading, narrows the source down to a short list of likely causes before anyone climbs a ladder. What matters most in the first few minutes is confirming the ceiling isn't at risk of collapsing under the weight of trapped water, since that changes the response from patch-and-wait to an immediate evacuation of the area below it.
Key insights
- Location narrows the source fast. A stain directly under a bathroom, kitchen, or laundry room on the floor above usually traces to a plumbing fixture, while a stain under the roof or top-floor ceiling usually traces to the roof itself.
- Saturated drywall gets heavy fast. Wet drywall holds far more weight than it does dry, and a sagging or bulging section is a collapse risk that calls for a controlled release, not a wait-and-see approach.
- Mold risk starts within 24 to 48 hours. The EPA cites this window for materials that stay wet, so drying time matters as much as fixing the leak itself.
- Painting over a stain doesn't fix anything. Repainting before the source is found and the material is confirmed dry usually means the stain reappears through the fresh coat within days or weeks.
- Category can shift with the source. A leak from clean supply-line water starts as Category 1, but the same ceiling cavity can carry Category 2 or 3 water if a drain line, toilet, or sewage backup is the actual source.
- Cost swings widely by cause and scope. A stain caught early that only needs a patch and paint can run a few hundred dollars, while a saturated ceiling requiring drywall replacement and structural drying runs into the thousands.
Is your ceiling at risk of collapse
A ceiling is at real risk of collapse when the drywall is visibly sagging, bulging, or flexes under light pressure. Standard half-inch drywall weighs roughly 1.6 pounds per square foot dry, and fully saturated drywall commonly weighs double that or more. A small, stable stain with no sag or bounce isn't an immediate structural threat, but a section that gives when you press on it needs the water relieved through a controlled opening before it fails on its own, unpredictably and often onto furniture or people below.
 Saturated drywall can weigh roughly double its dry weight, so a section that gives under light pressure should be relieved through a controlled opening instead of left to fail on its own.
Test a suspicious area with the back of your hand or a light fingertip press instead of a full palm push, since firm pressure on already-weakened drywall can be what causes it to give way. If the section bounces, feels soft, or has separated visibly from the surrounding ceiling, clear the room below and relieve it through a controlled opening rather than waiting, the same response emergency water damage restoration situations call for. A structural engineer's inspection is worth the cost if the sag covers a large area, involves an exposed or split ceiling joist, or keeps reappearing after repeated drying and patching.
What to do right now
If you find water damage on your ceiling, contain the water, cut power near the wet section, relieve any bulging area through a controlled opening, document the damage, and call the right professional based on the likely source. Working through these five steps in order limits the damage while the actual cause gets identified. None of them require special tools beyond what's likely already in the house, which is part of why acting immediately, rather than waiting for a professional to arrive, meaningfully limits how far the damage spreads.
 Insurers weigh timestamped photos of the damage far more heavily than a written description after the fact, so documentation before cleanup starts protects the claim.
Contain the water
Set a bucket, tarp, or towels below the stain and move furniture, electronics, and anything irreplaceable out from underneath it. A wet section can keep dripping for hours after the source is stopped, since water travels through insulation and framing before it finds its way out.
Cut power if wiring is nearby
Shut off power at the breaker for any circuit running through or near the wet section before doing anything else in the room. Water in contact with wiring or a light fixture is an electrical shock hazard, a precaution covered in OSHA's flood preparedness and response guidance.
Relieve a bulging section with a controlled opening
If drywall is sagging or bouncing under light pressure, puncture the lowest point over a bucket with a screwdriver so the water drains in one spot instead of failing on its own. This sounds counterintuitive the first time you do it, but a small, deliberate hole causes far less damage than an uncontrolled ceiling collapse.
Photograph everything before you touch it
Take wide shots of the room and close-up photos of the stain, any sagging, and standing water on the floor below before extraction or repair begins. Insurers and adjusters rely on this documentation far more than a verbal description after the fact.
Call the right professional
Contact a roofer, plumber, or HVAC technician based on the likely source, and bring in a certified restoration company if drywall, insulation, or framing is saturated. Calling both at once, instead of waiting for one to finish before contacting the other, keeps the timeline from stretching into extra days of drying delay.
What not to do
A few common instincts actually make ceiling water damage worse: painting over the stain, assuming a dry-looking area means the leak stopped, pressing hard on soft drywall to test it, and waiting on insurance before starting to mitigate. Each of these delays finding the real problem or adds risk in the process. Most trace back to treating a visible symptom, like the stain's color or size, as the full picture instead of confirming what's actually happening in the cavity behind it.
Don't paint or caulk over the stain
Covering a stain before confirming the source is fixed and the material is dry almost always means the discoloration bleeds back through within days, and it hides a problem that's still active behind the surface.
Don't assume a dry-looking stain means the leak stopped
The source may have only slowed, not stopped, so treat a static stain the same as an active one until the cause is confirmed and fixed.
Don't push firmly on a soft or bulging section to test it
Light pressure is enough to tell you whether an area has weakened. Pressing hard on drywall that's already saturated can be what causes it to give way while you're standing directly underneath it.
Don't wait on insurance approval before mitigating the damage
Most policies expect the homeowner to take reasonable steps to prevent further loss, the same standard behind any water damage restoration checklist, so delaying extraction or drying while waiting on an adjuster usually complicates the claim instead of protecting it.
Where the water is coming from
The room directly above a ceiling stain is the single strongest clue to its source, since water almost always travels straight down through insulation and framing before spreading laterally. Matching the stain's position to what's on the floor above narrows the likely cause to one or two possibilities before any inspection begins.
 Tracing a stain to its entry point in the attic, rather than assuming the ceiling stain sits directly below the leak, catches sources that traveled several feet along a rafter before dripping.
A stain that sits closer to a wall than to the center of the room often means the water is traveling along a joist or duct run before it drips, so the entry point can be several feet from where the stain first appears. Checking the fixture layout of the room above, not just the room's general use, catches sources a simple floor-plan guess would miss, since a half bath tucked into a corner can sit directly above an unrelated section of ceiling below.
| Ceiling location | Most likely source | What to check |
|---|---|---|
| Under an upstairs bathroom | Toilet wax ring, supply line, tub or shower pan, sink drain | Run each fixture separately and watch for a new drip |
| Under an upstairs kitchen or laundry room | Dishwasher, refrigerator line, washing machine hose or supply valve | Pull the appliance out and inspect connections and hoses |
| Directly under the roof, top floor or single story | Roof leak, ice dam, or attic condensation | Attic inspection for a wet rafter, insulation, or daylight at a penetration |
| Under an occupied room with no plumbing above it | Pipe running through the ceiling cavity, HVAC condensate line | Moisture meter reading along the joist bay nearest the stain |
| Centered around a light fixture or ceiling fan | Any of the above, collecting at the lowest point in the cavity | Cut power before inspecting; water pools at fixtures regardless of entry point |
A stain's shape adds a second layer of detail once the location narrows the source. A rounded, roughly circular stain usually means the leak enters directly above its center, while a cone- or teardrop-shaped stain that fans out toward one edge usually means the water is traveling along a joist or rafter before it drips, with the true entry point closer to the narrow end. Rust-colored or brown staining points to metal, either a fastener or old plumbing, rather than a fresh leak, and a stain that's spreading wider by the day is a more urgent sign than one that's stayed the same size for weeks.
Water traced to the floor above, not the roof, narrows further by fixture: a toilet, tub, or sink points to bathroom water damage, while a dishwasher or refrigerator line points to a kitchen or laundry room above.
When the ceiling in question sits directly under the roof or a floored attic, attic water damage covers the insulation, ventilation, and structural side of that same event from above instead of below.
Common causes of ceiling water damage
A roof leak is the single most common cause of ceiling water damage on a top floor or single-story home, but plumbing fixtures on the floor above cause just as many cases in multi-story homes. Seven sources account for nearly every ceiling stain a homeowner encounters.
 Roof leaks account for the largest share of ceiling stains, but a bathroom fixture, HVAC condensate line, or in-cavity pipe on the floor above produces the same visible stain from a very different repair path.
More than one cause can be active at the same time, particularly after a storm, when wind-driven rain finds a roof weakness at the same time a power outage stalls a condensate pump or sump system elsewhere in the house. Ruling out each source in order, starting with whichever is most likely given the stain's location, is faster than guessing at the cause from the stain's appearance alone.
| Cause | How it shows up | Classification |
|---|---|---|
| Roof leak | Missing shingles, damaged flashing, or a failed vent boot letting rain in | Category 1, occasionally 2 if it sits long enough |
| Skylight seal or flashing failure | Staining that starts at the skylight's edge and spreads outward, worse during wind-driven rain | Category 1 |
| Upstairs bathroom fixture | Wax ring, supply line, or tub/shower pan failure | Category 1 to 2 depending on the fixture |
| HVAC condensate line or drain pan | Clogged line or cracked pan overflowing into the ceiling cavity | Category 1 |
| Pipe in the ceiling cavity | Corrosion, a loose fitting, or a frozen and burst section | Category 1 |
| Ice dam | Melted snow forced back under shingles by ice buildup at the eave | Category 1 |
| Duct or vent boot condensation | Uninsulated ductwork sweating in a humid attic or crawl space | Category 1 |
If the stain sits under the roof rather than under another room, water damage from a roof leak is worth reading in full, since roof-specific causes like flashing failure and shingle age carry their own repair sequence separate from a plumbing fix.
Cold-climate homes should also rule out an ice dam, which forces melted snow back under shingles during a freeze-thaw cycle instead of through a damaged roof surface.
A burst pipe inside the ceiling cavity itself is less common than a roof or fixture source but tends to release far more water, far faster, which usually makes the source obvious the moment it happens, not something that needs tracing.
Signs of ceiling water damage
Ceiling water damage shows up as a combination of visual, textural, and airborne cues, not just a single stain. Recognizing the secondary signs matters because a stain alone can look minor while the material behind it is already compromised.
 Paint lifting away from the surface means moisture has already broken the paint's bond with the drywall, a stage past simple discoloration that usually means the material underneath needs more than a fresh coat.
Some of these signs show up before a stain is even visible, particularly on a textured or popcorn ceiling where discoloration is harder to spot against the surface pattern. A musty smell can be the first indication of possible mold growth days before any staining appears, a connection CDC: Basic Facts About Mold ties to damp, poorly ventilated conditions.
| Sign | Look or feel | What it means |
|---|---|---|
| Ring or cone-shaped stain | Yellow, brown, or rust-tinted discoloration | Active or past water intrusion at the wide or narrow end |
| Sagging or bulging | A visibly lower or rounded section of ceiling | Saturated drywall carrying trapped water |
| Bubbling or peeling paint | Paint lifting away from the surface in small pockets | Moisture has broken the paint's bond with the drywall |
| Musty odor | A damp, earthy smell without a visible source | Possible mold growth in damp, poorly ventilated conditions |
| Soft spots | Drywall that gives slightly under a light touch | Material has absorbed enough water to lose rigidity |
| Cracking near a fixture | Hairline cracks radiating from a light or fan | Water pooling at the fixture, the lowest point in the cavity |
A stain that's stopped growing isn't necessarily a stain that's stopped being a problem. Roof leaks in particular tend to appear only during or right after rain, so a section that looks static on a dry week can still sit above wet insulation and framing that never fully dried between events, which is one reason a stable-looking stain still warrants a signs of water damage check across the rest of the home rather than being treated as an isolated issue.
DIY vs. professional: what you can safely handle
A small, contained stain from a source you've already fixed is reasonable to dry and patch yourself, while anything involving sagging drywall, a large wet area, or an unidentified source calls for a professional. The decision comes down to scale, moisture depth, and whether the ceiling itself is structurally sound.
 A reading above 17% signals a cavity still too wet to patch, since drywall can look dry on the surface while the paper backing and insulation behind it stay saturated.
A visual check alone tends to underestimate how far water has spread, since drywall can look dry on the surface while the paper backing and the insulation behind it are still saturated. That gap between appearance and actual moisture content is the main reason a pin-style meter, not a hand test, should settle the DIY-versus-professional call rather than how the ceiling looks from below.
| Factor | DIY-appropriate | Call a professional |
|---|---|---|
| Stain size | Under roughly one square foot, no sagging | Larger area, spreading, or visibly bulging |
| Source | Already identified and fixed | Unknown, or requires roof or plumbing repair |
| Moisture reading | Under 15% on a pin-style meter | Above 17%, or unable to test the cavity |
| Material condition | Firm, no soft spots or visible mold | Soft, crumbling, or showing dark staining |
| Ceiling age and finish | Smooth drywall, home built after 1980 | Textured or popcorn finish on a home built before 1980, untested for asbestos |
For a small, source-confirmed stain, drying with a fan and a dehumidifier for a day or two before patching and repainting is realistic without hired help. Handling that extraction and drying yourself follows the same tools and moisture-confirmation steps used for DIY water damage cleanup generally, not a shortened version of them. Anything beyond that threshold, particularly a cavity you can't visually inspect or a source that hasn't been located yet, is where a moisture meter and thermal camera earn their cost quickly by finding wet framing a flashlight alone would miss.
A vaulted or cathedral ceiling shifts this decision toward professional help even for a moderate stain, since there's no attic above it to inspect from, and reaching the affected area at all usually means scaffolding or a lift rather than a stepladder. A textured or popcorn ceiling in a home built before roughly 1980 shifts it further: scraping or sanding that surface without testing it first for asbestos is a safety issue, not just a repair-quality one, so treat any DIY work beyond containment and drying as off the table until a test comes back clear.
Who to call
The professional to call first depends on the source, not the ceiling itself. A confirmed roof leak goes to a roofer, a plumbing fixture above goes to a plumber, and a condensate line or duct issue goes to an HVAC technician, with a certified water damage restoration company brought in alongside any of the three once drywall or insulation is saturated. Calling the trade and the restoration company at the same time, not sequentially, keeps drying equipment running while the underlying repair is scheduled instead of losing days between the two calls.
Confirm certification before work begins, not after: ask whether the technician assigned to the job holds an IICRC credential personally, since certification belongs to the individual rather than the company as a whole. A same-day or next-day inspection is a reasonable expectation for a residential ceiling job, and a company that pushes the visit out a week or more is worth calling elsewhere for.
Repairing the ceiling: patch, replace, or repaint
A ceiling section only needs patching and repainting if the drywall stayed firm and dry once the source was fixed, while sagging, soft, or visibly stained-through drywall needs to be cut out and replaced. A moisture meter reading, not the visual appearance alone, should decide which path a given section takes.
 A patch only holds if the surrounding drywall tested dry first, since sealing compound over a still-damp cavity just traps moisture behind a fresh surface.
Standard drywall patches straightforwardly, but plaster ceilings and textured or popcorn finishes complicate the repair in ways flat drywall doesn't. A plaster ceiling that's cracked or sagging from water weight typically needs a plasterer rather than a drywall crew, since patched plaster and surrounding original plaster rarely blend without visible texture differences. Textured ceilings carry a matching risk of their own: a smooth drywall patch stands out clearly against surrounding texture unless the repair crew re-texture-matches the patched area before painting, which is worth confirming with a contractor before work begins, not after a mismatched patch is already dry.
A suspended or drop ceiling, common in basements and finished lower levels, repairs differently from all three: a stained or sagging acoustic tile is usually just pulled out of the grid and replaced individually rather than patched, which keeps the repair fast and inexpensive as long as the grid and the framing above it are dry. Confirm the source is fixed and the space above the tiles is dry before swapping tiles back in, since a still-wet cavity will simply stain the replacement tile again.
Testing before you disturb an older textured ceiling
Homes with a spray-applied textured or popcorn ceiling installed before roughly 1980 carry a real chance of asbestos in that material, and water damage that softens or crumbles the texture is exactly the kind of disturbance that can release fibers. Don't sand, scrape, or cut into a textured ceiling of that age until it's tested, and treat it as asbestos-containing until a lab result says otherwise. This applies to the repair itself, not the water damage response: containing and drying the area is fine, but any work that abrades the textured surface should wait for testing or go to a licensed abatement contractor if the test comes back positive.
Cost of ceiling water damage repair and restoration
Ceiling water damage repair costs range from a couple hundred dollars for a caught-early stain to well over ten thousand for a saturated section requiring structural drying and framing repair. Cause and how quickly the damage was addressed drive most of the variation. Most ceiling-specific jobs land in the lower half of that range, since the volume of water reaching a ceiling is usually smaller than what a full-room flood would involve.
 A written estimate should separate drying, drywall replacement, and equipment access into distinct line items rather than a single lump figure, especially on a vaulted or multi-story ceiling.
Access adds cost that a flat comparison by room doesn't capture on its own, since a vaulted or multi-story ceiling often requires scaffolding or a lift rather than a standard ladder, and that equipment cost gets billed separately from the drying and drywall work itself. A restoration company's written estimate should break these out as separate line items instead of folding equipment access into a single lump figure.
| Scenario | Typical cost | What's included |
|---|---|---|
| Caught-early stain, no sagging | $150–$500 | Patch, primer, and repaint only |
| Moderate stain, section replaced | $500–$1,500 | Cut-out drywall, dry-in, patch, and paint |
| Saturated section, restoration involved | $1,500–$5,000 | Extraction, structural drying, drywall replacement |
| Upstairs plumbing fixture as the source | $2,000–$8,000 | Plumbing repair plus ceiling and any floor-above repair |
| Structural or collapsed ceiling | $5,000–$25,000+ | Framing repair, insulation replacement, full ceiling rebuild |
A per-square-foot estimate for the restoration portion of the job, separate from any drywall repair or repainting, follows the same rates used across every other cause of water damage restoration cost on a property.
If the ceiling damage is extensive enough to need a square-footage-based quote rather than a flat repair estimate, water damage restoration cost per square foot breaks that rate down further by category and material.
Insurance coverage and liability for a ceiling leak
Standard homeowners insurance covers ceiling water damage when the cause was sudden and accidental, such as a burst pipe or a storm-driven roof leak, and typically excludes damage traced to a long-ignored, gradual leak. Insurers treat the two very differently, since a sudden event is unpredictable while a gradual one is considered preventable with normal maintenance.
 An adjuster typically asks how long the leak was active before it was found, since that timeline determines whether the damage counts as sudden and accidental or a gradual, excluded loss.
An adjuster generally looks at how long the leak had been active and whether there were earlier signs a homeowner should have caught, a distinction NAIC: A Consumer's Guide to Home Insurance outlines as the core of the sudden-versus-gradual standard most policies apply.
That same standard applies to homeowners insurance and water damage claims generally, including the documentation an adjuster expects and how a denied or underpaid claim gets handled.
Condo and apartment liability when a leak crosses units
A ceiling leak in a condo or apartment often means the damage originated in the unit above, which raises a liability question a single-family home never faces. In most condo associations, the owner of the unit where the leak started is responsible for the damage it causes below, though the building's master policy may cover the shared structural ceiling assembly itself even when a specific owner's negligence caused the leak. Renters facing the same situation should notify the property manager immediately and in writing, since the timeline of that notice often matters as much as the leak itself when responsibility gets sorted out between insurers.
Preventing future ceiling water damage
Most ceiling water damage traces back to one of five preventable gaps: an unchecked roof, an aging bathroom fixture above, a clogged HVAC condensate line, poor attic ventilation, or the absence of an early-warning sensor. Catching any one of these during a routine check is far cheaper than the repair that follows a missed one.
 A supply line or valve failure often leaks for weeks before it's visible in the bathroom itself, since the water travels through the floor and shows up on the ceiling below first.
Inspect the roof annually
Check for missing or lifted shingles, damaged flashing around vents and chimneys, and granule buildup in the gutters before they lead to a leak rather than after.
Check upstairs bathroom fixtures for slow leaks
Look under sinks, at the toilet base, and around the tub or shower for the earliest signs of a supply line or seal failure, since these leaks often travel through a ceiling long before they're visible in the bathroom itself.
Flush the HVAC condensate line seasonally
A clogged line is one of the most common, and most preventable, causes of a stain forming directly below an air handler or in a closet ceiling near one.
Confirm attic insulation and ventilation are adequate
Poor ventilation lets warm, moist air condense on the underside of the roof deck, which can stain a ceiling with no active leak involved at all.
Place a water sensor near vulnerable fixtures
A sensor near an upstairs water heater, washing machine, or bathroom catches a slow leak within minutes rather than after it's already reached the ceiling below.
Building these checks into the same seasonal rhythm that water damage prevention recommends catches most ceiling-specific causes before they progress past a fixture repair into a full restoration job.
Frequently asked questions
Is it safe to sleep under a water-damaged ceiling?
No, not if the area is sagging, bulging, or actively dripping. A stable, dry stain with no sag or bounce isn't an immediate hazard, but any section that flexes when pressed should be avoided and relieved through a controlled opening before anyone spends time underneath it.
Can I just paint over a water stain on the ceiling?
Only after the source is fixed and the material is confirmed dry. Paint has no effect on moisture still trapped behind it, so covering the stain first just hides an active problem instead of solving it.
How do I know if a ceiling leak is coming from the roof or a bathroom above?
Check what's directly above the stain first. A stain under an upstairs bathroom, kitchen, or laundry room usually traces to a plumbing fixture, while a stain under the roof or top-floor ceiling with no plumbing above it usually points to a roof leak, ice dam, or attic condensation issue.
How much weight can a water-damaged ceiling hold before it collapses?
Very little once it's saturated. Standard half-inch drywall weighs roughly 1.6 pounds per square foot dry, but fully saturated drywall commonly weighs double that or more, and a bulging or bouncing section can fail with very little added weight beyond that, which is why a controlled release is safer than waiting to see what happens.
Does homeowners insurance cover a water-damaged ceiling?
Usually yes, if the cause was sudden and accidental, like a burst pipe or a storm-driven roof leak. Coverage is typically denied for damage traced to a long-term, unaddressed leak or lack of maintenance, since insurers treat that as a preventable, gradual loss, not a covered event.
Who pays if my upstairs neighbor's leak damages my ceiling?
Usually the unit where the leak started, not yours. That's a general rule, not a guarantee, so check the specifics with the HOA or property manager, since a building's master policy sometimes covers the shared ceiling assembly regardless of which owner caused the leak.
How long does a water-damaged ceiling take to dry out?
A small, caught-early stain can dry within a few days with airflow alone. A saturated section behind drywall often needs commercial air movers and a dehumidifier running for three to five days before a moisture meter confirms the cavity is dry enough to close back up.
Should I repair or fully replace a water-damaged ceiling section?
Replace it if the drywall is sagging, soft, or has visible mold, and patch it if the damage is limited to a stain on otherwise firm material. Go by a moisture meter reading over how the section looks, since drywall can appear dry on the surface while still holding water underneath.
Can a ceiling water stain mean there's mold above it?
Possibly, especially if the stain has been there for more than a couple of days or carries a musty smell. Mold can begin colonizing damp material within the same 24 to 48 hour window the EPA cites for water damage generally, so a lingering, unaddressed stain is worth treating as a mold risk, not just a cosmetic one. Once mold on the ceiling sets in, the signs and remediation steps differ enough from plain water staining to warrant their own response.
Why does my ceiling have a water stain but no active leak?
The source has likely stopped or slowed, not disappeared. Roof leaks often only run during rain, and a slow drain-line or supply-line drip can wick along a joist before showing up on the ceiling below, so a dry-looking stain can still sit above an actively wet cavity.
Sam Hickerson is the founder of RestoreAdvisor and writes consumer guides on mold remediation, water damage restoration, inspection, testing, and home recovery. His work focuses on helping homeowners understand costs, risks, and when to call a professional. He draws on guidance from the EPA, CDC, IICRC, and other authoritative sources to make complex home issues easier to navigate.