
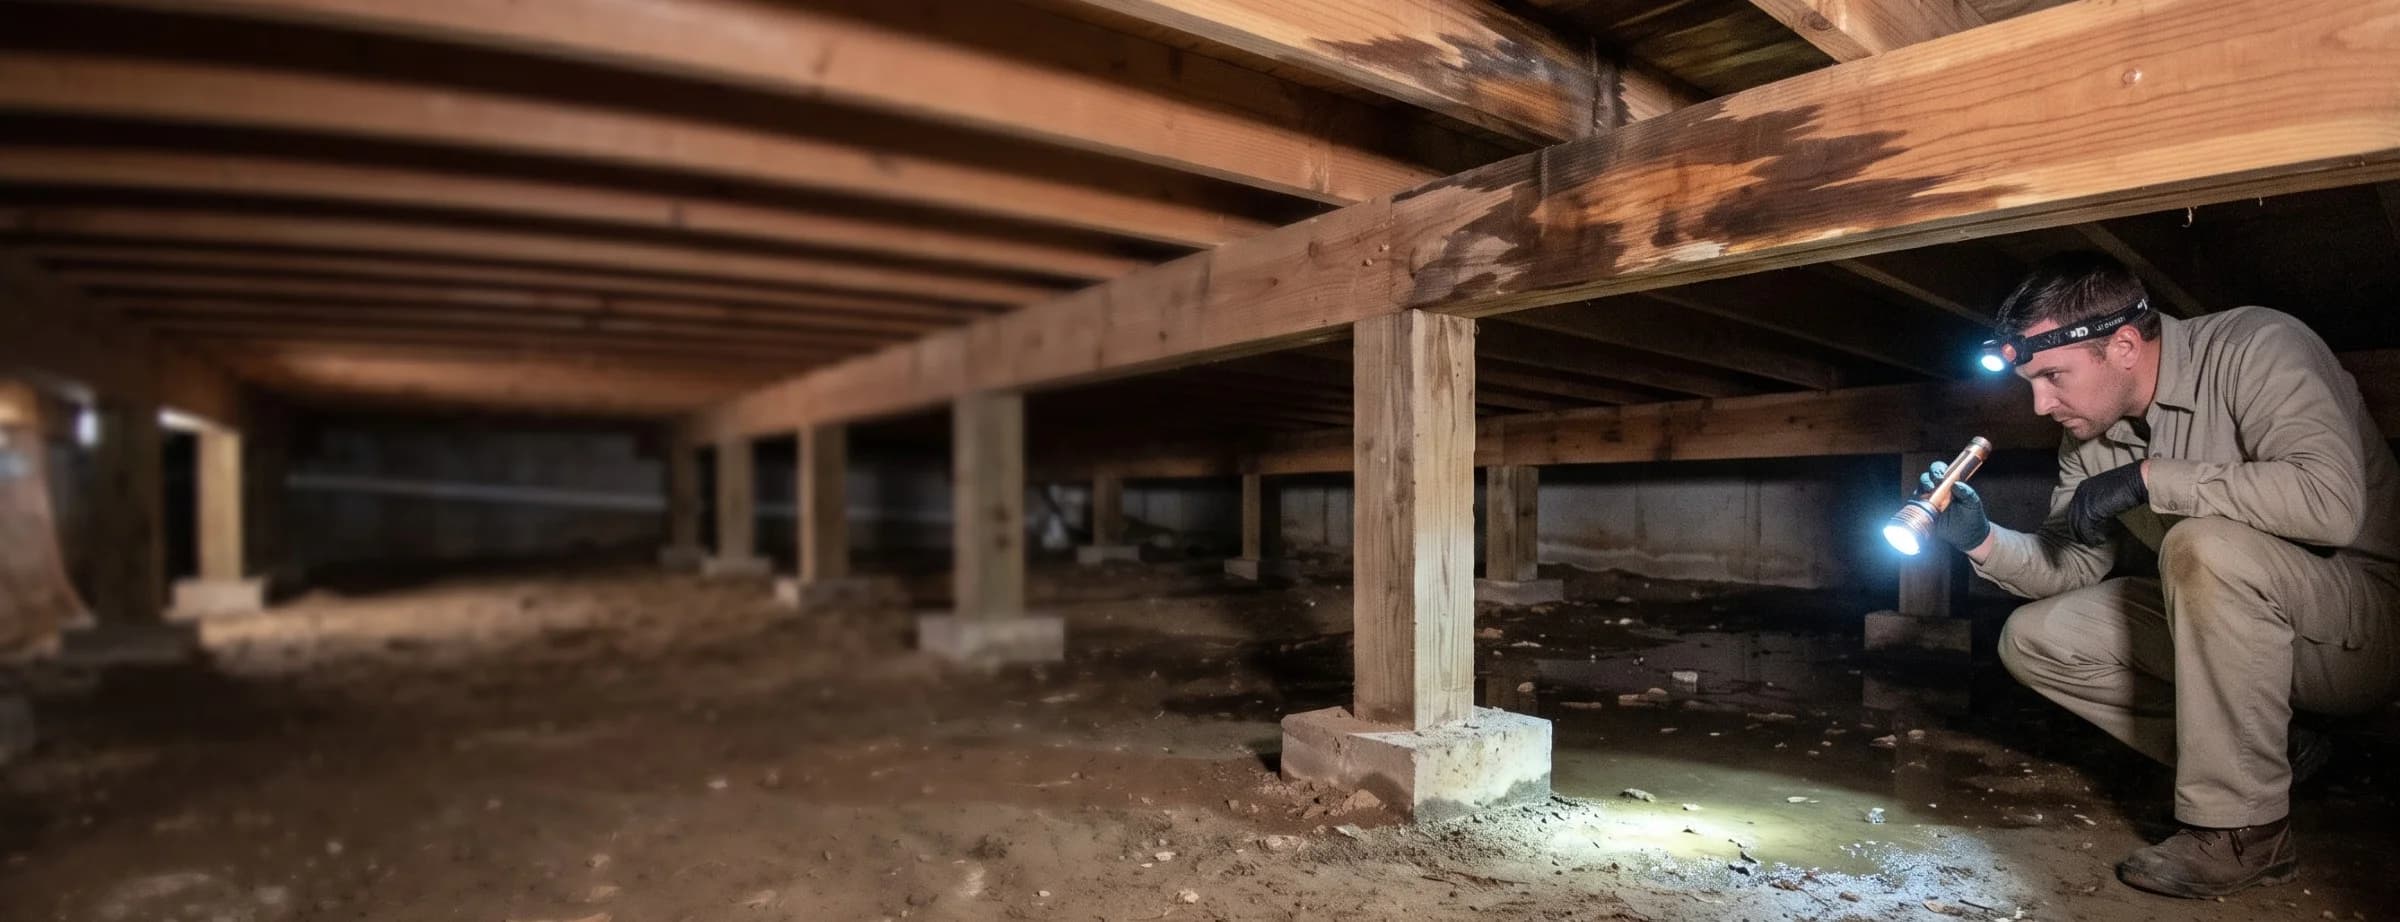

Standing water under a house rarely means something catastrophic happened. Most crawl space water traces back to one of a handful of ordinary sources, rainwater that never drains away from the foundation, a slow plumbing leak, or groundwater pushing through a dirt floor, and each one has a specific fix. Confirming which source is involved, drying the space correctly, and stopping the water before it reaches the floor joists above are the priorities in the first day.
Crawl space water damage is water intrusion beneath a home's living area that reaches the crawl space's dirt or concrete floor, framing, insulation, or mechanical equipment, and it's classified under the same ANSI/IICRC S500 category and class system used for any other water loss in the home. Standing water left in place for 24 to 48 hours creates conditions that support mold and wood decay fungi, per the EPA's guidance on flood cleanup and indoor air quality, and because a crawl space sits in direct structural contact with the subfloor above, damage here can eventually show up as sagging flooring, musty odor, or reduced air quality in the rooms overhead.
Key insights
- Four common sources. Most crawl space water traces back to surface drainage and grading, groundwater and hydrostatic pressure, a plumbing leak, or HVAC condensation.
- The 24 to 48 hour window matters. Water standing in a crawl space for more than a day or two creates conditions for mold and wood decay, per the EPA.
- Cost runs $500 to $15,000 or more. Extraction and drying alone typically fall at the low end, and structural joist or subfloor repair pushes the total higher.
- Vented crawl spaces see more condensation. Humid outside air entering through foundation vents condenses on cooler surfaces inside, a different mechanism than a plumbing leak or groundwater.
- A bouncy or sagging floor overhead is a warning sign. It often points to joist or subfloor damage that's already underway beneath the house.
- Insurance coverage depends on the source. A sudden plumbing leak is typically covered under a standard HO-3 policy, but groundwater seepage and flooding are standard exclusions, per NAIC.
What to do right now
The response sequence for crawl space water follows the same core steps as any other water loss in the home, adjusted for the tighter clearance and higher electrical risk of a confined space underneath the house. Confirming safety, stopping the source, and getting a plumber and restoration company on the phone within the first hour are what separate a routine cleanup from a job that grows into structural repair.
 An outlet mounted this close to standing water should be treated as live until the breaker feeding it is confirmed off, per OSHA's guidance on avoiding electrical shock during flood response.
Confirm it's safe to go in
Check for any sign of exposed wiring, a junction box, or an outlet near the water before entering, and don't step into standing water until power to the space is confirmed off.
Identify and stop the source if you can
If the water traces to a visible supply line or fixture, shut off that line's valve or the home's main water valve rather than guessing at the cause.
Cut power to anything in the crawl space
Switch off the breaker for any outlets, sump pump, or equipment located in the crawl space before the water gets any deeper, following OSHA's guidance on avoiding electrical shock during flood response.
Photograph everything before you touch it
Take wide shots of the standing water and close-up shots of the suspected source, insulation, and any staining on the joists above, for both diagnosis and insurance documentation.
Call a plumber and a restoration company at the same time
If the source looks plumbing-related, call a plumber to stop it and a restoration company to extract and dry the space simultaneously, rather than waiting for one before contacting the other.
A crawl space that's actively flooding, has standing water near live wiring, or carries a sewage odor moves past a routine response and into emergency water damage restoration territory, where the priority shifts to immediate extraction rather than a scheduled visit.
What not to do
A few common instincts actually make crawl space water damage worse rather than better, mostly by working against the drying process or missing a hazard that isn't obvious from a standing position. Each one below is a mistake worth avoiding even when the water looks minor.
Don't enter without checking clearance and ventilation first
Low headroom, poor lighting, and limited airflow make a crawl space more hazardous than a typical flooded room, so confirm you can move freely before going in.
Don't crawl through standing water without checking for debris first
Old fasteners, broken glass, or scrap material can hide under murky water on a dirt floor, and a puncture wound in a space this hard to exit quickly is worth avoiding.
Don't close the space back up before confirming it's dry
Sealing a vapor barrier or insulation back into place over damp wood traps moisture against the framing and accelerates decay rather than stopping it.
Don't assume a musty smell will go away on its own
A persistent odor usually means moisture is still present somewhere, even if the visible water is gone.
Following the same nine-phase sequence used in a water damage restoration checklist keeps the documentation, drying, and follow-up steps in order, even for a space as awkward to work in as a crawl space.
Where the water is coming from
A crawl space's water source usually reveals itself through timing and location. Water that only shows up after rain points outside, water that's present in dry weather points to plumbing or groundwater, and water concentrated near one fixture points to a leak rather than a broader drainage problem.
 Following a visible trail back to its source is often faster than guessing at the cause, and a leak this close to a supply line points to Category 1 clean water under IICRC S500 rather than groundwater seepage.
Confirming the source correctly matters before starting any water damage restoration work, since a plumbing leak, groundwater, and a sewage backup each call for a different first call and a different water classification. Every water source carries its own IICRC S500 category assignment, ranging from Category 1 clean water, such as a supply line drip, to Category 3 contaminated water, such as a sewage backup, and that assignment drives both the cleanup protocol and the insurance conversation that follows.
| Symptom | Likely source | Category | Timing pattern |
|---|---|---|---|
| Water appears only after rain and follows the slope of the yard | Surface drainage or poor grading | Category 1 | Follows storms, dries out between events |
| Water present even in dry weather, seeping through the floor or walls | Groundwater or hydrostatic pressure | Category 1–2 | Persistent, tied to the water table level |
| Water concentrated near one pipe run, fixture, or the water heater | Plumbing leak | Category 1–2 | Constant or intermittent, source-specific |
| Damp insulation or a dripping duct with no clear puddle | HVAC condensation | Category 1 | Worse during humid, high-cooling-demand months |
| Water with a sewage odor near a drain line or cleanout | Sewage backup | Category 3 | Sudden, often tied to a clog or main-line failure |
| Muddy water or debris entering through foundation vents during a storm | Flooding or storm runoff | Category 2–3 | Tied to a specific storm event |
This classification follows the same water damage categories used across every water loss in the home, not a scale unique to crawl spaces. A technician confirms it the same way here as anywhere else in the house: by tracing the water to its source rather than judging it by appearance alone.
What causes crawl space water damage
Six mechanisms account for nearly every case of crawl space water damage: poor drainage and grading, groundwater and a high water table, a plumbing leak, HVAC condensation, a missing or deteriorated vapor barrier, and foundation vents or cracks that let storm water in directly. Each has a different long-term fix, so treating the visible water without addressing the mechanism behind it usually means the problem comes back within a season.
 A downspout ending within a few feet of the foundation is one of the most common preventable causes of crawl space water intrusion, since the water has nowhere to go but toward the nearest vent or gap.
These mechanisms don't always act alone. A home with poor grading and an aging vapor barrier, for example, often shows both surface drainage water after a storm and a baseline of ground moisture the rest of the year, which is why a technician confirming the cause during inspection sometimes finds more than one factor contributing to the same wet crawl space.
| Cause | What's happening | How to confirm it |
|---|---|---|
| Poor drainage and grading | Roof runoff or yard water pools against the foundation and finds its way in through vents or gaps | Check gutters, downspout extensions, and whether the ground slopes toward the house |
| Groundwater and hydrostatic pressure | The water table rises above the crawl space floor level and pushes moisture through dirt or concrete | Water reappears even in dry weeks and tends to follow the lowest point in the space |
| Plumbing leak | A supply line, drain line, or water heater running through the crawl space fails | Water concentrates near a specific pipe run or fixture rather than spreading evenly |
| HVAC condensation | Ductwork or an air handler located in the crawl space sweats in humid conditions | Insulation and duct exteriors are damp with no clear puddle source nearby |
| Missing or torn vapor barrier | Ground moisture evaporates directly into the crawl space air with nothing blocking it | Persistent high humidity and condensation on pipes and framing with no leak present |
| Foundation vents or cracks | Storm water or a flash flood enters directly through open vents or a cracked wall | Water arrives during or right after a storm and often carries mud or debris |
A pipe that fails outright behaves differently than any of these slow sources. A burst pipe releases a large volume all at once and usually shows up as sudden, visible flooding rather than a gradual damp patch, which is why timing, not appearance, is often the fastest way to rule it in or out.
Ground moisture is the mechanism most homeowners underestimate. Even a crawl space with no active leak and no obvious drainage problem can stay damp year-round if there's no vapor barrier at all, since soil constantly releases water vapor into the air above it, and that vapor has nowhere to go in an unvented or poorly circulated space.
Signs of crawl space water damage
Crawl space water damage often shows up first in the rooms above rather than in the crawl space itself, since most homeowners rarely go down there to check. A musty smell drifting up through vents or floor registers, a floor that feels soft or bouncy in one spot, and a noticeable jump in heating or cooling bills are the three most common early indicators, and the CDC's guidance on mold and moisture treats a persistent musty odor as an early signal worth acting on even before visible growth appears.
 Condensation like this often has nothing to do with a leak; an uninsulated cold pipe sweating in humid air can stain a joist just as visibly as a dripping fitting over time.
A flashlight check through the crawl space access door, even without going all the way in, often turns up visible clues within the first few feet: dark staining on the sill plate, condensation beads on ductwork, or a sheen on the vapor barrier that wasn't there during the last inspection.
| Sign | Where you'll notice it | What it usually means |
|---|---|---|
| Musty odor | Floor registers, closets, or rooms directly above the crawl space | Active or recent moisture, often before visible water appears |
| Soft or bouncy flooring | Underfoot in the room above the affected joists | Subfloor or joist damage already underway |
| Visible mold on framing | Joists, subfloor, or insulation when viewed from inside the crawl space | Moisture has been present long enough to support growth |
| Condensation on pipes or ductwork | Metal surfaces inside the crawl space, especially in summer | Humidity buildup, often tied to a vented design or missing vapor barrier |
| Rising energy bills | Monthly utility statements | HVAC equipment working harder due to humid, uninsulated air infiltrating the space |
| Pest activity | Droppings, nesting material, or insect activity near the crawl space entry | Moisture and organic decay attract pests looking for a damp environment |
Any one of these signs of water damage on its own is worth a look, but two or more together, especially a musty smell paired with a soft spot in the floor, usually means the moisture has been present for a while rather than a fresh, one-time event.
What's at risk under your home
A crawl space's direct structural connection to the rest of the house is what separates its water damage from most other rooms: what happens to the floor joists and subfloor down here shows up as sagging, soft spots, or a bouncy feel in the flooring directly above. Insulation batts and any ductwork routed through the space are usually the next things affected, since both sit in direct contact with rising moisture and both lose their function once saturated.
 If the tip sinks in rather than meeting resistance, the wood has already softened from prolonged moisture, and a joist in this condition needs a contractor's evaluation, not just drying.
The sill plate, the horizontal framing member that sits directly on top of the foundation wall and anchors the floor structure to it, is especially vulnerable since it's usually the closest piece of wood to standing water and one of the hardest components to inspect without getting into the space directly.
| What's exposed | Risk | What to check |
|---|---|---|
| Floor joists and subfloor | Wood decay fungi weaken the structural framing that carries the floor above | Press a screwdriver tip into exposed wood; it should resist, not sink in |
| Insulation | Saturated batts lose R-value and become a mold reservoir | Check for sagging, discoloration, or a musty smell near the insulation |
| Ductwork and HVAC equipment | Standing water or condensation circulates moisture and odor into the living space | Look for rust, standing water under the unit, or damp duct wrap |
| Electrical wiring and outlets | Standing water near a junction box or outlet is a shock hazard | Never touch wiring in a wet crawl space; treat it as live until power is confirmed off |
| Stored items | Boxes, insulation, and equipment left on the ground absorb water fast | Move anything off the floor and onto shelving as a standing prevention habit |
Confirming which water damage class applies here matters for the same reason it matters anywhere else in the house: a Class 1 loss with minimal absorption dries in a few days with basic equipment, while a Class 3 or 4 loss with saturated wood and insulation takes considerably longer and often needs specialty drying equipment.
Ductwork located in a crawl space carries an added risk beyond structural drying, since moisture on or inside a duct run can circulate odor and airborne contaminants into the living space above through normal HVAC operation. Sealing and insulating any ducts routed through the crawl space is worth confirming as part of the drying plan, not just the visible joists and insulation.
The nearest comparison point in the house is a basement, since basement water damage shares the same below-grade exposure to groundwater and hydrostatic pressure, though a basement typically has better access, more headroom, and finished materials that behave differently than exposed joists and dirt.
How crawl space air reaches the rest of your home
Air quality problems can start in a crawl space and end up in the rooms above through a mechanism called the stack effect: warm air rising through the house creates lower pressure near the bottom of the home, and that pressure difference pulls air, along with any moisture, mold spores, or musty odor it's carrying, up through electrical penetrations, plumbing chases, and gaps around ductwork into the living space above. Standing water isn't required for this to matter; persistently damp framing or a saturated vapor barrier is often enough to measurably affect the air quality on the floor directly overhead.
This is also why a musty smell noticed upstairs so often traces back to a source that's never been visible from inside the house: the odor is riding the same air currents that heat the home in winter, just moving in reverse. Sealing the largest gaps between the crawl space and the floor above, particularly around plumbing and duct penetrations, reduces this pathway even before the underlying moisture source gets fixed.
Vented vs. encapsulated crawl spaces
A vented crawl space has open foundation vents that allow outside air to circulate through the space, while an encapsulated crawl space is sealed with a heavy vapor barrier, insulated walls, and often a dehumidifier or conditioned air supply, with no direct connection to outside humidity. The vent design was originally meant to prevent moisture buildup, but in humid climates it frequently does the opposite: warm, moist outside air enters and condenses on the cooler surfaces inside, a mechanism closely related to how HVAC condensation develops on ductwork located in the same environment, which is why many building scientists now favor sealed, conditioned crawl spaces over vented ones.
 A vapor barrier alone doesn't stop the humid air a vented crawl space pulls in during warm months; the two problems, ground moisture and outside air, need to be solved separately.
Encapsulation reduces condensation risk considerably, but it doesn't eliminate the need to address an active plumbing leak, a drainage problem at the foundation, or groundwater intrusion underneath it. A vapor barrier and conditioned air stop moisture from evaporating up out of the soil; they don't stop a burst supply line or storm runoff from adding water directly to the space, so diagnosing the actual source still comes first regardless of which type of crawl space you have.
DIY vs. professional cleanup
A small amount of clean water in an easily accessible crawl space is often within DIY range, provided there's no contamination, no standing water more than a couple of inches deep, and no visible mold. Anything beyond that threshold, particularly limited clearance, a sewage odor, or water that's been sitting for more than a day or two, is safer left to a professional with commercial extraction and drying equipment.
 A shop vacuum handles the extraction step, but running the fan for 24 to 48 hours afterward is what actually prevents mold, pulling the water out alone isn't enough to fully dry the wood underneath.
Even within the DIY-appropriate range, a wet/dry shop vacuum rated for water pickup and a fan running for at least 24 to 48 hours afterward are the minimum equipment needed to fully dry the area; extraction alone without sustained airflow often leaves enough residual moisture to support mold growth within days.
| Factor | DIY-appropriate | Call a professional |
|---|---|---|
| Water depth | A couple of inches or less, standing briefly | Several inches or more, or actively rising |
| Water source | Clean supply line drip, condensation | Sewage, flooding, or an unknown source |
| Access and clearance | Enough room to move and work comfortably | Tight clearance requiring specialized equipment |
| Visible mold | None present | Any visible growth on joists, insulation, or subfloor |
| How long it's been standing | Caught within a few hours | More than 24 to 48 hours |
The core steps behind DIY water damage cleanup still apply in a crawl space: extract, dry, and confirm with a moisture meter rather than a visual check, since wood that looks dry can still read well above a safe moisture threshold underneath the surface.
Who to call
Which specialist comes first depends on the source. A plumbing leak needs a plumber to stop it, while groundwater, drainage, or a failed vapor barrier calls for a waterproofing or foundation specialist rather than a plumber, and either scenario needs a restoration company for extraction and drying once the source is addressed.
Calling more than one at the same time is normal and often faster than waiting for one visit before scheduling the next. If the source turns out to be a failed water heater installed in the crawl space, which is common in older homes without a dedicated utility closet, a technician experienced with a water heater leak specifically can confirm whether the tank itself needs replacement in addition to the water cleanup.
Confirm credentials before work begins either way. A restoration company should carry IICRC Certified Firm status, and any technician doing the work should hold a current WRT certification, both of which can be verified directly through the IICRC Global Locator.
If there's a sewage odor involved, treat it as a sewage backup rather than a standard leak, since Category 3 water calls for different PPE and disposal procedures than a clean supply line drip.
How much crawl space water damage restoration costs
Crawl space water damage restoration typically costs $500 to $15,000 or more, depending on the water's contamination level, how long it sat before being addressed, and whether the floor joists or subfloor need structural repair. This range covers extraction, drying, and cleanup, not a full waterproofing or encapsulation project, which is priced separately as a longer-term system rather than a restoration response.
 A meter reading, not a visual check, is what actually sets the scope on an estimate; insulation this saturated usually means replacement rather than drying, which is the biggest swing factor in the final cost.
Response time affects the final number as much as square footage does. Water addressed within the first 24 hours usually stays in the lower half of this range, while a leak that sat for a week or more often adds insulation replacement, extended subfloor drying, and a mold inspection to the invoice.
| Scenario | Cost range |
|---|---|
| Minor intrusion, caught early, small area | $500–$1,500 |
| Moderate standing water, 200–500 sq ft, clean water | $1,500–$5,000 |
| Contaminated (Category 2–3) water requiring disinfection | $3,000–$8,000 |
| Extensive damage with joist or subfloor repair | $8,000–$20,000+ |
| Mold remediation add-on, if growth is already present | $1,500–$6,000 |
These figures track closely with water damage restoration cost figures for other rooms in the house, since the extraction and drying methodology doesn't change based on which room the water is in.
The main cost driver specific to a crawl space is access. A technician working in a two-foot crawl space with limited lighting and no room to stand takes longer to complete the same square footage than one working in an open basement or first-floor room, and that labor difference shows up on the final invoice.
Comparing a quote against typical water damage restoration cost per square foot figures for the affected area is a reasonable way to sanity-check a bid before signing.
A typical example: a homeowner discovers a wet crawl space three days after a water heater installed under the house starts leaking. The technician confirms Category 1 water covering about 150 square feet, with the insulation directly beneath the leak saturated but the joists still testing dry. Extraction and four days of equipment rental run $2,200, removing and replacing the ruined insulation adds $600, and the total water damage restoration invoice lands around $2,800, separate from the plumber's bill to replace the water heater itself.
Does insurance cover crawl space water damage
Insurance coverage for crawl space water damage depends entirely on the source, not the location. A sudden plumbing failure, such as a burst supply line or a water heater rupture, is typically covered under the same sudden-and-accidental standard that governs how homeowners insurance covers water damage anywhere else in the house.
Groundwater seepage, storm flooding, and long-term moisture from poor drainage are standard exclusions on nearly every policy, per NAIC guidance on named homeowners policy exclusions.
If flooding through foundation vents or storm runoff is a realistic risk for your home, that gap is what a separate NFIP flood policy is designed to close, and it's worth confirming with your insurer whether your policy includes any endorsement for water backup or sump pump failure, since a standard policy usually doesn't include either by default.
Documentation matters more in a crawl space claim than in a more visible part of the house, simply because an adjuster is less likely to have seen the damage firsthand before you have already cleaned it. Photograph the water, the suspected source, and any staining on the joists before extraction begins, and keep the plumber's or restoration company's written assessment of the cause, since that assessment is often what determines whether the claim gets classified as sudden and accidental or as gradual and excluded.
Preventing crawl space water damage
Most crawl space water damage traces back to a maintenance gap rather than an unavoidable event, which means a handful of routine checks catch the majority of problems before they become a restoration call. Grading, the vapor barrier, pipe insulation, HVAC condensate drainage, and foundation vents are the five areas worth checking on a recurring basis.
 Insulating exposed pipe addresses both freezing risk and the condensation that forms on a cold, uninsulated line in a humid crawl space, one fix that covers two separate causes at once.
Extend downspouts and check grading
Direct downspouts at least four to six feet from the foundation and confirm the ground slopes away from the house rather than toward it, since surface drainage is the most common cause of crawl space water damage overall.
Inspect the vapor barrier annually
A torn, shifted, or missing vapor barrier lets ground moisture evaporate directly into the crawl space air, so check it once a year for gaps or damage. The International Residential Code's under-floor space requirements, Section R408, call for a ground vapor retarder in most unvented crawl spaces for exactly this reason.
Insulate exposed pipes
Pipes running through an unconditioned crawl space are vulnerable to both freezing and condensation, and insulating them addresses both risks at once.
Address HVAC condensate drainage
If ductwork or an air handler sits in the crawl space, confirm the condensate line drains properly and isn't adding moisture to the space on its own.
Check foundation vents and seal cracks
Damaged screens or open gaps let pests and storm water in directly, so inspect vents and any visible foundation cracks each season.
These steps address the water sources within a homeowner's routine maintenance reach. A crawl space with a persistent high water table, chronic humidity even after these fixes, or a history of repeated flooding usually needs a dedicated waterproofing or encapsulation assessment, since that's a structural and moisture-control project rather than something maintenance-level water damage prevention can resolve on its own.
Frequently asked questions
Is standing water in a crawl space always an emergency?
Not always. A small, contained amount of clean water from a slow drip can often wait for a same-day response, but water contaminated by a sewage backup, water near electrical wiring, or a rapidly rising level from an active pipe failure needs immediate action, including cutting power and calling for extraction right away.
How much does crawl space water damage restoration cost?
Most jobs run $500 to $15,000 or more, and access is often the biggest swing factor beyond the water itself: a technician working in a two-foot crawl space with no room to stand takes longer to cover the same square footage than one working in an open basement, which shows up directly in the labor cost.
Does homeowners insurance cover crawl space water damage?
Sometimes. Coverage comes down to whether the water arrived suddenly, like a burst supply line, or gradually, like a long-term seepage issue, and documenting the suspected source before cleanup begins is often what determines which way an adjuster classifies the claim.
Can crawl space water damage affect a home sale?
Yes. A home inspector will typically flag standing water, mold, or joist damage in a crawl space during a pre-sale inspection, and unresolved moisture often becomes a point of price negotiation or a requested repair before closing.
Can I dry out a crawl space myself?
Yes, if the water is clean, shallow, and confined to a small area with no mold present. A wet/dry shop vacuum rated for water pickup plus a fan running for 24 to 48 hours afterward covers most DIY-appropriate jobs; anything beyond that equipment's capacity is safer left to a professional.
How long does a wet crawl space take to dry?
Three to seven days for a contained area with commercial air movers and a dehumidifier running continuously, similar to drying timelines for any other Class 1 or Class 2 water loss. A crawl space with limited airflow and a dirt floor can take longer than a comparable area in a finished room.
Will mold grow in a wet crawl space?
Yes, if the moisture isn't addressed within the EPA's cited 24 to 48 hour window. Crawl spaces are especially prone to mold because they're dark, often poorly ventilated, and in direct contact with damp soil, and once visible growth is confirmed, crawl space mold removal calls for containment and PPE beyond what water extraction alone requires.
Does fixing crawl space water damage require full encapsulation?
No. Encapsulation addresses chronic humidity and vapor intrusion as a system, but a specific leak, drainage failure, or storm event needs its actual source fixed directly; sealing a vapor barrier over an unresolved leak just traps the existing moisture behind a new layer.
Is it safe to go into a crawl space with standing water?
Only after confirming the water isn't near an outlet, junction box, or wiring, and only with a flashlight, gloves, and enough clearance to move without dragging skin or clothing through the water. Treat any standing water as electrically live until power to the space is confirmed off.
Can crawl space water damage affect my floors upstairs?
Yes, and by the time a floor feels soft or bouncy overhead, the joists and subfloor below have usually been wet long enough to need structural repair rather than just drying, since the crawl space framing carries the structural load for that section of the house.
Sam Hickerson is the founder of RestoreAdvisor and writes consumer guides on mold remediation, water damage restoration, inspection, testing, and home recovery. His work focuses on helping homeowners understand costs, risks, and when to call a professional. He draws on guidance from the EPA, CDC, IICRC, and other authoritative sources to make complex home issues easier to navigate.