
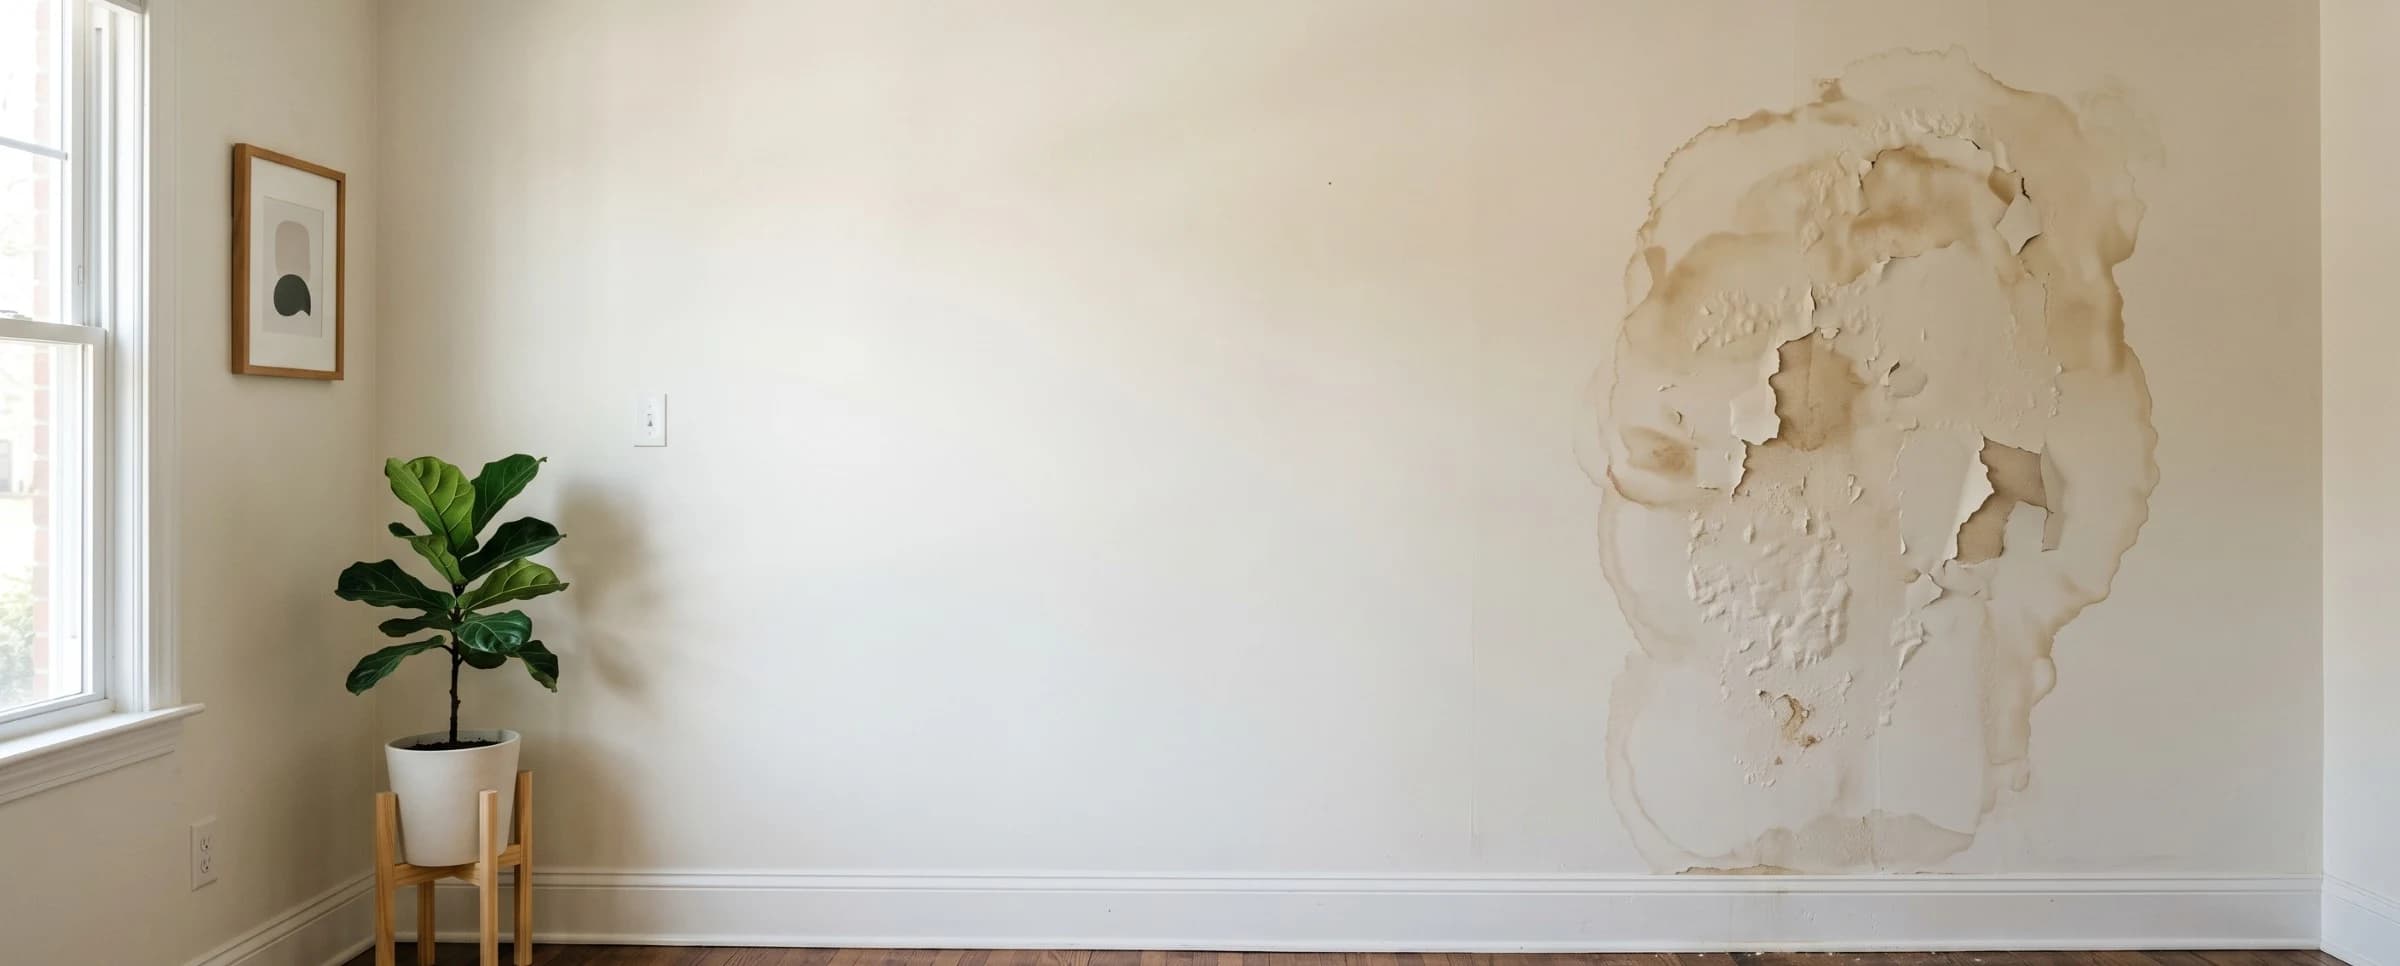

Water damaged drywall shows up as a stain, a bubble in the paint, or a soft spot that gives when you press it, and the first question is almost always the same: does this get patched, or does it get cut out. Water damaged drywall is gypsum wallboard that has absorbed enough moisture to compromise its paper facing or core, classified under the ANSI/IICRC S500 standard by how contaminated the water was and how long the drywall stayed wet. Those two factors, more than how bad the stain looks, decide whether a section can be cleaned and painted or needs to be cut out and replaced.
Key insights
- Firm and dry usually means repairable. Drywall that stayed structurally firm and dried within about 24 to 48 hours after clean water exposure typically only needs a stain blocking primer and paint, not replacement.
- Soft drywall doesn't get saved. Once the gypsum core softens, sags, or crumbles under light pressure, patching over it fails within weeks and the section needs to be cut out.
- Cut well past the visible stain. Water wicks sideways through the paper facing faster than it shows on the surface, so professionals cut 12 to 24 inches beyond the last visible sign of damage.
- The water type changes the decision. Category 1 clean water gives drywall the best chance of survival; Category 2 or 3 contaminated water almost always means replacement regardless of how the drywall looks or feels.
- Ceiling drywall is judged more strictly. A sagging or bulging ceiling section carries a collapse risk that a wall section doesn't, so ceilings get replaced at an earlier stage of saturation.
- Most repairs run $150 to $2,500. Cost scales with the size of the cut-out area, whether framing or insulation behind it also needs replacing, and how much texture and paint matching the patch requires.
Signs of water damaged drywall
Water damaged drywall shows itself through discoloration, bubbling or peeling paint, sagging or bulging, a soft or spongy texture, a musty odor, visible mold, or cracking at the seams, often in that rough order before any water is actually visible. The earliest signs tend to be subtle enough that homeowners walk past them for weeks before the damage becomes obvious.
 Bubbling paint like this means moisture has already broken the bond between the paint film and the drywall paper, not just stained the surface.
Painted drywall tends to show these signs faster than bare or primed-only drywall, since trapped moisture has to work through an existing paint film before it becomes visible, which is why bubbling paint often appears before a stain does. An unfinished garage or basement wall can hold the same amount of water for days longer before anything looks different, which is part of why visible signs alone aren't enough to rule out a leak in an unfinished space.
| Sign | What it looks like | What it means |
|---|---|---|
| Discoloration | Yellow, tan, or brown patches, often ring-shaped | Water has soaked into the gypsum core and is carrying minerals or old surface residue to the front |
| Bubbling or peeling paint | Paint lifting, blistering, or flaking off in sheets | Moisture behind the paint has broken the bond between the paint film and the drywall paper |
| Sagging or bulging | A visible dip on a ceiling or a bowed section of wall | The saturated core has lost rigidity and is being pulled down by its own weight |
| Soft or spongy texture | Gives noticeably when pressed, may leave a fingerprint | The gypsum core has started to break down structurally |
| Musty odor | A persistent damp, earthy smell with no visible source | Moisture has been present long enough to start supporting mold growth, a timeline the EPA ties to roughly 24 to 48 hours of dampness |
| Visible mold | Black, green, or white speckled growth on the surface | Mold has already colonized the paper facing and is spreading beneath it |
| Cracking at seams or corners | Hairline or widening cracks along taped joints | The paper tape has separated as the drywall panels swelled and shifted |
A stain that stays the same size for months is usually old and already resolved; a stain that's spreading, darkening, or growing a halo around its edges points to an active or recent leak, and it's the one that needs immediate attention rather than a paint touch-up. Musty odor without a visible stain is worth taking just as seriously, since it often means the moisture is concentrated inside the wall cavity rather than on the painted surface, the same early-warning pattern the CDC associates with mold growth conditions.
Discoloration, bubbling, and softness are three of several signs of water damage that read differently depending on the material involved, wood, tile, and carpet each telegraphing a leak on their own timeline rather than drywall's. A carpet stain often shows discoloration within hours, while a drywall stain can take days to surface since moisture has to migrate through the paper facing first.
Can water damaged drywall be saved?
Water damaged drywall can be saved when it stayed structurally firm, was exposed to clean water, and got dried within roughly 24 to 48 hours. Once any of those three conditions fails, patching stops being a reliable fix and the section needs to be cut out and replaced.
 A section that gives under light pressure means the gypsum core has already broken down and needs to be cut out rather than patched over.
A single wall often has both outcomes at once. The section closest to the water source is usually the one that needs to come out, while drywall just a foot or two away can test firm and dry enough to leave in place. Testing every foot or so along the affected area, rather than judging the whole wall by its worst spot, keeps a repair from turning into a larger replacement than the damage actually calls for.
| Condition | Repair or replace | Why |
|---|---|---|
| Firm to the touch, only a stain or slight bubbling | Repair | The gypsum core is intact; the damage is cosmetic and confined to the surface |
| Soft, spongy, or gives under light pressure | Replace | The core has absorbed enough water to lose its structural integrity |
| Sagging, bulging, or pulling away from framing | Replace | Weight and moisture have compromised the panel's ability to stay fastened |
| Category 1 clean water, dried within 24 to 48 hours | Repair (usually) | Clean water carries minimal contamination and drywall dries without breaking down if caught early |
| Category 2 or 3 water (appliance discharge, sewage, floodwater) | Replace | Contaminated water saturates the porous gypsum core in a way cleaning can't fully reverse |
| Visible mold on the surface | Replace | Mold has already colonized the paper facing and typically extends further than what's visible |
The contamination level matters as much as how the drywall feels, since the water damage categories system a restoration company uses to assess a leak also determines whether cleaning a firm, dry section is actually safe rather than just structurally possible. A firm, dry section exposed to sewage or floodwater still gets cut out on contamination grounds alone, even if it would otherwise pass a physical inspection.
The push test is the fastest way to check a suspect area yourself: press firmly with two or three fingers. Firm resistance with no give means the core is still sound. Any softness, sponginess, or a fingerprint left behind means the water has already broken down the gypsum, and no amount of drying time reverses that once it happens. This distinction matters more on drywall than on almost any other building material in a house, since drywall's gypsum core has no real structural memory. Wood can dry out and regain most of its strength; a soaked gypsum core stays weakened even after the moisture is gone.
Does it need a mold check first?
Yes, any water damaged drywall that stayed wet longer than the EPA's 24 to 48 hour mold-risk window, or shows dark speckled growth rather than a plain water stain, should be checked for mold before any repair or replacement work starts. Cleaning or painting over active mold instead of addressing it first is one of the more common reasons a repaired wall needs to be reopened within a few months.
A plain water stain, tan, yellow, or brown with a defined edge, is mineral and tannin residue left behind as the water dried, not mold itself, and it's safe to seal with a stain blocking primer once the drywall is confirmed dry. Dark green, black, or gray speckled growth, a fuzzy texture, or a musty smell that persists after the area dries point to mold on drywall instead, which needs its own inspection and remediation process rather than a standard water damage repair.
What to do right now
If you find water damaged drywall, stop the water source, cut power to any nearby outlet or fixture, remove standing water and start airflow, photograph the damage, then call a restoration company or drywall contractor depending on the scope. Working through these steps in the first few hours determines whether a patch job stays a patch job or turns into a full cut-out.
 Photographing the damage before any cleaning or drying starts gives an insurer a record of the original condition, which matters most for a sudden and accidental claim.
Stop the water source
Shut off the supply valve, appliance, or fixture feeding the leak. If the source isn't obvious, such as a roof leak or a pipe inside the wall, contain what you can and move to the next step rather than searching for it yourself.
Cut power to the area if needed
If the wet drywall surrounds an outlet, switch, or light fixture, shut off that circuit at the breaker before doing anything else. OSHA treats electrical contact with wet building materials as a shock hazard, and a wet outlet should be treated as live until a professional confirms otherwise.
Remove standing water and start airflow
Mop or vacuum up any standing water at the base of the wall, then open windows if the weather allows and point a fan at the affected section. Avoid a space heater or hair dryer directly on the wall, since concentrated heat dries the painted surface without drying the gypsum core underneath.
Photograph the damage before touching it
Take wide shots of the room and close-up photos of the stain, bubbling, or soft spot before you clean, paint, or cut into anything. This documents the damage for your insurer in its original condition.
Call a restoration company or drywall contractor
For anything beyond a small, contained stain, call a water damage restoration company to confirm the area is dry before repair, or a drywall contractor if the water source is already fixed and the job is cosmetic. Get both involved the same day if the source and the drywall repair need separate specialists.
A few habits work against you here more than they help. Don't sand, prime, or paint over a stain before it's confirmed dry, since trapped moisture behind fresh paint just resurfaces as a new stain within weeks. Don't push firmly on a sagging ceiling section overhead to test it, since a saturated ceiling panel can fail suddenly under added pressure; the emergency water damage response for a bulging ceiling is a controlled, low-point puncture from below, not a hand test from underneath it. And don't wait on insurance approval before starting to dry the area, since every day of delay pushes a borderline section closer to the point where it has to be replaced instead of saved.
What causes water damaged drywall
Water damaged drywall is most often caused by a roof leak, a plumbing pipe leaking inside the wall, an appliance hose or connection failure, HVAC or exterior wall condensation, a water heater leak, or a sewage backup or flooding, each reaching the drywall from a different point behind or above it. Identifying which one is responsible matters as much as fixing the drywall, since a repair over an unresolved leak fails again within months.
 A pipe leak inside the wall cavity often soaks the framing and insulation well before the drywall itself shows a visible stain on the painted side.
More than one cause is sometimes active in the same spot at once, particularly in an older home where a slow roof leak and attic condensation both drain toward the same section of ceiling. Treating a repeat stain as a single, already-fixed cause when a second source is still contributing is a common reason a patched section fails again within a season.
| Cause | How it reaches the drywall | Typical classification |
|---|---|---|
| Roof leak | Travels down through the attic or ceiling cavity to a ceiling or upper wall | Category 1, escalating to 2 if standing in an assembly for days |
| Plumbing pipe inside a wall | A burst pipe or slow fitting leak soaks the drywall from directly behind it | Category 1 at the source, can shift with time |
| Appliance hose or connection failure | A dishwasher, washing machine, or refrigerator line sprays or seeps against an adjacent wall | Category 1, occasionally 2 depending on the appliance |
| HVAC or exterior wall condensation | Warm, humid air meeting a cold surface inside the cavity wicks moisture into the back of the drywall over time | Not classified under S500; a moisture, not contamination, issue |
| Water heater leak | A slow tank leak or T&P discharge saturates the drywall of an adjacent closet or garage wall | Category 1 |
| Sewage backup or flooding | Contaminated water reaches the lower portion of a wall from below | Category 3 |
A ceiling stain with no obvious upstairs plumbing above it is one of the more common sources of confusion, since water damage from a roof leak can travel several feet horizontally along a rafter or truss before dripping down, meaning the wet drywall isn't directly below the actual roof penetration. HVAC condensation causes a similar mismatch: the wall feels cool and slightly damp with no active drip anywhere, and the moisture is coming from inside the cavity rather than from a fixture in the room.
Behind a wall with active plumbing, the confusion runs in the opposite direction: a burst pipe soaks the drywall directly behind it fast enough that the source is usually obvious right away, while a slow fitting leak can mimic condensation for weeks before anyone traces it back. Copper and PEX supply lines even fail differently, a copper pinhole tends to weep slowly at first, while a failed PEX fitting is more likely to let go all at once.
A slow tank leak behind a garage or closet wall follows a similar quiet pattern, and a water heater leak is often confirmed only once the drywall itself starts to soften. Checking the base of the tank for rust-colored residue or a faint metallic smell can catch it before the wall shows anything at all.
Is ceiling water damage more dangerous?
Yes, saturated ceiling drywall can weigh roughly double its dry weight, which is why ceiling sections carry a collapse risk a wall section doesn't. A wall panel that sags simply looks bad; a ceiling panel that sags is carrying that added weight against gravity, with nothing but the fasteners holding it up. That added weight is also reflected in the higher water damage classes assigned to a ceiling loss versus a comparable wall loss, since more water absorbed means more load on whatever screws or nails are still holding the panel to the joists above it.
 Saturated drywall on a ceiling can weigh roughly double its dry weight, which is why a section like this calls for a controlled relief puncture rather than a wait and see approach.
A ceiling section that's visibly bulging or that sounds hollow and heavy when tapped needs the same relief-puncture and containment response used for any ceiling water damage, not a wait-and-see approach. Wall drywall almost never carries that same collapse risk, since gravity is pulling the panel flat against the studs rather than away from them, which is part of why wall sections can sometimes ride out a slow, minor leak far longer than a ceiling section can before anyone notices a problem.
Access is the other practical difference. A wall repair usually means working at a comfortable height with straightforward visibility into the cavity once the drywall is cut open. A ceiling repair adds overhead work, dust falling directly down rather than to the floor, and in older homes, a check for asbestos in a pre-1980 textured finish before anything gets disturbed. Labor on a ceiling repair typically runs 20% to 40% higher than the identical repair on a wall for exactly these reasons.
Drywall types and water resistance
Standard drywall, sometimes called whiteboard, is the most common type installed in a home and has no built-in water resistance; its paper facing and gypsum core both absorb water on contact. Moisture resistant drywall, widely known by the trade name greenboard for its tinted, water-repellent paper facing, resists surface moisture and mold better than standard board and is the typical code minimum for bathrooms and other damp locations, though it isn't waterproof and still fails structurally if it's soaked and left wet.
 Moisture resistant board is the typical code minimum for bathrooms and other damp locations, but none of these materials become waterproof once the core is saturated.
Cement board and fiber-cement backer board go a step further and contain no organic paper facing at all, which is why they're used directly behind tile in showers and tub surrounds rather than anywhere water contact is only occasional. Paperless drywall, faced with fiberglass mesh instead of paper, resists mold growth on the surface better than either standard or greenboard drywall since there's no paper for mold to colonize, though the gypsum core inside still absorbs water the same way any other drywall does.
None of these upgrades make a wall waterproof, and all of them still need replacing once the core itself has been saturated and softened. The practical benefit shows up after a smaller, contained leak: a bathroom wall built with greenboard is less likely to show surface mold from routine shower humidity than the same wall built with standard drywall, which is why it's worth specifying when a damaged section is being rebuilt in a bathroom, laundry room, or basement even if the original wall used standard board.
Homes built before roughly the 1950s often have plaster walls rather than drywall, a solid lime or gypsum coating applied over wood or metal lath instead of a manufactured panel. Plaster responds to water differently: it has no paper facing for mold to feed on and can often be dried and resurfaced rather than cut out, but it cracks and delaminates from its lath in a way drywall doesn't, and the same repair-versus-replace criteria don't transfer directly to it. A soft or crumbling wall in an older home is worth confirming as drywall before applying the push test, since a plaster wall calls for a plasterer's assessment rather than a standard drywall cut-out.
DIY vs. professional repair
A small, contained patch on clean water damage is realistic to handle yourself with basic tools; anything involving the ceiling, a larger area, or any uncertainty about what's happening behind the wall is worth handing to a professional. Once the wall is confirmed dry, the actual repair work, cutting, patching, taping, and two coats of paint, usually fits into a single weekend if the compound is allowed to cure fully between coats rather than rushed.
 A section that looks and feels dry on the surface can still read wet on the framing behind it, which is why a moisture meter check matters even for a small DIY patch.
Even a DIY-eligible patch benefits from a moisture meter check before it gets closed up, since a section that looks and feels dry on the surface can still read wet on the framing behind it. Skipping that check is one of the more common reasons a DIY patch has to be redone within a few weeks.
| Factor | DIY-appropriate | Call a professional |
|---|---|---|
| Size of damaged area | Under roughly 2 square feet | Larger area, multiple sections, or unclear extent |
| Location | Wall, at a comfortable working height | Ceiling, given the collapse and overhead-work risk |
| Water source | Confirmed clean water, source already fixed | Contaminated water, or the source is still unclear |
| Moisture reading | Confirmed dry with a moisture meter before closing up | Reading still elevated, or no meter available to check |
| Texture and finish | Flat or lightly textured wall, simple color match | Complex texture, ceiling texture, or a highly visible room |
DIY repair works best when you're confident the water was clean, the source is fixed, and the affected area is small enough to see the full extent of it without opening up a larger section. Buying or renting a basic pin-type moisture meter is worth the cost even for a DIY job, since it's the only reliable way to confirm the framing behind the patch is actually dry rather than just dry-looking. When a job crosses into ceiling work, a contaminated water source, or an area where you can't tell how far the damage extends behind the wall, a DIY water damage cleanup attempt on drywall specifically is where the line between saving money and creating a bigger problem gets crossed most often.
How to repair it yourself
Repairing a small, DIY-eligible section of water damaged drywall follows seven steps: confirm it's dry, cut out the damaged area, dry and treat the cavity, fit and fasten a patch, tape and mud the seams, sand, then prime and paint. Closing the wall back up before the first step is actually confirmed is the single most common reason a DIY patch has to be redone.
 Cutting at least 12 to 24 inches past the last visible sign of damage avoids leaving a wet margin of gypsum behind the new patch.
Confirm the area is fully dry
Check the section with a moisture meter, not just a hand test, and don't move on until the reading matches a dry, unaffected part of the same wall. Patching over anything still damp just traps the moisture behind new material.
Cut out the damaged section
Mark a square or rectangle at least 12 to 24 inches beyond the last visible sign of staining or softness, then cut along those lines with a drywall saw. Cutting to a clean, dry edge rather than hugging the visible stain avoids leaving a wet margin behind the new patch.
Check and dry the cavity behind it
Inspect the exposed studs and any insulation for dampness or soft spots. Replace wet insulation rather than trying to dry it in place, and run a fan or dehumidifier in the open cavity for a day before closing it back up if the framing tested even slightly damp.
Cut and fit a replacement patch
Measure the opening and cut a new piece of drywall to match, sizing it so the edges land on the centers of the exposed studs rather than in open space, which gives the patch something solid to screw into on every side.
Fasten the patch and tape the seams
Screw the patch to the studs every 8 to 12 inches, then cover each seam with joint tape set into a first coat of joint compound. Apply two additional coats over several hours, feathering each one wider than the last so the seam disappears into the surrounding wall.
Sand and check the texture
Once the final coat is fully dry, sand it smooth and compare it against the surrounding wall. A textured wall needs the texture matched at this stage, before priming, or the patch will stay visible no matter how well it's painted.
Prime and paint
Seal the entire patched area with a stain blocking, oil based or shellac based primer, even if no staining is visible, then paint to match. Skipping the stain blocking step is why an otherwise well-repaired patch sometimes shows the old stain bleeding back through weeks later.
How professionals repair it
A professional follows the same basic sequence as a DIY repair: cut, dry, patch, tape, prime, paint. On anything bigger than a small, contained patch, a few additions matter most: moisture readings taken at multiple points across the framing rather than one spot check, an antimicrobial treatment on any stud or joist that stayed wet more than a day or two, and the equipment to handle several affected sections or a full wall in one visit.
 Treating framing that stayed wet more than a day or two with an antimicrobial solution before closing the wall back up is a step most DIY repairs skip entirely.
That antimicrobial step is the one most DIY repairs skip entirely, and it's also the one most likely to matter on a larger loss, since framing that stayed wet for days rather than hours carries a higher chance of hidden mold starting inside a closed cavity even after the drywall itself is replaced. For repairs where the water damage restoration company handles drying and demolition but a separate drywall contractor handles the rebuild, confirming who owns the framing treatment and the final stain blocking primer avoids the gap where each side assumes the other one covered it.
A repair split between two specialists goes smoother when you know in advance which crew walks the property first and what documentation each one leaves, the sequence what to expect during water damage restoration spells out for a first visit. Homeowners who confirm this ahead of time are also less likely to get billed twice for the same walkthrough, since some contractors charge a separate inspection fee if they're not looped in on what the restoration crew already documented.
Cost of water damaged drywall repair
Water damaged drywall repair typically costs $150 to $2,500, with the total driven mainly by the size of the cut-out area, whether a ceiling is involved, and whether framing or insulation behind the drywall also needs replacing. A patch that also needs texture matching or a full-wall repaint to blend in adds to that range even when the underlying water damage was minor.
 A patch-only quote covers just the repaired section, while one that includes painting the full wall for a seamless color match runs considerably higher.
Two quotes for the same size patch can still differ by several hundred dollars depending on scope. A patch-only price covers just the repaired section, while a quote that includes painting the full wall corner to corner for a seamless color match adds considerably more. Confirming which scope a number covers before comparing bids avoids mistaking a partial quote for a cheaper one.
| Scenario | Typical cost | What's included |
|---|---|---|
| Small wall patch, clean water, no framing damage | $150–$500 | Cut-out, patch, tape, texture match, primer, and paint on a small section |
| Moderate wall section, some insulation replacement | $500–$1,200 | A larger cut-out, new insulation, framing check, patch, and finish |
| Ceiling section, water damage | $350–$1,500+ | Overhead labor premium, containment for falling dust, patch, texture, and finish |
| Extensive damage across multiple walls or a full room | $1,500–$10,000+ | Demolition, structural drying, multiple panel replacement, and full repaint |
These figures cover the drywall repair itself, not the cost of fixing the leak that caused it or the broader water damage restoration cost if extraction and structural drying are also needed. A $400 drywall patch on top of a $2,000 mitigation bill is normal for a burst-pipe loss and isn't a sign the drywall contractor overcharged.
A full job that includes both the mitigation phase and the drywall reconstruction typically lands closer to the higher end of a water damage restoration cost per square foot estimate than to a drywall-only repair total. Labor makes up the majority of the bill on nearly every drywall repair, since the material itself, a standard 4x8 sheet of half-inch drywall, costs well under $20. What drives the price up is access, texture matching, and how many coats of compound and paint it takes to make the patch disappear into the surrounding wall.
Does insurance cover it?
Homeowners insurance typically covers water damaged drywall when the underlying cause was sudden and accidental, the same standard insurers apply to water damage generally. A burst pipe, an appliance hose that failed without warning, or a sudden roof leak during a storm usually qualifies; a slow leak the homeowner should have caught and fixed, and damage from flooding or groundwater, typically doesn't.
Depreciation applies the same way it does to any other building material: an insurer may pay the drywall's actual cash value rather than full replacement cost unless the policy specifically includes replacement cost coverage. Mold that develops from water damage the insurer already approved is often covered up to a separate, smaller sublimit, commonly in the $1,000 to $10,000 range, rather than under the full dwelling coverage limit, a distinction the National Association of Insurance Commissioners covers in its general homeowners coverage guidance. Photographing the damage before any repair starts, and keeping the moisture meter readings a restoration company provides, gives an adjuster the documentation needed to confirm the cause was sudden rather than gradual, which is usually the deciding factor in whether a drywall claim gets approved.
Preventing water damaged drywall
Preventing water damaged drywall mainly comes down to five habits: checking supply lines and connections annually, re-caulking wet areas, watching the water bill for unexplained increases, keeping gutters and flashing clear, and using moisture resistant drywall in high-risk rooms. Most water damaged drywall traces back to a leak that went unnoticed for days or weeks rather than a single dramatic event, which is why routine checks around the fixtures and appliances closest to a wall catch the majority of future problems before they reach the drywall at all.
 Failed caulk around a tub, shower, or sink lets water track behind the wall a little at a time with no visible sign until the drywall itself starts to fail.
Check supply lines and connections annually
Inspect the flexible supply lines under sinks, behind the washing machine, and at the water heater and refrigerator for cracking, corrosion, or a slow drip, and replace braided stainless steel lines every 5 to 10 years even if they look fine.
Re-caulk and reseal wet areas
Failed caulk around a tub, shower, or sink is one of the most common slow sources of drywall water damage, since it lets water track behind the wall a little at a time with no visible sign until the drywall itself starts to fail.
Watch the water bill for unexplained increases
A rising water bill with no change in household usage often points to a hidden leak somewhere in the walls before any staining or softness shows up on the surface.
Keep gutters clear and roof flashing sealed
Clogged gutters and failed flashing around chimneys, vents, and skylights are a leading cause of ceiling and upper-wall drywall damage, and both are checkable from the ground with binoculars during a seasonal inspection.
Use moisture resistant drywall in high-risk rooms
Specify greenboard or another moisture resistant board for any new or repaired wall in a bathroom, laundry room, basement, or utility closet, since it holds up to routine humidity better than standard drywall even though it isn't a substitute for stopping an active leak.
Building these checks into a seasonal routine catches the slow leaks that cause the most drywall damage before they ever reach the point of a visible stain, which keeps the fix a five-minute caulk job instead of a multi-day repair. Plumbing, appliances, and drainage carry their own room-by-room upkeep beyond what applies to drywall specifically, most of it collected under water damage prevention.
Frequently asked questions
Can water damaged drywall be saved?
Yes, in many cases. Drywall that stayed firm, was exposed to clean water, and got dried within about 24 to 48 hours can usually be cleaned, primed with a stain blocking primer, and repainted without cutting anything out. Drywall that feels soft, has started to sag, or sat wet for several days almost always needs to be cut out and replaced, since the gypsum core has already broken down.
How do you know if drywall is too wet to save?
Press firmly on the affected area with your fingers. If it feels soft, spongy, or gives way under light pressure, the gypsum core has absorbed too much water and the section needs to come out. Firm, dry to the touch drywall with only a stain or a small bubble in the paint is usually still repairable.
Does water damaged drywall always need to be replaced?
No. A small area that stayed firm and was dried quickly after exposure to clean water often only needs a stain blocking primer and paint. Replacement becomes necessary once the drywall is soft, sagging, moldy, or was exposed to gray or black water.
How far beyond the stain should damaged drywall be cut out?
At least 12 to 24 inches beyond the visible stain or soft spot on every side. Water wicks sideways through the paper facing and gypsum core faster than it shows on the painted surface, so the wet area is almost always larger than what's visible.
How long does it take drywall to dry out after a leak?
Three to five days with air movers and a dehumidifier running continuously, assuming the water source has been stopped and the area isn't sealed behind cabinetry or flooring. A moisture meter reading on the framing behind the drywall, not just the surface, confirms when it's actually dry enough to close back up, and a full room usually takes longer than a single wall section, a difference how long water damage restoration takes explains by severity and material.
Is water damaged drywall covered by homeowners insurance?
Usually, if the cause was sudden and accidental, such as a burst pipe or an appliance hose failure. Drywall damage from a slow, ongoing leak the homeowner should have caught and fixed, or from flooding and groundwater, is typically excluded under a standard policy, the same homeowners insurance covers water damage distinction that applies to water damage generally.
What does it cost to repair water damaged drywall?
Most jobs run $150 to $2,500 depending on the size of the affected area, whether the ceiling is involved, and whether framing or insulation behind the wall also needs attention. A small patch on a wall sits at the low end; a soaked ceiling section with wet insulation above it sits at the high end.
Can you paint over water stained drywall without replacing it?
Only after the drywall is confirmed fully dry and the stain is sealed with a stain blocking, oil based or shellac based primer first. Regular latex paint applied directly over a water stain almost always lets the stain bleed back through within a few weeks.
Does water damaged drywall always mean mold?
No. Mold needs both moisture and time, and drywall dried within the EPA's 24 to 48 hour window rarely develops it. Mold becomes likely once drywall or the insulation behind it stays wet for several days, particularly in a closed, poorly ventilated wall cavity.
Is moisture resistant drywall worth installing after water damage?
Yes, in bathrooms, laundry rooms, basements, and any wall near a water heater or appliance connection. Moisture resistant, or greenboard, drywall resists surface mold better than standard drywall, though it isn't waterproof and still needs to be replaced if it's soaked and softened.
Sam Hickerson is the founder of RestoreAdvisor and writes consumer guides on mold remediation, water damage restoration, inspection, testing, and home recovery. His work focuses on helping homeowners understand costs, risks, and when to call a professional. He draws on guidance from the EPA, CDC, IICRC, and other authoritative sources to make complex home issues easier to navigate.