
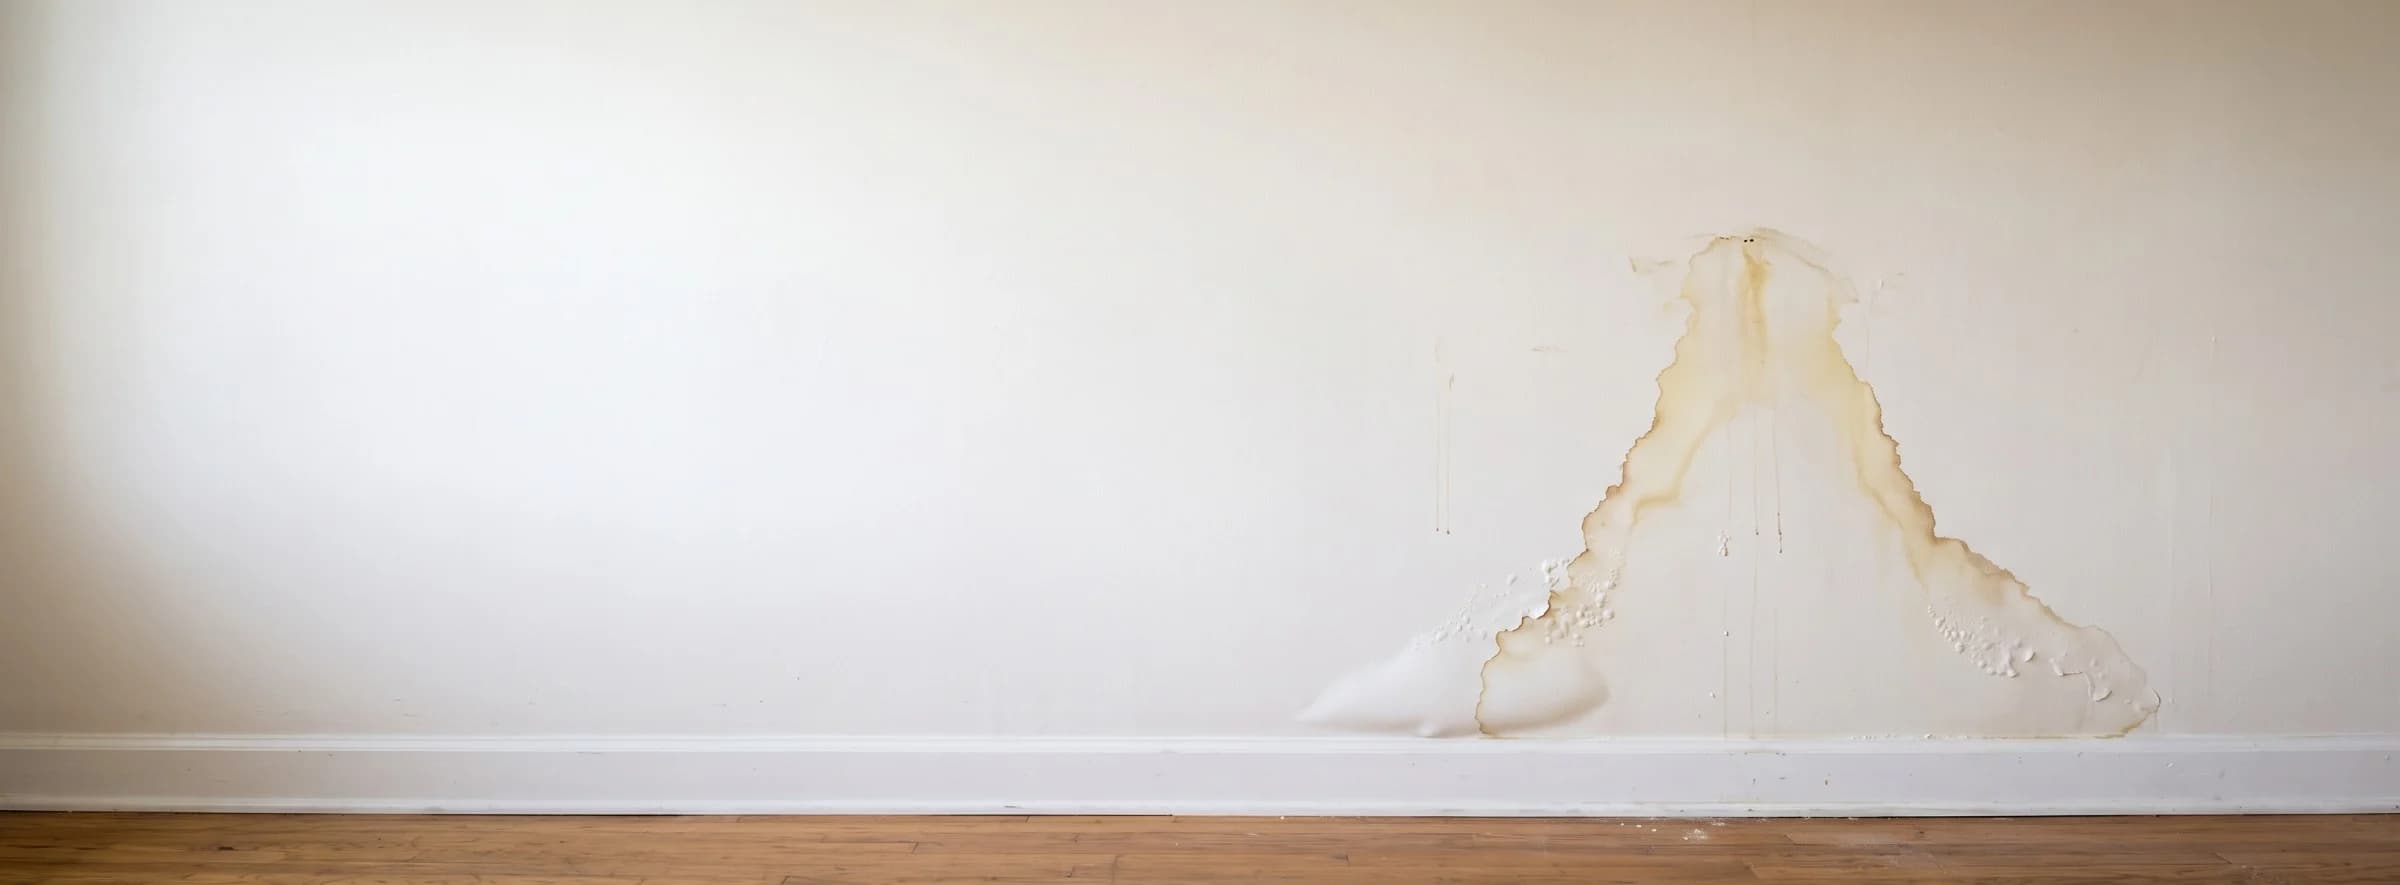

A stain, a bubble in the paint, or a musty smell on a wall usually means water has been moving inside it for days, which is fixable if the leak is stopped within 24–48 hours. Most wall leaks are found with a two hour water meter test and a moisture meter rather than a sledgehammer, and typical repairs run $350–$5,000 when the wall is opened early.
A water leak in a wall is a failed supply line, drain line, fitting, or exterior seal that lets water soak the drywall, insulation, and framing inside a wall cavity, and restoration companies classify and dry that water under the ANSI/IICRC S500 standard. Because the damage sits behind a finished surface, the visible stain is often the last sign and rarely marks the exact spot where the water escapes.
Professional water damage restoration on a wall leak follows the same order as any other loss: stop the source, remove what cannot dry, dry the cavity to a verified reading, then rebuild. How long the wall has been wet decides how many of those steps the job needs.
Key insights
- Common signs. A stain that keeps growing, bubbling or peeling paint, soft or warped drywall, a musty smell, and a water bill that rises with no change in use are the most common signs of a leak inside a wall.
- Meter test. If the water meter moves after two hours with every fixture and appliance off, water is escaping somewhere in the system, according to the EPA.
- Mold window. Wet drywall and insulation can start growing mold within 24–48 hours, so the cavity should be drying the same day the leak is found.
- Typical cost. A wall leak caught early usually costs $350–$5,000 to repair and dry, while a leak that ran for months with mold or rot reaches $8,000–$20,000 or more.
- Two separate jobs. A plumber repairs the pipe, and a restoration company removes wet materials and dries the wall, which usually means two invoices.
- Insurance. Homeowners insurance generally pays for a sudden leak such as a burst supply line, but often denies a leak that ran slowly for weeks or months.
Signs of a water leak inside a wall
The most reliable signs of a water leak inside a wall are a stain that keeps growing, paint that bubbles or peels, drywall that feels soft or looks warped, a musty smell near one wall, and a water bill that climbs with no change in use. Any two of these on the same wall point to an active leak, not an old one.
 Drywall that dents under light finger pressure has absorbed water into its gypsum core, so press an unaffected section of the same wall to compare. Soft board is usually cut out, not dried in place.
Water travels down and along pipes and framing before it soaks through a finished surface, so a stain often sits several feet from the leaking line. A stain with a darker ring at its edge usually means the wall was wet, partly dried, and got wet again, which fits a slow or intermittent leak.
| Sign | What it looks like | What it usually means |
|---|---|---|
| Growing stain | Yellow, tan, or brown patch that widens after showers or rain | Active leak or repeated wetting behind the surface |
| Bubbling or peeling paint | Blisters or flaking on a flat wall | Moisture pushing through drywall from the cavity |
| Soft or spongy drywall | Wall dents under light finger pressure | Paper facing and gypsum core have absorbed water |
| Warped or bulging wall | Wavy panel or bowed baseboard | Long term saturation, sometimes with framing involved |
| Musty odor | Earthy smell that strengthens near one wall | Microbial growth on wet materials inside the cavity |
| Sound of dripping or hissing | Water noise with every fixture off | Pressurized supply line leak or running water |
| Rising water bill | Higher bill with no change in habits | Hidden leak somewhere in the plumbing, confirmed with a meter test |
| Warm or damp spot on the wall | Wall feels warm or clammy to the touch | Hot water line leaking inside the wall |
The same signs of water damage appear on ceilings, baseboards, and floors near the wall. Check the room below and the flooring at the base of the wall too, because water often exits the cavity at the bottom plate.
Is it a leak, or something else?
A wet looking wall is not always a leaking pipe, because condensation, a window or roof leak above, an old dried stain, and bathroom steam can all mimic one. The fastest way to separate them is timing, since a plumbing leak wets the wall regardless of weather while an exterior leak follows rain.
 Trace the edge and recheck in 24 hours. A stain that spreads past the line is active, while one that holds its outline and reads dry on a moisture meter is likely old and resolved.
Photograph the stain with a coin or ruler for scale, then compare it with a second photo the next day. A stain that has grown is active, and one that has not changed and feels dry to the touch is more likely old and resolved.
| Lookalike | How to tell it apart | Where it usually shows |
|---|---|---|
| Condensation | Surface beads or dampness that changes with humidity and weather, with no stain growth | Exterior walls in winter, sweating cold pipes in summer |
| Window or door leak | Stain sits under or beside a frame and appears only after wind driven rain | Below windows, beside exterior doors |
| Roof or flashing leak | Stain on a top floor or upper wall that follows storms | Upper walls, near chimneys and roof to wall joints |
| Old resolved stain | Dry, stable, no odor, and a normal moisture meter reading | Anywhere a past leak was fixed but never painted |
| Air conditioner condensate | Stain appears only in cooling season near an air handler or duct | Closets and walls beside HVAC equipment |
Rain linked stains beside a frame usually trace back to a window or door leak, where failed caulk or flashing lets water run into the wall cavity. If the stain appears only during or after storms and no fixture near the wall has been used, plumbing is unlikely to be the source.
What to do when you find a wall leak
When you find a water leak in a wall, shut off the water to that line, cut power to circuits near the wet area, and call a plumber and a restoration company at the same time. Water keeps spreading inside the cavity while you work, so speed matters more than a perfect diagnosis.
 On a quarter-turn ball valve, a handle parallel to the pipe means open and a handle crosswise to it means closed. Find this valve before a leak happens, because a stuck or hidden shutoff is what turns a small leak into a flooded wall.
Spraying water, pooling near outlets, or a wall panel bulging with water is an emergency. Calling an emergency water damage restoration company while the plumber is on the way shortens the time the cavity stays wet.
1. Shut off the water to that line
Close the fixture shutoff valve under the nearest sink, toilet, or appliance first. If the source is unknown or water keeps coming, close the main shutoff valve, then open the lowest faucet in the house to drain the lines and relieve pressure.
2. Cut power to the area
Switch off the breaker for any circuit that runs through or below the wet wall, and stay out of standing water until it is off. According to OSHA, electrical shock is a primary hazard around floodwater, and an outlet on a wet wall should stay off until an electrician tests it.
3. Contain the water and move belongings
Place buckets and towels at drips, lift rugs, and move furniture and electronics away from the wall. If a panel is bulging with water and the power is off, a small hole at the lowest point of the bulge lets it drain in a controlled stream instead of letting the panel fail all at once.
4. Photograph everything before cleanup
Take wide and close photos and a short video of the wall, the floor at its base, and the shutoff valve you closed. Record the water meter reading with the date and time, since that record supports both a plumber's diagnosis and an insurance claim.
5. Call a plumber and a restoration company
Call both at once instead of waiting for the plumber to finish. The plumber repairs the line, while the restoration crew extracts water and starts drying the cavity the same day.
Do not paint, caulk, or close up the wall over a stain before the cavity has been checked for moisture. The stain returns because the water source and the wet cavity are still there.
How to find a water leak inside a wall
The best way to find a leak inside a wall is to confirm it with a water meter test, then narrow the location with a moisture meter or thermal imaging camera before cutting anything open. A plumber's acoustic listening equipment and pressure testing can pinpoint the line closely enough that the inspection hole stays small.
 Read outward from the stain in 6 inch steps until the numbers fall back to a dry reference on the same wall, since readings vary by meter and material setting. The wet area ends where they return to that baseline.
The EPA recommends reading the water meter, using no water for two hours, and reading it again. Any change means water is escaping somewhere, and once toilets, irrigation, and appliances are ruled out, a wall leak becomes the likely cause.
| Method | What it does | Best for | DIY or pro |
|---|---|---|---|
| Water meter test | Shows whether any water is moving through the house with everything off | Confirming that a leak exists | DIY |
| Moisture meter | Reads moisture in drywall and framing | Mapping how far the wet area extends | DIY or pro |
| Thermal imaging camera | Shows temperature differences from wet materials or hot water lines | Finding wet zones without opening the wall | Pro or rental |
| Acoustic listening | Picks up the sound of water escaping from pressurized pipes | Pinpointing a supply line leak | Pro |
| Pressure test and isolation | Shuts off one branch at a time while watching a gauge | Finding which line is leaking | Pro |
| Inspection hole | A small cut in the drywall to see the cavity | Confirming and photographing the leak | DIY or pro |
Take readings in a grid across the wall, starting at the stain and moving outward in 6 inch steps until they return to normal. Compare each reading with a dry section of the same wall, since moisture meter readings mean different things in drywall, wood framing, and plaster.
Water follows gravity, pipes, and framing before it soaks through, so start looking above the lowest wet spot. Check what sits on the other side of the wall, such as a shower valve, a sink, or an appliance, because the source is usually within a few feet of that fixture.
When the readings and the camera agree on a spot, an inspection hole about the size of a hand confirms the source. The cut should wait until the power is off and the wiring behind the wall is located.
How to cut an inspection hole safely
Cut an inspection hole only after the power to the wall is off, the studs, pipes, and wires behind it are located, and the cut is planned to stay small and shallow. A hand sized opening at the lowest wet spot is usually enough to see the cavity, and it patches far more easily than a large one.
 Matted insulation and a stained stud are the usual evidence of a wet cavity, so look for them before touching anything. Set the blade to the board thickness so a shallow cut stays clear of pipes and wires behind the drywall.
Cutting blind is how a second problem starts, because water lines, drain lines, and electrical cable often share the same cavity. If the wall holds a shower valve, a subpanel, or a gas line, leave the cutting to a plumber or restoration technician.
1. Turn off the breaker for the circuit
Switch off the breaker for every circuit that runs through the wall, then confirm with a non-contact voltage tester at the nearest outlets and switches. Stay out of standing water while you work.
2. Locate studs and anything behind the wall
Use a stud finder with AC wire detection to mark the studs and any detected cable. Also note what sits on the other side of the wall, such as a sink, valve, or appliance, and keep the cut several inches away from outlets and switches.
3. Score and cut shallow
Cut between two studs with a drywall saw or an oscillating tool set to the board thickness, which is usually 1/2 inch. Cut slowly and stop as soon as the blade breaks through, since a deep cut can nick a pipe or wire.
4. Look inside and photograph what you see
Use a flashlight and a phone camera or inspection camera to check for dripping, corroded fittings, wet insulation, stained framing, and mold growth. Take wide and close photos before touching anything.
5. Stop if the cavity is saturated or moldy
If the insulation is soaked or mold is visible, stop cutting, keep the opening small, and call a restoration company. Wear gloves and an N95 respirator if you must be near the opening, and keep the cut piece so the hole can be patched later.
Leave the hole open only until the plumber has seen it, then close it or cover it so the cavity does not collect dust or insects. A small, clean opening also patches faster and costs less to finish.
Where wall leaks come from
Wall leaks come from a handful of sources: pinhole corrosion in supply lines, failed joints and fittings, split pipes from freezing, drain line leaks, shower and tub valves, appliance supply boxes, fasteners driven through a pipe, and exterior seals that fail in rain. Leaks from plumbing inside the wall wet it regardless of weather, while exterior seals leak only when it rains.
 A pinhole this small can run around the clock at supply pressure, so the cavity can stay wet long before a stain shows on the wall. Blue-green crust on copper marks active corrosion and is worth showing a plumber even before it drips.
Age and water pressure drive most plumbing failures, because copper develops pinholes as it corrodes and pressure above the 80 psi maximum set by the International Residential Code stresses joints and valves. Homes with polybutylene pipe installed from the late 1970s through the mid 1990s, or galvanized steel that often lasts 40 to 60 years, have higher failure odds, and water damage in an older or historic home adds plaster walls and lead safe work to the repair.
| Cause | How it fails | Typical signs |
|---|---|---|
| Pinhole corrosion in copper | A tiny hole opens from internal or external corrosion and sprays a fine mist | Slow damp spot, hissing, warm wall on a hot line |
| Loose or failed fitting | A solder joint, compression fitting, or push fit connector works loose | Drip at one joint, stain in the same place after each use |
| Frozen pipe that splits | Ice expands and cracks the pipe, and water escapes when it thaws | Sudden flooding after a freeze, often in an exterior wall |
| Drain line leak | A cracked or loose drain or vent joint | Stain that appears after draining a tub or sink, sewage odor |
| Shower valve or tub spout | A worn valve body or failed seal behind the tile | Damp wall behind the bathroom, stain in the room next door |
| Appliance supply box | A washing machine box or ice maker line fails at the connection | Stain behind a laundry room or refrigerator wall |
| Fastener through a pipe | A nail or screw punctures a line during hanging or renovation | Leak begins soon after a project, often a slow drip |
| Exterior seal failure | Window, siding, flashing, or hose bib lets rain into the cavity | Stain that follows rain, mostly on outside walls |
Leaks that start right after renovation or hanging a shelf often trace to a screw or nail through a line, and they stay hidden because the fastener can partly plug the hole. The leak may not appear until the fastener corrodes or the pipe moves.
A frozen line that splits inside an exterior wall behaves like any other burst pipe, with water released as soon as the ice thaws. Insulation and heat in the wall cavity decide whether a cold snap ends in a leak.
Likely causes by wall location
The location of the wall narrows the source quickly, since interior walls holding plumbing usually leak from supply or drain lines, exterior walls usually leak from windows, flashing, or siding, and shared walls can leak from a neighboring unit. Checking what sits on the other side of the wall cuts the search area to a few feet.
 The wall's location narrows the source to a fixture or seam within a few feet, so check what sits on the other side before cutting. A stain on an exterior wall that appears only after rain points to windows, siding or flashing, not plumbing.
Bathroom and kitchen walls
Supply lines, shower valves, tub spouts, and drain traps concentrate in these walls, so a stain here usually traces to a fixture within a few feet. A stain in the room next door often comes from a shower valve or tub spout on the shared wall.
Laundry room walls
The washer supply box and drain standpipe sit inside the wall, and leaks tend to appear during or right after a wash cycle. Rubber hoses that fail at the connection can also drip into the wall from the outside.
Exterior walls
Windows, doors, siding, flashing, and outdoor hose bibs let water into the cavity, and a roof leak can run down inside the wall for a full story before it shows. Stains that appear only after rain point to these outside sources.
Walls beside air handlers and closets
An air conditioner condensate line or a cold duct can soak the wall behind it, and the stain typically appears only during cooling season. A stain that follows the air conditioner's run cycle is a strong clue.
Shared walls in condos and townhomes
A leak on a shared wall can start in a neighbor's unit. Responsibility depends on where the leak began and what the association's master policy covers, so water damage in a condo often involves two insurance policies.
What water does inside a wall
Water inside a wall soaks the drywall paper and insulation first, then reaches the wood framing, and each material fails on its own clock. Drywall softens within days, insulation holds moisture for weeks, and framing can start to decay once its moisture content stays above about 20 percent.
The EPA puts the mold window for wet drywall and insulation at 24–48 hours. Fiberglass batts sag and lose insulating value when wet, and cellulose holds water longest, so both are usually removed and replaced instead of dried in place.
A wall that stays wet for months can rot the bottom plate and lower studs, and rusted fasteners or a soft baseboard are early evidence. When structural water damage is suspected, a contractor or structural engineer should check the framing before drywall closes the wall again.
Repairing a water leak in a wall
Repairing a wall leak takes five stages in order: stopping the source, opening the wall, removing wet materials, drying the cavity, and rebuilding. A plumber handles the first two stages and a restoration company or contractor handles the rest, so the job usually involves two invoices.
 Opening the lower wall lets the cavity dry from the inside, and drying continues until readings match a dry reference on the same wall, the goal ANSI/IICRC S500 sets. The wall is closed only after that.
Drying comes before any patching, and the ANSI/IICRC S500 standard ties the drying goal to a dry reference reading on the same wall, so the cavity should read close to it before it is closed. Skipping that check is how a patched wall stains again a few months later.
| Stage | What happens | Who does it | Typical time |
|---|---|---|---|
| Stop the source | Shut off and repair or replace the leaking line | Plumber | 1–4 hours |
| Open the wall | Cut access holes or remove a section of drywall | Plumber or restoration technician | 1–3 hours |
| Remove wet materials | Extract water and remove drywall and insulation that cannot dry | Restoration company | 2–6 hours |
| Dry the cavity | Air movers and dehumidifiers run until readings match a dry reference | Restoration company | 3–5 days |
| Rebuild | Insulation, drywall, texture, primer, and paint | Contractor or restoration company | 1–3 days plus paint cure |
When water damaged drywall has stayed wet under two days and still feels firm, it can sometimes be dried in place, while soft, sagging, or crumbling board comes out. Plaster walls dry more slowly and often need injection drying or partial removal.
Who to call and what you can DIY
Call a plumber first to stop and repair the leak, and call a water damage restoration company at the same time to dry the wall, because drying loses value with every hour of delay. Homeowners can safely shut off the water, extract small amounts of standing water, and patch and paint once the wall reads dry.
 Cutting or joining copper inside a wall near wiring carries fire and shock risk, and some jurisdictions require a licensed plumber or a permit for the work. Get the plumber's finding of cause in writing before the wall is closed.
The line between DIY and pro work is set by risk, since soldering, cutting near wiring, and working around contaminated water each become more dangerous when a mistake is made. Local rules also matter, because some jurisdictions require a licensed plumber or a permit for pipe work inside walls.
| Task | Who | Why |
|---|---|---|
| Shutting off the water and power | Homeowner | Fast, low risk, and it limits the damage right away |
| Extracting small amounts of standing water | Homeowner | A wet vacuum and towels handle a small spill on the floor |
| Replacing an exposed fitting or supply line | Homeowner or plumber | Manageable at an open access panel with basic plumbing skill, but local code may apply |
| Finding and repairing a pipe inside a closed wall | Plumber | Requires locating the line, opening the wall, and making a code compliant repair |
| Soldering or cutting near wiring | Licensed tradesperson | Fire and shock risk, and a mistake can hide a second leak |
| Wet insulation, sagging drywall, or mold | Restoration company | Needs extraction, containment, and drying with documented moisture readings |
| Sewage or drain line water | Restoration company | Contaminated water requires protective equipment and removal of affected materials |
| Soft studs, a sagging wall, or a leak that ran for months | Structural engineer or contractor | Framing needs an assessment and repair of any decayed wood |
| Rebuilding drywall, paint, and trim once dry | Homeowner or contractor | Cosmetic work is safe only after the cavity has been confirmed dry |
Written moisture readings at the start and end of drying, plus technicians with the IICRC Water Damage Restoration Technician (WRT) credential, are the two checks that matter most when choosing a water damage restoration company for a wall leak. A written scope and a daily drying log filter out crews that only pull drywall and leave.
A fitting swap on an exposed pipe is where most homeowners should stop. If the leak is inside a closed wall, or you are not sure which line is leaking, calling a plumber first usually costs less than opening the wall more than once.
Water leak in wall repair cost
A water leak in a wall typically costs $350–$5,000 to repair when it is found early, combining the plumber's pipe repair, drying, and drywall patching. Costs climb to $8,000–$20,000 or more when the wall stayed wet for months or mold and framing damage are involved.
 Taped seams are finished in thin coats with drying time between each, which is why the rebuild stage runs one to three days plus paint cure. Access, drying and finishing drive most of a wall leak bill, not the pipe.
Most of the total comes from access, drying, and finishing, not the pipe itself. For comparison with other losses, national water damage restoration cost figures run $1,500–$7,000 for a single room.
| Scenario | What's involved | Cost |
|---|---|---|
| Small leak caught within days, one wall | Pipe or fitting repair, small access hole, drywall patch, paint | $350–$1,200 |
| Leak with a wet cavity | Plumber repair, extraction, 2–4 days of drying, cut out and replace a drywall section | $1,000–$3,500 |
| Drain line leak (Category 2 or 3) | Repair, removal of contaminated drywall and insulation, antimicrobial treatment | $1,500–$5,000 |
| Leak running for weeks to months | Larger drywall and insulation removal, framing drying, rebuild and finishing | $3,000–$8,000 |
| Several walls or floors, mold or rot | Mold remediation, framing repair, rebuild of multiple sections | $8,000–$20,000+ |
Restoration quotes usually price drying and demolition at a cost per square foot of about $3–$7.50 for mitigation, so a quote can be checked against that range. A kitchen supply line pinhole found after two weeks might run $450 for the plumber, $300 for access and patching, $900 for three days of drying with air movers and a dehumidifier, and $150 for paint, about $1,800 in total.
What drives the price
Four factors move a wall leak quote more than any other, and the plumber and restoration company each price them differently. Knowing them ahead of time helps you compare estimates on the same footing.
How long the wall stayed wet
Each extra day adds saturated insulation, softer drywall, and a higher chance of mold. A leak caught in the first few days often needs a patch, while one that ran for weeks usually needs a full section rebuilt.
Wall access
Tile, plaster, and second floor walls cost more to open and close than a plain drywall wall on the ground floor. A shower valve behind a tiled surround can double the access cost.
Water category
Leaks from clean supply lines start as Category 1, while drain line leaks are Category 2 or 3 and require contaminated materials to be removed, not dried. Higher categories also add protective equipment and antimicrobial treatment.
Materials involved
Insulation type, plaster versus drywall, and baseboard or trim that must be matched all change the finishing bill. Older homes with plaster and lath usually run higher.
Pipe repair cost by method
Plumbing ranges depend on region and wall access, and they cover the plumber's work only, not drying or drywall. Pipe material and how much of the run has to be replaced set most of the difference between methods, so a short spot repair on an accessible pipe sits at the low end, while replacing a full run behind tile, plaster or a finished wall sits at the high end.
| Repair method | Best for | Typical cost |
|---|---|---|
| Replace a short pipe section | One pinhole or cracked section | $300–$1,200 |
| Replace a fitting or shutoff valve | Leak at a single joint or valve | $150–$600 |
| Replace a shower or tub valve | Failed valve body behind a tiled or surround wall | $300–$1,500 |
| Repipe one branch or bathroom | Repeated pinholes on the same line | $1,500–$4,000 |
| Whole house repipe | Widespread corrosion or polybutylene pipe | $4,000–$15,000+ |
Does insurance cover a wall leak?
Homeowners insurance generally covers a sudden, accidental wall leak such as a burst supply line, and it often pays to open and rebuild the wall, but it commonly denies leaks that ran slowly over weeks or months. The NAIC notes that standard policies exclude damage from wear and tear and from problems the owner failed to maintain.
 Take wide and close photos before drying or repairs start, since adjusters use dated evidence to separate a sudden failure from a long-term leak. Keep the plumber's invoice and written finding of cause with the photos.
The sudden versus gradual test behind whether homeowners insurance covers water damage turns on evidence of duration. Adjusters look for staining, rusted fasteners, decayed framing, and mold, and a plumber's written finding of the cause plus dated moisture readings help show a recent failure.
| Situation | Covered? | Why |
|---|---|---|
| Supply line bursts inside a wall | Usually yes | Sudden and accidental |
| Pinhole leak found within days | Often yes | Depends on proof the failure was recent |
| Slow leak running for months | Often no | Excluded as long term seepage or deterioration |
| Cost to open and rebuild the wall to reach a covered leak | Often yes | Access is commonly covered when the leak itself is covered |
| The failed pipe itself | Usually no | Wear and tear is excluded |
| Drain line or sewer backup | Depends | Usually needs a water backup endorsement |
Report the leak the same day, photograph it before drying starts, and keep the plumber's invoice, because filing a water damage insurance claim late or without records is a common reason payouts are reduced. When total repair cost sits near or below the deductible, filing may not pay anything and can still affect renewal, so get the estimates before deciding.
Renters and tenants
A renter who finds a wall leak should notify the landlord in writing the same day, because the landlord owns the pipes and the wall. The landlord is generally responsible for repairing them, though the specifics depend on state law and the lease. Keeping a dated copy of the notice and photographs protects the tenant if repairs are delayed.
Repair deadlines and habitability duties run from the notice date, and tenant rights and remedies for water damage in a rental vary by state. A renter's own insurance covers personal belongings damaged by a sudden leak, not the building.
Can a wall leak cause mold?
Yes, a wall leak can cause mold when drywall and insulation stay wet past the first few days. Mold behind a wall usually shows first as a musty odor or dark spots along the baseboard before any growth appears on the surface, and the CDC: Basic Facts About Mold notes that mold in damp indoor spaces can cause nasal stuffiness, throat irritation, and wheezing.
The EPA treats a moldy area smaller than about 10 square feet as a job many homeowners can handle, while larger growth or a lot of water damage calls for a professional. Contaminated water from a drain line always calls for a professional with experience in that type of damage.
Porous drywall with confirmed growth is usually cut out, not scrubbed, because mold on drywall tends to grow into the paper facing and gypsum core. A restoration company dries the cavity first, and remediation is added only if growth is confirmed.
How to prevent water leaks inside walls
Most wall leaks are preventable when pressure, corrosion, and fastener problems get caught before they become pinholes. Running a water meter test each year, keeping pressure at or below 80 psi, and replacing aging supply lines catch the most failures early.
 Put sensors at the low point under sinks, behind toilets, beside the water heater and next to the washer, where water collects first. Most alert your phone at the first drop, long before a stain shows on the wall.
Run the meter test each spring
Repeat the two hour meter test after any plumbing project and before long trips. A meter that moves with everything off is the earliest warning of a hidden leak.
Keep water pressure at or below 80 psi
A pressure gauge that threads onto a hose bib costs about $10–$15 and shows static pressure in seconds. If the reading is high, a plumber can install or adjust a pressure reducing valve.
Replace aging supply lines and valves
Replace braided or rubber lines on toilets, sinks, and washers before they fail, and plan a repipe if the home has polybutylene or heavily corroded galvanized pipe. Old shutoff valves that do not close fully should be replaced when found.
Locate pipes before drilling
Use a stud finder with pipe and live wire detection before driving screws into bathroom, kitchen, and laundry walls. A fastener through a line can stay hidden for months before the leak shows.
Add leak sensors at high risk spots
Battery powered sensors under sinks, behind toilets, near the water heater, and beside the washing machine alert your phone at the first drop. Sensors cost about $15–$40 each and cover the fixtures that most often leak into walls.
Frequently Asked Questions
Can you fix a leaking pipe in a wall without cutting the drywall?
Sometimes, when the pipe can be reached through an access panel behind a tub or shower, the back of a cabinet, or a closet on the other side of the wall. Otherwise a plumber cuts a hand sized inspection hole, and sealants or epoxy applied through it are stopgaps, not lasting repairs.
How much does professional leak detection cost?
Professional leak detection typically costs $150–$500. Acoustic, thermal, and pressure testing usually take one to two hours, and locating the leak precisely keeps the inspection hole small, which lowers the drywall repair bill.
How much water can a hidden wall leak waste?
Thousands of gallons a year. The EPA estimates the average household loses more than 9,300 gallons a year to leaks, and about nine percent of homes leak 50 gallons or more per day. A pressurized supply leak inside a wall runs around the clock, so it often first shows up as a higher water bill.
Can you paint over a water stain on a wall?
No. Stain blocking primer hides the mark but does not stop the leak, and paint over water damaged drywall bubbles and peels again. Confirm the wall reads dry against an unaffected section first, and clean up any mold before painting, as the EPA advises.
Can a leak inside a wall damage electrical wiring?
Yes, water in a wall can corrode connections, short wiring, and trip breakers. An electrician should test every outlet, switch, and fixture on the wet wall before it is powered again, checking insulation resistance and continuity.
How long does a wall take to dry after a leak?
Usually three to five days. With air movers and dehumidifiers, most wall cavities dry in that window, and plaster or saturated insulation can take longer. Drying ends when moisture meter readings match an unaffected reference point on the same wall, not when the surface feels dry.
Can I wait to repair a wall leak until I can afford it?
No. Shut off the branch valve so the wall stays dry while you arrange payment, and have the plumber stop the leak first, because a running leak is what multiplies the bill and can eventually cause structural water damage. Contractor payment plans, personal loans, and home equity products are the main ways to pay when insurance does not apply.
What should I do if I find a wall leak after being away from home?
Shut off the main water valve first. Then cut power to the affected circuit, photograph the wall and floor before touching anything for a possible water damage insurance claim, and call a plumber and a restoration company the same day, since a leak that ran for days is more likely to have wet insulation and framing behind the surface.
What should I ask before hiring a company to dry the wall?
Ask for the water category and damage class in writing, moisture readings at the start and end of drying, a list of the drying equipment, and who handles the rebuild. Insurance billing, subcontractor use, and warranty terms are also worth confirming before signing.
Does a wall leak have to be disclosed when selling a house?
Yes, in nearly every state, sellers must disclose known water damage even after repair. Repaired damage still counts as a known material fact on most disclosure forms, and repair invoices and dry moisture readings help document that the problem was resolved.
Sam Hickerson is the founder of RestoreAdvisor and writes consumer guides on mold remediation, water damage restoration, inspection, testing, and home recovery. His work focuses on helping homeowners understand costs, risks, and when to call a professional. He draws on guidance from the EPA, CDC, IICRC, and other authoritative sources to make complex home issues easier to navigate.