
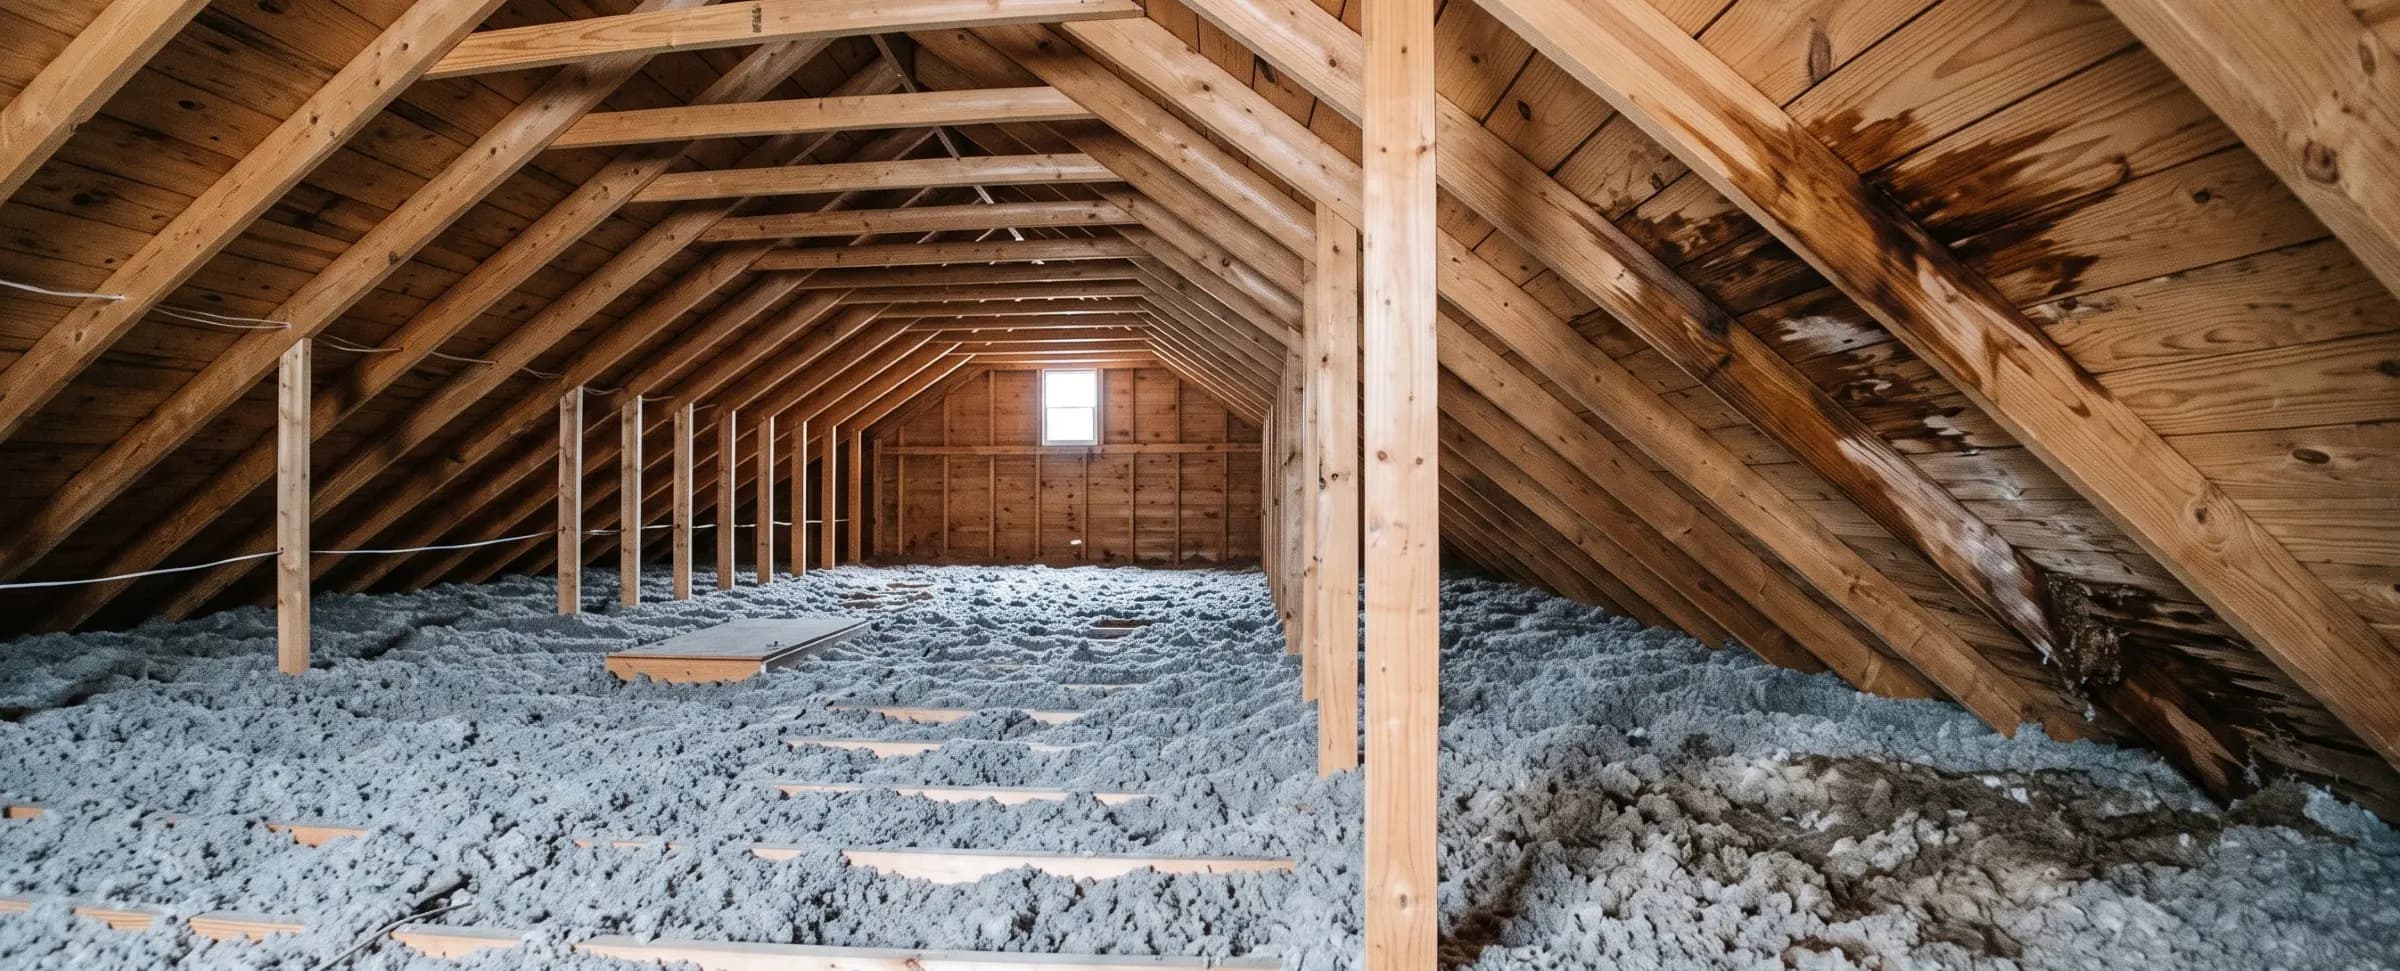

You went up for a box of decorations, or noticed a stain spreading across a ceiling below, and now there's water somewhere in the attic that shouldn't be there. That doesn't automatically mean structural damage or a mold problem, but it does mean the next hour matters more than it would in a room you walk through every day. Start with what to do right now, then find out what's actually causing it and whether the ceiling below is at any real risk, so you know who to call and what to expect before anyone shows up.
IICRC S500 defines attic water damage as moisture intrusion that reaches the roof deck, framing, or insulation of an unfinished or semi-finished attic space, most often from a failed roof, an ice dam, an HVAC condensate line, or a pipe running through the space. Restoration companies classify the water using the same category and class system applied to every other room in a house, so the source determines both the contamination level and how the drying plan gets scoped.
Key insights
- Attic leaks often go unnoticed for weeks. Because the space isn't part of daily routines, a stain on the ceiling in the room below is frequently the first sign homeowners actually see.
- Six sources account for nearly all attic water damage. Roof leaks, ice dams, HVAC condensate line failures, frozen or burst pipes, vent boot failures, and wind-driven rain cover the full list, with roof leaks responsible for the largest share.
- Saturated insulation adds real weight to the ceiling below it. Blown-in and batt insulation both hold water rather than shedding it, and that added weight is what turns a sagging ceiling into a genuine structural concern instead of a stain you can leave alone.
- Wet insulation is rarely worth drying. Materials that stay damp for 24 to 48 hours become a mold risk, and blown-in insulation in particular is difficult to dry in place once it compacts.
- Restoration typically runs $300 to $8,000. Larger jobs involving structural framing or extensive insulation replacement can run well past that range.
- Roof, HVAC, or plumbing repair is billed separately from water damage restoration. A restoration company dries and repairs the attic itself; a roofer, HVAC technician, or plumber fixes the source.
What to do right now
Five steps matter most in the first hour: contain the water, confirm it's safe to go up, cut power if anything's wet, document the damage, and call the right specialist. Acting in that order limits how far the water spreads before help arrives.
 Containing the drip keeps the water from spreading further into surrounding insulation while the source gets confirmed. Left uncontained, this same leak can soak insulation over several feet before anyone notices.
Contain the water and protect what's below
Slide a bucket, tarp, or towel under any active drip to catch water before it spreads across insulation or through the ceiling below. Set the bucket on a joist or a laid board rather than directly on the insulation, since that spot is usually the most saturated part of the ceiling and the least able to hold extra weight.
Check whether it's safe to go up
Only step on the joists or a laid board, never directly on insulation or the drywall itself, since both can hide a soft spot that won't hold your weight. Skip the attic entirely if you can see sagging drywall, a bulging ceiling, or wetness near an electrical junction box or recessed light.
Cut power if wiring or fixtures are wet
Shut off power at the breaker for any circuit running through the wet area before doing anything else up there, since water and live wiring create a serious shock hazard per OSHA. An electrician should confirm a circuit is safe before it's turned back on if wiring itself got wet.
Document the damage before you touch anything
Take photos and video of the wet insulation, staining, and any ceiling damage below from multiple angles before you move or remove anything. This documentation is what an insurance adjuster and a restoration company will both ask for first.
Call a specialist and a restoration company at the same time
Whoever fixes the source, a roofer, plumber, or HVAC technician, should be called alongside a restoration company rather than after, since drying needs to start while the source is still being fixed.
If water is actively spraying from a pipe or pooling faster than it can be contained, treat it as an emergency rather than a routine leak. The same rule applies here as any active flood: emergency water damage restoration means stopping the source first and worrying about everything else once the water itself is under control.
Most roof or condensate leaks aren't that urgent and give you time to think before acting, but a frozen pipe is the exception. A pipe that freezes inside an attic during a hard freeze needs a different first step: confirming it hasn't already split before applying any heat, since warming a cracked section too fast turns a slow drip into a spray.
What not to do
The biggest mistake after finding attic water damage is treating a wet ceiling or matted insulation as something that will dry out on its own. Sealing over a stain, ignoring a sagging ceiling, or waiting on the insurance company before drying anything out all turn a contained problem into a larger one.
 Weight from a person concentrates into a much smaller area than a laid board or bucket, which is why saturated insulation that holds a bucket's weight can still give way underfoot.
Don't step directly on ceiling drywall
Weight from a person, even distributed weight while crawling, can be enough to break through drywall that's already saturated and weakened. Stay on joists or a laid board at all times.
Don't ignore a sagging or bulging ceiling
A ceiling holding back pooled water is a structural problem, not a cosmetic stain, and it can fail suddenly rather than gradually. Relieve the pressure through a controlled puncture rather than waiting.
Don't paint or seal over a stain before it's confirmed dry
Drywall or wood that looks dry can still hold enough moisture to feed mold growth for days afterward, and a visual check alone won't catch that. Sealing over damp material before a moisture meter confirms it's actually dry traps that moisture underneath the new surface, exactly what the EPA warns against after any water intrusion.
Don't wait on the insurance company before starting mitigation
Drying out the attic promptly limits the damage and the eventual claim size. Document the damage first, then start drying while the claim is still being processed.
What's causing the water in your attic
Attic water traces to one of six sources: a roof leak, an ice dam, a failed HVAC condensate line, a frozen or burst pipe, a failed exhaust duct or plumbing vent boot, or wind-driven rain during a storm. Each points to a different specialist, which is why identifying the exact source matters as much as confirming there's a leak at all.
 Roof leaks account for the most attic water damage overall, but ice dams and vent boot failures follow the same roofline entry path while HVAC condensate and frozen pipes originate inside the attic itself, a distinction that determines which specialist gets called first.
More than one of these can be active on the same job, particularly after a major storm, when wind-driven rain and an overwhelmed gutter system show up at the same time as an unrelated HVAC drain failure. A technician typically confirms the exact source before any insulation comes out.
| Source | Signal | Typical classification |
|---|---|---|
| Roof leak | Damp insulation or staining that traces back to a valley, chimney flashing, or vent pipe boot, often worse after rain | Category 1, can shift with time |
| Ice dam | Dripping or staining near the eaves that appears specifically during a thaw following a hard freeze | Category 1 |
| HVAC condensate failure | Pooling or staining directly under an attic-mounted air handler, furnace, or ductwork | Category 1 |
| Frozen or burst pipe | Sudden dripping, spraying, or a wet patch tracing a supply line, usually after a hard freeze | Category 1, can shift to Category 2 |
| Exhaust duct or vent boot failure | Localized staining around a bathroom exhaust duct connection or plumbing vent pipe, independent of weather | Category 1 |
| Wind-driven rain or storm damage | Staining that only appears during wind-driven storms, often near gable vents or ridge caps | Category 1 to 2 |
A roof leak accounts for more attic water damage than any other cause, and it's usually the first thing a technician rules in or out. Left unaddressed, water damage from a roof leak tends to worsen with each subsequent rain rather than staying at a fixed severity. Staining that only shows up during a thaw, rather than during the rain itself, is usually a different problem entirely.
That timing pattern is the clearest way to tell an ice dam from a plain roof leak before a professional confirms it. The freeze-thaw cycle behind ice dams forms specifically at the roofline and needs its own removal method rather than a standard roof repair.
When the cause isn't obvious from the staining pattern alone, tracing the wet insulation back toward its highest point usually narrows the list quickly. Water that travels along a rafter or truss chord toward one specific spot on the roof deck points to a roof or flashing failure, while water pooling directly under a mechanical unit or duct run points to HVAC or plumbing rather than the roof. A homeowner rarely needs to make the final call alone; the goal at this stage is narrowing the list enough to know which specialist to schedule first.
Not every damp attic has a leak at all. Widespread dampness with no single wet spot, especially in cold weather, is often condensation rather than water intrusion, since warm, moist household air condenses on cold roof sheathing the same way it fogs a cold window. A single wet spot that traces back to one point on the roof or a mechanical unit is a leak; a uniform dampness spread across a large area of decking, with no clear point of entry, points toward ventilation and airflow instead.
Signs of attic water damage
The most common first sign of attic water damage is a stain on the ceiling in the room below, since the attic itself often goes unchecked for weeks or months at a stretch. A musty smell, in particular, tracks with conditions the CDC associates with active mold growth, and often shows up before any visible staining does.
 A ceiling stain like this is usually the first sign anyone notices, since it can take weeks for water pooling in the attic above to soak through the insulation and drywall to this point.
A slow leak tends to produce several of these signs together over time, while a sudden failure, such as a burst pipe or heavy wind-driven rain during an active storm, usually produces just one or two signs but much faster. Noticing more than one sign at once is generally a stronger indicator that water has been present for a while rather than a single recent event.
| Sign | What it usually means |
|---|---|
| Ceiling stain in the room below | Water has already soaked through insulation and drywall from above |
| Musty odor in an upstairs room or hallway | Moisture has been present long enough for mold to begin developing |
| Damp, matted, or discolored insulation | Direct contact with water, usually visible once you climb up and look |
| Sagging or bulging ceiling | Pooled water is adding weight faster than the ceiling can hold |
| Frost or ice on the underside of the roof deck in winter | Condensation or an active leak freezing overnight, common with poor ventilation |
| Rising energy bills with no other explanation | Wet or compacted insulation loses R-value and lets conditioned air escape |
None of these signs point to a specific cause on their own. The same signs of water damage that appear in an attic, staining, warping, a musty smell, turn up in every other room too, just with different materials absorbing the moisture first.
How professionals locate a hidden leak
Professionals confirm a hidden attic leak with a moisture meter and, on larger or unclear jobs, a thermal imaging camera, rather than relying on a visual inspection alone. Both tools find moisture that hasn't produced a visible stain yet, which matters in an attic since insulation hides a problem that a finished room would show much sooner.
 A reading in the low 80s against surrounding wood in the high 90s and above confirms genuine moisture rather than a stray shadow or a cold draft, since ordinary temperature drift rarely produces this sharp a contrast.
A pin-style or pinless moisture meter reads the actual water content of wood, drywall, or insulation instead of relying on how a surface looks or feels. Thermal imaging works differently: it detects the temperature difference between wet and dry material, since damp insulation and wood typically read cooler than everything around them, and a technician uses that pattern to trace a leak back toward its source without tearing into insulation blindly.
The compression pattern in blown-in insulation is its own diagnostic clue. Insulation that's matted down in a line or a spreading patch usually marks the path water has traveled since it entered, which often points several feet away from where the leak actually started rather than straight down from the wettest visible spot.
Finished attic vs. unfinished attic
A finished attic used as a bedroom, office, or playroom carries drywall, flooring, and sometimes ductwork that all get treated as living space damage, while an unfinished attic used mainly for storage is scored almost entirely by insulation and framing loss. That distinction changes what's actually at risk, what a restoration company includes in the estimate, and how an insurance policy treats the claim.
 A finished attic's sloped ceiling hides sagging more easily than an open joist line does, since the angle makes a soft or bulging section harder to spot just by looking up.
Materials salvage looks different between the two as well. A finished attic's drywall, flooring, and paint follow the same category and class rules used in any other room of the house, while an unfinished attic's largest loss is almost always the insulation itself rather than a finished surface.
| Factor | Finished attic | Unfinished attic |
|---|---|---|
| What's at risk | Drywall, flooring, paint, sometimes ductwork | Insulation, roof deck, framing |
| Drying approach | Same extraction and drying process used in any finished room | Insulation removal first, then drying the exposed framing |
| Typical cost | Closer to restoring a finished room elsewhere in the house | Usually lower, limited mostly to insulation and structural repair |
| Insurance treatment | Often counted as livable square footage on the policy | Treated as storage or unfinished space, which can affect coverage limits |
A finished attic's drywall ceiling also makes a collapse risk harder to spot from below, since a knee-wall or sloped ceiling can hide sagging that would be obvious on a flat, open joist line. A flashlight check along the slope, rather than a quick glance from the attic hatch, is the more reliable way to catch it early.
Is your ceiling or attic floor at risk of collapse
A ceiling is at meaningful risk of collapse when it's visibly sagging, bulging, or feels soft and spongy to the touch, all signs that pooled water above has added more weight than the drywall and framing were built to hold. Saturated insulation and pooled water both add real load, and that load is what turns a wet ceiling into a structural warning instead of a stain to keep an eye on.
 A firm surface that just looks discolored is a different situation than one that flexes or feels cool and damp, and that distinction only shows up under pressure, not by sight.
Blown-in insulation holds far more water than its dry weight would suggest, and that added weight sits directly on the ceiling drywall below it rather than draining away on its own. How long that water has been sitting factors into the same water damage classes system used to scope a drying plan anywhere else in the house, since a longer soak time generally means more absorption and a harder dry.
You can often assess risk from the room below without ever going up into the attic itself. Press gently on a stained ceiling with an open palm rather than a fingertip; a firm surface that just looks discolored is a different situation than one that flexes or feels cool and damp to the touch. A ceiling that flexes under light pressure has already lost some structural integrity and should be treated as an active hazard rather than something to monitor over the next few days.
The attic floor carries a separate risk once you're actually up there: it's often just insulation laid over joists with no walkable surface between them, so a soaked or matted section can hide exactly where a joist is and where it isn't. Weight from a person, not just from pooled water, can push straight through wet insulation and the ceiling drywall it's sitting on, which is why staying on joists or a laid board matters as much as the water itself.
Insulation: what's salvageable and what isn't
Blown-in insulation, whether cellulose or fiberglass, is rarely salvageable once it's wet because it wicks and compacts instead of shedding water, while batt insulation can sometimes be dried in place if it's caught within the first day. The type of insulation in the attic, more than the amount of water involved, determines whether removal or drying is the right call.
 Blown-in insulation loses roughly this much loft once saturated, and that compaction is permanent even after the material dries, which is why removal is standard rather than an attempt to fluff it back into shape.
Removal typically starts at the point of highest saturation and extends a few feet beyond it in every direction, since insulation at the edge of a visibly wet area can still be damp enough to feed mold growth even if it looks dry from above. That margin is why a small ceiling stain often turns into a much larger insulation removal once a technician actually opens up the space.
| Insulation type | Behavior when wet | Salvageable? |
|---|---|---|
| Blown-in cellulose | Compacts, mats down, and loses R-value permanently; holds water like a sponge | Rarely, removal is standard |
| Blown-in fiberglass | Doesn't mat as badly as cellulose but still traps water against the deck below | Rarely, except very brief exposure |
| Batt fiberglass | Sheds surface water faster and can sometimes dry in place | Often, if dried within 24 to 48 hours |
| Mineral wool | More water-resistant than fiberglass or cellulose, dries faster | Often |
| Spray foam | Doesn't absorb water; damage is usually limited to what sits directly beneath it | Yes, the foam itself typically doesn't need replacement |
How long insulation has been wet matters as much as the water category itself. Water sitting untouched for several days in dense insulation can behave closer to a higher contamination level by the time a technician finally gets a moisture meter on it, even if the original source was clean water.
Protecting belongings stored in the attic
Attics double as storage for the items used least often, which means a leak can soak through boxes for weeks before anyone opens them. Cardboard, paper documents, and fabric absorb and hold moisture quickly, while sealed plastic totes on a shelf or pallet well above the attic floor usually stay dry even when the insulation around them doesn't.
Move anything nearby off the attic floor immediately
Water spreads across a flat attic floor faster than it seems like it should, and items sitting directly on insulation or subfloor are the first to take on moisture.
Check cardboard boxes for wicking, not just visible wetness
Cardboard pulls moisture up from a damp surface well before the box itself looks soaked through, so lift and check the bottom corners rather than relying on a glance from above.
Separate anything that got wet from anything that didn't
Damp items left touching dry ones can spread moisture and, eventually, mold, especially with fabric, paper, or untreated wood.
Photograph damaged items before discarding anything
Photos of ruined boxes, documents, or decorations support a contents claim the same way structural documentation supports the dwelling portion of a claim.
Who to call
The specialist to call first depends on the cause: a roofer for a roof or flashing failure, a plumber for a frozen or burst pipe, an HVAC technician for a condensate line or drain pan failure, and a water damage restoration company in every case for the water itself. Calling that company at the same time as the repair specialist, rather than after, keeps drying from being delayed while a repair gets scheduled.
 Calling a restoration company at the same time as the roofer, plumber, or HVAC technician, rather than waiting for that repair to finish first, keeps drying from being delayed while the source gets fixed.
A restoration company handles extraction, drying, and any insulation or drywall replacement below, while the roofer, plumber, or HVAC technician handles the actual repair that stopped the water in the first place. Confirm the company holds current IICRC certification and ask whether they've worked attic-specific jobs before, since access and insulation handling differ from a finished room. A pull-down ladder, a scuttle hole, or a walk-up stair each change how quickly equipment and materials can move in and out, and a company that's priced the job without seeing the access point in person is more likely to revise the estimate once work starts.
For a condensate-driven leak specifically, the diagnosis and fix look different from a roof or plumbing problem, and confusing the two wastes a service call. An attic-mounted air handler or furnace is the usual suspect behind HVAC water damage from condensation, and a clogged drain line or a cracked pan are the two things a technician checks first.
DIY vs. professional cleanup
Attic water damage is DIY-appropriate only for a small, contained Category 1 spot that's caught within a day and doesn't involve wet insulation over a large area or any sign of ceiling sagging. Anything beyond that, especially once blown-in insulation or ceiling drywall is involved, calls for professional extraction and drying equipment.
 A stain roughly this size, under about 10 square feet with no ceiling sagging below it, is the kind of scope a homeowner can reasonably dry out with rented equipment rather than a full extraction crew.
Most homeowners underestimate how much bigger the affected area turns out to be once insulation is actually moved aside, since it hides the true extent of a leak from above. If the wet section turns out to be larger than it looked from the attic hatch, that's usually the moment to stop and call a professional rather than continue on the assumption the job is still small.
| Factor | DIY-safe | Call a professional |
|---|---|---|
| Area affected | Under roughly 10 sq ft | Larger or spreading |
| Insulation type | Small batt section | Blown-in insulation of any size |
| Ceiling condition | No sagging or staining below | Any sagging, bulging, or ceiling stain |
| Water category | Confirmed Category 1, caught same day | Category 2 or higher, or unknown source |
| Access | Full-height, well-lit attic | Cramped, knee-wall, or hatch-only access |
A small, contained Category 1 spot in an attic follows the same DIY water damage cleanup tools and drying steps used anywhere else in the house. The one added caution is access itself: reaching the spot with the right equipment, not just drying the water, is usually what pushes an attic job past the DIY threshold.
Cost of attic water damage restoration
Attic water damage restoration typically costs $300 to $8,000, with larger jobs involving structural framing repair or full insulation replacement running higher. Cost tracks the amount of insulation that must be removed, whether ceiling drywall below needs replacement, and whether the roof deck or framing sustained damage.
 These figures cover water damage restoration only, since roof repair, HVAC repair, and plumbing repair are separate line items billed by their own contractors and won't appear on this estimate.
Access difficulty adds to labor time on nearly every attic job, since equipment and materials have to move through a hatch, pull-down ladder, or narrow stairway rather than a standard doorway. A cramped, knee-wall attic with limited headroom typically costs more to work in than a full-height, walk-up attic even when the amount of water damage is identical.
| Scenario | Typical cost |
|---|---|
| Small spot, no insulation removal | $300–$800 |
| Partial insulation removal, no ceiling repair | $800–$2,500 |
| Full insulation replacement plus ceiling drywall repair | $2,500–$8,000 |
| Structural repair to rafters or roof deck | $8,000–$18,000 |
| Extensive damage across multiple attic sections | $18,000–$30,000+ |
These figures cover water damage restoration only; roof repair, HVAC repair, and plumbing repair are separate line items billed by their own contractors. An attic job typically lands toward the lower end of water damage restoration cost figures for the house overall, since the affected footprint is usually smaller than a room like a kitchen or basement.
A quote that seems out of line with these ranges is worth double-checking against the actual square footage involved rather than the whole attic footprint. Most attic jobs affect a fraction of the total space, and pricing should reflect that rather than a flat per-attic rate.
A contractor's per-square-foot rate should fall within the same $3 to $7.50 mitigation range and $20 to $37 repair range used in water damage restoration cost per square foot figures elsewhere in the house, regardless of how small the attic job is. A rate well outside either range is worth questioning before signing off.
Insurance coverage for attic water damage
Homeowners insurance covers attic water damage when the cause is sudden and accidental, such as a storm-driven roof failure or a pipe that suddenly bursts, but typically excludes damage from gradual leaks, long-term condensation, or deferred roof maintenance. The same sudden-versus-gradual standard that applies to every other room in the house applies here.
An adjuster will often ask how long the roof or the failed component had been in that condition, since a slow leak that went unnoticed for months looks more like a maintenance issue than a sudden loss. Documentation matters just as much here as anywhere else in the house: photos, moisture readings, and dated records all strengthen a claim regardless of which room the water reached.
Per NAIC guidance, roof age and documented maintenance history are common factors insurers weigh when deciding whether a roof-related claim qualifies as sudden damage rather than routine wear and tear. Keeping roof inspection records on hand makes that conversation easier if a claim ever comes down to it.
Prevention: keeping water out of your attic
The highest-impact prevention steps are an annual roof inspection, clear gutters, adequate attic ventilation, and confirming any HVAC or plumbing line routed through the attic is properly insulated and maintained. Most attic water damage traces back to one of these four items being skipped for a season or more.
 Shingles, flashing, and pipe boots are the most common entry points for water reaching the attic, which is why an annual check focuses on these spots rather than the roof surface as a whole.
Inspect the roof annually and after major storms
Check shingles, flashing, and pipe boots for cracking or lifting, since these are the most common entry points for water reaching the attic.
Keep gutters and downspouts clear
Clogged gutters push water back under the roof edge instead of away from the house, a common contributor to both roof leaks and ice dams.
Confirm attic ventilation is adequate
Balanced soffit-to-ridge airflow, per International Residential Code ventilation minimums, keeps warm, moist air from condensing on cold roof decking, which reduces both water accumulation and the mold risk that follows it.
Insulate any pipe routed through the attic
A supply line running through an unconditioned attic faces the same freeze risk that leads to frozen pipes in a garage or crawl space, and foam pipe insulation is inexpensive relative to the cost of a burst pipe.
Schedule HVAC maintenance that includes the condensate line
A clogged condensate line or a cracked drain pan on an attic-mounted unit is a slow, easy-to-miss leak until the ceiling below finally stains.
These same habits are part of a larger, room-by-room water damage prevention system, not a one-time project. That fuller system covers plumbing, appliances, and drainage well beyond just the attic, on a seasonal schedule rather than an annual one.
Frequently asked questions
What's the most common cause of attic water damage?
A roof leak is the most common cause, followed by ice dams in cold climates and HVAC condensate line failures in homes where the air handler or furnace is mounted in the attic.
How do I know if my ceiling below the attic is at risk of collapsing?
Press gently on the stained area with an open palm. If it flexes, feels cool, or is soft rather than firm, treat it as an active hazard and get a professional assessment right away rather than waiting to see if it gets worse.
Can I dry wet attic insulation myself?
Sometimes, but only in limited cases. Small, contained batt insulation caught within a day can sometimes dry in place, but blown-in cellulose or fiberglass rarely dries successfully once saturated and is typically removed and replaced rather than dried.
How long does it take to know if attic water damage caused mold?
Roughly 24 to 48 hours of sustained dampness is enough for mold to begin developing under the right conditions, which is why documenting and drying quickly matters even for a leak that looks minor.
Does homeowners insurance pay for the roof repair too, or just the water damage?
Sometimes both, but they're evaluated as two separate questions on the same claim. A sudden covered event may pay for both the roof repair and the interior water damage, while a gradual cause can leave both uncovered. The same homeowners insurance covers water damage mechanics apply here as anywhere else in the house, so review the specific cause with the adjuster before assuming either is included.
Why does my attic leak only show up after certain storms?
Wind-driven rain can push water under shingles or through flashing at angles a normal rain event wouldn't reach, which is why some roof leaks only appear during specific wind directions rather than every time it rains.
Is it safe to go into my attic to check for water damage myself?
Generally yes for a quick visual check, as long as you stay on joists or a laid board and avoid any area where drywall, insulation, or an electrical fixture looks wet or is visibly sagging.
How much does it cost to fix attic water damage?
Most attic water damage restoration costs $300 to $8,000, with larger jobs involving structural framing repair or full insulation replacement running higher. This figure covers restoration only, not the roof, HVAC, or plumbing repair itself.
What's the difference between attic water damage and attic mold?
Water damage refers to the physical moisture intrusion and its effect on insulation, drywall, and framing, while mold is a biological growth that can follow if that moisture isn't dried within a day or two. Once growth is confirmed, attic mold removal follows a different process entirely: source removal and containment rather than just drying out the space.
Sam Hickerson is the founder of RestoreAdvisor and writes consumer guides on mold remediation, water damage restoration, inspection, testing, and home recovery. His work focuses on helping homeowners understand costs, risks, and when to call a professional. He draws on guidance from the EPA, CDC, IICRC, and other authoritative sources to make complex home issues easier to navigate.