
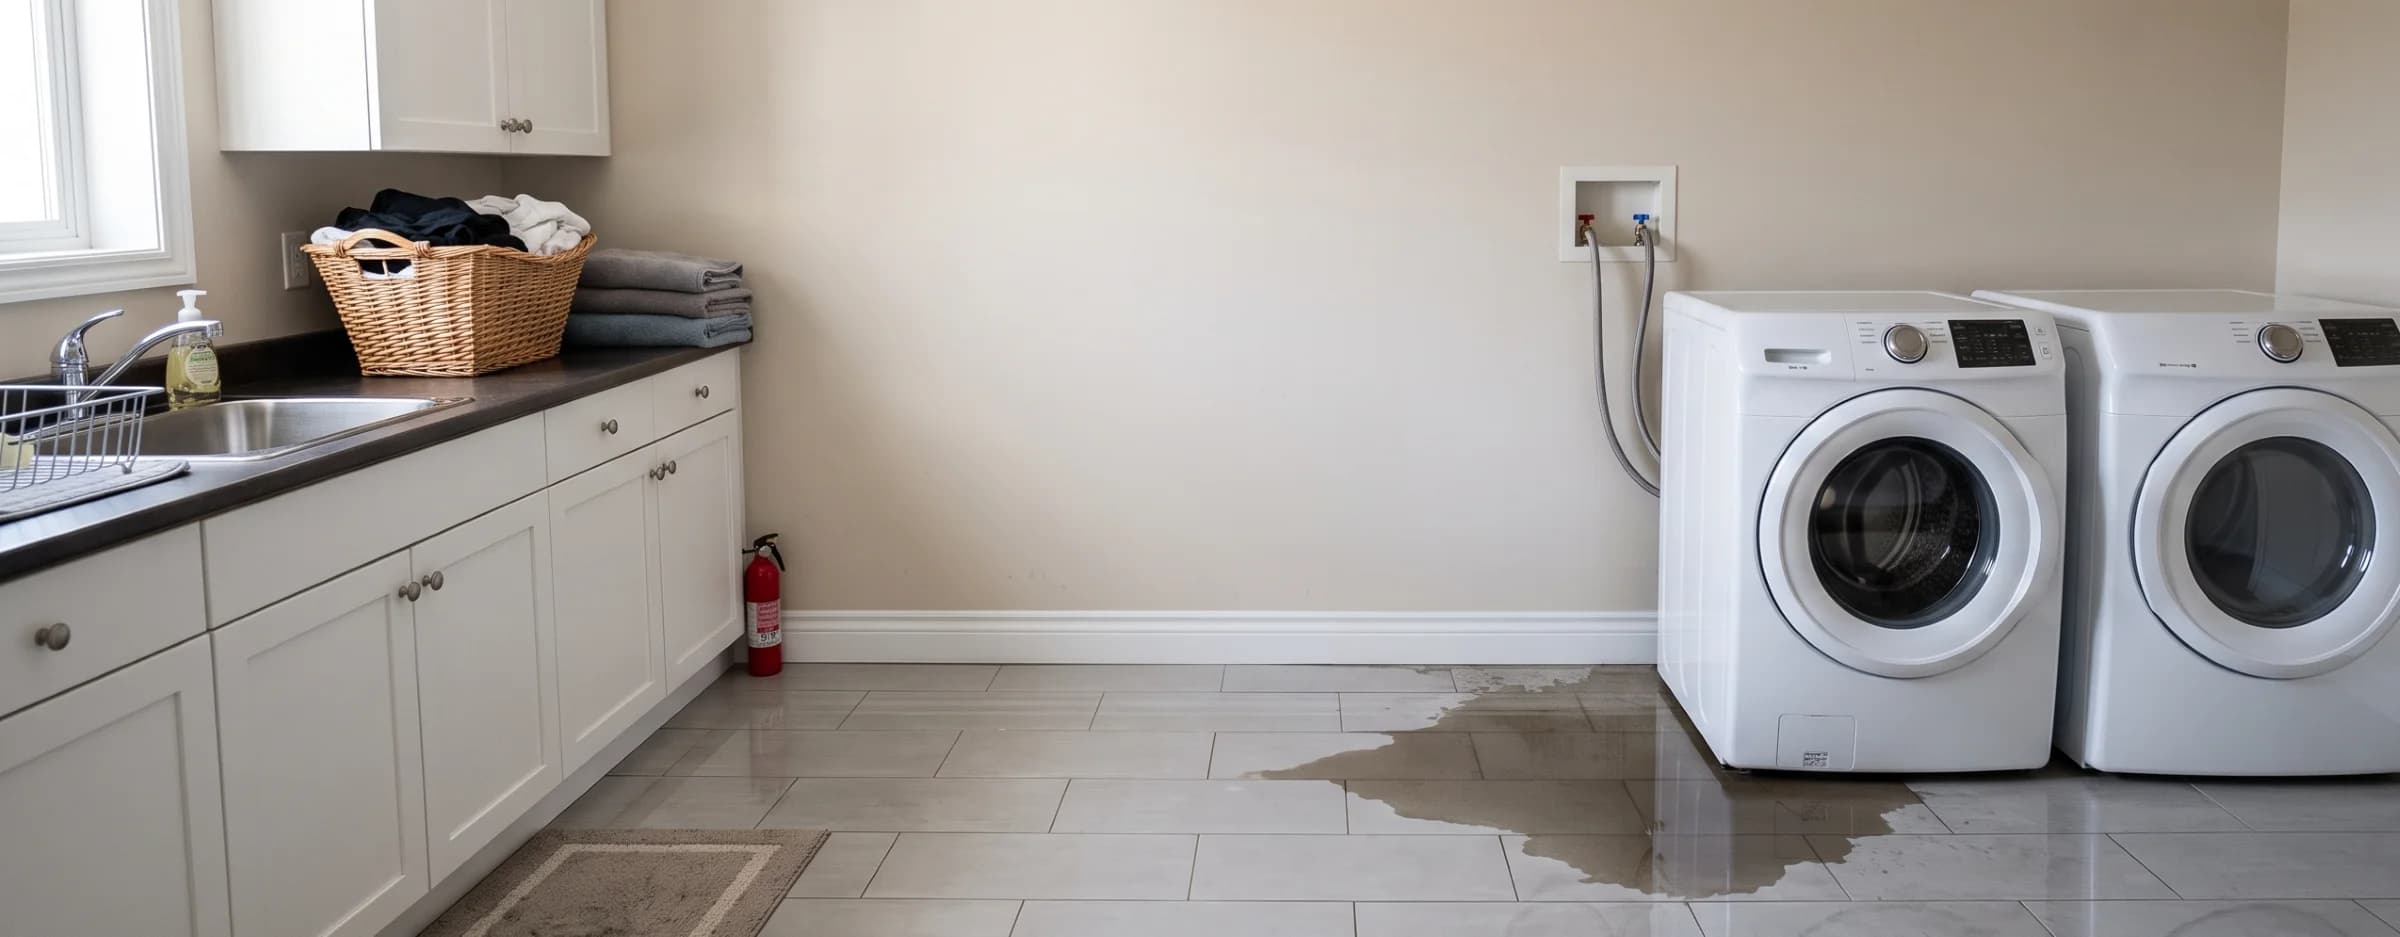

A puddle spreading out from behind the washing machine, or water pooling under the drum after a cycle, is one of the more common ways water damage starts in a home. It rarely looks dramatic in the first few minutes, which is exactly why it gets underestimated. Washing machine water damage is water intrusion from a supply hose failure, a drain pump leak, or an overflow during a cycle, and it's classified as Category 2 gray water under the IICRC S500 standard that governs professional water damage restoration in the United States. Gray water carries enough detergent, lint, and biological residue that it needs different handling than a clean water spill, even when the volume looks small.
Stopping the water source and protecting the subfloor comes first. After that, knowing whether the cause is a $15 hose or a $400 pump, whether insurance will pick up the cost, and when a DIY dry-out is enough versus when to call a restoration company are the decisions that determine how much this ends up costing.
Key insights
- Washing machine water damage is Category 2 gray water. Under the IICRC S500 standard, it carries enough detergent and organic residue to require more thorough cleaning than a clean water event, even in the same room.
- Insurance usually covers it when the cause was sudden. A burst supply hose or a failed pump is typically covered under a standard homeowners policy; a hose you knew was cracked and never replaced usually isn't.
- A cracked supply hose is the single most common cause. Rubber hoses fail from the inside out with no visible warning, which is why industry guidance recommends replacing them every five years regardless of appearance.
- Water can hide beneath a floor that looks dry. Subflooring beneath a washing machine can stay saturated for days after the surface appears fully dried, which is why professional moisture readings matter more than a visual check.
- Typical repair and drying costs run $2,000 to $5,000. That range covers a leak that reaches the laundry room and nearby areas; it can run higher if water reached a finished basement below.
- Mold risk starts within 24 to 48 hours. Wet drywall or flooring left undried on that timeline creates the conditions mold needs, separate from any mold that develops inside the machine itself.
What to do in the first 24 hours
The first steps after a washing machine leak are to shut off the water supply, cut power to the machine, and extract standing water, in that order, before anything else. Acting in that sequence within the first 24 hours determines whether the damage stays contained to the laundry room or spreads into subflooring, adjacent walls, and cabinetry, and the same water damage checklist that applies after any leak in the home works here too, just compressed into a single afternoon rather than spread over days.
 The cold valve is the one that matters most, since it's what feeds the tank during the fill cycle. Braided steel hoses like these last longer than rubber, but neither type is exempt from a five year replacement schedule.
1. Shut off the water supply
Turn the two shutoff valves behind the machine, hot and cold, clockwise until they stop; if they're seized or you can't reach them, shut off the main water supply to the house instead.
2. Cut power to the machine
Unplug the washer or switch off its breaker before stepping into any standing water near it, since a leak that reaches the electrical connection can turn a cleanup job into a shock hazard.
3. Extract standing water
Remove visible water with towels, a wet/dry shop vacuum, or a mop, working from the wettest point outward so it doesn't spread into dry areas of the room.
4. Move and elevate anything on the floor
Pull laundry baskets, detergent boxes, and anything cardboard off the floor immediately, since cardboard and particleboard wick water fastest and start breaking down within hours.
5. Check the subfloor and adjacent rooms
Press a hand or a moisture meter against the flooring near the machine and check the ceiling of any room directly below the laundry area, since water that pooled on a hard floor may have already traveled through seams or a floor drain.
6. Photograph the damage before cleanup goes further
Take photos of the standing water, the failed part if it's visible, and any affected flooring or cabinetry before drying begins, since this documentation is what an insurance adjuster or restoration company will ask for first.
For a leak that's actively flooding a room rather than sitting as a contained puddle, drying typically needs to start within hours rather than days to keep the damage from escalating a category or class under IICRC guidelines. A few habits also make the damage worse rather than better: running the machine again before the cause is identified risks compounding the leak, assuming a floor is dry because the surface feels dry skips the subfloor check that catches trapped moisture, and waiting to see if a small leak stops on its own usually just adds hours to how long materials sit wet.
What causes washing machine water damage
Washing machine leaks are one of the most common triggers for residential water damage restoration calls, alongside burst pipes and roof leaks, and the causes usually break down into four groups: a cracked or loose supply hose, a failed internal component like the drain pump or water inlet valve, a door or tub seal that no longer holds a watertight fit, or a cycle overflow caused by overloading, excess detergent, or an unlevel machine. Supply hose failure is the most common single cause, since rubber hoses harden and crack under years of constant water pressure even when there's no visible warning sign.
 Rubber hoses fail from the inside out, so cracking like this is usually already advanced by the time it's visible from the outside. Braided steel doesn't eliminate failure risk, but it typically outlasts rubber by several years.
Machine age plays a role independent of which part actually fails. Units past the eight-year mark see rubber components, especially hoses and the door gasket, degrade at a much faster rate, which is why an aging machine that has never leaked before can still fail with no change in how it's maintained.
| Cause | Typical warning sign | Typical fix |
|---|---|---|
| Cracked or loose supply hose | Dripping or damp flooring behind the machine | Hose replacement, $50–$150 |
| Drain pump or drain hose failure | Water appears during the drain cycle | Appliance repair, $150–$350 |
| Door or tub seal failure (front-load) | Water at the bottom of the machine during wash | Repair or replace seal, appliance technician |
| Water inlet valve stuck open | Machine overflows or fills with power off | Plumber or appliance technician |
| Overloading or an unlevel machine | Vibration and leaking during spin cycle | Rebalance load, level the machine, DIY |
| Excess detergent or suds | Leak during the wash cycle only | Reduce detergent, switch to HE formula, DIY |
A washing machine hose failure follows the same pattern as a water heater leak: a rubber or supply-line component ages past its service life and lets go without warning, which is why both appliances are common candidates for supply line replacement on a five-year cycle regardless of visible wear. A $15 hose is inexpensive next to the cost of the water damage a failed one causes, which is why that replacement schedule pays for itself even on a machine that's never leaked.
How to tell where a washing machine leak is coming from
Where water shows up on or around the machine narrows down the cause before any parts get inspected. A leak at the front of the machine during the wash cycle usually points to the door seal or excess suds, water at the back points to a supply hose, and water pooling underneath typically means the drain pump, tub seal, or a loose hose fitting.
 This small panel gives access to the drain filter and pump without pulling the machine away from the wall. A towel underneath catches the water that drains out once the filter cap is removed.
Timing narrows it down further than location alone. A leak that only appears during the fill portion of the cycle points toward the water inlet valve, one that shows up only during drain points toward the pump or drain hose, and one that only happens during the spin cycle more often traces back to overloading or a machine that's no longer level.
| Where water appears | Most likely cause | Next step |
|---|---|---|
| Front of machine, during wash | Door seal or excess suds | Inspect gasket folds; reduce detergent |
| Back of machine, steady drip | Supply hose or fitting | Tighten connection or replace hose |
| Underneath, during drain cycle | Drain pump or drain hose | Check pump housing and hose for cracks |
| Underneath, during fill or wash | Tub seal or water inlet valve | Appliance technician needed |
| Only during spin cycle | Overloading or unlevel machine | Rebalance load, check leveling feet |
Running a quick test cycle with no clothes and no detergent isolates the timing cleanly, since a machine with nothing in it removes overloading and detergent residue as variables. If no leak shows up during that empty cycle, an overloaded or unbalanced load from a full wash is the more likely explanation rather than a failing part.
What water category and class does a washing machine leak fall under
Washing machine water damage almost always falls into Category 2 under the IICRC S500 standard, the middle tier of the water damage categories used industry-wide, because the water carries detergent residue, lint, and enough organic matter to pose a mild contamination risk even though it never touched sewage. That classification determines how thoroughly affected materials need to be cleaned, not just dried, before a job is considered complete.
The class of the damage, separate from category, measures how much area and how many materials absorbed the water rather than how contaminated it is. A leak caught within minutes on a hard floor is typically Class 1, while water that wicked into cabinetry, carpet padding, or a finished space below can push the job into one of the higher water damage classes, which call for more extraction equipment and a longer drying timeline.
Is washing machine water damage covered by insurance
Most standard homeowners insurance policies cover washing machine water damage when the cause is sudden and accidental, such as a supply hose that bursts without warning, according to guidance from the National Association of Insurance Commissioners. Coverage typically extends to the flooring, drywall, and cabinetry the water damaged, but not to the washing machine itself, which insurers treat as a mechanical failure rather than a covered loss.
A claim is far more likely to be denied if the adjuster traces the leak back to a hose that was visibly cracked or years overdue for replacement, since that shifts the cause from sudden to a maintenance issue you should have caught. Insurers also draw a hard line between water that originates inside the home and water that enters from outside, so a washer overflow is handled entirely differently from a flood claim.
Photographing the failed part immediately, before repairs start, is the single biggest factor in avoiding a denial. The insurance coverage process for a water damage claim generally follows the same documentation standard regardless of what caused the leak, from the first call to the insurer through the final repair invoice.
Washing machine leak in an apartment or condo: who's responsible
In an apartment or condo, responsibility for washing machine water damage depends on whose unit the leak started in and whether it was sudden and accidental, not simply on where the damage ended up. A leak that starts in one unit and reaches the unit or ceiling below can involve three separate coverages: the originating unit's own policy, the affected unit's policy, and the building's master or HOA policy, and which one pays first depends on the building's governing documents. That split follows a fairly consistent pattern across most buildings, though local condo declarations and lease terms can shift the details.
 Photos taken before repairs start are what an insurer uses to confirm which unit's policy responds first. In most buildings that's the originating unit's coverage, with the affected unit's insurer pursuing reimbursement afterward.
If you're a renter and the leak started in your unit
Renters insurance liability coverage typically pays for damage to the unit below or to common areas, while the landlord's own policy covers the building structure itself. Notify the property manager immediately regardless of fault, since most leases require prompt reporting.
If you're a condo owner and the leak started in your unit
An HO-6 policy covers the unit's interior finishes and any liability to a neighboring unit, while the building's master policy usually covers shared structural elements like the subfloor and pipes running between units, though the exact split depends on the condo declaration.
If your unit was damaged by a leak from above
File with your own policy first, then your insurer may pursue reimbursement from the responsible party's insurer through subrogation. Document the damage the same way as any other water event, with photos and a timestamp, before repairs start.
If the building's master policy has a high deductible
Many HOAs pass a portion of that deductible to the unit where the leak originated, sometimes billed as a loss assessment. Checking the HOA bylaws or condo declaration before assuming insurance fully covers a shared-building leak avoids an unwelcome bill later.
Getting the source unit identified quickly matters more in a multi-unit building than in a single-family home, since drying delays affect a second household's property in addition to your own. A restoration company that regularly works condo and apartment claims will already know to loop in the HOA or property manager as part of the first call rather than treating it as a separate step.
How much does it cost to fix washing machine water damage
Fixing washing machine water damage costs between $2,000 and $5,000 when Category 2 gray water reaches the laundry room and adjacent areas, the typical range for this specific type of appliance overflow. Category 2 mitigation runs $4 to $6.50 per square foot before any repair work, and a cost per square foot figure gives a more precise estimate than a flat range once you know exactly how much flooring and drywall the water reached.
 How far water wicked into porous material like drywall and baseboard, not the square footage alone, is what usually pushes a job from the low end of the cost range toward the high end.
Two factors swing the total more than any other: how much water reached porous material before it was caught, and whether flooring needs to be replaced or can simply be dried in place. Tile and sealed concrete typically dry without replacement, while engineered hardwood and particleboard cabinet bases often need to come out entirely once they've absorbed water, which is what pushes a job from the low end of a range toward the high end even when the square footage stays about the same.
| Scenario | Typical cost | What's included |
|---|---|---|
| DIY-caught leak, no professional mitigation | Under $200 | Wet vac and fan rental only |
| Minor contained leak, professional spot mitigation | $350–$1,500 | Extraction, spot drying, no material removal |
| Reached the laundry room and adjacent areas | $2,000–$5,000 | Extraction, structural drying, antimicrobial treatment |
| Leak reached a finished basement below | $1,500–$10,000+ | Basement dry-out, plus flooring, drywall, and belongings if finished |
| Appliance repair only, no structural damage | $75–$400 | Hose, pump, valve, or seal replacement |
These figures cover the structural side of the job. Burst pipes, roof leaks, and sewage backups carry their own water damage restoration cost ranges, since water category and class shift the price as much as which specific appliance or fixture failed.
DIY cleanup vs. calling a professional
A washing machine leak is DIY-appropriate when the water stayed on a hard floor, was caught within an hour or two, and didn't reach carpet, drywall, or cabinetry, since a wet/dry vacuum and a few fans can fully dry that scenario without professional equipment. Once water has soaked into flooring, wicked up drywall, or sat for more than 24 hours, moisture readings from professional equipment become necessary because surface-dry materials can still hide trapped water underneath.
 A wet/dry vacuum handles a leak caught on a hard floor within an hour or two. Once water sits longer than that or reaches carpet or drywall, moisture readings from professional equipment become the more reliable call.
Choosing DIY when the damage actually crossed into professional territory tends to cost more later than calling a professional right away, since drywall or subfloor left damp for even a few extra days can develop hidden moisture pockets that require demolition rather than drying. Renters should also check with a property manager before starting cleanup themselves, since many leases route anything beyond surface water through the landlord's maintenance team or insurance.
| Factor | DIY is usually enough | Call a professional |
|---|---|---|
| Water spread | Confined to hard flooring | Reached carpet, subfloor, or drywall |
| Time before drying started | Under 2 hours | Over 24 hours |
| Odor or discoloration | None present | Musty smell or visible staining |
| Affected material | Tile, vinyl, or sealed hardwood only | Particleboard cabinets, drywall, insulation |
| Household risk factors | None noted | Infant, immunocompromised, or asthma in the home |
For the DIY-appropriate scenario, the same DIY water damage cleanup steps that apply to a small clean-water spill elsewhere in the house work here, since gray water at this volume doesn't require different technique, only more thorough disinfection of the surfaces it touched. A diluted disinfectant on any surface the water crossed is the one extra step clean water cleanup doesn't call for, since detergent residue alone doesn't disinfect the way it might seem to.
Once a job crosses into professional territory, not every company that answers the phone is equally qualified to handle it. IICRC certification and proof of general liability insurance are the two credentials worth confirming before signing a contract, since a company missing either has less incentive to document the job correctly for an insurance claim, one of several factors behind how to choose a water damage restoration company for an appliance leak like this one.
Signs the damage is worse than it looks
Signs that washing machine water damage has spread further than it looks include a ceiling stain in the room below, flooring that feels soft or spongy near the machine, a musty smell that shows up a day or two later, and drywall or baseboards that look darker or slightly bubbled. These signs show up because water travels along subfloor seams, down through floor drains, and into wall cavities behind and beside the machine well before anyone notices the spread on the surface.
 Paint or drywall that looks slightly darker or bubbled near the floor, even without visible water, usually means moisture wicked up from below and is drying from the inside out.
Ceiling stains in the room below
A brown or yellow ring on the ceiling directly beneath the laundry area means water has already traveled through the subfloor, even if the laundry room floor itself looks dry.
Soft or spongy flooring near the machine
Flooring that gives slightly underfoot within a few feet of the washer usually means the subfloor absorbed water that a surface wipe-down never reached.
A musty smell that shows up a day or two later
An odor that wasn't there during cleanup but appears within 24 to 48 hours points to moisture trapped somewhere cleanup didn't reach, since mold after water damage can begin developing in wet building materials within that window.
Baseboard or drywall that looks darker or slightly bubbled
Paint or drywall paper that appears discolored near the floor, even without visible standing water, usually means moisture wicked up from below and is drying from the inside out rather than staying wet on the surface.
If any of these signs show up after what seemed like a fully dried cleanup, that's the point to call a professional for moisture readings rather than repeating the drying process yourself. The same signs of water damage worth checking for after any water event in the home apply here, just concentrated around the laundry area and the room below it.
Mold risk after a washing machine leak
Mold can begin colonizing wet drywall, subflooring, or cabinetry within 24 to 48 hours of a washing machine leak if the area isn't fully dried, a timeline consistent with EPA guidance on cleaning up after water intrusion in a home. This is a separate issue from mold that grows inside the washing machine itself, which develops from detergent residue and trapped moisture in the gasket and drum rather than from a leak reaching the surrounding room.
If the leak affected less than roughly 10 square feet of a porous material like drywall or subfloor and was dried within 48 hours, cleaning it yourself is usually sufficient. Larger areas or leaks that went unnoticed for several days cross the threshold where the growth needs to be treated as a remediation job rather than a wipe-down, particularly if anyone in the household is managing asthma or a compromised immune system, according to CDC guidance on higher-risk groups.
Mold confined to the machine's gasket or detergent drawer is a cleaning problem, not a structural one. It's worth ruling out before assuming a musty smell in the laundry room came from the leak itself rather than the appliance, and cleaning mold out of a washing machine typically takes about an hour with bleach or vinegar rather than any structural drying equipment.
Preventing washing machine water damage
Replacing supply hoses every five years regardless of visible wear is the single most effective prevention step, since rubber hoses fail from the inside out and rarely show a warning sign before they burst, a maintenance interval recommended by the Insurance Institute for Business and Home Safety. Braided stainless-steel hoses last longer than rubber ones and cost only a few dollars more, which makes them the better choice when the originals wear out.
 Braided steel costs only a few dollars more than rubber and typically outlasts it by several years, which is why replacing a hose before it fails is the cheapest form of insurance against this kind of leak.
A laundry room on a second floor or above a finished living space carries higher stakes if prevention gets skipped, since a leak there has gravity working against it from the start. Some local building codes already require a drain pan with a dedicated overflow line for upper-floor installations, and adding one is worth doing even where it isn't mandated, since it buys time between a leak starting and water reaching the ceiling below.
| Action | Frequency | Why it helps |
|---|---|---|
| Replace supply hoses with braided steel | Every 5 years | Rubber cracks invisibly under constant pressure |
| Check hose connections and machine level | Twice a year | Loose fittings and imbalance strain hoses and seals |
| Clean the drain filter or lint trap | Monthly | Clogs force water backward through seals |
| Install a leak detection sensor | One-time setup | Alerts before water spreads beyond the machine |
| Use a drain pan under the machine | One-time setup | Catches slow leaks before they reach flooring |
| Avoid overloading the drum | Every wash | Excess vibration strains hoses and the tub seal |
These appliance-specific steps sit alongside the broader water damage prevention habits worth building into a home maintenance routine, since a washing machine hose is only one of several supply lines in a house that age out on a similar schedule. Pairing the hose check with an existing habit, like swapping detergent or cleaning the lint trap, makes it easier to remember than treating it as a separate task.
Frequently asked questions
Is washing machine water damage covered by homeowners insurance?
Yes, usually, when the cause was sudden and accidental, such as a burst supply hose. Damage traced to a hose you knew was cracked or years overdue for replacement is more likely to be denied as a maintenance issue.
Does a washing machine leak count as a flood for insurance purposes?
No, a washing machine leak is not a flood under a standard insurance definition, even though it can look and feel like one. Flood insurance through the NFIP covers water that enters from outside the home, such as rising groundwater; a washing machine leak originates inside the home and falls under standard homeowners coverage instead.
How much does it cost to fix washing machine water damage?
Between $2,000 and $5,000 when the leak reaches the laundry room and adjacent areas, and up to $10,000 or more if the water reached a finished basement below. The washing machine repair itself is usually a separate, smaller cost of $75 to $400.
Can I run my washing machine again after a leak?
Not until the cause has been identified and repaired. Running the machine again with a cracked hose or failed pump risks a second, often larger leak on top of one that hasn't finished drying.
How long does it take to dry out water damage from a washing machine?
About 3 to 5 days for a contained laundry room leak using professional drying equipment, longer if water reached subflooring or a finished space below. DIY drying with fans alone can take longer and doesn't reach hidden moisture the way commercial dehumidifiers do.
Is water from a washing machine considered gray water or black water?
Gray water, in almost every case. It's Category 2 under the IICRC S500 standard, meaning it carries detergent and organic residue but hasn't been in contact with sewage the way Category 3 black water has.
Will a washing machine leak cause mold?
It can, if the area isn't dried within 24 to 48 hours. Drywall, subflooring, and cabinetry that stay damp past that window create the conditions mold needs to establish.
What's the difference between a washing machine leak and a washing machine overflow?
A leak comes from a failed part, hose, pump, valve, or seal, letting water escape during a normal cycle. An overflow happens when the machine fills beyond its intended level, usually from a stuck inlet valve or a malfunctioning water level switch, and tends to release more water at once than a typical leak.
Sam Hickerson is the founder of RestoreAdvisor and writes consumer guides on mold remediation, water damage restoration, inspection, testing, and home recovery. His work focuses on helping homeowners understand costs, risks, and when to call a professional. He draws on guidance from the EPA, CDC, IICRC, and other authoritative sources to make complex home issues easier to navigate.